mythankfultable.com

Feeding the Heart, Body, and Family

  • My Pics
  • My Story
  • The Puppies
  • Contact Us

Author: chrissy@mythankfultable.com

Sunday Dinners and Irish Apple Cake

March 24, 2020 by chrissy@mythankfultable.com
Irish Apple Cake

Sunday dinners are still a thing. Well, at the moment they are a smaller thing, but typically we eat together on Sunday. With work schedules, school schedules, and life in general, we try to all eat together before the week kicks off again. If I am lucky, I don’t have to cook (Sunday I meal prep for the week so the idea of creating something specific for dinner does not bode well). Even if I do, sitting together with my family and puppy at my feet, that’s the norm. I look forward to it. It’s the little things.

My heart is always thankful for the family that gathers together, but once in a while we get to eat with our chosen family, and that is a special treat. It starts with a group text, evolves to a Facebook event with a sign up sheet, and ends with a driveway full of cars and me having someone back my car out when I leave because I am afraid of hitting someone’s truck. True story. There are packaged up leftovers, drinks and laughter. You can move from one room to another and there is always someone to talk to. Those are the extra special Sunday dinners.

This cake made an appearance at last year’s Saint Patrick’s Day Dinner. When the menu included items such as corned beef and cabbage, shepherd’s pie, bangers and mash, and the like…I was on the hunt for a more traditional dessert. We did have a selection of bailey’s cupcakes and trifle, but for some reason, this simple apple cake called out to me.

Flash forward to now. Here we are at the onset of an “essential trips only” stay in place advisory. I find myself asking if I really need anything…or can we make do? Do we risk exposure to this virus or worse, endangering others if we don’t need to? No. Our family is staying put.

That said, I don’t want to waste one thing. I usually have a large bowl of fruit in the middle of the table and I am finding myself with some apples I need to turn into something and quickly. Enter this recipe.

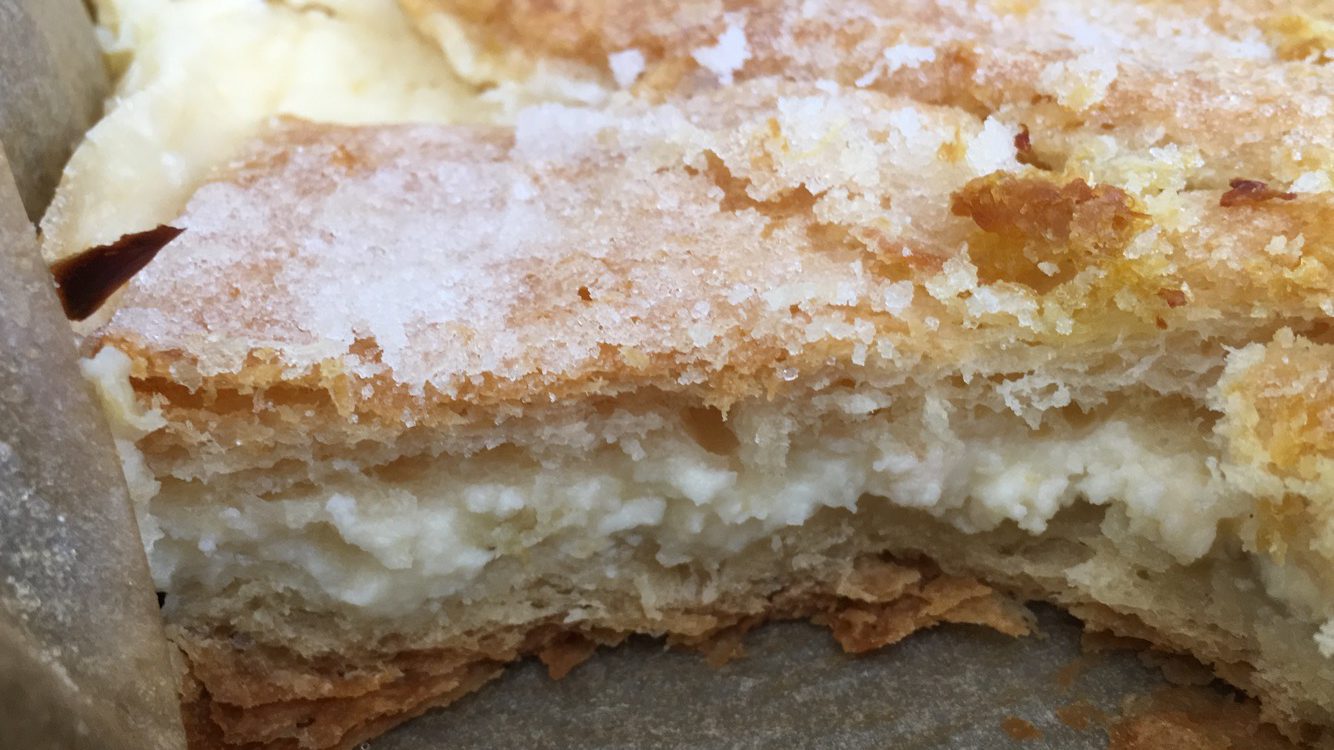
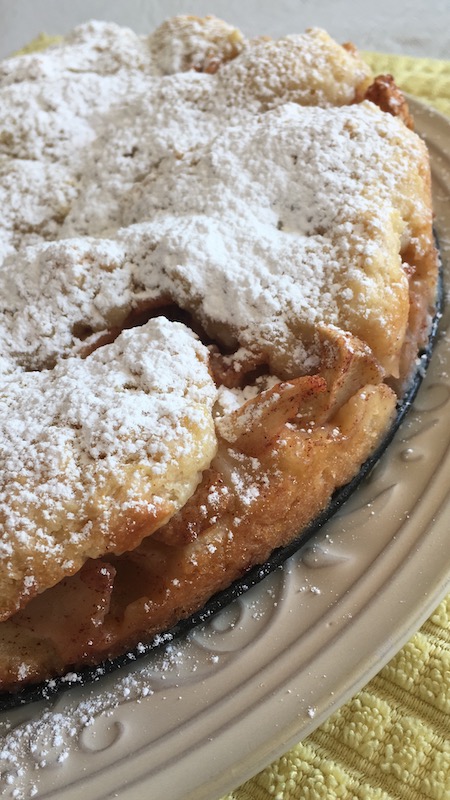
This simple apple cake is layers of dough and prepared cinnamon sugar apples. It is easy to prepare, and if you make it in a spring form pan, looks really pretty when plated. A quick note about making the cake part, if you grate the butter ahead of time and stick it back in the refrigerator to chill, when you cut in the butter to the dry ingredients, it goes really quickly.

While the dough is light and slightly sweet, this dessert isn’t overly so. The apples retain their texture and so there is a nice tooth to this recipe. In a world of crazy sweets, this cake brings a change to the table. You also don’t feel overly guilty having a slice because hey, its mostly apples.

I don’t know when the next big Sunday dinner will be. I know I will be thankful for the invite. I know there will be laughter and friendship. I know we will be changed by what we are living now. I also know that the hearts of those people were already precious and tethered before something like this came into our lives. Because, those are the types of people I am lucky enough to have in my life. I may swim in my own lane, but I know who is with me in the pool. And while I don’t get to go to every thing, they can have my toilet paper if they find themselves without.

To the next family dinner, when we are hearty and hale, and together again. Sending you love friends.

I hope you enjoy this recipe, and thank you for coming to the table.

Print

Irish Apple Cake

Irish Apple Cake
Print Recipe

This lightly sweet apple cake combines spicy apple chunks between two doughy layers, sprinkled with confectioner’s sugar. It can be served with a caramel or custard sauce, but it is delicious on its own. Adapted recipe from Irish Traditional Cooking.

  • Author: chrissy@mythankfultable.com

Ingredients

Scale
  • 3 Granny Smith Apples, peeled and chopped
  • 2 Cups All Purpose Flour
  • 2/3 Cup Sugar
  • 8 Tablespoons Butter, Chilled and Cut/Grated
  • 1 Egg
  • ½ Cup Milk
  • 2 Teaspoons Sugar
  • 1 Teaspoon Cinnamon

Instructions

  1. Peel and chop apples into chunks. You could do slices if you prefer. 
  2. Toss apples with cinnamon and sugar to coat. Set aside.
  3. Preheat oven to 350* and spray springform pan or cake pan with cooking spray.
  4. In a bowl, combine flour, baking powder, and sugar. 
  5. Cut in butter using a pastry blender or two knives. until pieces are no larger than pea sized.
  6. In a separate bowl, mix egg and milk together.
  7. Pour wet ingredients into dry ingredients.
  8. Mix until just combined.
  9. Pat one half of mixture into prepared baking dish.
  10. Spread apple cinnamon sugar mixture over the dough.
  11. Cover apples with remaining dough. It is ok if this is imperfect looking.
  12. Bake for 40 minutes. Cake will be lightly brown on the top.
  13. Remove and let cool.
  14. Right before serving, dust with confectioner’s sugar. 

Did you make this recipe?

Share a photo and tag us — we can’t wait to see what you’ve made!

Posted in: bread, Dessert, Fruit, My Story Tagged: Apple, cake, Cinnamon, dessert, Holiday, Irish, powdered sugar

On Raising Humans and Strawberry Jello Pretzel / Pretzel Jello Salad

March 21, 2020 by chrissy@mythankfultable.com

It’s funny, because when I started this blog post back in February, I have no idea what I planned to write. But here I sit, and the title still works, so we will go from there.

We find ourselves in a pandemic. I said to my daughter last night, “You get that you are living history right now?” Which, in truth is both interesting and really scary. She looked over at me and smiled. I’ll take it. In a time when we are spending a whole lot of time with our own children, smiles are good things.

As a Reading Teacher in a pretty good sized school, I get the privilege of seeing a lot of little faces. Many cannot pronounce my last name correctly, and that’s ok. I answer to a lot of things. I also get to do the announcements in the morning, and I am missing the jokes of the day I get handed to me on scraps of paper from the students. It’s all of the tiny moments that make up the school day. I really do have great stories. I often say, “If you didn’t work here, you wouldn’t believe it.” And my colleagues? I am one of the lucky ones. Our building is family. That’s a gift.

This week was the onset of “distance learning.” A week where teachers are gathering materials and supporting students online. A time where parents are with their children all day, and working on materials they may or may not understand. It’s all very different looking, and feeling. We are finding work spaces in our home spaces. We are thankful for the internet. We are trying to make it work. And it is challenging for many.

I’ll just say it, raising humans is hard and exhausting. Go back and reread that, because it is worth repeating. If you are a parent and you are depleted at the end of the day, and wondering…”Did I do everything I could?” breathe, you are normal.

We don’t always use our teacher voices when we talk to our own kids. We don’t always see their struggles like we would our students, because, well, they have us for parents…how hard can their lives be?

Now, my kids have always been my priority, and we are past the help with bathing, help with potty, help with bedtime rituals. They don’t really need me. I mean, they need me but not really. I think I did a good job raising them and then, I realize an area where I just missed the mark. Where I say to myself, “how did I miss that?” or “I could have handled that this way.” Hindsight is awesome, isn’t it?

When I knew I wanted to have children, I had three foundational rules as a mom. 1. I would say the following things and mean it. “I am sorry”, “I am proud of you”, and “You are loved.” 2. I would step back and give myself a few breaths before reacting. 3. I would cuddle and hug my kids if they let me. I was raised by non-huggers. I have worked to become a hugger, but I think I actually raised cacti. But hey, we try. I hope I have succeeded in these goals. My eerie calm when stuff goes down proves the step back part worked…but I still find pockets of sucky parenting if I analyze it enough.

So, that being said, one phrase I hate to hear is, “There is nothing to eat.”

Cue the evil eye.

Here is a recipe that will not get that comment. I’ve realize that “There’s nothing to eat” actually means, “I don’t see anything in the fridge I want to eat.” Different sentence. This is not one of those things. This is a birthday, Easter, and picnic/gathering staple. Is it dessert? Is it a side dish? Is it called Jello-Pretzel or Pretzel Jello salad? I don’t know. I just know if I make it the kids eat it.

This was first introduced by the amazing Nonni in PA, and I lost her recipe somewhere along the line and the internet found me another one. I think they are all pretty much the same in that it is a layer of salty pretzels, a layer of cream cheese cool whip goodness, and a layer of strawberries in Jello.

Don’t judge. Salty, sweet, creamy, crunchy. It’s good stuff.

I guess if I were going to parallel it to parenting, its got the whole spectrum, the ups and downs, the smooth and the rough. It’s not just one thing, ever. And, I am finding as my children become adults, the worries get bigger and harder. But that’s for another blog post.

Make this dish. You won’t be disappointed. I am not sure what our Easter will look like, but I can guarantee this will be on the table.

Oh, and you are doing a great job raising your kids, in case no one has told you today.

I hope you enjoy this recipe, and as always, thank you for coming to the table,

Chrissy

Print

Strawberry Jello Pretzel / Pretzel Jello Salad

Print Recipe

This is a layered side dish/dessert that consists of a salty crushed pretzel layer, a sweet cream cheese cool whip layer, and topped with a strawberry jello layer. If you can use fresh strawberries that’s amazing but frozen work just as well!

  • Author: chrissy@mythankfultable.com

Ingredients

Scale

Pretzel Layer

  • 2 Cups crushed pretzel rods
  • 3/4 Cup melted butter (I use salted)
  • 3 Tablespoons Sugar

Cream Cheese Layer:

  • 8 Ounce package of cream cheese
  • 8 Ounce container of frozen whipped topping (cool whip)
  • 3/4 Cup Sugar

Strawberry Layer:

  • 6 Ounce package Strawberry Gelatin 
  • 2 Cups Boiling Water
  • 20 Ounces Frozen Strawberries (or Fresh)

Instructions

  1. Preheat Oven to 400*
  2. Mix crushed pretzels, butter, and sugar together and press into a 9×13 pan. This should form a thin pretzel crust. 
  3. Bake for 7 minutes and set aside to cool.
  4. In a mixer, combine cool whip and cream cheese to a light fluffy texture. 
  5. Spread over cooled pretzel crust and refrigerate until chilled.
  6. Combine boiling water, Jello, and strawberries and combine. Cool slightly.
  7. Pour strawberry mixture over cream cheese layer and refrigerate.
  8. When the Jello Layer is set, cut and serve.

Did you make this recipe?

Share a photo and tag us — we can’t wait to see what you’ve made!

Posted in: My Story Tagged: cool whip, cream cheese, dessert, pretzels, Salad, strawberries

Step Away from the Cheez-its and make yourself this Coconut Quinoa…

March 18, 2020 by chrissy@mythankfultable.com
Creamy Coconut Quinoa Bowl

Hello from the world different than it was when we rang it in. I saw a funny post today that said, “I didn’t intend to give up this much for Lent.” Which, was the humor I needed after the last week.

We are officially home from school, and I have thrown myself into a tailspin of bleaching and organizing and sorting. I haven’t been a good sleeper ever, and this hasn’t helped. For some reason controlling the list of crap I need to do in my house is helping. Only the people I love know how long my list is…and the fact that its typed out. Because, yeah… I don’t know. I’ve embraced my nerdness. Love it or leave it.

Now, in the light of all that is going on in the world I am very aware that I am blessed. I have a career where I am home, can still work, and do my part of social distancing. At this moment we are healthy, and if I can keep us this way and prevent us from causing harm to others, that’s the goal. I get that I am fortunate. I do. Wholeheartedly.

That said, I have kind of broken up with Weight Watchers. I have beenhosting a food-party that calls for every processed cheez-product-and-salt-carbs- chocolate-ice-cream-peanut-butter-standing-in-the-kitchen-alone-zone. I haven’t enjoyed bread for real in months. Game on. I baked bread last night and stood there with my children, real salted butter and real homemade strawberry jam and we had a party. I have eaten processed packaged cookies while making a puzzle. We have ordered take out unlike ever before.

I am essentially the swipe right of online dating with food.

However, we are in the “this is going to be for awhile” part of this process. We are five days in. This can not be my new lifestyle. I have worked too hard to eat my way through anxiety and grief. No matter how precious the Cheez its are in my world. (Think Gollum. That’s how I treat that big red box).

I am for using what I have on hand. I am for not wasting the food in my refrigerator. I want to be the culinary project runway and “make it work.” So when I saw a recipe for a creamy coconut quinoa on @kristydenney’s instagram story…I snapped that screenshot as fast as my fingers could.

The idea of quinoa being slowly cooked in coconut milk, with a hint of cinnamon sounded amazing. I changed up the recipe a bit to include shredded coconut, and almond milk. It’s a fairly simple recipe to follow. Similar to steel cut oats, but changed up. I feel like many of my readers may have half a container of quinoa around, so go ahead and grab it and make yourself a comforting breakfast that isn’t processed or fake cheese orange. (Wait, what…you don’t eat snack food for breakfast when you are stressed? Gold star for you…).

This recipe requires you to bring the coconut milk, water, and almond milk to a simmer with coconut, vanilla, and cinnamon, then slowly cook the quinoa. I added a little more almond milk because I didn’t want a crunchy texture…but you can cook it as you like.

Literally the options here are endless. I threw some more coconut and frozen blueberries on mine. Bananas, berries, maple syrup, peanut butter, nuts, more almond milk, whatever makes your heart happy here…go for it. Because, we need a little comfort today. We also need to nourish our hearts and souls and bodies.

Truthfully, most of last week I didn’t cook. Thursday night when we were told we were not going back to school I think my heart broke. As teachers we love our kids. We love our jobs. We love the routine of life as we know it. For some of us we extend our momma hearts to the students who need a momma’s heart. And now…everything looks different.

For a person who finds solace in cooking and feeding others, my heart kind of said, “why bother?”

But, my heart and your heart are resilient. And our kitchens need someone to create in it. Because we have people to feed, and will feed more and soon…because we live with hope, not despair.

My family, I am sending you so much love right now. I am sending you health and comfort, joy in seclusion, and a sense of wonder. I am sending you nourishment for your bodies, and hopefully, your hearts.

Put down the cheez its. They will be waiting for you later. I promise.

I hope you enjoy this recipe, and as always, thank you for coming to the table!

Much love,

Chrissy

Click below for printable recipe.

Print

Creamy Coconut Quinoa

Print Recipe

Creamy coconut quinoa to serve as a base for a breakfast bowl or to eat on its own!

  • Author: chrissy@mythankfultable.com modified from Kristy Denney’s recipe

Ingredients

Scale
  • 1 Cup uncooked quinoa (I used tricolor because it is what I had on hand) rinse if necessary
  • 13.5 ounce unsweetened Coconut Milk
  • 1/4–1/3 Cup of Water
  • 1/4–1/3 Cup of unsweetened Almond milk (I use the almond cashew blend because its what was in my refrigerator)
  • 1 heaping teaspoon Cinnamon
  • 1 1/2 teaspoon Vanilla Extract
  • 1/4 Cup shredded unsweetened coconut

Instructions

  1. In a saucepan, combine coconut milk, water, cinnamon, and vanilla extract together and bring to a boil.
  2. Reduce liquid to a simmer and add quinoa. Stir to combine, and lower heat to simmer.
  3. Add almond milk  and shredded coconut and cook until liquid is absorbed. I stirred frequently but not like you would with risotto.
  4. (In Kristy’s recipe here is where she added collagen peptides…I did not)
  5. Scoop into a bowl and top with whatever your heart desires.
  6. Give yourself a hug from me.

Did you make this recipe?

Share a photo and tag us — we can’t wait to see what you’ve made!

Posted in: My Story Tagged: almond milk, breakfast, coconut, grains, plantbased, quinoa, Vegan

Double Chocolate Peppermint Cookies

February 12, 2020 by chrissy@mythankfultable.com

The season for peppermint crunchy topped chocolate cookies may have passed…no wait, it hasn’t.

While traditionally a this is considered a Christmas peppermint cookie, I dare to say these little darlings can still find a place in February. The smart marketing people of the world determined that pre crushed peppermint candies make this possible. Starlight mints (I think that’s what they used to be called) are available year round as well, so if the combination of chocolate and peppermint makes your heart flutter, this cookie is for you.

There is something to be said about the way mint complements the dark chocolate, red and white are for sure in with Valentine’s theme, and no one will say no to cookies. Unless your sweetheart is one of those not into sweets people. I know they are out there.

My return to writing the blog has been slow, and I am going to ease myself back in, but this recipe was too nice to wait for my thoughts to get lofty to blog about. I switched up Broma Bakery’s recipe to include dark chocolate chips instead of white, mine are drizzled instead of dipped, but the essence of the recipe is the same and they get all of the credit. I also bake my cookies at 325* because that is what I do. I like a cookie with no brown on the bottom, a soft chewy cookie that is just ever so slightly under-baked and left to continue cooking on the cookie sheet tends to make perfection for my taste. If you are a 350* baker, watch the cookies so they don’t overcook while baking!

Hopefully this new year has brought all good things, and this cookie recipe will find you with happy hearts.

I hope you enjoy it, and as always, thank you for coming to the table!

Chrissy

Print

Double Chocolate Peppermint Cookies

Print Recipe

This dark chocolate peppermint cookie is drizzled with white chocolate and crushed peppermints…perfect for the holidays and for your favorite minty valentine. Original recipe found on Broma Bakery’s website. Their cookies use white chocolate chips and are dipped in additional white chocolate. I used dark chocolate chips and drizzle…but the options are limitless. 

  • Author: chrissy@mythankfultable.com

Ingredients

Scale
  • 1/2 Cup Butter at room temperature
  • 1 Cup packed Dark Brown Sugar
  • 1 Large Egg at room temperature
  • 3/4 Cup Flour
  • 1/3 Cup Dark Cocoa Powder
  • 1/2 Teaspoon Salt
  • 1/2 Teaspoon Baking Soda
  • 1 Teaspoon Peppermint Extract
  • 1 Bag Dark Chocolate Chips
  • 7 ounces White Chocolate
  • 1 Teaspoon Coconut oil or Crisco
  • 1/2 Cup Crushed Peppermint Candies

Instructions

  1. In a mixer with a paddle attachment, cream together butter and sugar until light and fluffy.
  2. Add in Egg and Peppermint Extract.
  3. Sift together dry ingredients in a separate bowl.
  4. Add dry ingredients carefully into butter mixture, until combined. 
  5. Fold in Chocolate Chips.
  6. Scoop dough into balls and chill dough (I do this with almost every cookie dough I make- it isn’t necessary but I like the way the cookies turn out after the dough has been chilled).
  7. Preheat oven to 325*, prepare cookie sheet with parchment or silicone mats.
  8. Place chilled dough balls on the cookie sheet and bake for approximately 10-12 minutes.
  9. Allow cookies to come to room temperature.
  10. Combine white chocolate and crisco or coconut oil over a double boiler or microwave and stir gently until melted.
  11. Drizzle white chocolate over cookies and sprinkle with crushed peppermint candies while chocolate is still soft.

Did you make this recipe?

Share a photo and tag us — we can’t wait to see what you’ve made!

Posted in: Cookies, My Story, Recipes Tagged: chocolate, Cookies, Dark Chocolate, Peppermint, peppermint cookies, White Chocolate

Cherry Crescent Moon Cookies and Finding the Joy

February 11, 2020 by chrissy@mythankfultable.com

Welcome 2020 a little bit late…I have been busy being a mom. Like, full on seeing the light at the end of the tunnel momming. Not that I haven’t always been a mom, or that things have ever been really quiet in our world.

With one child in college and the other a junior in high school, we are ending the days of carpooling and chauffeuring, of planning calendars for who needs to be where and when, and what does the future hold? Looking for colleges, choosing majors, making decisions for an uncharted path. But I find myself with the knowledge that unfortunately age has granted along with my laugh lines. It’s all about the journey, it’s all about finding the joy.

I have told my children in their endeavors to choose what is next, that you have to love what you do. Not every day, but most days. I have also told them that no one at nineteen maps out what the future holds. Almost no one in my life is living Plan A. It just isn’t a thing. We choose something and then life hands us something else, and we grow, and change, and become something better. So choose the path that gives you joy.

I am not sure that this is the advice of the wealthy. I am not sure that this is the advice you would give your children, but it is the advice I am giving mine. Now, that being said, there is a no-stagnating rule in my home. You are not allowed to just sit and do nothing. You will either go to school or work, or both. You will move forward in one capacity or another, but you will move. Choose wisely, but be flexible, life has a plan of handing you options. My father used to say, “Keep moving forward. As long as you keep moving forward, you’ll be ok.”

So, to this cookie; Which is a little bit about the journey, and a little bit about joy.

This is a cookie my Pennsylvania family makes. Now, that family could be an ex-family, but they aren’t. They could be a removed family as a result of divorce and sad circumstances. They aren’t…and that is by choice. By them as well as me. I am thankful for it. I say this because sometimes, in choosing joy, you choose to do the thing that other people don’t get or understand. Sometimes though, grace and love choose the better thing. The different path. It shapes you, if you let it…and then you find joy when you didn’t expect it. Oh, and a cookie.

This cookie is a soft, pillowy cream cheese dough filled with either cherry preserves or the good old pie filling, then drizzled with an almond glaze and sprinkled with sliced almonds.

They are delicious.

They are little pockets of joy.

They take a little extra time in that you have to make the dough and chill it. Then you have to roll it out, cut into circles, spoon a little cherry filling, then press together. You can use a fork to seal the edges or pinch with your fingers…then there is the post baking decorating that is extra…but oh so worth it. Cherry and almonds and soft dough, oh my.

And, this momma is trying to find her way back to the thing that brings her joy, which is writing. The cooking and baking has continued, but the writing has been stuffed back in the corner of my brain with the cobwebs, and it’s taken me a month to do what a writing professor once said, “Put your Butt in the Chair” and write (Thank you Jane Yolen). I still plan on momming full time/over time, but somewhere, I am hoping to catch up on the blogging and post more. That is the 2020 creative intention, anyway.

With Valentine’s Day on the horizon and cool weather still in the forecast…I highly recommend these tasty little cookies for your loved one. You will not be disappointed. I’d be remiss if I didn’t give you all the Norma Jane warning…”Watch out, the cherries may have pits!”

Find the joy my darlings.

I hope you enjoy this recipe and as always, thank you for coming to the table.

Chrissy

Print

Cherry Crescent Moon Cookies

Print Recipe

Cherry filled and drizzled with almond glaze, these light cream cheese pastry cookies are the perfect combination of sweet and tart.

  • Author: chrissy@mythankfultable.com

Ingredients

Scale


  • 1 cup butter, softened
  • 1 8 ounce cream cheese, softened
  • 1 teaspoon almond extract
  • 2 cups all-purpose flour
  • ½ cup cherry preserves
  • 2 egg whites
  • ¾ cup powdered sugar
  • ¼ teaspoon almond extract
  • 1 – 2 tablespoon water
  • ¼ cup sliced almonds

Instructions


1. In a large mixing bowl beat the butter and cream cheese with an electric mixer on medium to high speed for 30 seconds. Beat in the 1 teaspoon almond extract until combined. Beat in the flour until dough comes together. Divide dough in half. Cover and chill dough about 1 1/2 hours or until easy to handle. 

2. Preheat oven to 375°F. Line cookie sheets with parchment paper; set aside. On a lightly floured surface roll half the dough at a time to 1/8 inch thick. Using a scalloped-edge 3-inch round cookie cutter, cut out dough. Place rounds 1 inch apart on prepared cookie sheets. 

3.  Spoon 1/2 teaspoon cherry preserves onto one side of each round; spread to 1/4 inch from the edge. Fold dough rounds in half, enclosing preserves; press edges with the tines of a fork to seal. Whisk egg whites until frothy; brush cookies lightly with egg whites. Bake for 12 to 15 minutes or until cookies are light brown. Transfer cookies to a wire rack and let cool. 

4. In a small bowl stir together powdered sugar, the 1/4 teaspoon almond extract, and enough of the water to make an icing of drizzling consistency. Drizzle cookies with icing. Sprinkle with almonds. Let stand until icing is set. 

Did you make this recipe?

Share a photo and tag us — we can’t wait to see what you’ve made!

Posted in: My Story Tagged: Almond, cherry, Cookie, cream cheese, dessert, Holiday

And Then There Were Fluffernutter Bars…

May 27, 2019 by chrissy@mythankfultable.com

I’m going to make this post quick. It’s Memorial Day, most of you are heading somewhere to eat at someone’s cookout if you didn’t already, and time’s a wasting. Get to baking.

The Fluffernutter is the quintessential New England sandwich, made with peanut butter, and Fluff (not marshmallow creme, and yes, there is a difference). I am not saying it is the most nutritious food item to put in a lunchbox for your kid, but I do know anyone raised in Massachusetts knows what it is…and likes it. If you were lucky you got it on soft white bread, and maybe even got the crusts cut off.

Tuck those Peanut
Tuck those Peanut Butter Cups into their bed of Cookie Dough

Fast forward to now: My bread is typically sprouted grain. My peanut butter is natural. Oh, but there is a brand new container of Fluff in the cabinet at all times. For you know, life emergencies. Some days a woman needs to stand in her kitchen with a spoonful of fluff and giver her dog the stink eye because she is not sharing.

To the recipe: the original recipe is from soccer mom.com. When a friend sends you a Pinterest posted recipe and you have a cookout to be the next day, you try it. I am glad I did. I am also glad I fiddled with the proportions and made MORE. I am also glad I left them at the campsite where our cookout was because they are like a siren song to me. All good.

This recipe is a basic peanut butter dough with chocolate chunks, divided into two parts. Press one part on the bottom of a pan and add FULL SIZED Peanut butter cups. Add Fluff! Add more dough! Bake and leave to cool. Sound simple? It is. Do people need to know this deliciousness wasn’t an all day process? No. You can keep that little secret to yourself.

If you were one of us who embraced sugary marshmallow and peanut butter, loves peanut butter cups, or just needs to feel like a gooey dessert is essential for a cookout, you have met your match. I hope you make these. Today.

I hope you enjoy this recipe, and as always, thank you for coming to the table!

Chrissy

Click below for a printable recipe

Print

Fluffer Nutter Bars

Fluffernutter Bars
Print Recipe

This delicious creation of peanut butter, peanut butter cups, and fluff originally was posted on thesoccermomblog.com. I changed the proportions to make a larger batch. You will not be disapointed!

  • Author: chrissy@mythankfultable.com

Ingredients

Scale
  • 1 Cup Butter
  • 2/3 Cup Plain Peanut Butter (I used Creamy Jif)
  • 12 Unwrapped FULL SIZED Peanut Butter Cups
  • 2 Cups packed Dark Brown Sugar
  • 2 large Eggs
  • 2 generous teaspoons Vanilla Extract
  • 2 1/2 Cups All Purpose Flour
  • 1 bag Nestle Chocolate Chunks
  • 1/2 Container Marshmallow Fluff

Instructions

  1. Preheat oven to 350* and prepare a 9×13″ baking pan by lining it with parchment paper.
  2. in a mixer with a paddle attachment, cream butter and sugar until light and fluffy.
  3. Add peanut butter and combine. Add eggs and vanilla and continue to combine until uniform.
  4. Add flour until mixed in, fold in chocolate chunks (I just add mine while the mixer is running on low)
  5. Divide dough into 2/3 and 1/3.
  6. Press 2/3 of dough into prepared pan. Distribute Peanut butter cups evenly into dough.
  7. Cover peanut butter cups with Marshmallow Fluff, smooth to create an even layer.
  8. Break apart remaining dough and cover the mixture. Press down.
  9. Bake in 350* oven for 25-30 minutes until golden brown, do not overcook.
  10. Leave bars in pan until cool (they will continue to cook in the pan and you want this!)
  11. Pull bars out of pan with edges of parchment paper and slice!
  12. These will keep in an airtight container for a few days…but they won’t last that long!

Did you make this recipe?

Share a photo and tag us — we can’t wait to see what you’ve made!

Posted in: Cookies, Dessert, My Story Tagged: bar cookies, Chocolate Chunks, Fluff, fluffernutter bars, marshmallow, Peanut Butter

Banana Chocolate Chunk Muffins

April 17, 2019 by chrissy@mythankfultable.com

I know in the new year a lot of us make resolutions to do this or that. Some of those resolutions we keep, and some…well…let’s just say we get points for trying.

Muffins, even healthy muffins, still seem like an indulgent thing. So when I spy a recipe for a healthier muffin I of course am going to investigate. This muffin incorporates greek style yogurt, coconut oil and sugar, and in the original recipe on the www.bakerbynature.com website (which is gorgeous) whole wheat flour. I substituted bread flour, and I like the substantial chocolate chunks as well as the dusting of cookie or decorating sugar on top of muffins…which makes them less healthy…but still yummy.

I used bananas I had previously frozen, and let them defrost. I only used the banana itself not the thawed juice of the mix. (If you have ever frozen a ripe banana and then thawed it, you know what I mean). If you use a fresh ripe banana this won’t be an issue. I didn’t notice any difference in quality by using a frozen banana…and actually the combination of bread flour with the yogurt and baking powder gave these muffins a lift that was light and cake even though banana muffins are typically dense.

This is pretty much a one-bowl recipe, I melted the coconut oil and set it aside to cool a bit before adding it to the mix. There is just enough cinnamon to offset the chocolate and banana flavors. The muffins bake up rounded and puffy, they are sweet without being overly so. They are delicious warm out of the oven, and the next day. I froze half of the batch and they thawed out fine.

I am a big fan of a healthier anything, and if a muffin looks and tastes this good with the healthy substitutions it has, it’s a winner in my book.

I hope you enjoy this recipe, and as always, thank you for coming to the table!

Chrissy

Click on the link below for a printable recipe.

Print

Banana Chocolate Chunk Muffins

Print Recipe

These banana muffins incorporate healthier ingredients such as yogurt and coconut oil, bananas and honey. Original recipe from www.bakerbynature.com

  • Author: chrissy@mythankfultable.com original recipe posted by Ashley Manila on the bakerbynature website

Ingredients

Scale
  • 1 Cup mashed banana
  • 3/4 Cup plain greek yogurt
  • 1/4 Cup coconut oil, melted
  • 1/3 Cup honey
  • 2 large eggs, at room temperature
  • 3 Tablespoons coconut sugar
  • 1/2 Teaspoon ground cinnamon
  • 1/2 Teaspoon salt
  • 3 Teaspoons baking powder
  • 2 Cups flour *original recipe called for whole wheat, I used bread flour.
  • 1 Cup chocolate chunks
  • Decorating sugar for tops of muffins (optional)

Instructions

  1. Preheat oven to 375*
  2. Line muffin tins with liners and set aside.
  3. Sift together flour, baking powder, salt, and cinnamon.
  4. Combine mashed bananas, greek style yogurt, eggs, honey, and sugar until completely incorporated.
  5. Add dry ingredients to wet ingredients and mix until just combined. 
  6. Add melted coconut oil and combine.
  7. Fold in chocolate chunks until just combined. 
  8. Scoop batter into lined muffin tins, filling each almost full.
  9. Bake for 15-20 minutes, until muffins are puffed, light golden brown, and a tester comes out clean.

Did you make this recipe?

Share a photo and tag us — we can’t wait to see what you’ve made!

Posted in: bread, breakfast, My Story Tagged: banana, Banana Muffin, breakfast, chocolate chunk, Greek yogurt, Healthy

Grandma’s Angootie/Ungootie (Easter Bread)

April 16, 2019 by chrissy@mythankfultable.com

This post is about a year in the making. Partially because I wanted more research on this recipe prior to sharing…and partially because I haven’t found the answers I was looking for. For example…

What is the real name of this bread?

How do you really spell its name? This is phonetically spelled I am sure.

Where did this recipe originate?

Which recipe is the right recipe?

The answers to those questions? There are many answers. This is a recipe my Grandmother made, that she learned from her mother in law (my Great Grandmother). The recipe varies and regardless of researching “Italian Easter Bread” in old Italian church cookbooks, online resources, etc…I am coming up empty handed.

Actually, I come up with an abundance of information…just not my specific answers. Every region in Italy has a variation of this bread. It can be covered with glaze, sugar, colored eggs, plain eggs, sprinkles, no sprinkles. It is named with a list of names, but I could not find one the way our bread is named. (It is pronounced UN-GOO-TEE). But, I didn’t find it anywhere other than in the family recipes. I have learned that Easter Bread is Easter Bread. It usually is sweet, enriched with some sort of butter, oil, or shortening. It typically holds one or multiple eggs, and is served as a part of Easter weekend.


I do, have the recipe from family three sources, each slightly different, but I am going to use the one my own Grandma used. It is also a tradition to make it on Good Friday. I figure empty/over handed or not, I don’t want to wait another year to post this recipe. If my readers can add to the story, or fill in the blanks, I will update this post as I go.

This bread starts out with melting Crisco in boiling water, then allowing it to cool. Milk is added, along with a large quantity of flour and sugar. This bread can be baked into larger loaves, or, as I remember them, smaller individual loaves.

Once the dough is risen, it is rolled and shaped around an egg. Our recipe does not call for coloring the eggs, but I can see the attraction. It’s pretty with the colored eggs, and while I am at it, the glaze and sprinkles make it not only sweeter but a decorative bread. This recipe is pretty basic when it comes to decoration, but it is a tradition I can’t imagine letting go. Even though carbs are my enemy. Even though sweet bread is in essence, a dessert. It is the kind of bread I rip a hunk off of, and it can be served with coffee or tea, eaten for breakfast, etc. It doesn’t need butter or preserves. It is a complete taste in and of itself.

Italian Easter Bread

When I was little, this bread was a part of Easter weekend, as we helped my Grandma with the making of the bread, and Easter dinner was served with each place setting having a bread. (I am not sure if this was just one time or every time…but it is distinctly imbedded in my brain, seeing the little breads at the table).

I never knew “Nona” or the stories around this bread. I just know it was something my Grandmother, along with second cousins, and other family members carry on as a tradition of family and food. I can be a part of that, and continue it on for another generation.

Now the egg. It is baked in the oven, and apparently has the same consistency of a hard boiled egg but better. I have never eaten it. At our house, my Father would always eat the egg the day the bread was made. I can very clearly see him taking a hunk of bread, the egg, and a cup of coffee to his space at the table. I didn’t eat the egg when I was little because Dad always did, and there was only one egg. Now I don’t, only because the bread is out on the counter and not refrigerated…and for some reason the egg is still in my heart, the part my Dad would eat. It’s a heart thing for me.

I am thankful for memories of my family, and for traditions that were part of my childhood, such as this bread. It makes me smile, the idea of my Grandmother being in my kitchen with me as I make the breads. I’d like to think she would be happy they are still being served. I wish I knew Nona, she seemed like quite a lady. I am glad she was willing to share the recipe with her daughter in law, so we could have it with us today.

I hope you enjoy this recipe, and as always, thank you for coming to the table!

Chrissy

Click below for a printable recipe.

Print

Grandma’s Angootie/Ungootie (Easter Bread)

Print Recipe

This is the Easter Bread I grew up with. As I have researched, there are many variations, even within my own family! I love that nothing is specifically measured, but it usually turns out as a sweet bread. I don’t eat the egg and we have never died the egg or put a glaze on it, but both of those additions sound wonderful!

  • Author: chrissy@mythankfultable.com

Ingredients

Scale
  • 5 Pound Bag of Gold Medal Flour (I have used other kinds of flour but this is the recipe my grandmother gave me).
  • 3 Packages Dry Active Yeast – Check the date
  • 3 Good heapings salt (we use salt to taste now)
  • 2 to 2 1/2 Cups Granulated Sugar
  • 1– 1 1/2 Pound Crisco  (we use 1 pound now)
  • 1 1/2 Quarts Boiling Water
  • 1/2 Quart Milk

Instructions

  1. Boil water and add Crisco, allow it to melt.
  2. Add milk and allow mixture to cool to tepid temperature.
  3. Mix flour, salt and sugar.
  4. Make a well in your flour and add cooled crisco mixture.
  5. Add yeast in and knead.
  6. Let rise in a warm place, cover with a damp towel.
  7. When the dough has risen, knead until silky, cut and shape into form (form is a round shape surrounding a raw egg).
  8. Place on baking sheet, cover with a damp towel and allow to rise a second time.
  9. Brush with beaten egg yolk.
  10. Bake at 365*-375* approximately 50 minutes or until golden brown.

Did you make this recipe?

Share a photo and tag us — we can’t wait to see what you’ve made!

Posted in: bread, My Story Tagged: Bread, Holiday, Italian Easter bread

On Church Ladies and Shirley’s Pineapple Gratin

April 15, 2019 by chrissy@mythankfultable.com
Pineapple Gratin
Pineapple Gratin

Once upon a time, another life ago, I encountered this recipe at a church pot-luck supper. I am not sure how many churches still do this tradition, an event where people sign up and gather together with covered dishes and casseroles…that somehow end up working even though they contain potentially ingredients that may or may not work with the dish it is sitting next to. It’s alway’s somewhat magical, or maybe miraculous loaves and fishes style…there is enough food and enough diversity for all to share and break bread together, figuratively and literally.

This isn’t a post about religion. It is however, a post about family. The family you choose and make your own. I’m drawn to and want to be all about authenticity. Even though I am no longer a member of that church from long ago – there are women in my life today that still own a place in my heart. They are the most authentic, loving individuals. When you meet someone like the lady who shared this recipe with me…it isn’t so much about the side dish as it is about those who’s dish it is.

This recipe is easy and pineapple-y but cheese and crunchy. I know, sounds weird, right? It isn’t.

Think ham dinner with pineapple and Au Gratin potatoes. You put them on your plate and they go. Well, this recipe takes out the potato part. Or those of us who live in New England and eat cheddar cheese on top of apple pie. It works. This recipe is also topped with a crunchy, crumbly, buttery, ritz topping. It is a simple side for an Easter dinner, which, in my world is the only time I bake a big ham.

This recipe basically combines pineapple tidbits, shredded cheddar cheese, crushed cracker topping. SIMPLE. It’s something I throw together in a deep dish pie plate, and adds to round out the sides of the meal. It isn’t too sweet, its a warm fruity option at the table. Truth be told, I make it because it reminds me of sitting along side strong women who lifted me up as a young minister’s wife long ago.

I am so thankful for those women, those pot-luck suppers, and the way my life was made better by sharing meals and recipes. They shaped me to be who I am today.

I hope you enjoy this recipe, and as always, thank you for coming to the table!

Chrissy

Click below for a printable recipe.

Print

Shirley’s Pineapple Gratin

Pineapple Gratin
Print Recipe

This side dish combines sweet pineapple tidbits with melty cheddar cheese and is topped with buttery crunchy Ritz crackers. It is the essential side dish for a ham dinner, and makes for a great potluck addition!

  • Author: chrissy@mythankfultable.com original recipe from Shirley in Clarks Summit, PA

Ingredients

Scale
  • 1 Can Pineapple Tidbits (you can also use crushed pineapple)
  • 1 Cup White Sugar ( I have never tried light or dark brown sugar but I bet it would work well)
  • 3 Tablespoons AP Flour
  • 1 Cup Grated Sharp Cheddar Cheese
  • 1/2 Sleeve Ritz crackers
  • 4 Tablespoons Butter, melted

Instructions

  1. Drain pineapple, reserve juice.
  2. Combine sugar, flour, and pineapple.
  3. Mix in cheddar cheese and incorporate.
  4. Put in a baking dish. (I use a pie plate but it an be made in a bigger dish depending on if you double recipe)
  5. Crush Ritz crackers and sprinkle on top of mixture, and then pour melted butter over the top of the crackers.
  6. Bake at 350* for at least 30 minutes.

Did you make this recipe?

Share a photo and tag us — we can’t wait to see what you’ve made!

Posted in: Fruit, One Pan, Recipes, side dish Tagged: Gratin, Pineapple, Potluck Favorite

Easy Lemon Cream Cheese Bars

April 14, 2019 by chrissy@mythankfultable.com
Lemon Cream Cheese Bars

Lemon, you belong in my life. Easy lemon recipe? Game on. This recipe could pass for either a breakfast treat or a dessert, depending on the time of day you choose to serve it…if that even matters. Basically it is a light, cream cheese batter zingy with lemon zest and juice, with a flaky pre-made crescent dough top and bottom. As in, the hardest part of this recipe is the pat pat pat of stretching out the dough you popped out of a can, and blending the cream cheese part.

While your cream cheese filling is in the mixer, press your crescent roll dough in the bottom of a parchment lined pan (you can skip the parchment but I like to be able to slice/serve and it makes it so much easier).

Smooth the cream cheese mixture over the dough, then cover with another layer of crescent dough.

I wasn’t super careful about the making sure the top was sealed together, because you end up brushing the dough with butter and sprinkling with sugar and additional lemon zest, which…covers the mistakes.

This simple, light, lemony dessert is the perfect addition to any spring table, bringing a sweet, tangy, creamy, pastry combination to your meal.

I hope you enjoy this recipe, and as always, thank you for coming to the table!

Chrissy

Print

Easy Lemon Cream Cheese Bars

Lemon Cream Cheese Bars
Print Recipe

These delicious Lemon Cream Cheese Bars combine the sweet cream cheese lemon layer sandwiched in between crescent dough. Very much like a danish, this easy recipe  is light and tangy and sweet.

  • Author: chrissy@mythankfultable.com

Ingredients

Scale
  • 2 containers of refrigerated Crescent Roll Dough (8 ounces)
  • 2 packages of Cream Cheese (8 ounces)
  • 2 Lemons, Zested and juiced (I used more lemon zest because I like it)
  • 1/2 Cup White Sugar
  • 2 Tablespoons Melted Butter
  • 3 Additional Tablespoons White Sugar

Instructions

  1. Preheat oven to 350*
  2. Line the bottom of a 9×13 baking dish with parchment paper and spray with cooking spray.
  3. Take one container of crescent roll dough and press into pan (try to keep it as one whole piece-rectangle)
  4. Mix cream cheese, sugar, zest, and juice together until smooth and creamy.
  5. Spread cream cheese mixture evenly over the bottom layer of crescent roll.
  6. Unroll the second container of crescent roll dough and carefully stretch over the lemon cream cheese layer.
  7. Brush melted butter on top of crescent dough top.
  8. Mix remaining sugar (3 tablespoons) and additional lemon zest together and sprinkle on top of the butter.
  9. Bake for approximately 30 minutes, until the top is golden brown and the sugar/butter mixture is crackly.
  10. Allow to cool for at least 20 minutes. Chill in the refrigerator until ready to cut into bars.
  11. When cool, use the parchment paper to lift the bars out the pan, and transfer to cutting board.
  12. Cut into squares and serve.

Did you make this recipe?

Share a photo and tag us — we can’t wait to see what you’ve made!

Posted in: Dessert, My Story, Recipes Tagged: breakfast, cream cheese, Danish, dessert, lemon, Lemon Cream Cheese Bar
« Previous 1 2 3 4 5 6 7 … 12 13 14 15 16 Next »

Recipe Search

Recent Posts

  • Fluffernutter Cookies…You Heard Me April 12, 2024
  • On Nests July 30, 2023
  • Lemon Rosemary Shortbread Cookies April 24, 2022
  • Praline Sweet Potato Pie March 22, 2022
  • Italian Ricotta Cake March 13, 2022

Recent Comments

  • Cathy Carroll on To My Daughter On Her 18th Birthday
  • Maureen / Mimi on To My Daughter On Her 18th Birthday
  • Kathy G on To My Daughter On Her 18th Birthday
  • chrissy@mythankfultable.com on Cherry Crescent Moon Cookies and Finding the Joy
  • chrissy@mythankfultable.com on Cherry Crescent Moon Cookies and Finding the Joy

Archives

Categories

  • appetizer
  • bread
  • breakfast
  • Cookies
  • crockpot
  • crockpot
  • Dessert
  • Fruit
  • My Story
  • One Pan
  • Recipes
  • side dish
  • Side Dishes
  • soup
  • Vegan

Copyright © 2025 mythankfultable.com.

Lifestyle WordPress Theme by themehit.com