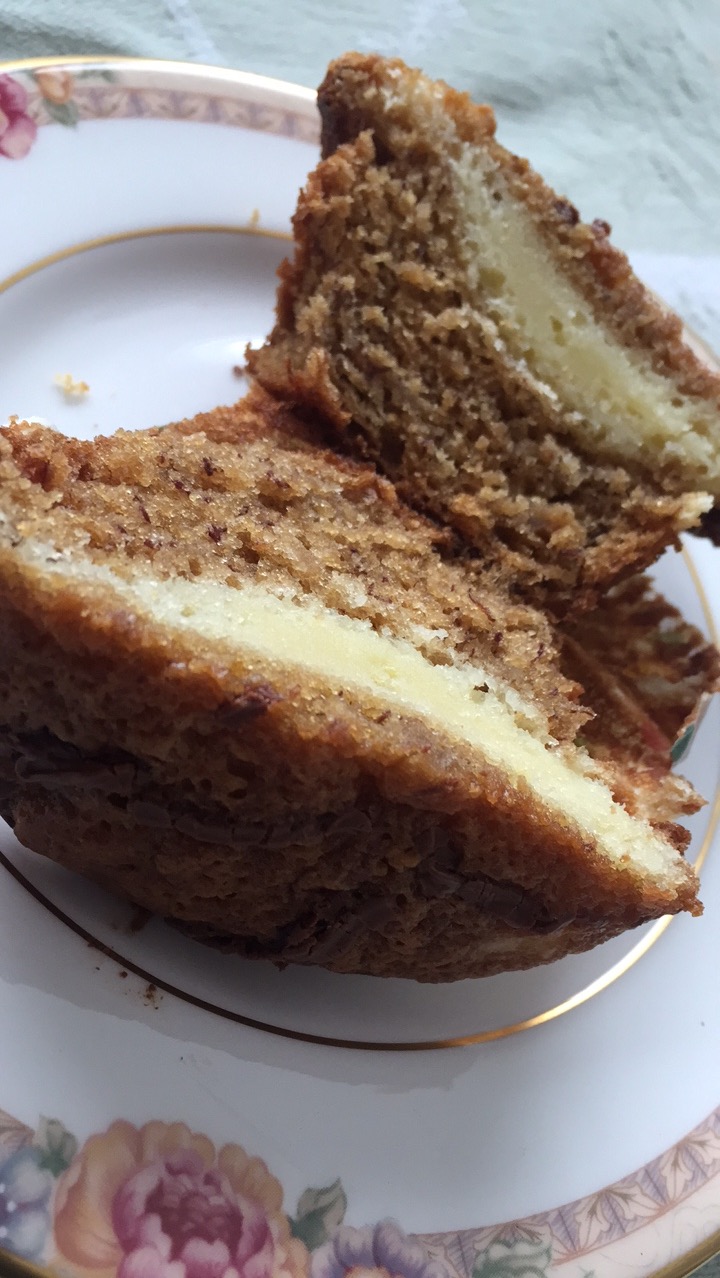
Cream Cheese Filled Banana Nutella Muffins

Cream Cheese Filled Banana Nutella Muffins
When you find yourself with yet another snowy icy day, and a handful of really ripe bananas on the counter, you investigate banana muffins. I love a good banana bread. I love banana bread with chocolate chips, with coconut, with walnuts or pecans…it’s a beautiful thing.
But somedays, you just want the simplicity of a paper wrapped treasure that travels well and freezes well and doesn’t require a knife to cut a slice. So yeah, muffins are lazy bread. Or are they?
I love this recipe because it creates a light but dense muffin. (It is possible). It packs a punch of banana flavor without being heavy.
The original recipe for this is from www.u-createcrafts.com. Then, I saw another recipe from www.thenovicechef.com that incorporated a drizzle of Nutella on top of a banana muffin. Hence my Frankenstein muffin creation wherein I combine two recipes.

Cream Cheese Filled Banana Nutella Muffins
What is there to say about a muffin with a cream cheese filling except, “yes please?” A sweetened cream cheese filling that holds up to the muffin mixture and creates the perfect little pocket of yummy.
Topped with a remainder of batter, a slightly warmed Nutella is swirled on the top. Just enough chocolate hazelnut-ness to bring this muffin to dessert status. Hello tastebuds.

Here’s where I have to ask myself…have we now crossed over from breakfast foods to post-supper food? I mean, a pop tart, a danish, a donut, a toaster strudel all are considered breakfast foods…right? I mean, an Eggo waffle is still considered breakfast even though they come in birthday cake and chocolatey chip flavors…right? The end result of this inner monologue is stop over thinking it. Eat the darn muffin/breakfast cupcake.
Again, I brought these to my teacher’s room…and again, they disappeared quickly. Even the healthy eaters shared one between them. I can’t fault them. There is a reason I get this stuff out of my house right away.
 Now, if I were to add yet another layer, (and I will, and I will post when I do) what I would have added was bacon. Or, peanut butter. Because a banana bacon Nutella muffin is just insane. Insane enough for me to try to make it. Or, a banana peanut butter fluff muffin. OOOOh my wheels are spinning. Hey, banana, peanut butter and bacon worked for Elvis. They didn’t call him the King for nothing.
The teacher’s room discussion when I brought these in centered around ripe bananas and what to do with them. Some people throw them out. DON’T. Peel and throw in a plastic bag. Break into chunks if you want to take the extra step or don’t. Why? Because frozen bananas are spectacular in so many things. Smoothies. As is, or dipped in chocolate, thrown into the blender and made into “nice-cream,” the possibilities are endless. The best part is, if you want to use them for banana bread, you can. Almost every recipe calls for mashed bananas. No banana is easier to mash than the thawed banana from the freezer.
 These muffins keep for several days in an air tight container, if they last that long. The Nutella drizzle is just enough, not too much, but you could always add more if you wanted.
This recipe filled 24 muffin tins to a pretty full capacity with their glorious layers.
In a winter filled with less than wonderful weather, it is nice to have a recipe like this in your repertoire. It makes a cold day warmer, and sweeter. Isn’t that all we want in life? A little warmth and sweetness? You betcha.
I hope you enjoy this recipe, and as always, thank you for coming to the table!
Chrissy
Click below for a printable recipe.
PrintCream Cheese Filled Banana Nutella Muffins

Light Banana Muffins with a cream cheese filling and a Nutella swirl on top! Original recipe from www.u-createcrafts.com
Ingredients
- 2 Cups Mashed Bananas (4–5 Bananas approximately)
- 1 Cup Brown Sugar
- 1/2 Cup White Granulated Sugar
- 1/2 Cup Vegetable Oil
- 2 Large Eggs
- 1/2 Cup Sour Cream
- 4 Teaspoons Vanilla Extract
- 2 Cups AP Flour
- 1 Teaspoon Baking Soda
- 1 Teaspoon Baking Powder
Filling:
- 2 Large Eggs
- 8 Ounces Cream Cheese (softened)
- 1/2 Cup Granulated Sugar
- 6 Tablespoons AP Flour
Nutella: Approximately 4 Tablespoons warmed slightly
Instructions
- Preheat oven to 350*
- In a mixer, combine sugars, oil, sour cream, and vanilla extract.
- Add mashed bananas to mixture and combine.
- Add Dry ingredients and mix well, set aside and make cream cheese filling.
- Combine cream cheese filling ingredients.
- Line muffin tins (This recipe made 24 muffins) and fill 1/2 way with banana mixture.
- Scoop 1-2 Teaspoons of cream cheese filling into each muffin tin.
- Cover with remaining banana mixture.
- Take warmed Nutella and swirl on top of each muffin.
- Bake for 30-35 Minutes or until tester comes out clean.


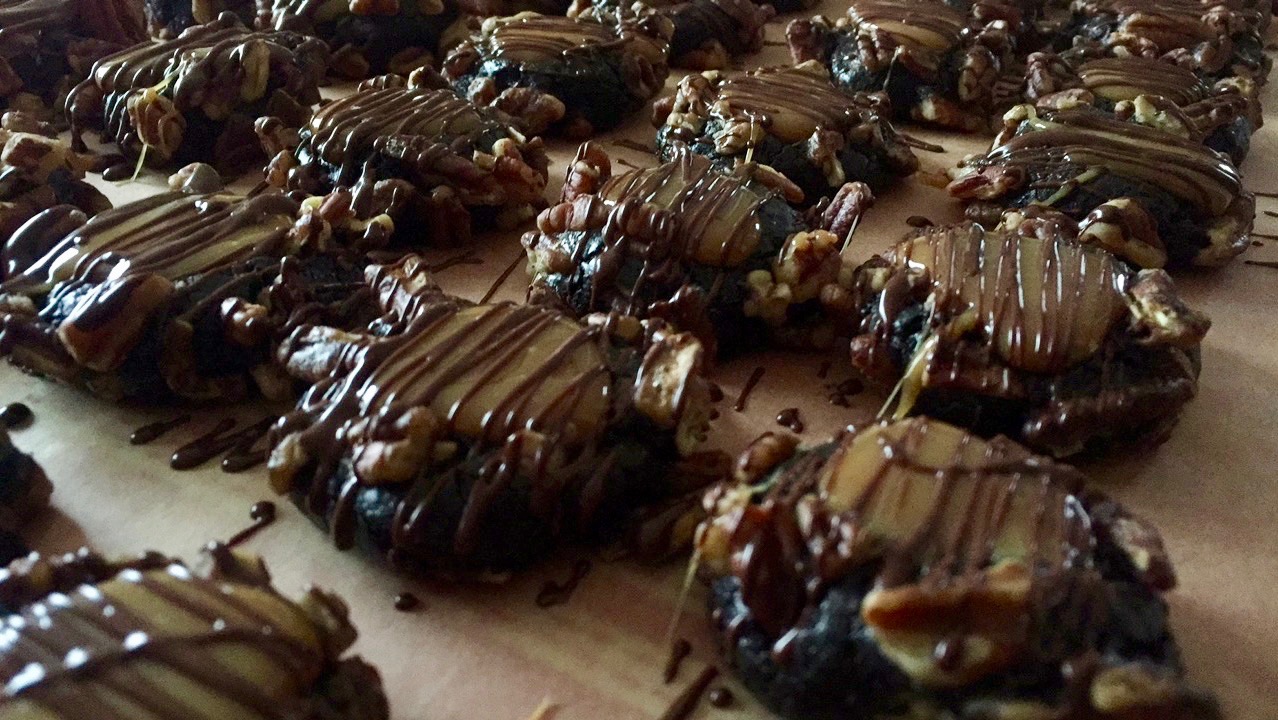


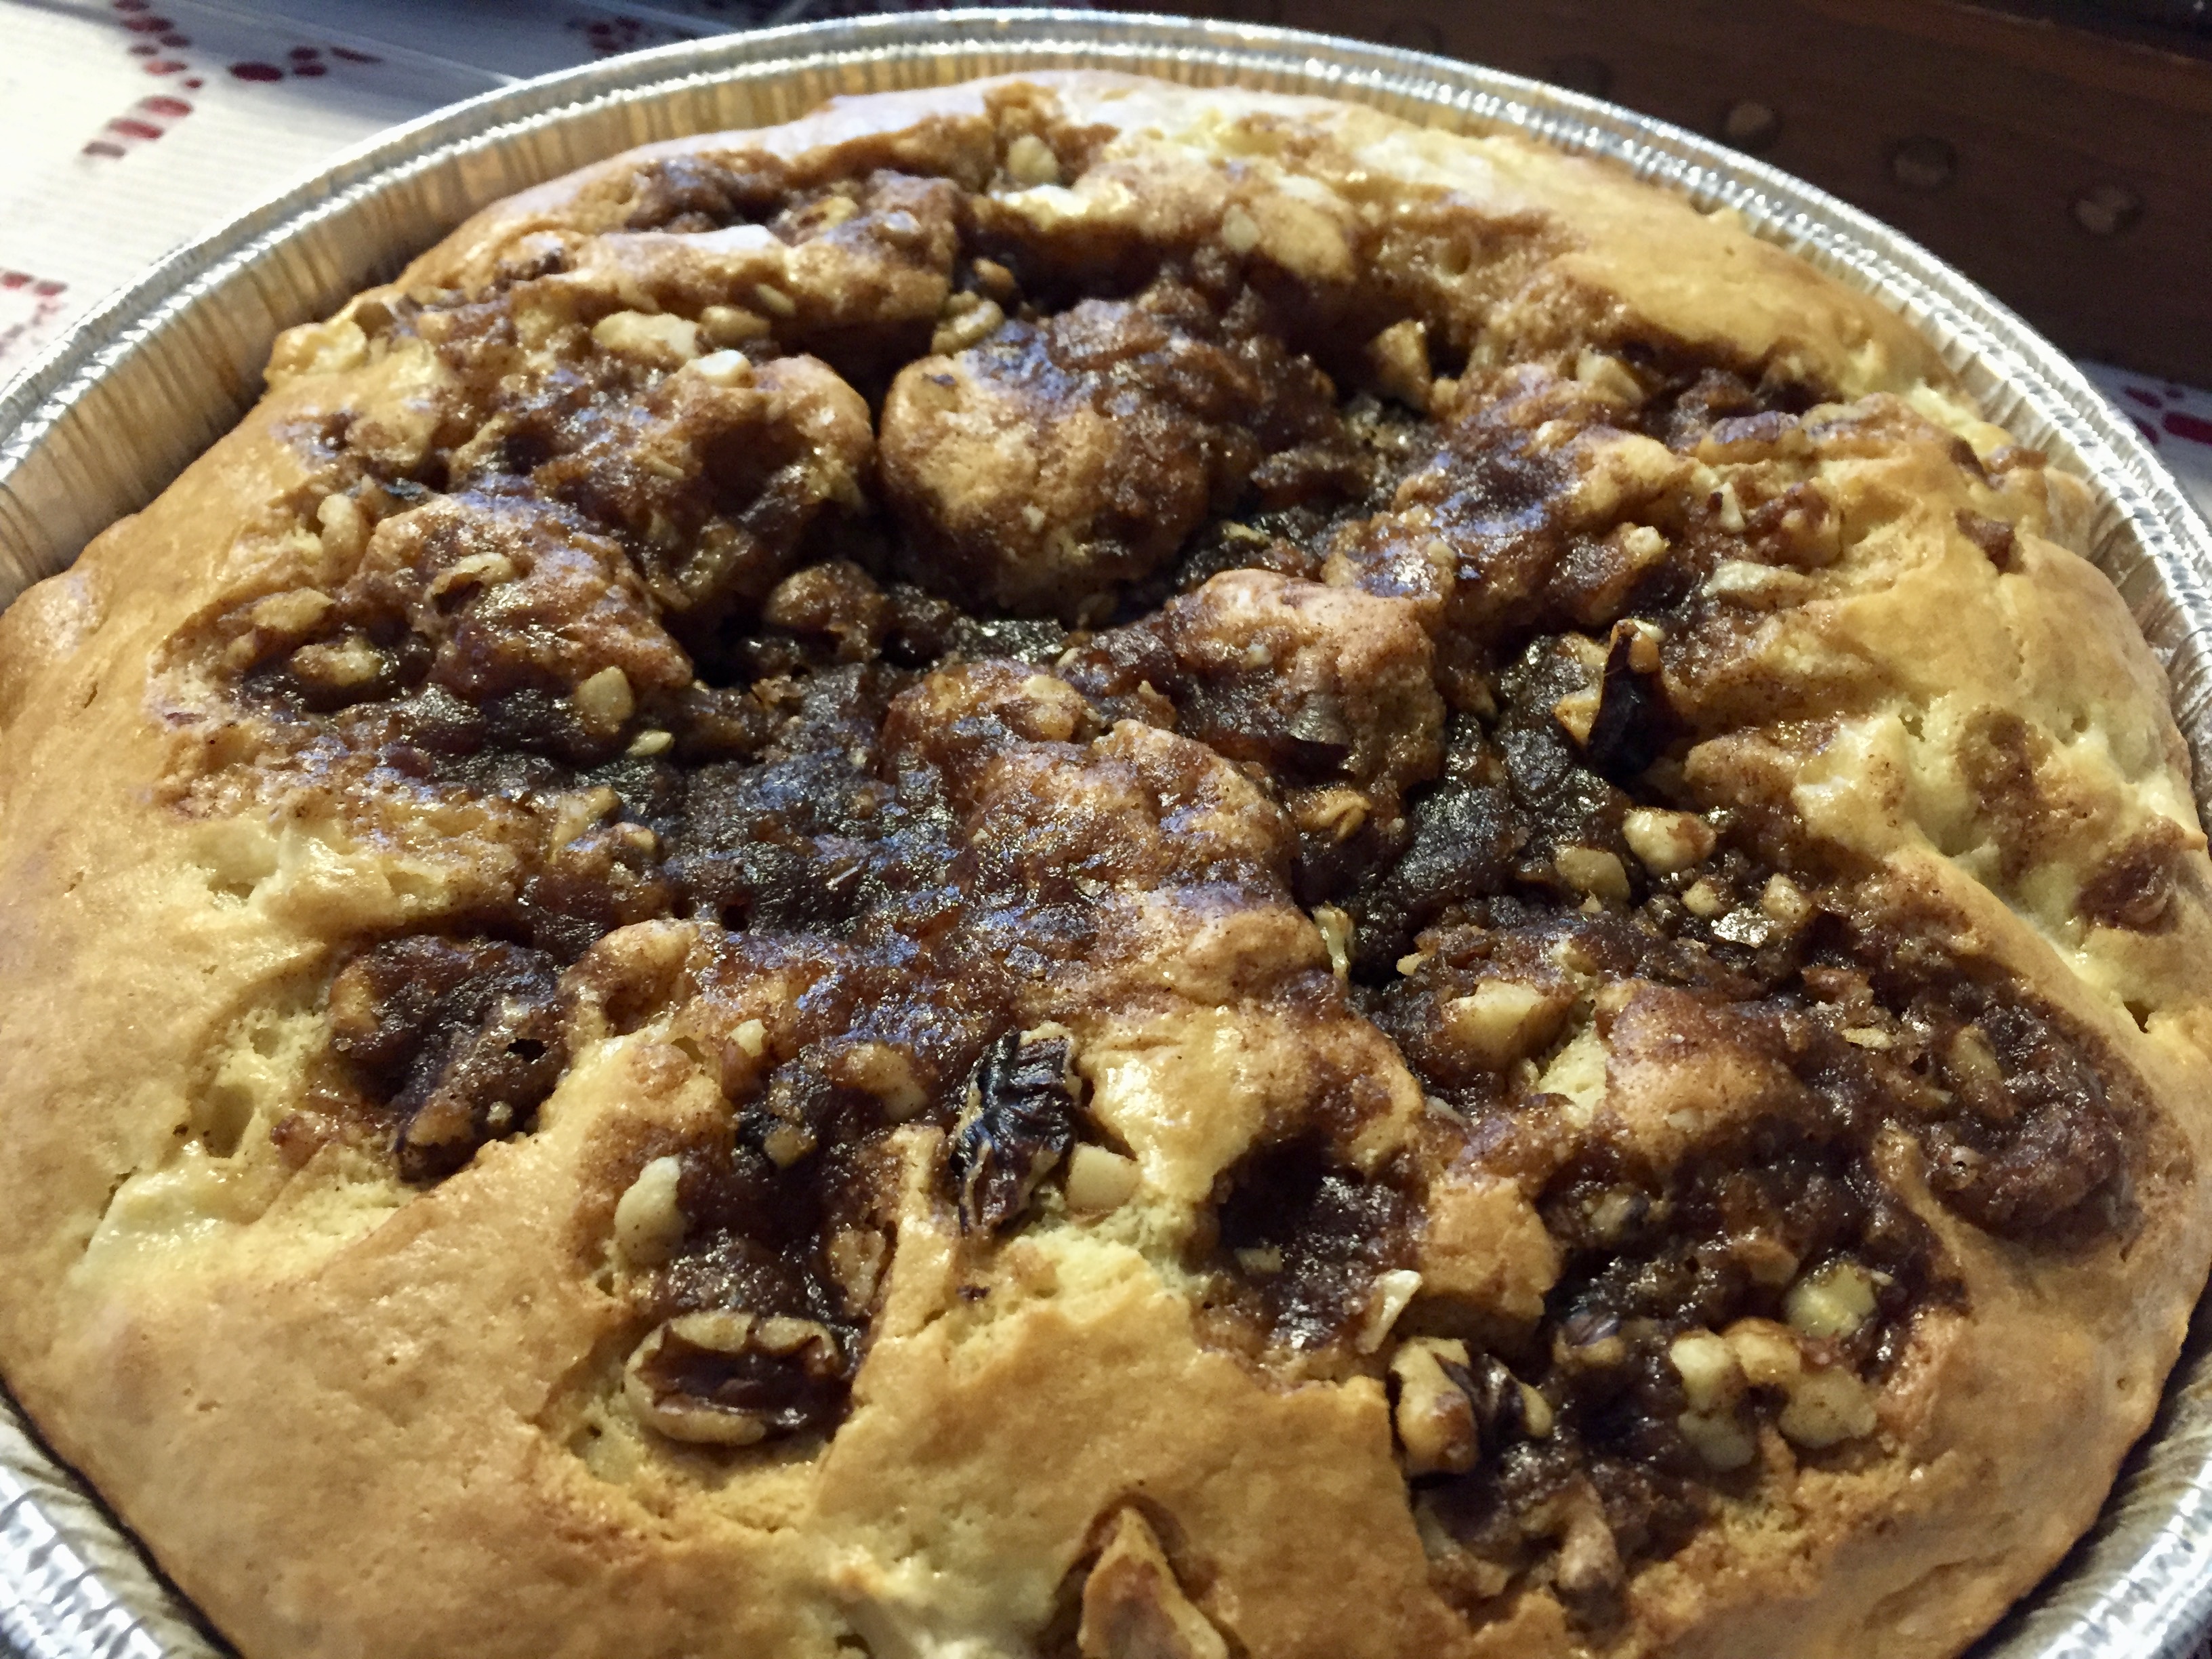
 Bake, then set to cool, make your caramel and fill. Then a simple chocolate drizzle is added to say, “Hey baby, you know you want me.”
 If you need to break up the task of making these (and I love this when baking anything that requires multiple steps…thus my profound respect for biscotti, so easy). I say, mix and roll day one, roll in pecans and bake and indent, then caramel and drizzle. This can be spread over a few hours or a few days. The cookies keep in an air tight container and the caramel can be added right away or the next day, your choice.
 I hope you enjoy this recipe (you will), and as always, thank you for coming to the table!
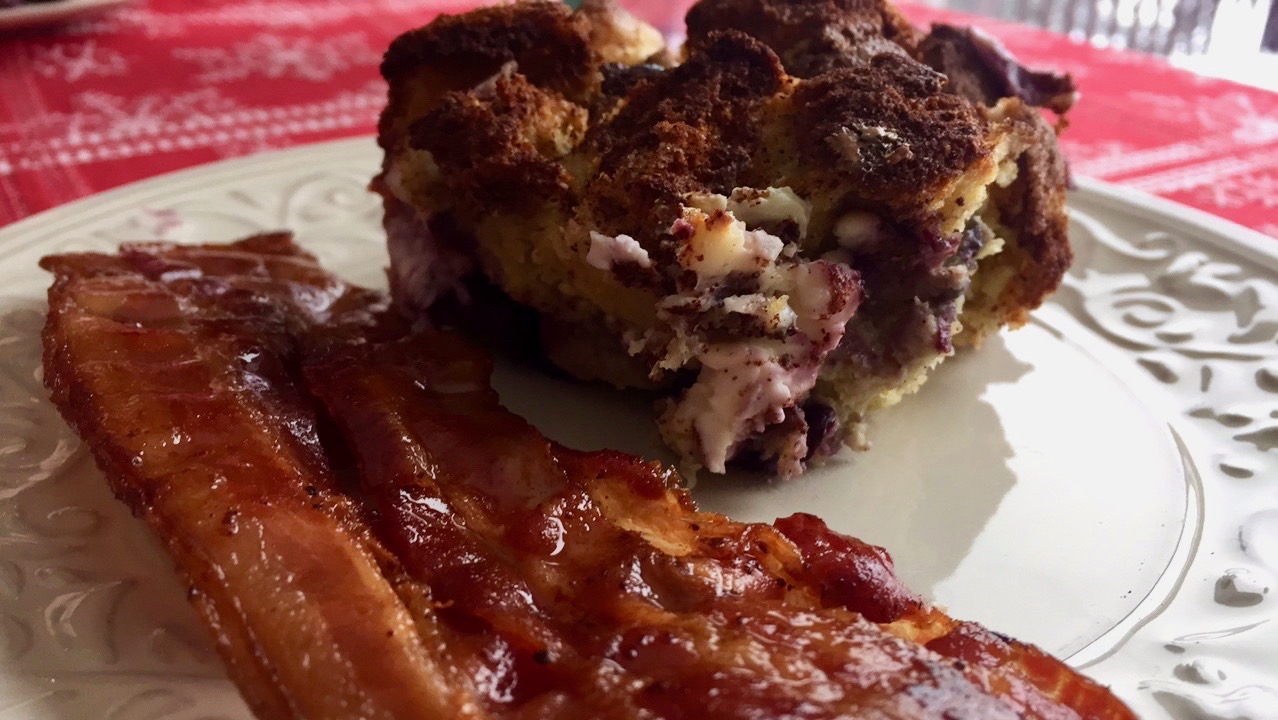

 This casserole was as much a part of our Christmases as was a special luncheon, finding the pickle (German tradition),my mother-in-law putting on her Christmas socks to signal the present opening could begin, and the general celebratory traditions that happen in a family during a holiday.
 I make this casserole one day a year. Once. Probably because we all eat our own thing for breakfast and for the most part, it doesn’t ever include maple syrup or cinnamon and sugar and cream cheese. But hey, this once a year treat is over the top indulgent and worth every bite.
 So I am not going to lie, this Christmas was a little heavy. We have suffered a major loss, and having navigated this kind of thing with losing my own dad a few years ago, the weight of the worry “Are the kids going to be ok?” and “Is everybody having a good Christmas?” along with my making sure my momma enjoyed the day and everyone was ok, I didn’t want to spend my day in the kitchen. I had enough to deal with.

 I am not what you would call a maudlin person. At least to the outsider. I tend to be a #blessed kind of girl.
 coincidences in your life?
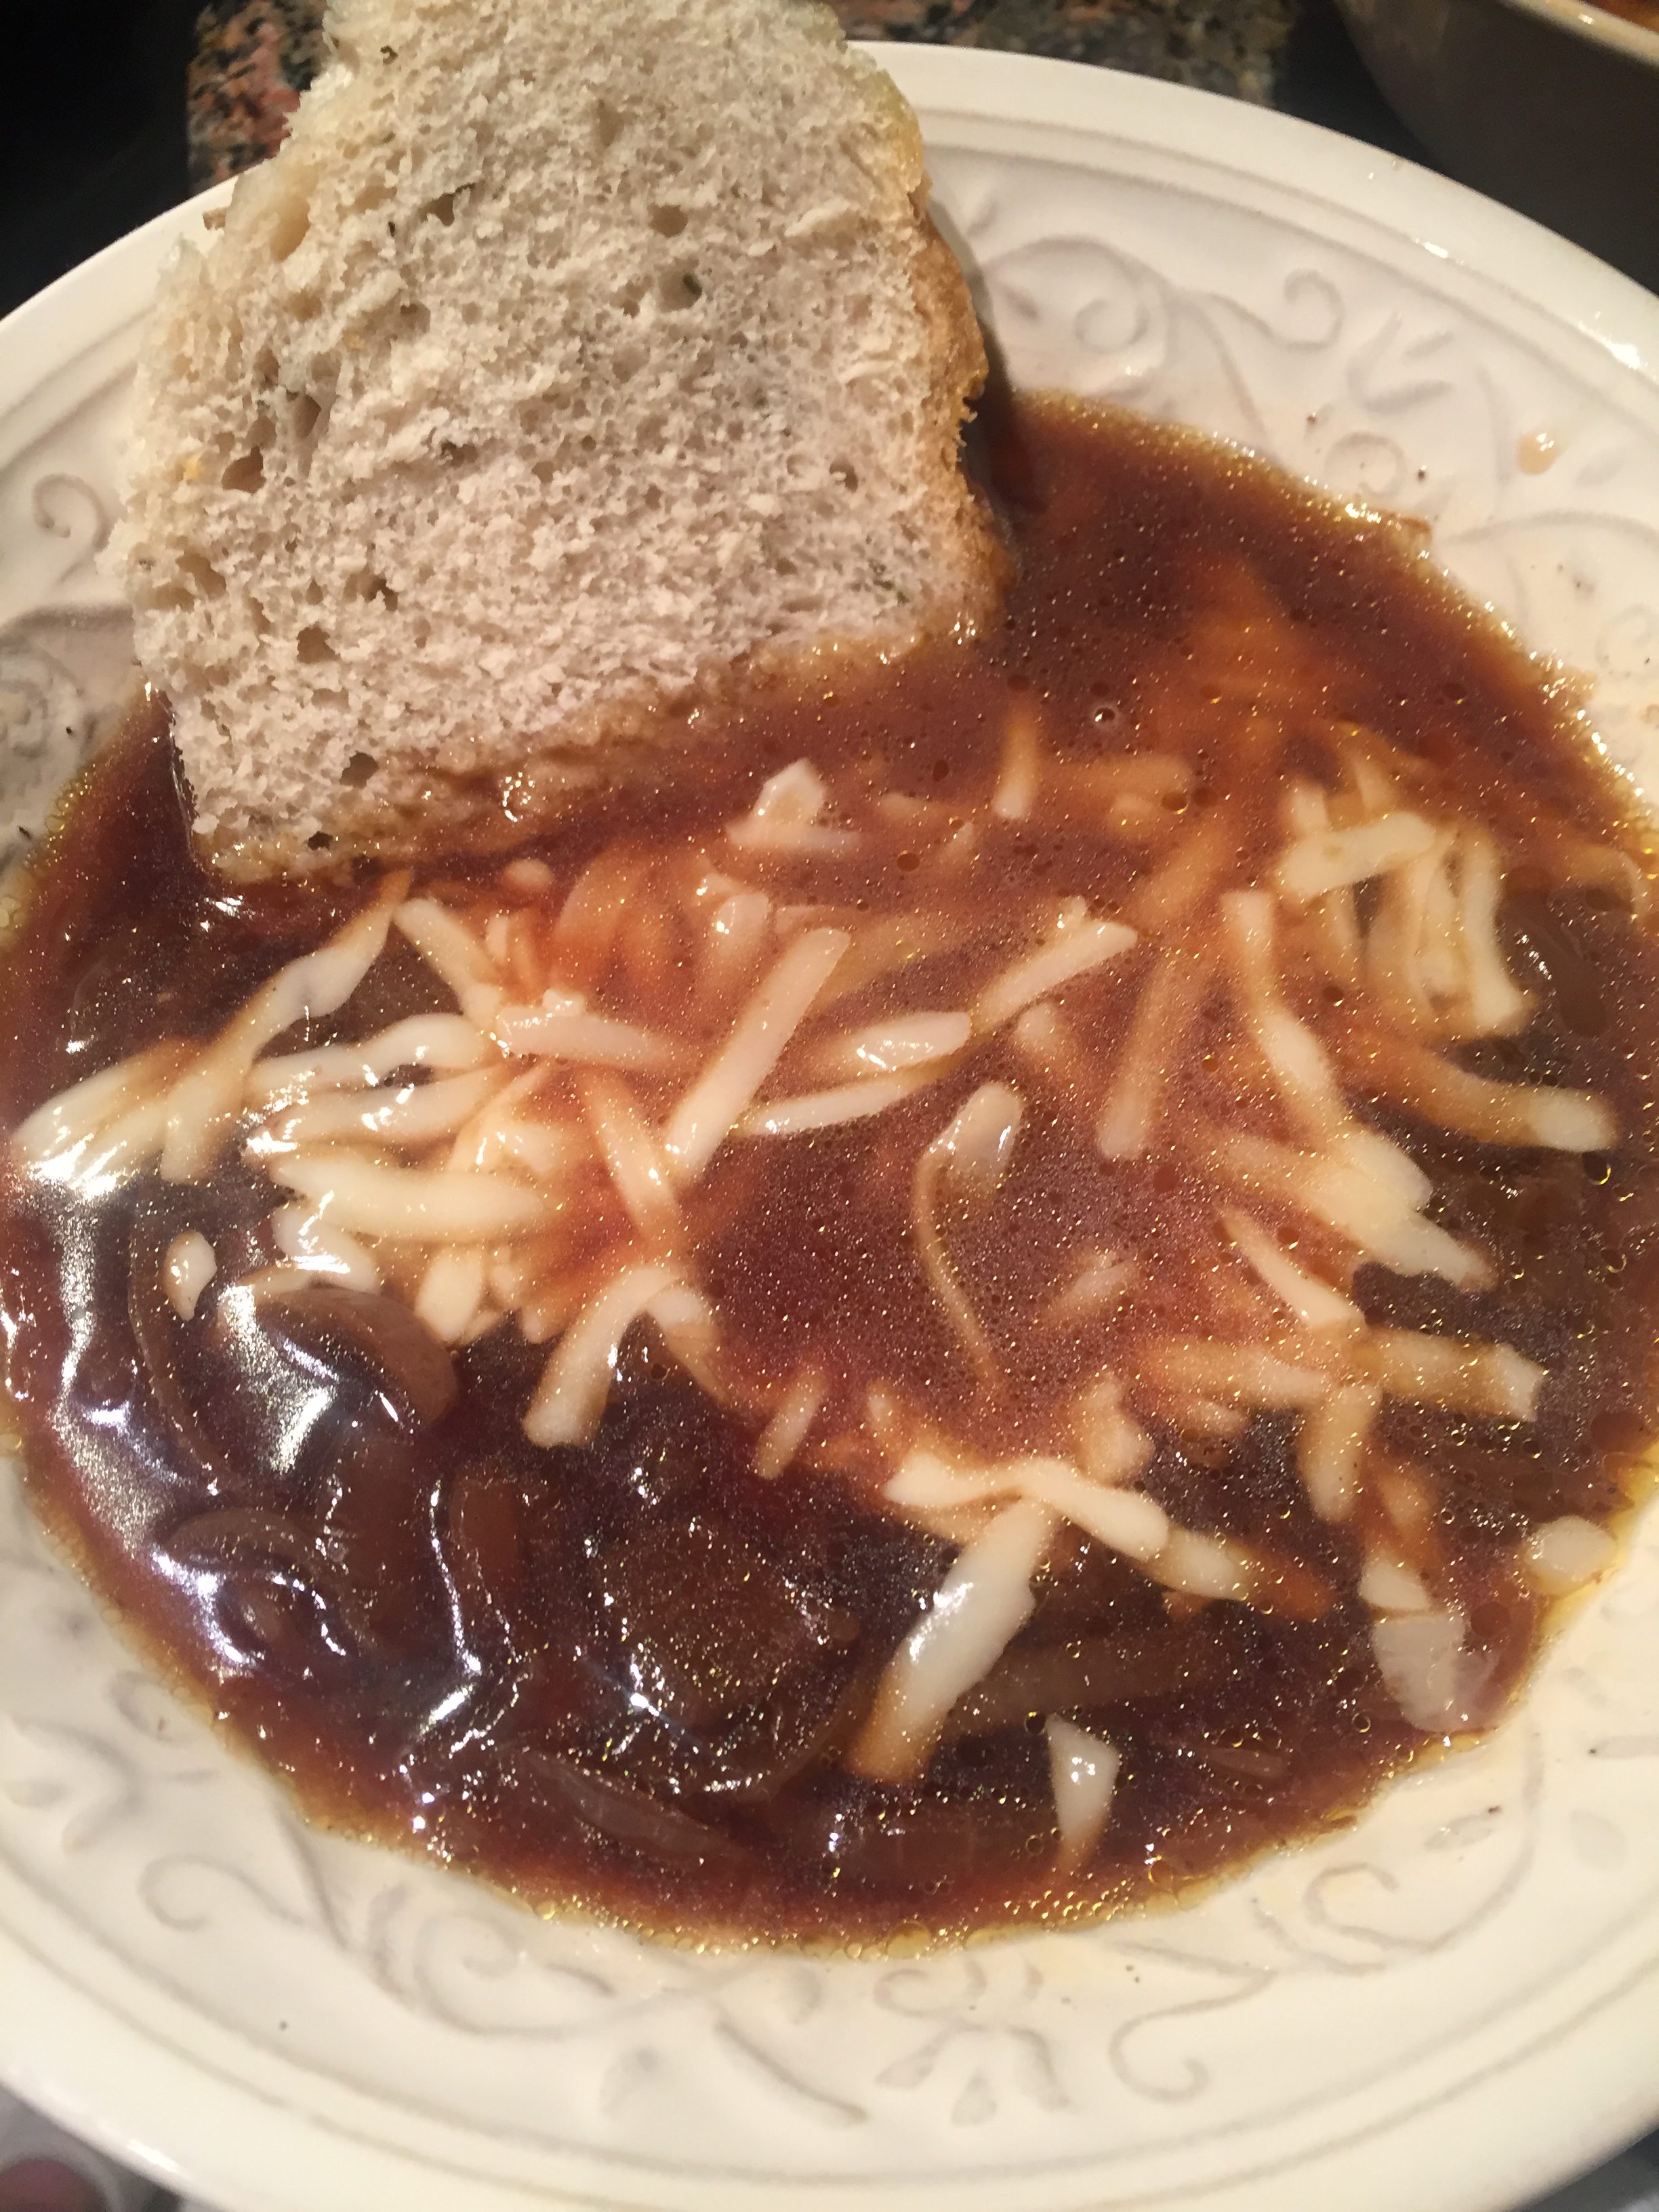
 We had less than a year with my Dad from the point of his diagnosis to his passing. His prognosis was not spectacular, and a second round of chemo had started, when I got a text that Dad had made French Onion Soup and were we coming for supper?


 Fast forward; I have used a seatbelt every time I enter a car since the late 80’s. My children wear bicycle helmets, and we do not find ourselves around much second hand smoke. We are pretty boring. I’m thrilled with this. The internet, laptops, cell phones, have invaded our lives, and with them, different dangers.


 However;
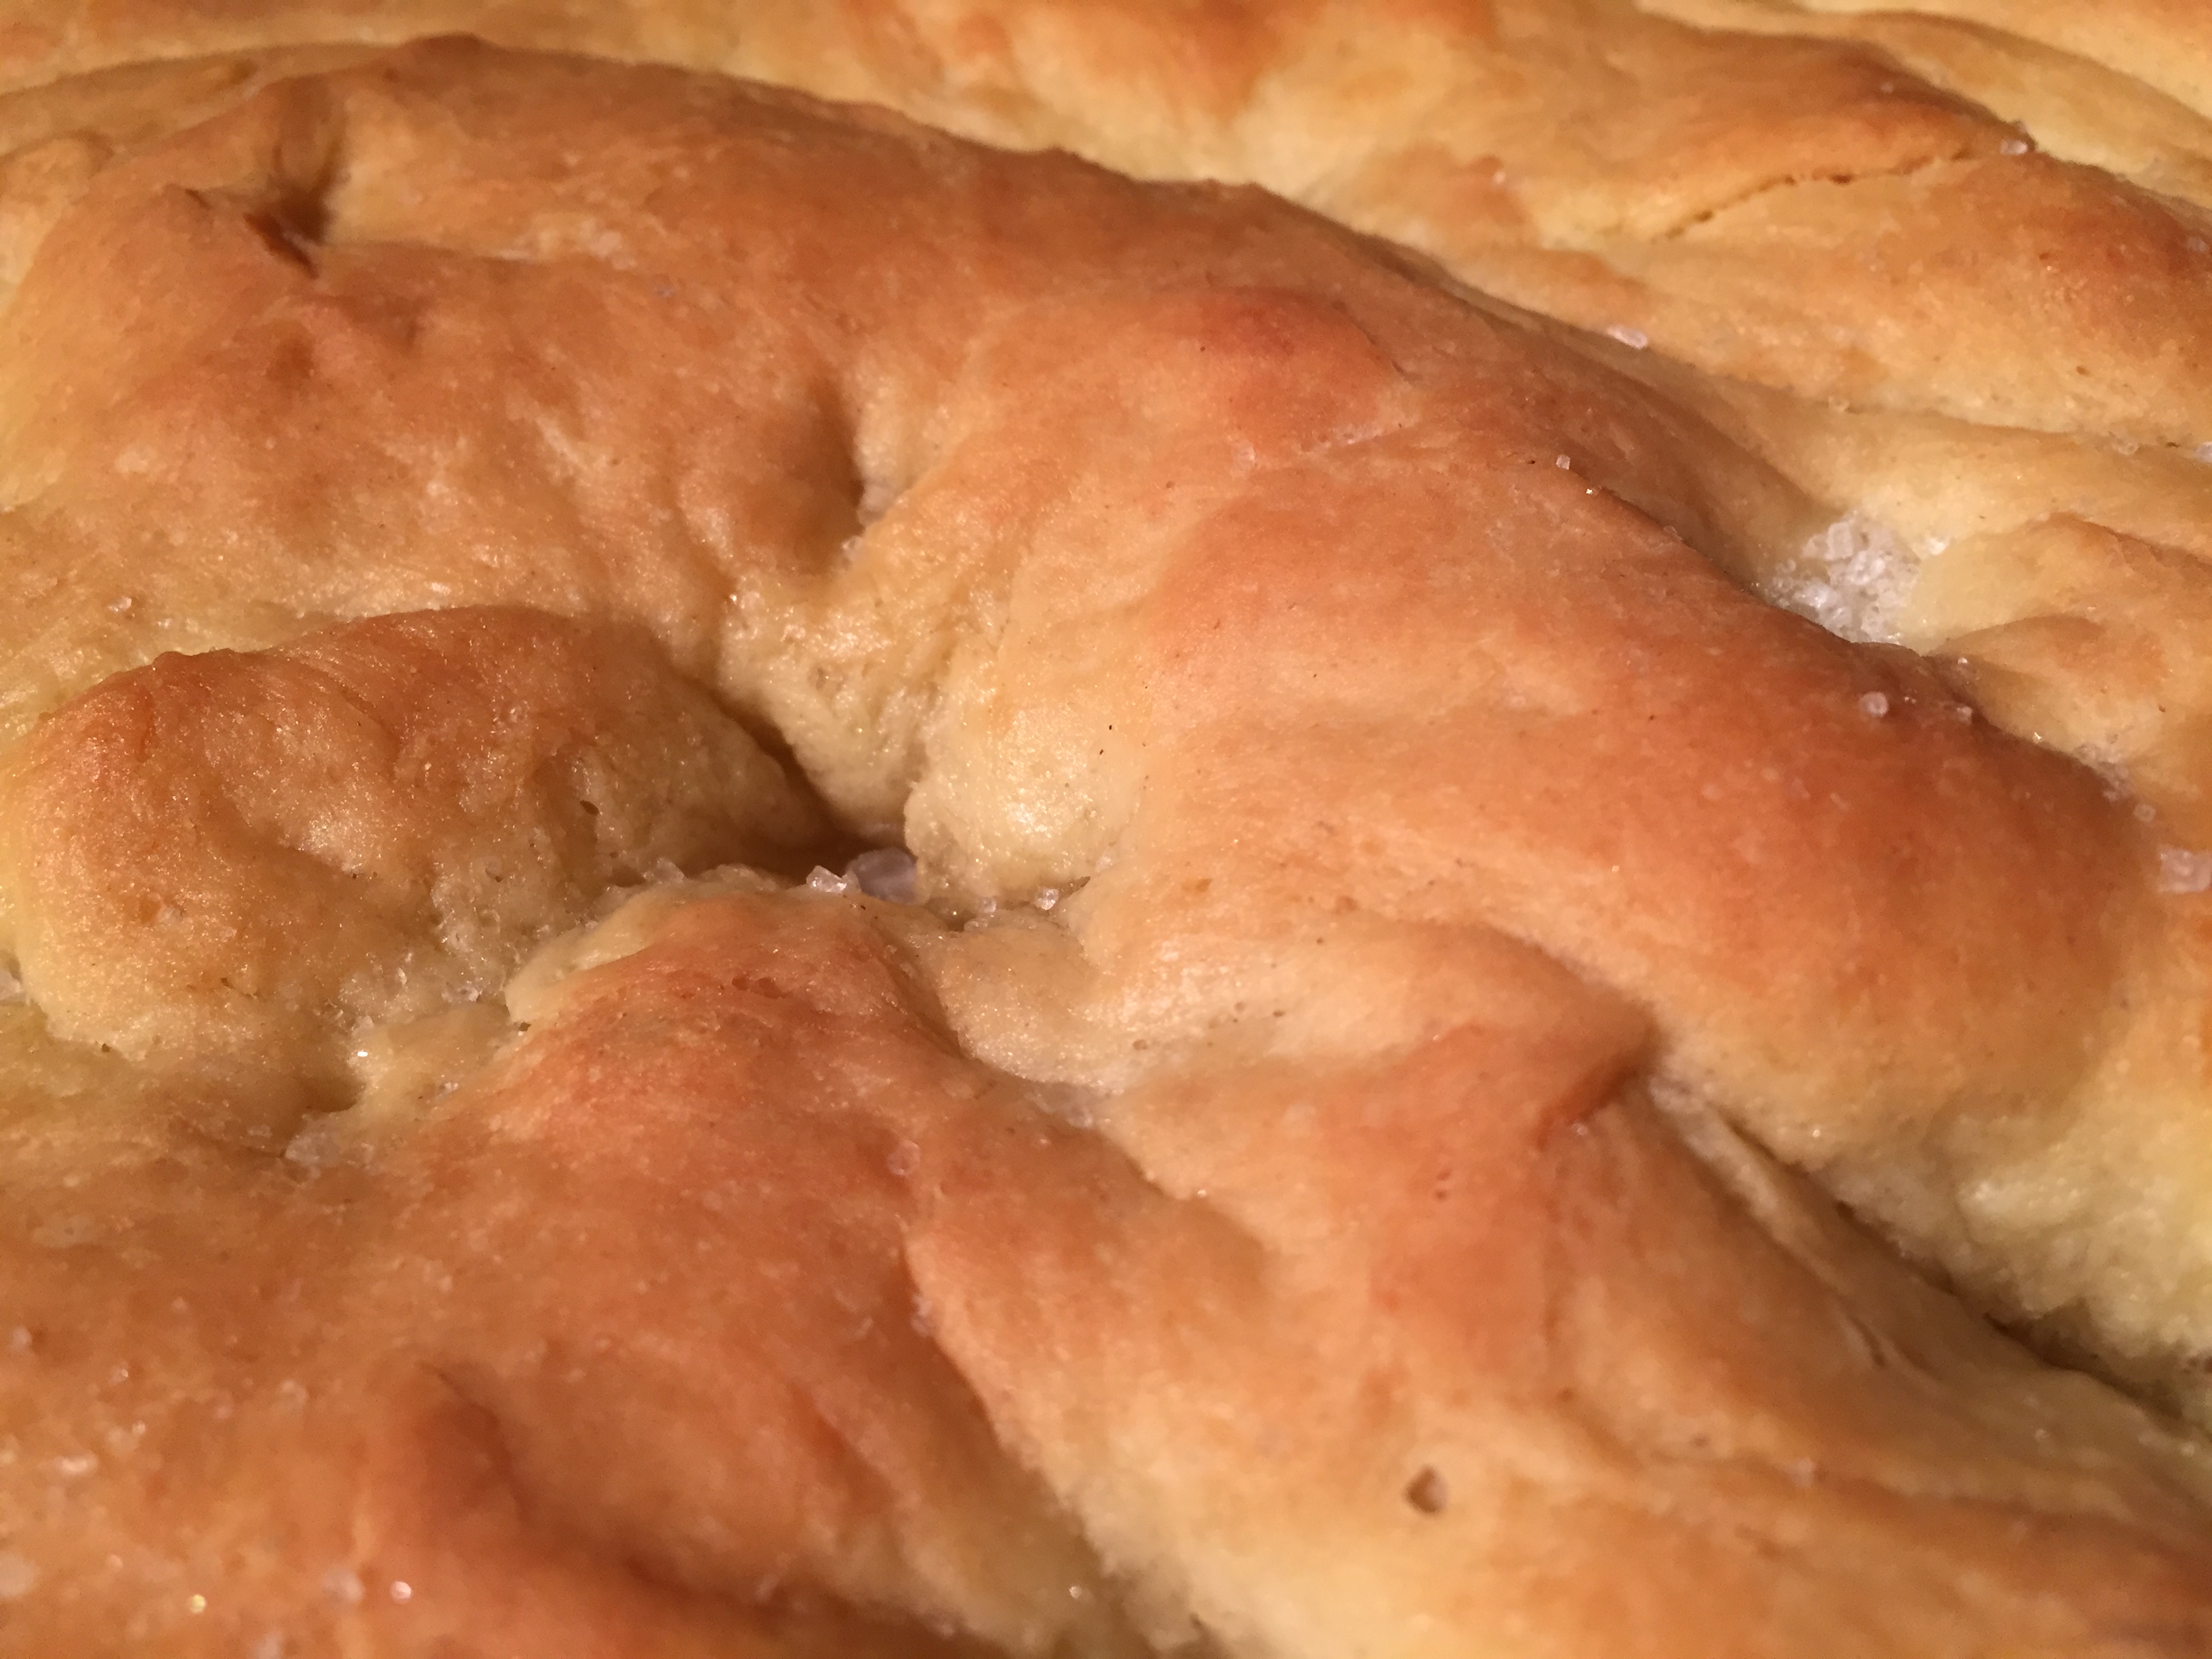
 So, when my son asked me to make focaccia after supper one night, and even found the recipe on-line to do make it happen, I stayed up late to coach the baker I didn’t know existed in my kid.

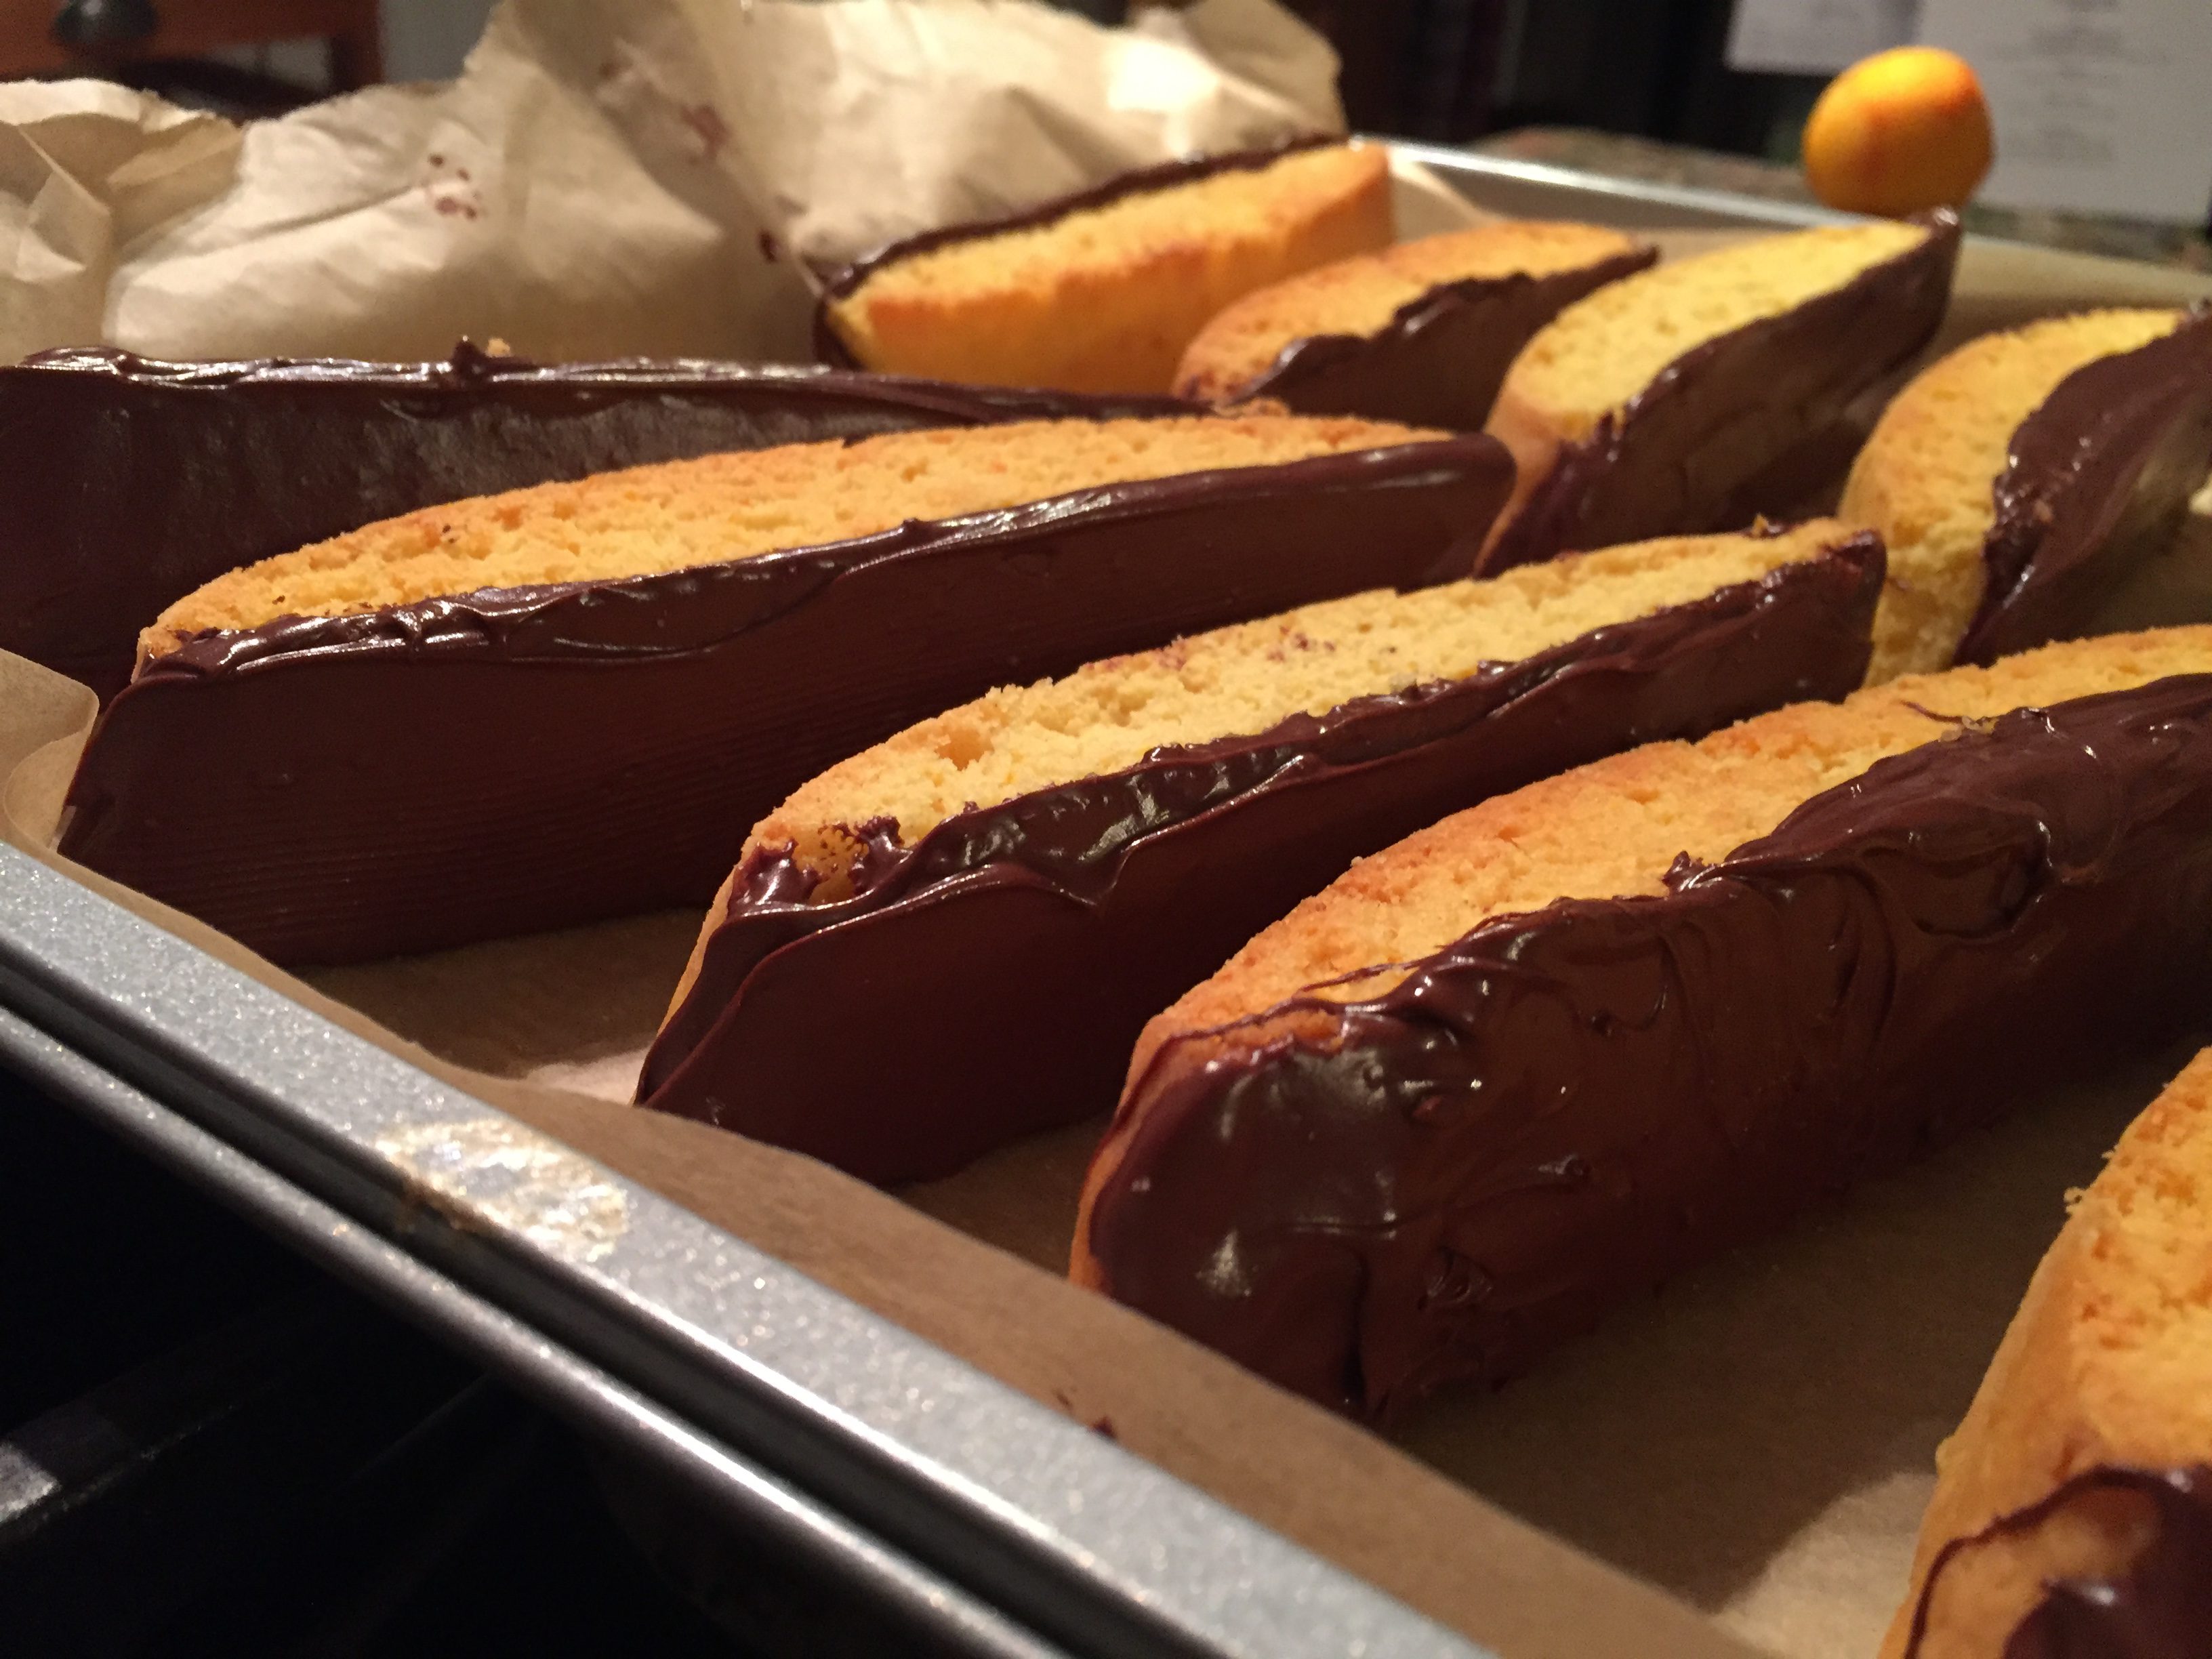


 Pleasant surprise, biscotti turns out to be one of the easiest, most beautiful cookies to make, and did I mention easy already? because they are. If you have attempted the
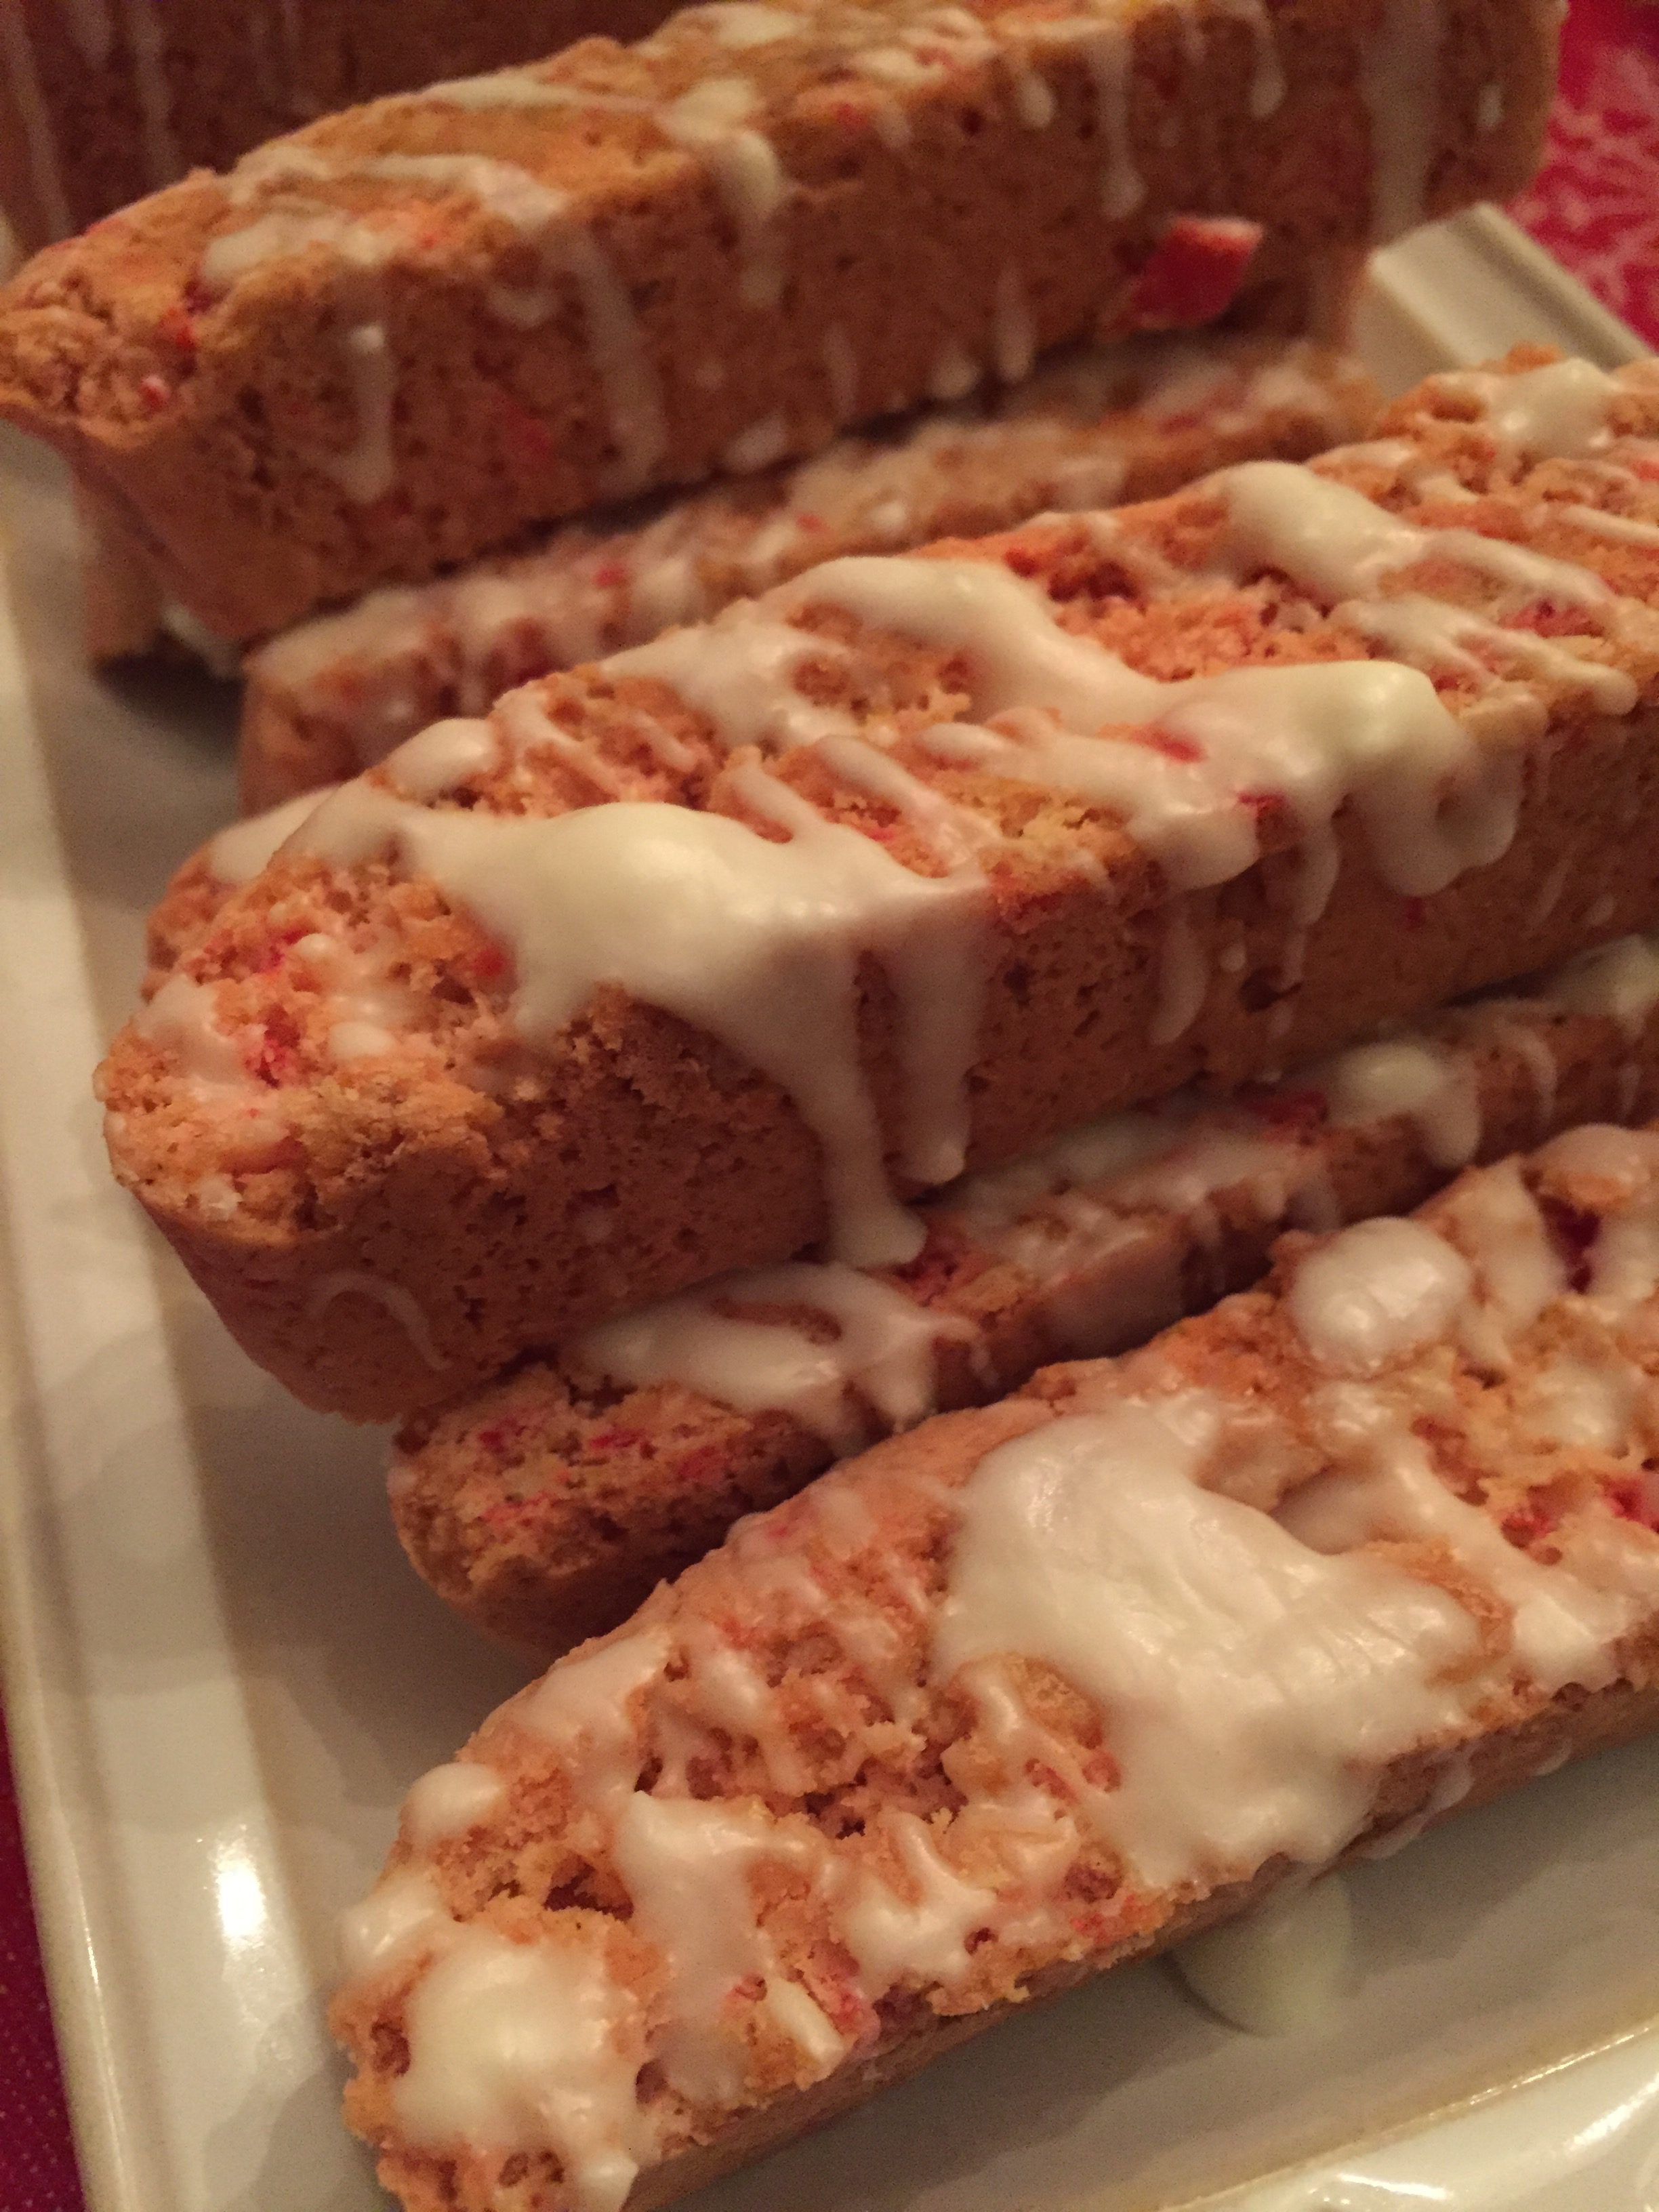
 So, I tried. I selected Chocolate Dipped Orange Biscotti, because chocolate and orange are two of my favorite flavors. The original recipe from www.portandfin.com seemed pretty straightforward. I switched out the extract and of course added more orange zest. I also used semisweet chocolate because it is what I had in my pantry.
 Once the cookies are done baking a second time and cool, melt that chocolate and dip away.
 I might even go as far as to say my baker pride inched up a notch. Which, is good for the soul. Probably not as good as the spin class that I am afraid of and should take would be for my figure, but hey. I’ll take my romance of the biscotti for now. Baby steps and conquering fear and all that.
