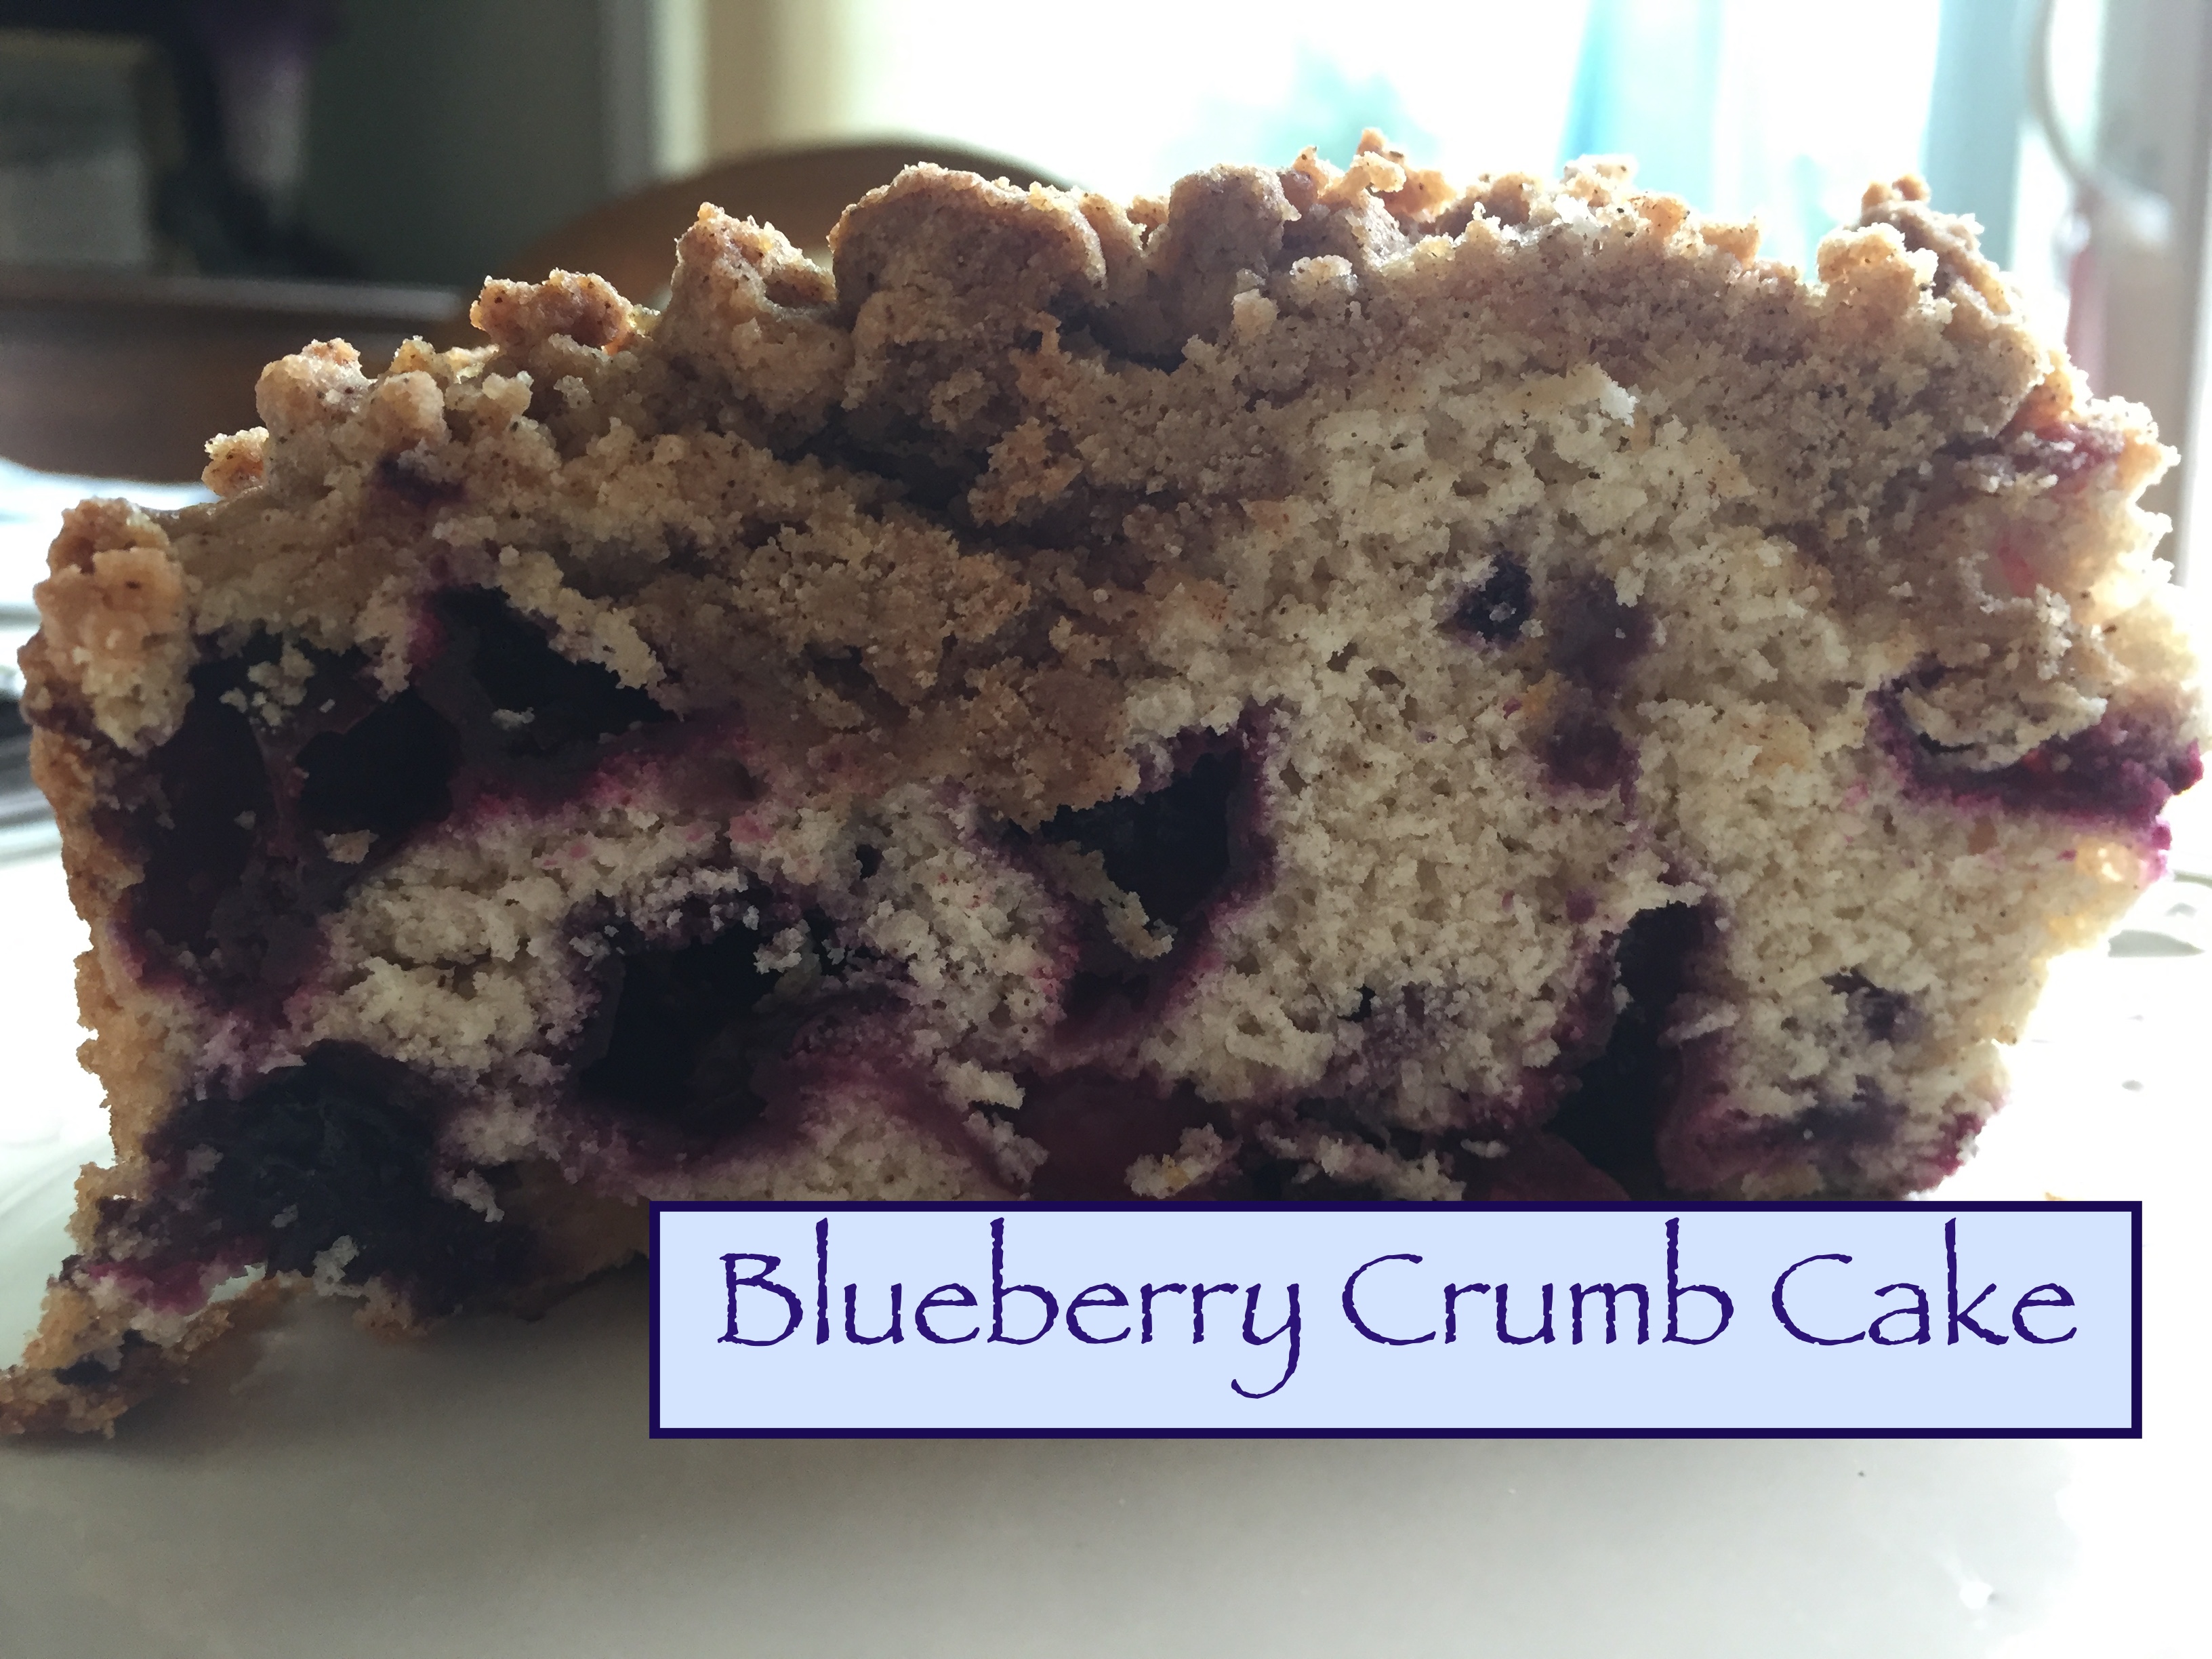
Springform Pan Blueberry Crumb Coffee Cake

Once upon a time, I went to bed with a cookbook and a stack of post its. OK, it wasn’t that long ago…no worries, I have fully accepted and embraced my nerd status. I’m ok with it.
Actually, I tend to purchase cookbooks and read them like novels. There is something about a back story to a recipe or the person creating it. Enter websites and food blogs, and I am one happy reader. Listen, some people binge watch reality tv, recipes are my thing…it’s all good.
As a teacher note- if you or your loved one doesn’t consider yourself, “a reader,” but you find yourself drawn to reading online articles, sports magazines, book about bugs, how-to books, or say, cookbooks…guess what? You are a reader. You just prefer non-fiction. I am a balanced reader, in that I read whatever, but for some people (and students in particular young students who don’t love reading) non-fiction is my in. I am teaching about bugs, and trucks, and tigers, oh my. If they are interested in what they are reading, leave it alone and let them read.
We also have this staff breakfast on Fridays at my work where we take turns supplying the eats. It’s a collaborative friendly celebration of survival and academic excellence. So my inner breakfast bossy-pants wants to bring my best to the table, I want my staff to know I love them enough to make the good stuff.
Practice makes perfect. So, I tried out another recipe.
This recipe started out with one from the justapinch food blog. The original recipe can be found here: https://www.justapinch.com/recipes/dessert/cake/blueberry-crumb-coffee-cake.html I did make some changes because I don’t want to just use another person’s recipe, and I am also always struggling with the density of coffee cakes and muffins, and am on a cake flour bender.
 I made this recipe using a springform pan, which is another new thing for me, but I think the effect of the finished cake was beautiful, and enabled me to slice it into perfect wedges for sharing.
The crumb topping for this cake is beautiful. I added more spices than the original and in truth, felt it needed more. I asked my tasters (fresh out of the gym, yes I am the bad friend who hands baked goods over after people work out) and the response was, “What? It doesn’t need anything.” Granted, it could be the boot camp talking. They work hard in those classes. Anything may have tasted good at the moment.
I once read about how one of the makers of Ben and Jerry’s Ice Cream had a condition which made him not be able to taste efficiently, which is why the flavors in that ice cream are so intense. I wonder sometimes if I suffer from the same thing? The need for more cinnamon is a thing, right? Right?
So, in addition to messing with the flour, I also added a little more sugar, more blueberries, and like aforementioned, more spice.
This deliciousness will be coming to Friday breakfast for sure, and even though it is close to perfection, I can be absolutely sure it won’t be my last recipe when it comes to blueberries, crumb topping, and the oven. Like my nerd awareness, I am ok with it. I really am.
I hope you like this recipe, and as always, thank you for coming to the table!
Chrissy
PrintSpringform Pan Blueberry Crumb Coffee Cake
This blueberry perfection is based on the original Recipe Blueberry Crumb Coffee Cake by Lori Newton of www.justapinch.com My alterations to the recipe include combination of flours, and minor regarding amounts of spice, sugar, and berries. Her recipe is perfection!
- Category: Breakfast
- Method: Baking
- Cuisine: Coffee Cake
Ingredients
Blueberry Cake:
- 1 C AP Flour
- 1 C Cake Flour
- 2 tsp Baking Powder
- ½ tsp salt
- 1 tsp cinnamon
- 1 ¼ C granulated sugar
- ¼ C softened butter
- 1 egg
- 1 tsp vanilla extract
- ½ C buttermilk
- 4–5 C blueberries
Perfection Crumb Topping:
- ½ C light brown sugar
- ¼ C AP Flour
- ¼ C Cake Flour
- ½ C Butter
- 1 ½ tsp cinnamon
- 1 tsp freshly ground nutmeg (I used a nutmeg and a microplane)
Instructions
Prepare a springform pan, buttering and flouring, then set aside. Preheat oven to 350*
Combine ingredients for crumb topping, mixing flours, cinnamon, nutmeg, brown sugar until combined. Grate butter or cut into small cubes and cut into dry mixture until form a crumble texture.
For Cake:
Cream together butter, sugar, until light yellow, add in egg, vanilla, and small amount of buttermilk. Combine dry ingredients, then add to mixture slowly, alternating with remainder of buttermilk. Gently fold in blueberries.
Put batter into prepared springform pan, and top with crumble topping.
Depending on your oven, bake anywhere between 45-60 minutes, testing the center until the tester comes out clean with just a little crumb.
Cool and slice in to wedges.


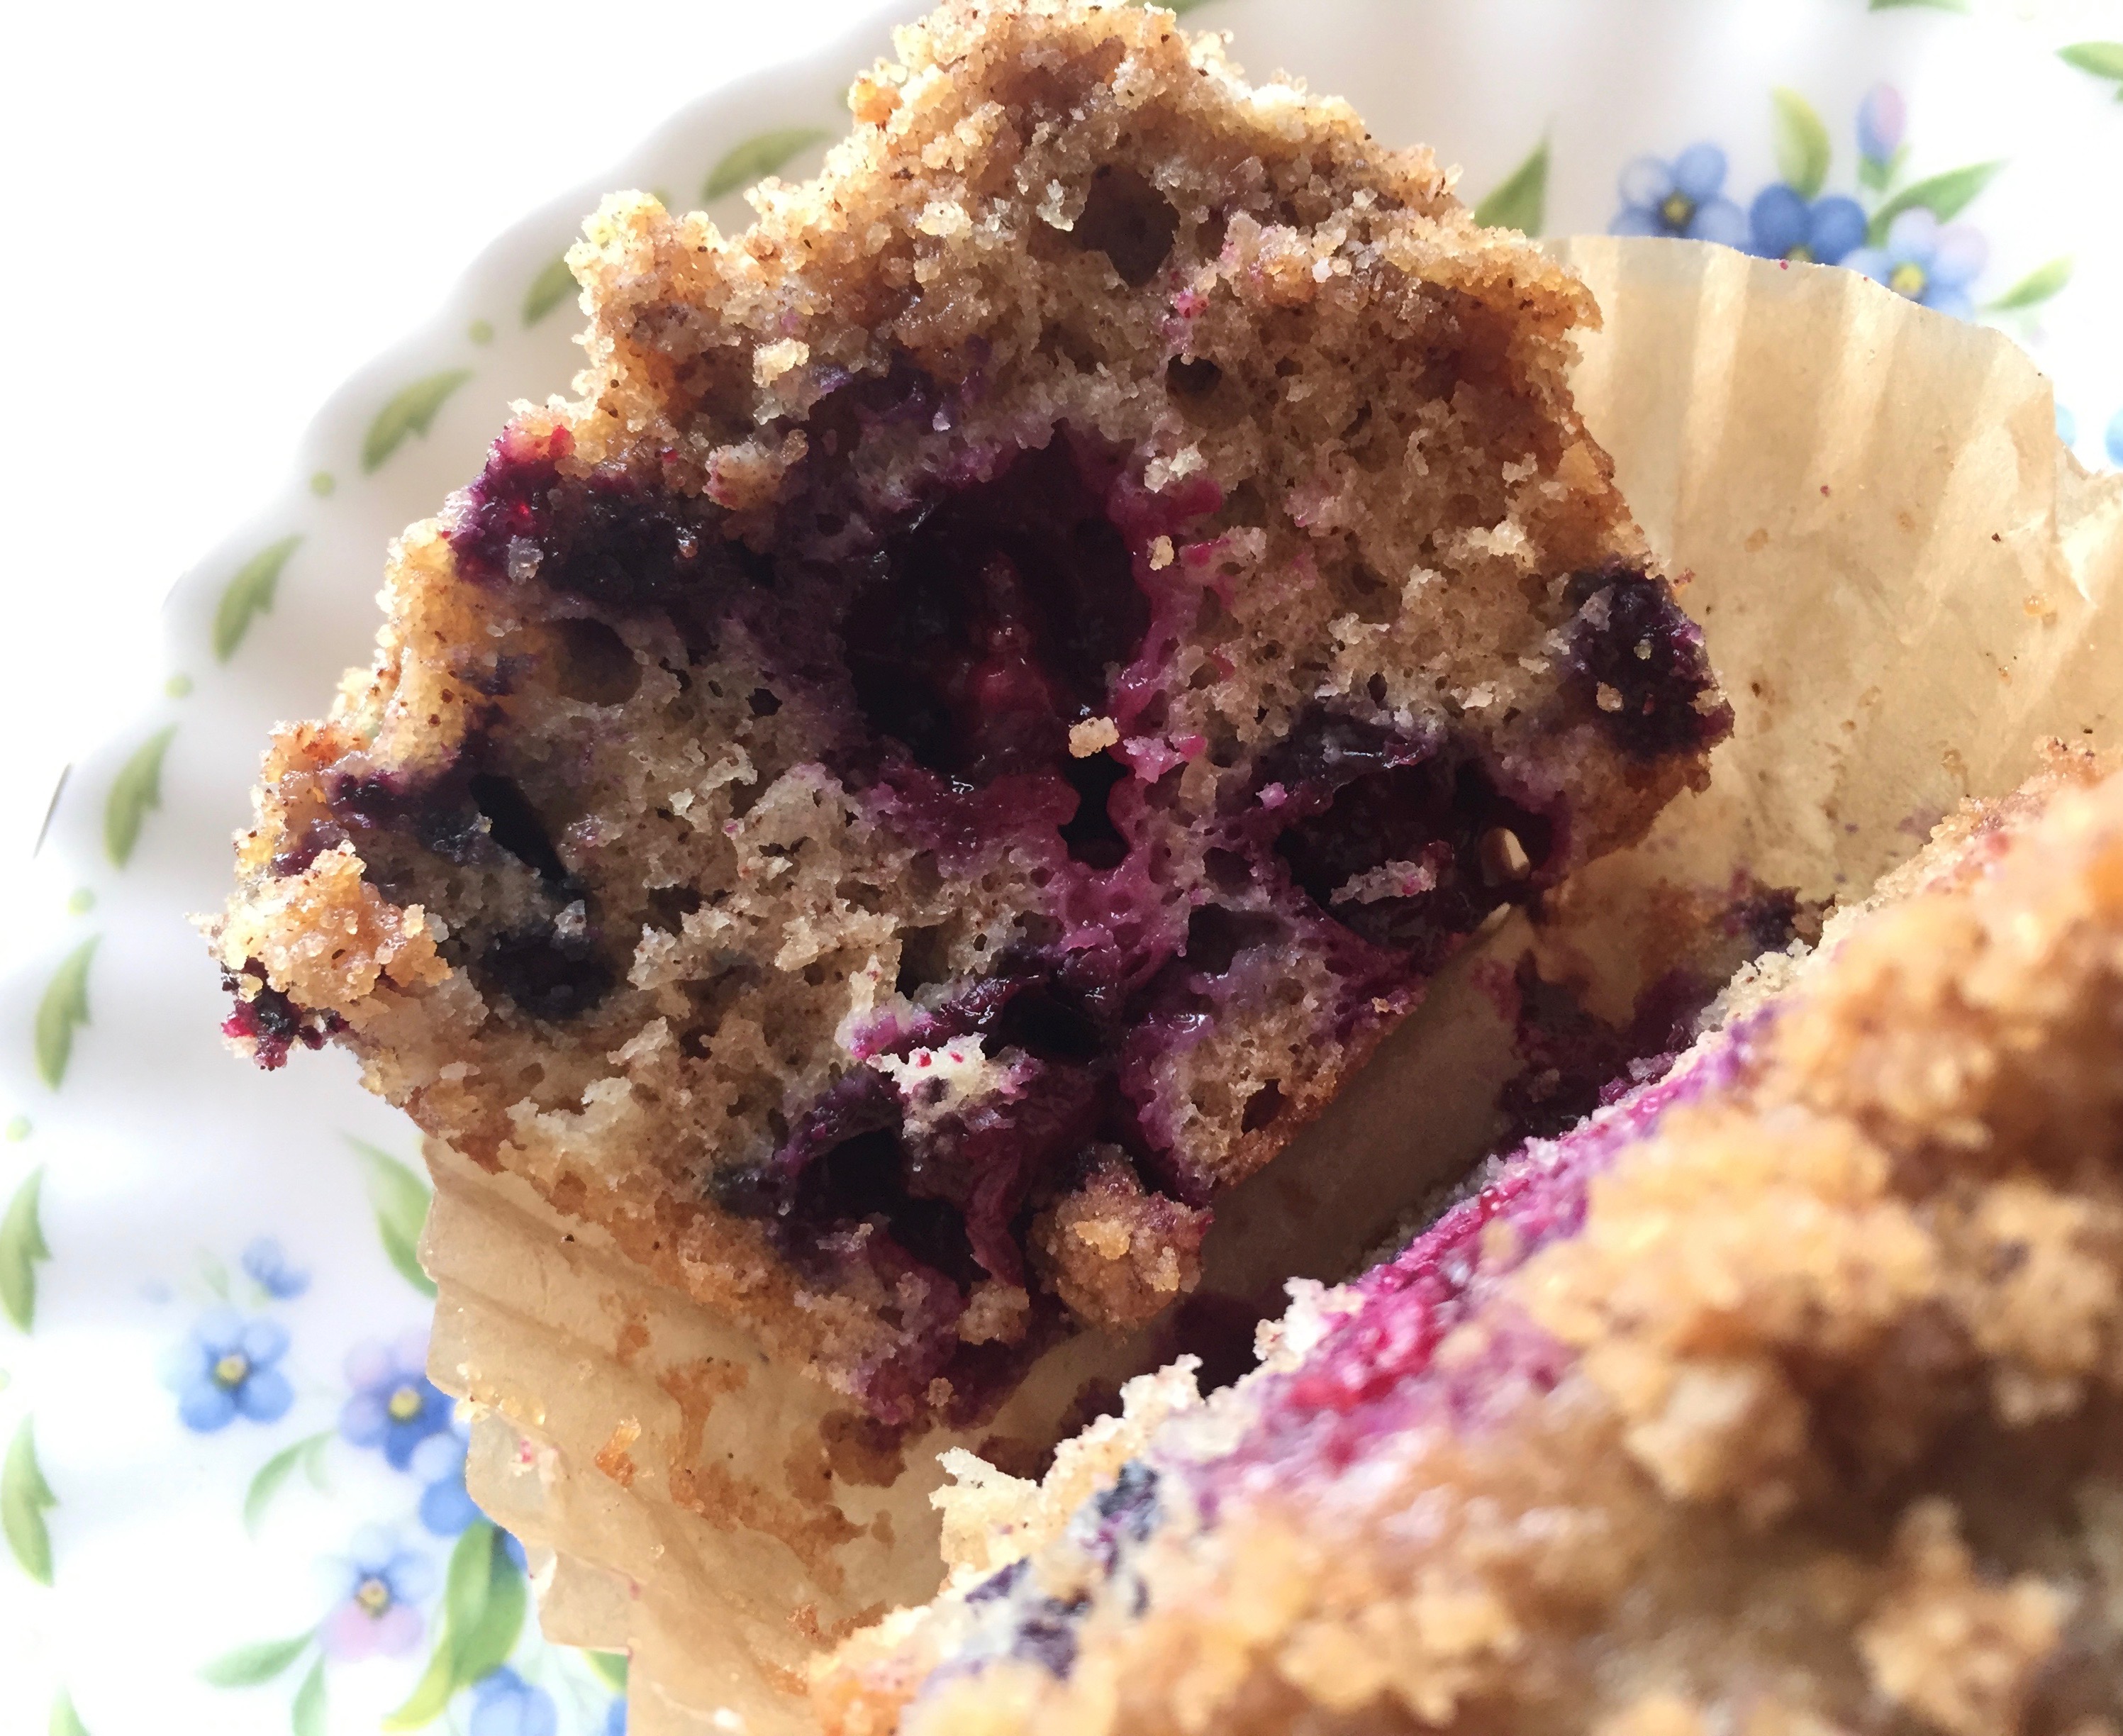
 The perfect blueberry muffin. Why are you so darn elusive? I have so many blueberries, and yes they can go in a protein smoothie. But little cups of cinnamon and blueberries fresh out of the oven call to me like sirens. “Chrissy…chrissy…come to me!” (Your food calls to you, right? No?)


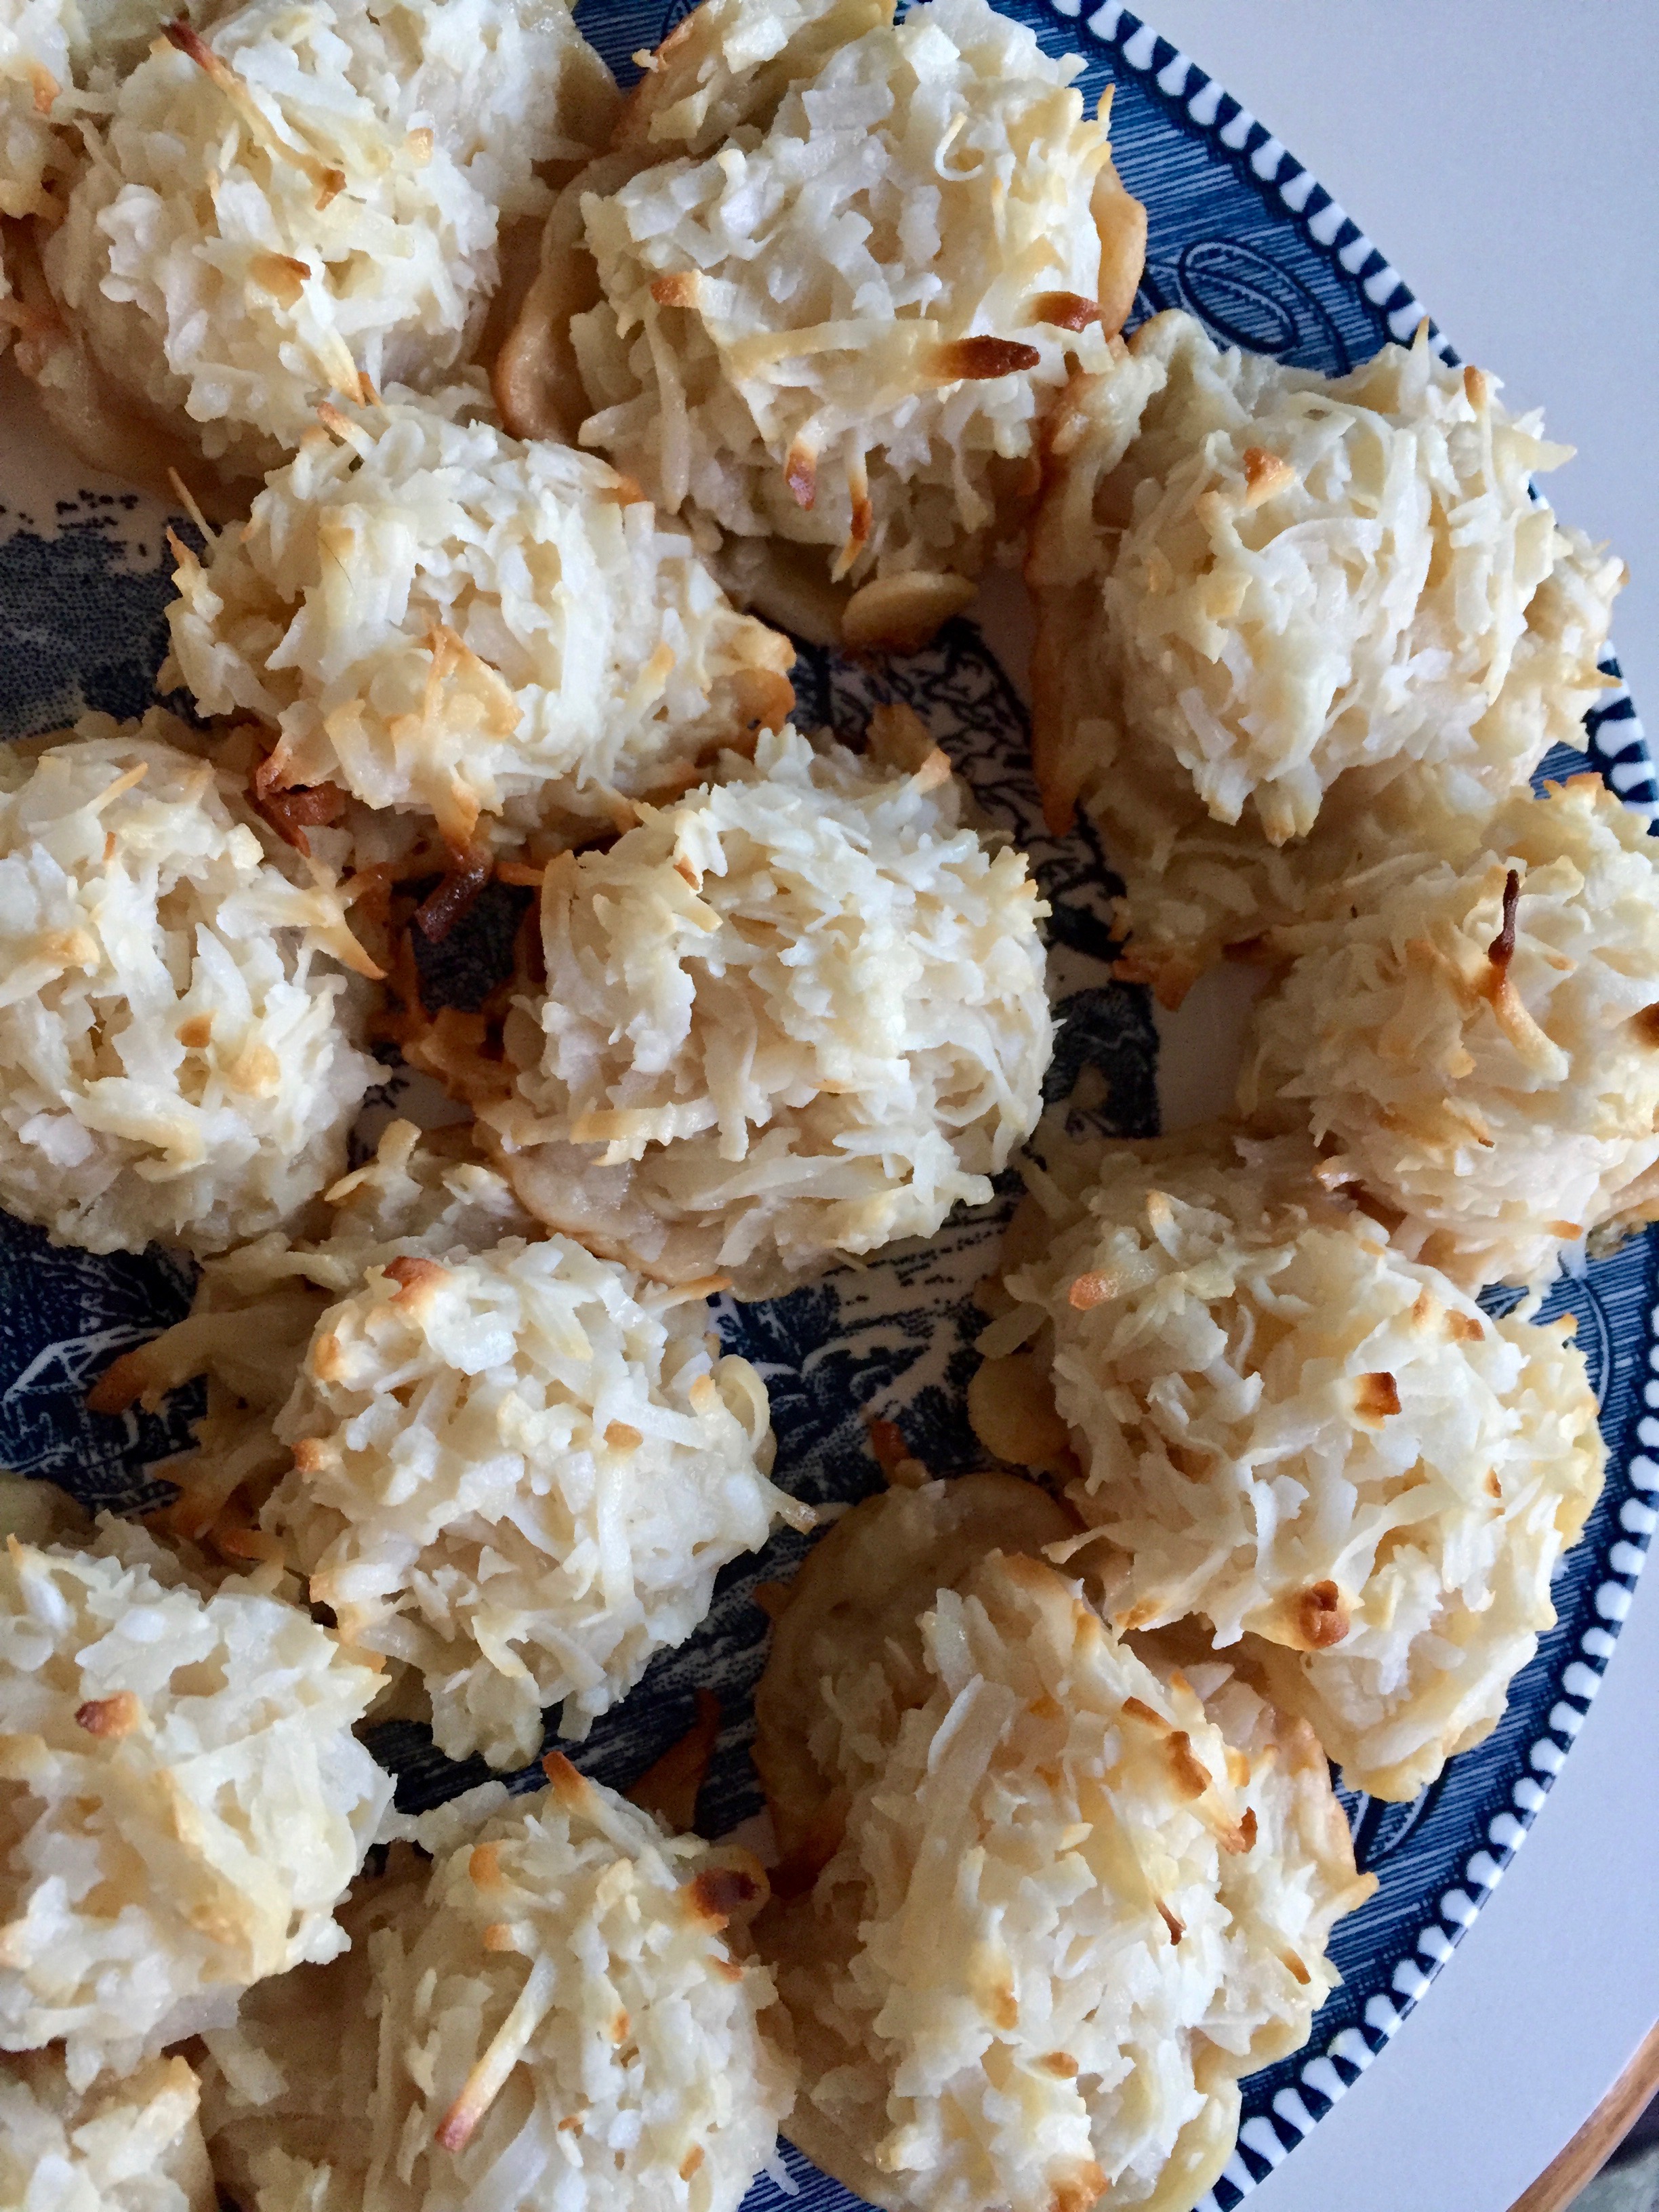
 My mom has this gift, where she makes all of her cookies exactly the same size and shape. It’s one of her many talents. For this recipe, I really did try to strive for the same effect, so I scooped the dough, then rolled them in my hands before putting them on parchment lined baking sheets. I was close to Momma perfection. Ok, true story, we ate the ones that didn’t conform. The rule in my house is any ugly cookies are up for dibs. At least eating these we felt a little less guilty!
 So today, I bumped up to the older age group box on surveys. I’m not so troubled by the actual number. There are certainly things I notice on the day-to-day, like the fact that I am certainly wearing more sunscreen and investing in a new skin regimen for reversing aging. Hey, a gal can hope. I’m also making healthy choices, tracking what I eat and exercising more, because I need to be living in this body for a lot longer.


 The beauty of a galette (is, you roll out the dough, place on a parchment lined baking sheet, scoop your beautiful filling on top in the center, and carefully fold up the edges.
 I am going to say this…when you pull this amazing dessert out of the oven, bubbly, peachy, beautiful, you will want to break off just an edge piece to taste. I know. It’s just out there. But remember this, bubbly fruit filling is the same consistency of hot lava. It will burn you. Not that I know this from personal, ahem, experience. Just let it cool for a few.
 When you go to Mimi’s house, not only do you get to swim, and throw the ball to Lexus (The Super Golden Doodle), and sit next to your best friend since forever; you also get trade secrets and recipes and all things magical that are in essence, Mimi. Oh, and she makes Zucchini Boats for supper and you are staying.
