mythankfultable.com

Feeding the Heart, Body, and Family

  • My Pics
  • My Story
  • The Puppies
  • Contact Us

Author: chrissy@mythankfultable.com

Fluffernutter Cookies…You Heard Me

April 12, 2024 by chrissy@mythankfultable.com

In New England, we are known for all sorts of things, like leaf peeping and stone walls, die hard sports fans and quick weather changes. We talk fast, we are critical of everything, but we will also lend a helping hand. Its a meaner vibe than the people of say, Missouri, where I lived for a school year. But I will live here as long as my hand and back can handle a snow shovel, watch the river for flooding, and wake up with the birds around four am. Too many of Noah Kahan songs resonate. But wow am I a thankful New England woman.

Cut to, what I ate for supper last night, which is what brought me here. To the essence of NE, the fluffernutter. Peanut butter, Fluff, bread. I used to like it on the cheapest white bread I could find. Now we do artisinal bread. Lightly toasted. Standing at the counter with two pups waiting for any toasty peanutbuttery goodness.

So, when I saw a recipe with these two ingredients baked up into a cookie? Yes. Yes. Yes.

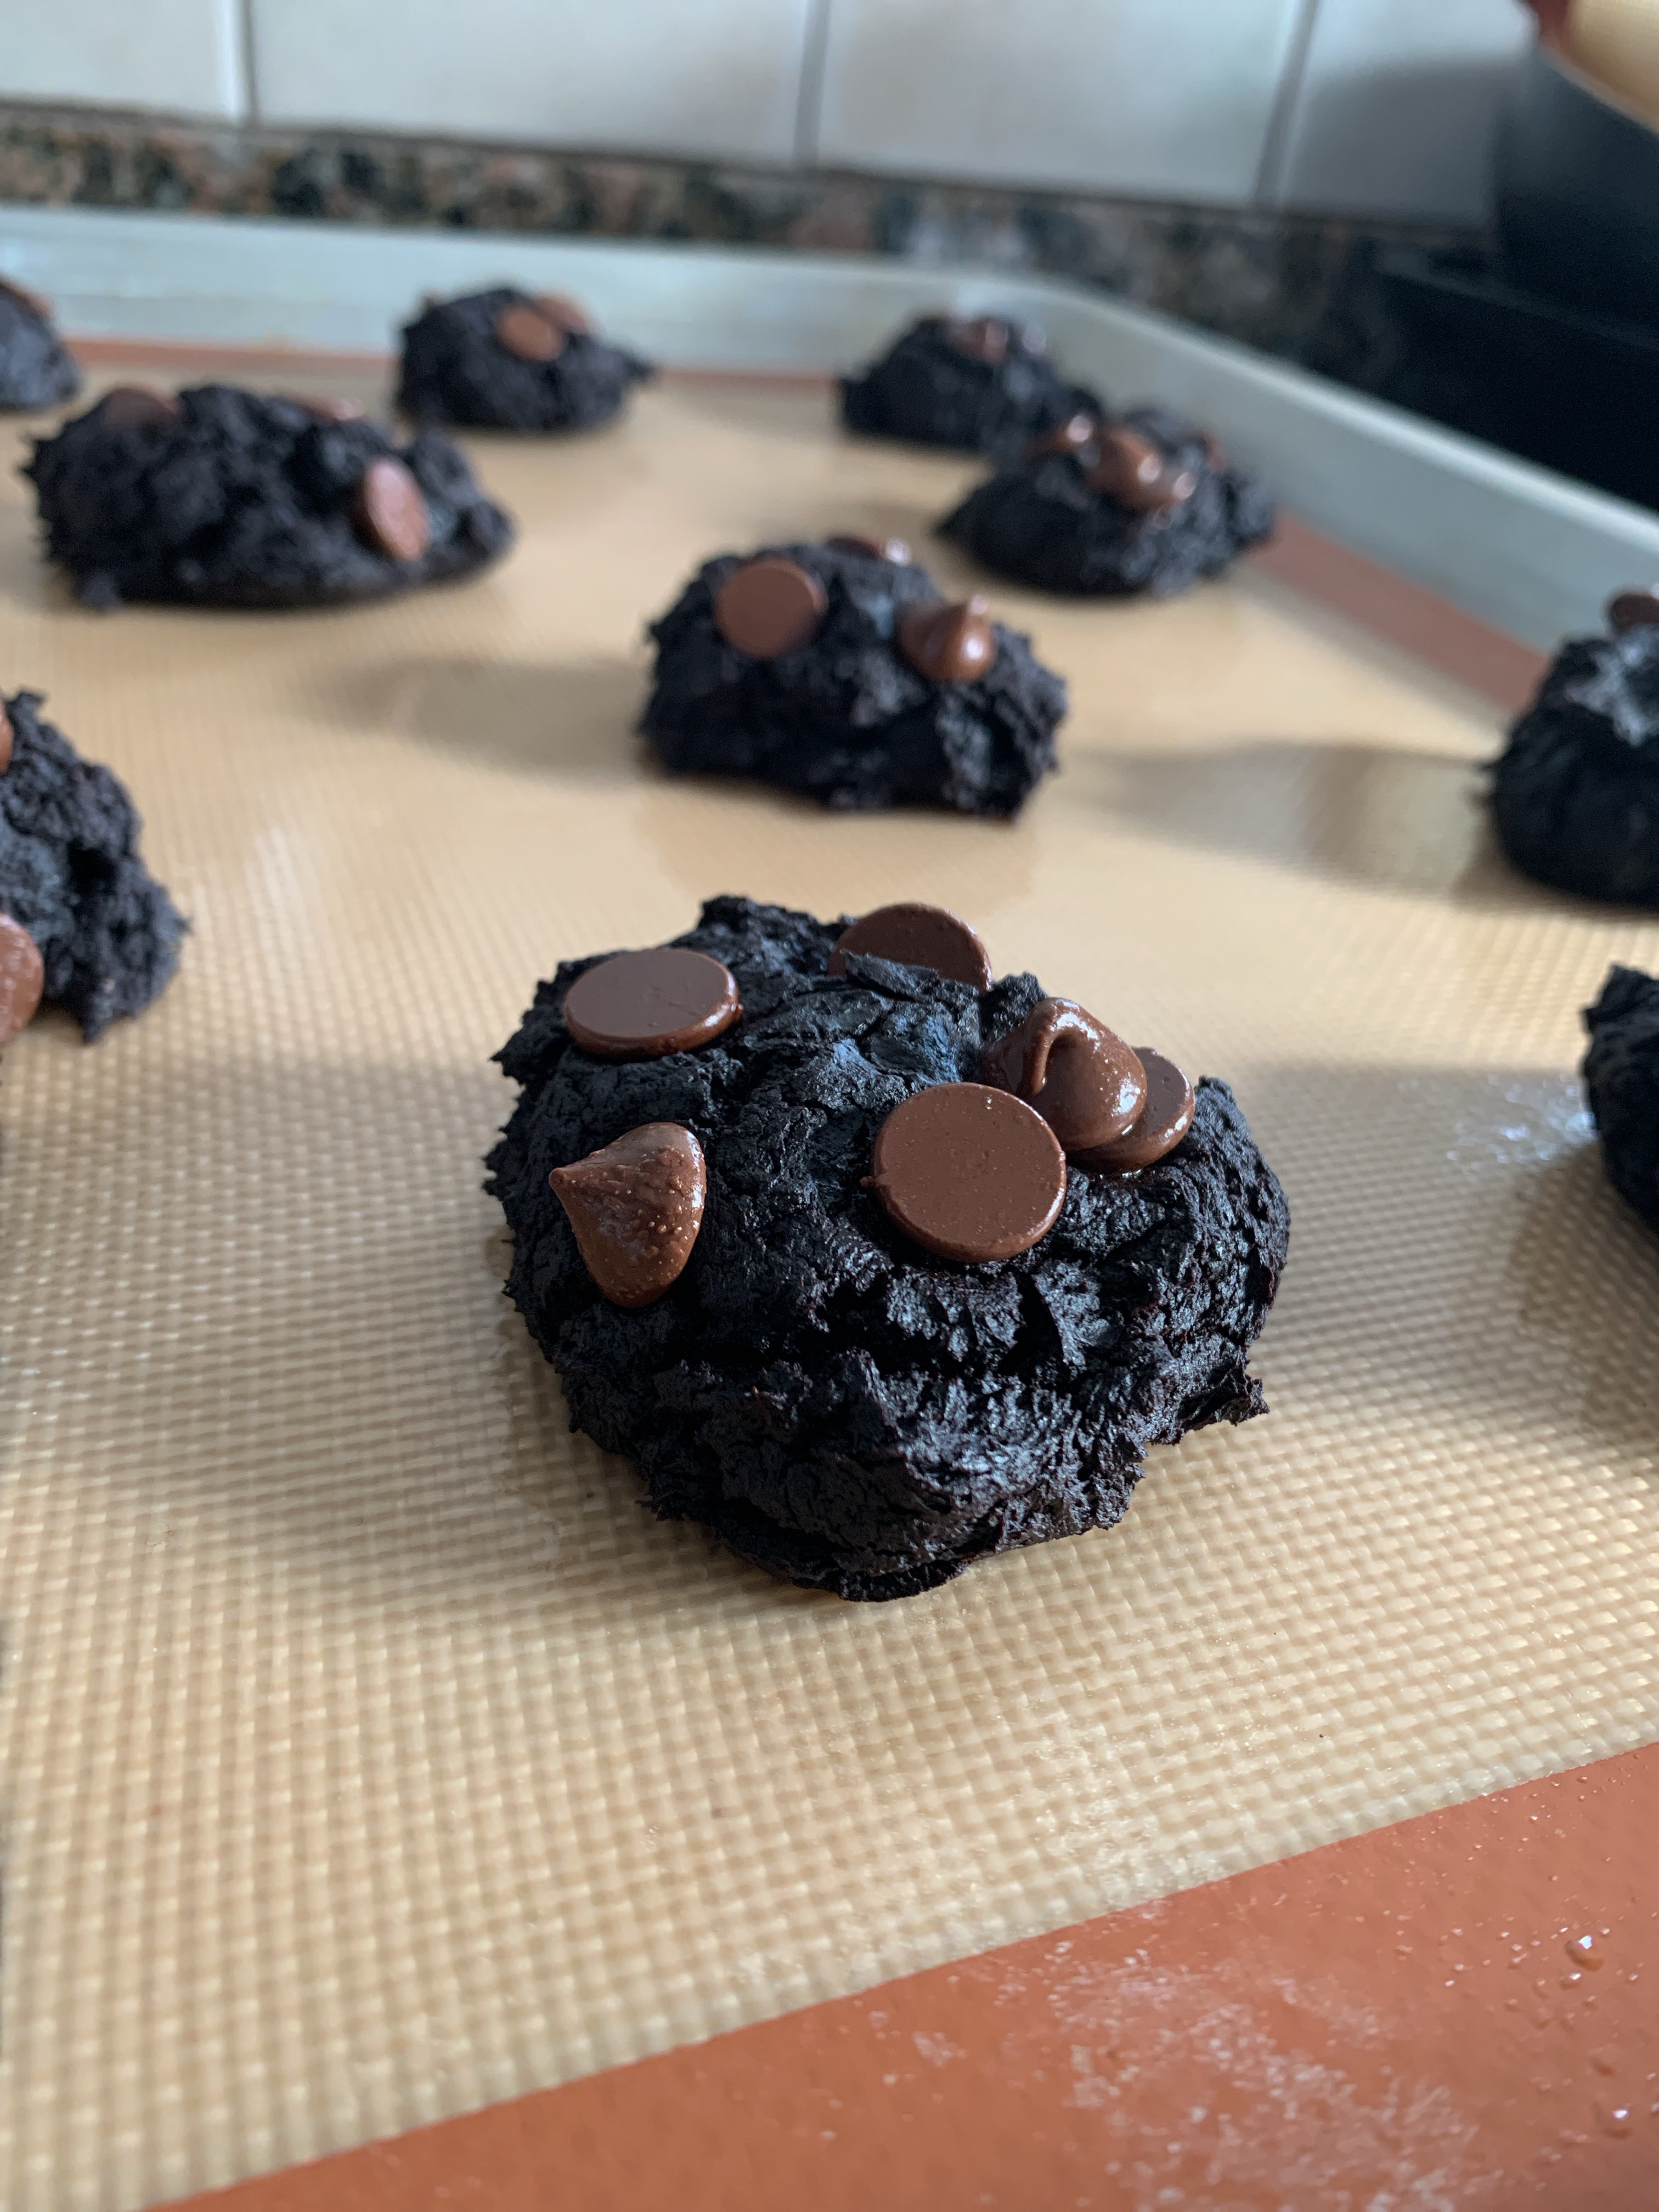
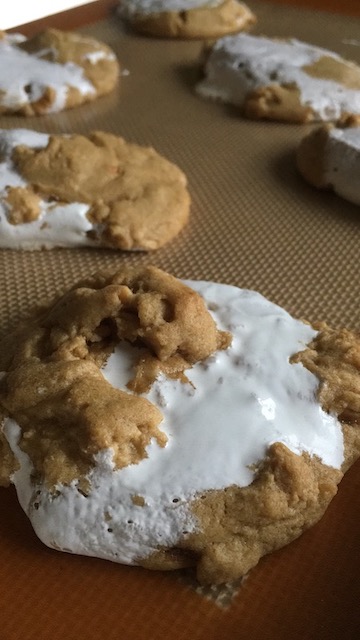
It is messier than your average cookie- not sure it would be my first pick for a cookie tray, but so worth the time if you are looking for a little sweet treat that brings back the nostalgia of school lunches packed in a metal lunchbox, complete with thermos.

I wish for you on this rainy spring day all the good, and warm gooey cookies. As always, thank you for coming to the table.
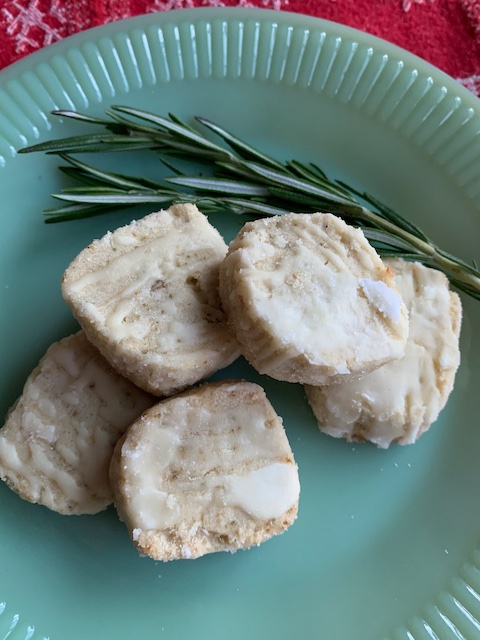
Print

Fluffernutter Cookies…You Heard Me

Print Recipe

Peanut Butter and Fluff come together to make an amazing cookie.

Original Recipe found on stress baking by Leslie Haasch 

https://stressbaking.com/fluffernutter-cookies/

Yield 12 Cookies

  • Author: chrissy@mythankfultable.com

Ingredients

·       ⅔ cup all purpose flour

·       1 teaspoon baking soda

·       Pinch of salt

·       8 tablespoons butter, room temperature

·       1 cup creamy peanut butter, well-stirred if using natural

·       1 ⅓ cups light brown sugar

·       1 egg, room temperature and lightly beaten

·       1 teaspoon pure vanilla bean paste or extract

·       2 tablespoons to ¼ cup marshmallow fluff, depending on how much you add to each cookie

Instructions

·       In a medium bowl, whisk together flour, baking soda, and salt.

·       In a stand mixer fitted with a paddle attachment, combine butter, peanut butter and brown sugar and beat on medium speed until light an fluffy.

·       Add egg and vanilla and beat to combine.

·       Add dry mixture and beat again to combine until you have a thick dough.

·       Cover the bowl with plastic wrap and place in the fridge for at least 30 minutes, preferably up to 1 hour.

·       Preheat oven to 325 °F. Prepare two baking sheets with nonstick silicon mats or parchment paper and set aside.

·       Grab a medium cookie scoop and fill it halfway with dough, pressing it into the bottom and up the sides. Spoon a teaspoon of marshmallow fluff into the center, and then top with more dough to fill the scoop. Place each ball of dough on prepared baking sheets, with no more than 6 on each, evenly spaced out with plenty of room for the cookies to spread.


·       Bake for 9-11 minutes until the cookies have spread and started to crinkle on top. Remove from the oven and let cookies cool for at least 15 minutes on the baking sheet itself – they will continue to spread and set a bit more as they cool. Carefully move to wire racks to cool completely. Enjoy!

Did you make this recipe?

Share a photo and tag us — we can’t wait to see what you’ve made!

Posted in: Cookies Tagged: Cookies, dessert, Fluff, Peanut Butter

On Nests

July 30, 2023 by chrissy@mythankfultable.com

I have had a bit of sorrow of late, and found it worth pondering enough to write. There isn’t a recipe associated with this, but that may be part of the future of this endeavor. I have given myself three years (the renewal of the domain and webhost) to really write, so here goes.

Most of the summer we have had a momma bird who built her nest in my elderberry. Positioned right outside my back door, she has been a bit of entertainment in the transition from gathering materials, to laying and sitting on her four little eggs. We have left that area of the garden untouched, the weeds have grown and the plan to powerwash the fence stayed until the babies were safely grown.

Through the many storms and heat that come in July, she has been faithful to sit. I learned that momma birds sit with their open beaks to pant, I have witnessed how her nest has been precisely and beautifully interwoven amongst the branches – even the strongest winds have left it untouched. She has been my morning check in and evening walk about in the yard stop- from a safe distance. I’ve only snapped photos when she has flown away for a moment or two.

Then suddenly, after one of our latest storms, she is gone. There were only two eggs remaining, with no sign of foul play. Then there was only one. I haven’t witnessed broken eggs or feathers. She simply stopped nesting. Abruptly, everything has changed. I’ve lost a friend in my garden, and nature has given me no answers.

Which got me to thinking about the friends and family in my life who have hoped for a family of their own. The urge to mother so great, and yet again, nature has decided cruelly, to plan otherwise. Or the loved ones who get sick and pass on, without a rational reason as to why. How unfair and truly hard life can sometimes be.

It got me reflecting on my own nest, and the now-grown boy who has found happiness on his own. Of his inner light that radiates now that he has found his calling. Of the now-grown girl who is ready to launch on her own as well. And how this momma bird has done her job, we raise them so that they can go and be and do. This nest too, will be empty.

It isn’t sad like I anticipated. It is more of a doorway in which I get to stand and watch, and if given the opportunity to guide from here, I can. I am no longer able to buffer from the hard things, but if they are willing to share with me…boy am I ready to listen. It is a gift to celebrate the high points and share in the joy- as it is to sit with someone in the darker moments and walk, or drive, as they pour it out. If that happens to be my children, I count myself doubly blessed.

I have always considered myself to be a great lover of nature. Every flower I grow, every critter that passes through my yard, the caterpillar on the plant I purchased, they get their moment of praise. The ability to stand outside and stretch my arms overhead in sunshine is not lost on me. It is all a gift. It’s been a mindset I have cultivated over time. Thankfulness over fear, gratitude over sorrow. My new and fabulous doctor asked, “Chrissy, isn’t that exhausting?” and the answer is yes. Mental health is no joke. Sometimes it is easier to live in the world with a sense of wonder, especially in the chaos that ensues all around us. But seriously, nature is cruel and unfair some days.

I wish I had been able to protect my own nest from the internal hardships as well as the external ones.

I am thankful for the million “I am sorry’s” meant with heartfelt emotion and the change that followed.

I am grateful we got here. To the launching point. Only slightly cracked.

While I don’t have answers, I do know that right next to this nest I have a pair of young mockingbirds, who begin singing and never seem to stop, a playlist that rotates and evolves. They didn’t hatch here in my yard, but have found the blackberries and blueberries fair pay in exchange for their dancing and singing in my garden. They remind me that even in the sorrow, there is time to be light. Life continues. We move forward. It would be a shame to miss it.

I have decided not to prune the branches where the empty nest now sits. I like its reminder that even in the best, most carefully placed nests, we don’t control any of it. We do the very best we can, and hope.

Sending you love and light, and as always, thank you for coming to the table.

Chrissy

Posted in: My Story Tagged: Birds, Nest

Lemon Rosemary Shortbread Cookies

April 24, 2022 by chrissy@mythankfultable.com

Every now and then I come across a recipe and think, “Hmmm, yes. I need to make these.” At that point the recipe goes into a “Future Recipe” folder. (Sometimes I carry this around with me in my school bag like a total food nerd. I am ok with this).

Typically I bake for a specific reason, like a holiday, or a special event; then there is the recipe I make because it’s right there in the file, calling out to me. I find solace in the mundane parts of chopping or mincing, mixing and folding (now for my Schitt’s Creek fans, say it with me, “David, you simply fold in the cheese.”)

Maybe it’s a new Banana Bread recipe (which I have recently found and have made several times and will add to the blog), or it’s citrus season and the beautiful array of oranges and clementines and everything in between says, “Make that recipe now.” Cranberries are fresh in the early fall, and that is when you utilize every cranberry recipe in the file. I am currently watching my rhubarb unfurl with the first few warm days of spring, and you know the cobbler and crumble recipes await.

So, when I came across a cookie that combined savory, tart, and sweet…I figured it was worthy of the file.

This cookie, with its simplicity and yet complex flavors, was the cookie I made this winter just because. I made very few Christmas cookie plates up this year- I made a few of our favorites and I made only single batches of each.

When the kids and I discussed what was going to be baked, we streamlined to the top few. Our holidays were pretty quiet here. Also, I kind of needed to eliminate many things this year just because…the last two years have been a little crazy.

When I tell you that this savory but sweet little buttery cookie fills the wild card cookie spot, I kid you not. I have fond memories of the big blue tin of butter cookies and my grandmother’s house and tea time. These are not those cookies.

This is a buttery shortbread that incorporates rosemary, lemon rind, butter, egg, salt, confectioner’s sugar. It is so simple to put together.

The tricky part, if any, is keeping the dough chilled throughout the baking process. You only take out what you are baking and the rest goes back into the refrigerator. If you are like me and like to multitask (ie, put a bunch of cookies on the sheets and pop them in the oven as you do other things), this part is “meh.” But worth it!

I chose to drizzle a little extra lemon glaze on it to make it decorative, but really, it wasn’t needed.

The recipe yields approximately two dozen cookies, depending on the size of your dough roll and how thickly you cut them. I wanted mine to have an almost square look, so I flattened the rolls slightly to accommodate. I would also recommend erring on the smaller side for these, as they pack a punch flavor wise.

If you are looking for a cookie where the samplers stop for a second and have a look of, “What is this exactly?” but in the best way- this may be for you. Again, it’s not a peanut blossom or a double chocolate peppermint. It’s different for sure.

No matter the reason or season for your baking, I encourage you to expand the horizon and try something different. You will be surprised!

I hope you enjoy this recipe, and as always, I thank you for coming to the table!

Love,

Chrissy

Print

Lemon Rosemary Shortbread Cookies

Print Recipe
  • Author: chrissy@mythankfultable.com

Ingredients

Scale

1 Cup (2 Sticks) cold unsalted butter (I used salted and it didn’t impact the recipe) cut into small (1/2”) pieces

½ Cup granulated Sugar (plus 6–8 Tablespoon for coating)

2 Tablespoons chopped Fresh Rosemary

2–3 Tablespoons freshly grated Lemon Zest (I use a microplane for this)

1 Egg Yolk

¾ Teaspoon Salt

¼ Cup Confectioner’s Sugar

2 Cups AP Flour

Instructions

1.     Combine granulated sugar, lemon zest, rosemary, and salt in the bowl of a food processor. Pulse 5-6 times. 

2.     Add the egg yolk; pulse again several times. 

3.     Add the flour and confectioner’s sugar; pulse again to mix.

4.     Remove the lid and scatter the cold butter pieces over the dry ingredients. Pule until the dough forms large clumps that start gathering together. Stop pulsing before the dough form a ball around the blade.

5.     Turn the dough onto a lightly floured work surface. Divide it in half.

6.     Gently squeeze and knead the dough several times to even out the consistency. 

7.     Dust a long piece of waxed paper with 3-4 tablespoons of granulated sugar. 

8.     (Using your palms) Roll one half of the dough onto the granulated sugar until it forms a 1 ¾”-2” log.

9.     Repeat for the other half of the dough.

10.  Slip dough logs into gallon food storage bags or wrap tightly and store in the refrigerator over night.

11.  Preheat oven to 350* Line a baking sheet with parchment paper.

12.  Unwrap dough, and using a serated knife, cut the dough into rounds and place on baking sheet.

(a good tip is to keep unused dough refrigerated until ready to be baked- also don’t put cold dough on warm baking sheet or they will start to melt before they bake).


13.  Bake the cookies for 15-17 minutes or until the edges are golden and the surface is barely starting to brown. Leave on baking sheet for two more minutes then transfer to a rack to cool. 

These do not need anything, but I added a quick lemon glaze, whisking lemon juice and extract into powdered sugar until I got the desired consistency. It just added the extra lemon kick I was looking for!

Did you make this recipe?

Share a photo and tag us — we can’t wait to see what you’ve made!

Posted in: Cookies, My Story Tagged: Butter, Cookies, herb, lemon, Rosemary, Shortbread, Sweet

Praline Sweet Potato Pie

March 22, 2022 by chrissy@mythankfultable.com

Every Thanksgiving, I make too many desserts. I am a big believer in, “Swing by the house and have dessert if you have room” on holidays. Until the whole pandemic thing happened. However, as the world has slowly emerged and people are doing bigger family gatherings, I look forward to that being an option again.

My one Aunt is the type of cook that had an open door and a serving station where all of the menu items were kept warm and you ate when you got there. One of my favorite memories of the holidays was knowing Aunty Johanne would make a “to go” plate for me when I was working…and specifically didn’t add turnips. I love them now, but then, not so much.

I love the idea of a beautiful sit down dinner. But lately, I am more in love with the idea that people who have busy lives and other family members to see can think one less person is putting pressure on them to be somewhere. I like being able to say, “If it works and you want pie, we have a LOT.” It’s not a horrible situation to find oneself in, if ever.

I also love the idea that if you make different pies, there are more options, and a person could say, sample several pies and it really equals one or two slices. I also like the idea that a person could technically cut into the pies pre-Thanksgiving dinner, as in for breakfast that day. Because, life is short. Eat pie for breakfast if it makes your heart happy.

One thing I do every holiday is print out a menu for myself and a timeline. I like lists. Like REALLY LIKE LISTS. I always refer to what worked, didn’t work, and have a folder of recipes for what I want to try next time. Desserts have more room for flexibility here, because as long as I have the basics covered: Pumpkin, Chocolate Bourbon Pecan, Tollhouse Cookie, and my Aunty Cathy’s Cheesecake…I can add any crazy pie I want. This was the new endeavor this year.

Sweet Potato pie has always intrigued me. As in, how is it different than pumpkin or squash pie (I never really got the difference between squash and pumpkin). And what does a praline topping really mean? When I make a sweet potato casserole it is the Ruth Chris recipe- with a pecan streusel topping…but baby marshmallows? This was new to me, but I will not shy away from a dessert with a praline topping.

I don’t have the benefit of southern relatives to share this specialty with me. I wish I did. I’m still trying to work my way into my best friend’s fiance’s family from the south. I need to learn everything they want to teach me. (Because, when you visit family up north you want to spend your whole time teaching a stranger all the family cooking secrets…but I digress).

I chose the trusty recipe from Joanna Gaines and Magnolia because they are from Texas, and if she says this is what she makes for her family, it is good enough for me.

This recipe requires pre-blind baking the crust, making a sweet potato filling (not unlike pumpkin pie), and baking. Then topping with a mixture of butter and brown sugar and marshmallows. Had I stopped there, this pie would be amazing. However, I put it back in the oven and toast/melt the topping all together. It is rich and decadent. For me, maybe not a pretty pie before you cut into it…but it’s delicious.

Here’s my take: Sweet potato filling is similar to pumpkin and yet it isn’t. The flavor is bright, there is a nice mix of sweet but not too sweet (which is hard to believe considering there is a gooey marshmallow topping), and I like it in the wildcard pie position at my table. It incorporates a typical Thanksgiving menu item in a new way. I would maybe, moving forward, make some sort of marshmallow meringue and use that as a topping…making the topping lighter and prettier…but I’m saving that for next year’s wild card pie. I made a note in the folder on the list. 🙂

The recipe is simple and precise, and I did not change one word. It is a Magnolia recipe as printed.

In life, I wish for you a dessert table and life table filled with the basics and the spontanteous choices. The ones we know we need and the ones we want to try. Like I mentioned earlier…Life is short. Have a slice of pie for breakfast.

Sending love and light to you. I hope you enjoy this recipe, and as always, thank you for coming to the table.

Love,

Chrissy

Print

Praline Sweet Potato Pie

Print Recipe

This recipe is originally from the Magnolia Journal. A single crust sweet potato pie with a marshmallow brown sugar and pecan topping. This pie was a welcome addition to our Thanksgiving table, and will be made again!

  • Author: chrissy@mythankfultable.com

Ingredients

Scale
  • Pastry for a single-crust pie
  • 1 2/3 Cup Cooked, mashed Sweet Potatoes or one 17.2 ounce can of Whole Sweet Potatoes, drained and mashed
  • 1/3 Cup Granulated Sugar
  • 1/4 Cup Pure Maple Syrup
  • 1 Teaspoon finely chopped Crystallized Ginger or 1/2 Teaspoon Ground Ginger
  • 1/2 Teaspoon Ground Cinnamon
  • 1/2 Teaspoon freshly grated Nutmeg or 1/4 Teaspoon Ground Nutmeg
  • 1/4 Teaspoon Allspice
  • 1/8 Teaspoon Salt
  • 3 Eggs, slightly beaten
  • 1 Cup Buttermilk or Sour Milk

Praline Topping

  • 2 Tablespoons Butter
  • @ Tablespoons Packed Brown Sugar
  • 2 Tablespoons Pure Maple Syrup
  • 1 Tablespoon Milk
  • 1/2 Cup Chopped Pecans
  • 1 Cup tiny Marshmallows

Instructions

  1. Preheat oven to 450* Prepare pastry for single crust pie.
  2. Place Pie Crust into pie plate and prick bottom of pie crust with a fork.  Line pastry with a double layer of foil and bake for 8 minutes covered. Remove foil and bake for an additional 6-8 minutes or until golden. (You can use an alternate blind baking option that works for you)
  3. Cool on wire rack.
  4. Reduce oven to 375*
  5. For the filling, stir in mashed sweet potatoes, sugar, maple syrup, ginger, cinnamon, nutmeg, allspice, and salt. 
  6. Add eggs, beat lightly with a fork until just combined. 
  7. Gently stir in buttermilk/sour milk until thoroughly combined.
  8. Place pastry shell on a foil lined baking sheet. 
  9. Carefully fill pie shell, and bake in the oven for 30 minutes.
  10. In a small saucepan combine butter, maple syrup, brown sugar, and the milk. Cook until the mixture comes to a boil.
  11. With pie on oven rack, carefully sprinkle pecans and mini marshmallows over the surface of the pie. 
  12. Carefully pour hot brown sugar mixture over top.
  13. Bake 15-20 minutes or more or until center of the pie appears to be set when jiggled. 
  14. Cool on a wire rack at least 1 hour. 
  15. Cover and chill two hours before serving.

Did you make this recipe?

Share a photo and tag us — we can’t wait to see what you’ve made!

Posted in: Dessert, My Story Tagged: dessert, Gaines, Ginger, Magnolia, Magnolia Table, maple syrup, marshmallows, pecan, pie, praline, sweets, thanksgiving

Italian Ricotta Cake

March 13, 2022 by chrissy@mythankfultable.com
Italian Ricotta Cake

Spring is days away, and yet today has been a cluster of snow and sleet. The bulbs are peeking out through the soil, and my favorite crocus at my Mom’s house has bloomed as a sign that yes, life is returning to New England. I am already pulling Easter recipes. I don’t even know the plan for that holiday except, I will be cooking for however many/whenever. It’s enough to sift and sort through the recipes for ideas at this point. Hence, Ricotta Cake!

I need to preface this recipe with a few thoughts. Like the fact that if you are Italian, my way of saying ingredients such as prosciutto, marscarpone, and ricotta would make you cringe. Think soft “a” sounds, and pronouncing all of the syllables. I know the real deal people say “Ricot” with a strong abrupt tone and such…but I am one of those people who say it wrong and know I am not bold enough to say it right. I own it. I say ri-cot-ta. (It sounds as nasally as it reads in real life too).

I will say this. My childhood memories in an Italian family include making tortellini from scratch and a huge table covered with a white bedsheet that became covered with beautiful little belly button pasta as the family worked together to roll, stuff, cut, and pinch. Tortellini soup was a staple, as were many Italian traditions. I have yet to travel abroad, but one day the dream is to visit Italy and absorb every beautiful thing.

Growing up, we had Sunday dinners, and Easter Bread with the egg baked in the middle. (In our family we called this Angootie…I have researched this bread and have yet to find this name or this recipe-although I have found many with other names and ingredients). While I may say ricotta wrong, I do have enough of the Italian memories in my past to know that ricotta it is amazing and to never, ever, use the kind made with skim milk. One of my good friends makes her own. Which, is kinda impressive.

In my growing up though, I had never heard of Ricotta Cake. We were local-bakery-Rum-Cake-people (I am not one of those anymore as a result). In all honesty, one of my children always requests a fudgey chocolate cake from the Italian bakery down the street. But Ricotta Cake? New to me!

A few years ago, a friend at work mentioned she was making it for her family Easter dinner.

Now, I have had ricotta in all sorts of pasta dishes or on pizza in big dollops, on toast both as sweet or savory, (heck I have eaten it from a spoon out of the container-no shame), but never baked in a cake. So try this recipe I did!

This cake is easy to assemble and so amazing. My photos do not do it justice. It is indulgent. It is a butter, sugar, and egg laden recipe. We are not low calorie anything here. It is made in two layers, though it almost resembles a cheesecake-y blondie type texture. It is dense, and creamy, and delicious. I want to liken the top layer to a cheese danish type consistency- but it is so much better.

There is a slight lemon tang to the ricotta layer that balances out the sweetness. My final cake split a little while cooling, even though I ran a knife around the edge as you would a cheesecake before letting it cool. I am not sure if this is typical, and welcome any comments on it! I have made this multiple times and always get the “crackin.”

My theories are in the incorporation stage, or I am over cooking, the heat is too high, or something with the cooling process. (So basically any of the steps I am causing this…) It’s a work in progress. Regardless, this cake is SOOOOO GOOOD. When I served it, I cut it up so the cracks didn’t show…and there were no complaints!

I hope you enjoy this recipe. There is something special about a recipe that is written in a friend or relative’s handwriting, that add to the beauty of the occasion. I always think when we sit down at a table where other people’s recipes are present, it is like they join us for the meal. I am all for a full table, whether in person or in spirit. It is good for the soul.

I am sending you light and love and a big slice of this heavenly dessert.

I hope you enjoy this recipe, and I thank you as always, for coming to the table.

Love,

Chrissy

Print

Italian Ricotta Cake

Print Recipe

This Italian Ricotta Cake recipe is from a friend Suzanne. A sweet, slightly lemony ricotta layer atop a cake base. It is so good. We use this recipe around Easter time, but it is perfect for any time of year.

  • Author: chrissy@mythankfultable.com

Ingredients

Scale

Cake Base:

  • 1 Cup Butter
  • 2 Cups Sugar
  • 4 Eggs
  • 2 2/3 Cups sifted lour
  • 1 1/2 Teaspoon Baking Powder
  • 1 Cup Milk
  • 1 1/2 Teaspoon Vanilla Extract

Ricotta Topping:

  • 2 Lbs Ricotta Cheese (Whole Milk)
  • 4 Eggs
  • 1/2 Cup Sugar
  • 2 Tablespoons Flour
  • 2 Tablespoons Lemon Juice (freshly squeezed if possible)
  • 1 Teaspoon Vanilla Extract

Instructions

  1. Grease a 13x9x2 baking pan and set aside.
  2. Preheat oven to 350

For the bottom layer:

  1. In a separate bowl, sift together dry ingredients (flour and baking powder)
  2. Cream together butter and sugar and blend through, making it light in color.
  3. Add eggs one at a time, and incorporate after each.
  4. Stir in sifted dry ingredients alternately with milk and vanilla.
  5. Pour combined batter into prepared pan

Top Layer:

  1.  Mix ricotta, eggs, sugar, flour, lemon juice and vanilla together. 
  2.  Pour over top of unbaked cake layer.
  3.  Bake in 350* for one hour.
  4. Run a knife dipped in warm water around the edge of the pan to loosen the edges and hopefully avoid cracking. 
  5. Allow cake to cool completely before serving.

4. Allow cake to cool in pan.

  1. Stir in sifted dry ingredients

Did you make this recipe?

Share a photo and tag us — we can’t wait to see what you’ve made!

Posted in: Dessert, My Story Tagged: cake, dessert, Easter, italian, Ricotta

Dilly Bread and Book Club

February 21, 2022 by chrissy@mythankfultable.com

It has taken me a ton of self help books, almost fifty years, and a global pandemic to realize I am an introvert. LOL. I find I regenerate in the quiet. There is something earned in stillness that I cannot find entrenched in social stuff. I have also learned that this is perfectly ok.

Never to be one who liked theme parks or waiting in lines for rides, crushed by bodies at concerts or events, I am good to just…not. I like events. I like social things. I do like people. I just kinda have realized that I deplete after a while. Now add a couple of years of isolating and social distancing. I’m not sure where I fit in. I’m figuring it out. As we all are, but wow, am I finally ok to politely say “no” to things. With only slight guilt…that I can eventually sort through.

I have learned in the last however many years of books and podcasts that WE NEED TO LIVE AS AUTHENTIC SELVES. I got the memo. So here, I sift through if I really need-to-want-to-should. I have no diagnosis for any of my “stuff.” I’m just a woman approaching the world a whole lot less concerned about belonging than I did three years ago, and that’s probably on par with a lot of people in life right now.

That being said, there is such a communion in being with people you love. With people who interest you and make you smarter. With others who teach you and give you grace and make you better. So, no one is an island. We need to be around the people who make us better humans.

I am fortunate in my career to have such amazing friends. While education is not the same field I entered at all, I love what I do when I get to do what I do. I have a community of kind people who carry one another. I am so, so lucky in this.

And then there are the cool things in life (or cool to me) like book clubs, and groups of people who do the things and get to be together to talk about it. I have a friend who plays billiards weekly, and while it is a fun thing to do on a weeknight, it is also about the community that plays. Bottom line is, whether we find it at the gym or church, the local pub, or the library, we need people.

One thing I miss quite a bit is Cookbook Bookclub. My local library holds a meeting once a month and there is either a theme, a specific cookbook, or a topic such as “SOUP” that we all have for that one meeting. Then we bring a prepared item, the recipes are typed up by an amazing volunteer, and we share. Covid took care of that whole concept for a while. Not possible. Now they are still meeting, and while I took a break, I realize how important it is to be with people who love to cook. How did this recipe go? What did you substitute? Why is this spice so unbelievably expensive? Etc. Beautiful humans gathered around a table. Which, is kind of my thing. I hope to go back and soon.

One of the fun events we held was an author’s visit from the Pudding Hollow Cookbook. What a treat. There was also a bit of pressure to get the recipe right, since the author of the recipe would be at the actual table. This recipe for Dill Bread adds an additional kick in the fresh scallions and dill added to the dough. It also has a new (to me) ingredient of adding cottage cheese to the bread dough as well! This recipe is written up exactly as it appears in the cookbook, I did not alter it in any way. Two beautifully flavored loaves of bread are the yield. As in the photos, the texture is not like a typical sourdough or white bread, it is more dense, and obviously flavorful in its own way.

This bread is the perfect accompaniment to a hearty soup or stew, salad, even as a savory breakfast side. It is moist, flavorful, and hearty without being heavy. Definitely a win. I happen to love the flavor of dill so this recipe really delivers in the “cool bread” category in my opinion. Being able to celebrate the cookbook with the author and the recipes she collected (as well as the stories behind each) made it even more special.

So, for new recipes, coming together around a table, being social, and figuring out where the lines of this newly defined life after loss of what was (good with the bad), at least I know there are wonderful things such as bread and the people who give our life sustenance. That gives me hope. 🙂

I hope you enjoy this recipe, and as always, thank you for coming to the table.

Love,

Chrissy

Print

Dilly Bread and Book Club

Print Recipe

This recipe is from the Pudding Hollow Cookbook by Tinkie Weisblat. We had the pleasure of meeting the author at my local library’s amazing CookBook Book Club. This bread is light and has the delicious flavor of dill and scallion. It is the perfect side dish to a soup or salad! 

  • Author: chrissy@mythankfultable.com

Ingredients

Scale
  • 2 Cups Creamed Cottage Cheese 
  • 2 Tablespoons Sweet Butter
  • 2 Tablespoons plus Fresh Dill (half if dried)
  • 2 Tablespoons Minced Scallion
  • 1/4 Cup Sugar
  • 1/4 Teaspoon Baking Soda
  • 2 Teaspoons Salt
  • 2 Eggs, Beaten
  • 1/2 Cup Lukewarm Water
  • 1 Package Dry Active Yeast
  • 5–6 Cups Unbleached Flour

Instructions

  1. Warm the cottage cheese and Butter.
  2. Add dill, scallions, sugar, baking soda, salt, and eggs. Beat until blended.
  3. Combine the water and yeast until dissolved.
  4. Stir yeast mixture into the warm cheese mixture. 
  5. Stir in as much flour as possible, and knead in more until dough is no longer sticky.
  6. Place dough in a greased bowl. Cover and let rise until it doubles in bulk.
  7. Punch down the dough, and shape into two loaves. 
  8. Allow to rise again until it has doubled.
  9. Bake in greased loaf pans in a preheated 375* oven for 35-45 minutes.

Notes

This recipe yields two loaves.

Did you make this recipe?

Share a photo and tag us — we can’t wait to see what you’ve made!

Posted in: bread, My Story Tagged: Bookclub, Bread, Dill, Loaf

Fudgey Avocado Chocolate Chip Cookies

February 7, 2022 by chrissy@mythankfultable.com

I don’t think there is anything prettier and more rewarding than cutting into the perfectly ripe avocado. That creamy flesh, with a buttery texture and full of good things for our bodies. The avocado is complete in and of itself. I will eat an avocado sliced up, on toast, mashed into guacamole, in salad, on tacos, the possibilities are endless.

Finding the avocado at it’s perfect ripeness is that daily dance of checking to see- too firm, just soft enough? Then there is the occasional over ripe one I’ll try to make work, but an avocado is not like a banana. There’s no magical bread to make with the over ripe avocados. In my home, avocados rarely last long enough to be over ripe. So for me, it is a worth while weekly produce purchase.

Now, add some coconut sugar, some dark cocoa powder, and turn these beauties into cookie dough? Why not! If you are looking for an indulgent cookie that isn’t guilt laden. (Though truthfully, I am not looking at cookies like that ever at this point in my life…I am almost 50. Eat the darn cookie). Here we have an example of a healthier version, with no refined sugar, gluten free, oil free, and vegan. (I know there are vegan chocolate chips available at a lot of grocery stores at this point, which is great).

This cookie dough comes together quickly in the food processor, and it is dense, and fudge like. If you choose to make the cookies without the chips, they turn out as little brownie scoops. YUM

Because these cookies don’t spread much, slightly dampen your hand and give each of them a little pat to flatten. Ten to twelve minutes later, you have a delicious and mostly healthy treat!

I’ll be the first to admit that not many of my recipes fall into this category, so I am pleased to start incorporating healthier options for people in my life, and for me as well!

I hope you enjoy this recipe, and as always, I thank you for coming to the table!

Love,

Chrissy

Print

Fudgey Avocado Chocolate Chip Cookies

Print Recipe

These tasty, vegan, flourless, gluten free, oil-free, refined sugar free cookies are NOT flavor free! Tender little bites of chocolatey goodness let you have a treat without feeling guilty.  Original recipe from www.veggiekins.com


  • Author: chrissy@mythankfultable.com

Ingredients

Scale

1 Cup Avocado (ripe but not over ripe)

3/4 Cup Coconut Sugar

3/4 Cup Dark Cocoa Powder

2 Tsp Baking Powder

1/2 Cup Chocolate Chips

1 Tsp Salt

Instructions

  1. Preheat oven to 350*
  2. Line a baking sheet with parchment paper. 
  3. Scoop avocado from skin and give a rough chop.
  4. Using a food processor, pulse coconut sugar to remove any chunks.
  5. Add avocado to coconut sugar and process until combined.
  6. In a separate bowl, whisk together coconut, baking powder, and salt until combined.
  7. Transfer avocado mixture to the bowl with dry ingredients fold to combine.
  8. Add in chocolate chips if you are using them.
  9. Your dough will look a little wetter than usual cookie dough. Use a cookie scoop to place dough in scoops on parchment lined baking sheet.
  10. Using damp hands, pat down each cookie mound slightly- cookies will not flatten on their own.
  11. Bake cookies at 350* for 10-12 minutes. Tops of cookies and edges will look slightly cooked. 
  12. Allow cookies to cool on baking sheet.

Cookies will be soft and store in an air tight container for a few days- they won’t last that long!

Did you make this recipe?

Share a photo and tag us — we can’t wait to see what you’ve made!

Posted in: Cookies, My Story, Vegan Tagged: avocado, chocolate, Chocolate Chip, Cookie, flourless, food processor, Gluten Free, oil free, Vegan

Big Crumb Strawberry Rhubarb Cake

February 6, 2022 by chrissy@mythankfultable.com

While I write this entry, it is sleeting, and miserably cold. It was 40* earlier this week, and last weekend we had a big snow storm. So, there you go New England weather…Good times.

I don’t mind the cyclical movement of the seasons, there is something absolutely beautiful in each, and there is a reminder that things change. Winter brings about a certain type of darkness and quiet that I do not get in the summer.

Which is all a gift. I’m more apt to be comfortable in my own skin during the warmer productive months. Summertime brings long days outside working either in my own yard or my other job (which I love- working on a local flower farm). I am up really early, am outside later, and I go to bed tired. I like the long hours of sunlight. I like the sound of crickets and birds.

So during winter, I have found, I am not good at sitting still. I’m working on it, but it’s not something that comes naturally. I kind of envy the people that slowly ease into their day or sit on a sofa on a Saturday morning just to watch TV. It is just not who I am. I had a friend who could nap anywhere. What a talent! Winter is nice for a few weeks, but it is wearing out its welcome. Winter is just too quiet.

No matter the weather today, I have to remember that soon the days will get longer and the plants will send forth their shoots, and the world will be green again. It will happen, I mean, in a few months or so…but still. A girl can dream.

I planted four Rhubarb plants over the course of the last few years, and they are always a welcome reminder that spring is coming. They pop up with their little “hello world” selves and my heart is so happy. Four rhubarb plants provide enough for multiple recipes, even being newly established.

In Pennsylvania, my children’s great grandparents -affectionately called “Grandma and Grandpa Choo Choo” (because he had built an elaborate train set in his basement) had a real-deal victory garden. He had served overseas in WWII, they had known what it was like to live without during that time. He would tell stories of having to ration items, to make due with what they had. Every year their garden was sizable and productive.

They had rhubarb plants so big you could hide in them. Or maybe that’s just my memory.

What I loved most about that garden was, whenever you needed rhubarb, Grandpa would hold back the leaves, grab an old knife hidden/stuck in the ground near the base of the plant, and whack off a few stalks. It was genius. Maybe not super safe according to today’s standards, but it worked.

I know rhubarb isn’t an ingredient well loved by all. It’s a sour-celery sort of thing. But when it is baked into a cake with strawberries, it provides the moist, bursts of flavor that balance a sweet cake and definitely the cinnamon sugar buttery topping.

There are a few renditions of this recipe out there in the recipe world, the original one I found was the New York Times recipe that is straight up rhubarb. I added the strawberry. You can add or substitute as you see fit. It might be really good with blueberry or without anything extra.

The cake batter comes together quickly and is the top and bottom layer for a generous fruit filling.

Now, the crumb topping is out of this world. When you make it and set it aside as the cake bakes, you think…did I do this right? It may appear stiff and clumpy. The answer is yes, yes you did. The buttery cinnamon and sugar goodness is so complimentary to the strawberry rhubarb/cake part of this recipe. Don’t skimp.

When this bakes up the crumb topping stays in chunks, and it is glorious.

Now if we could just get the weather to agree and move on to spring. Soon, soon, soon.

I hope you enjoy this recipe, and as always, I thank you for coming to the table.

Love, Chrissy

Print

Big Crumb Strawberry Rhubarb Coffee Cake

Print Recipe

This perfect spring dish combines the tart tangy rhubarb and the sweet bright taste of strawberry. Topped with a big crumb cinnamon brown sugar streusel, this coffee cake is a winner. Originally in the New York Times, my version is made in a bigger pan due to the increase in ingredients and addition of strawberries. I hope you enjoy it!

  • Author: chrissy@mythankfultable.com

Ingredients

  •  Butter, for greasing pan

FOR THE STRAWBERRY RHUBARB FILLING:

  •  2 Cups rhubarb, chopped into small dice
  • 2 Cups sliced strawberries
  • ¼ cup sugar
  • 2 teaspoons cornstarch
  • ½ teaspoon ground ginger (I used fresh)

FOR THE CRUMBS:

  • 1/2 cup dark brown sugar
  • 1/2 cup granulated sugar
  • 2 teaspoons ground cinnamon
  • 1 teaspoon ground ginger
  • ⅛ teaspoon salt
  • ½ cup melted butter
  • 1 ¾ cups flour (original recipe called for cake flour but I used all purpose)

FOR THE CAKE:

  • ½ cup sour cream
  • 3 large eggs
  • 3 teaspoons vanilla extract
  • 1 cup flour (cake or All purpose)
  • 3/4 cup sugar
  • 1 teaspoon baking soda
  • 1 teaspoon baking powder
  • 1/2 teaspoon salt
  • 6 tablespoons softened butter, cut into small pieces

Instructions

  1. Preheat oven to 325 degrees. Grease an 9×11” baking pan. 

For filling:

Slice rhubarb and strawberries 1/2 inch thick and toss with sugar, cornstarch and ginger. Set aside.

  1. To make crumb topping, in a large bowl, whisk together sugars, spices, salt and butter until smooth. Stir in flour with a spatula. It will look and feel like a solid dough. Set aside.
  2. To prepare cake, in a small bowl, stir together the sour cream, eggs, and vanilla. 
  3. Using a mixer fitted with paddle attachment, mix together flour, sugar, baking soda, baking powder and salt. 
  4. Add butter and a spoonful of sour cream mixture and mix on medium speed until flour is moistened. Increase speed and beat for 30 seconds. Add remaining sour cream mixture in two batches, beating for 20 seconds after each addition, and scraping down the sides of bowl with a spatula. Scoop out about 1/2 of batter and set aside.
  5. Scrape remaining batter into prepared pan. Spoon strawberry and rhubarb mixture over batter. Dollop set-aside batter over rhubarb; it does not have to be even.
  6. Using your fingers, break topping mixture into big crumbs, about 1/2 inch in size. They do not have to be uniform, but make sure most are around that size. Sprinkle over cake. Bake cake until a toothpick inserted into center comes out clean of batter (it might be moist from rhubarb), 45 to 55 minutes. Cool completely before serving.


Did you make this recipe?

Share a photo and tag us — we can’t wait to see what you’ve made!

Posted in: breakfast, My Story Tagged: breakfast, cake, Cinnamon, coffee cake, crumb, My story, Rhubarb, Streusel

Banana Pecan Streusel Coffee Cake

February 5, 2022 by chrissy@mythankfultable.com

Recently while grocery shopping, my daughter asked me why we never buy coffee cake. It’s not that I don’t like coffee cake, I just always lean towards making it instead of purchasing it. Especially since it is an easy thing to put together.

This recipe is so good. It combines a lighter banana cake, a sweet crumble toping with pecans, and then an optional “Honey Bun” glaze…(as if that is an option). It’s from a cookbook entitled Big Bad Breakfasts, by John Currance, which I just had to check out. It has a tough guy book exterior, but actually the stories associated with each of the recipes is charming. I love that in a cookbook.

I’m the type of person who would rather go out for breakfast over any other meal. Find me a diner or a tiny cafe, I am in. There is something to having someone else make my breakfast it better.

This batter uses two ripe mashed bananas, which is either the amount hanging around or easy enough to find in the produce section. I like that the banana flavor is present without being overpowering. It comes together quickly, and the streusel topping is out of this world.

In the original recipe it calls for placing the pecans on top of the streusel- I just chopped mine up and added them in with all of the brown sugary goodness. If you wanted to do both, I am sure the larger pieces of pecan would add a special decorative quality as well as flavor boost. I figured since I was opting for the Honey Bun Glaze, I didn’t mind incorporating the pecans with the streusel mixture.

This recipe bakes up beautifully, combining the sweetness of cinnamon and brown sugar with the banana cake.

While your cake is cooling, prepare your glaze and drizzle away! You will not be disappointed!

While the winter season continues to keep us bundling up with warm sweaters and socks, there is something comforting in a recipe such as this. It isn’t just for breakfast either…I am pretty sure a slice of this cake is perfect any time of day.

I hope you enjoy this recipe, and as always, thank you for coming to the table.

Love,

Chrissy

Print

Banana Pecan Streusel Coffee Cake

Print Recipe

Banana Pecan Coffee Cake with Honey Buns Glaze is originally from the cookbook Big Bad Breakfast by John Currance. This light banana coffee cake is topped with a generous streusel topping and another layer of sweet glaze!

  • Author: chrissy@mythankfultable.com

Ingredients

Cake:

·       1/3 cup granulated sugar

·       1/4 cup unsalted butter, at room temperature

·       2 ripe bananas, mashed

·       1/4 cup sour cream

·       1 egg

·       1 1/4 cups all-purpose flour

·       1 tablespoon baking powder

·       1/2 teaspoon baking soda

·       1/4 teaspoon ground nutmeg

·       1/4 teaspoon salt 

·       1/4 cup milk

Streusel Topping:

·       1/4 cup all-purpose flour

·       1/4 cup packed light brown sugar (I use dark brown sugar in my recipe)

·       2 tablespoon granulated sugar

·       1/2 teaspoon ground cinnamon

·       3 tablespoons cold unsalted butter, cut into cubes

·       1/3 cup toasted chopped pecans

Honey Glaze:

·       1/2 cup powdered sugar

·       2 tablespoons honey

·       1 1/2 teaspoons vanilla extract

·       1 tablespoon milk

·       1 1/2 tablespoon unsalted butter, melted

Instructions

Cake:

Preheat the oven to 375ºF. Grease an 8-inch square baking dish. Set aside. (I baked my recipe at 350*, you can also line your baking pan with parchment paper for easy lifting/cutting for serving).

Combine the sugar and butter in a large bowl and cream together in an electric mixer with a paddle attachment until light and fluffy, (about 5 minutes).  

Add in the mashed bananas, sour cream, and egg.  Mix until thoroughly combined.

In another bowl, stir together the flour, baking powder, baking soda, nutmeg and salt.  

Add the dry ingredients into the banana mixture, then add the milk.   

Beat until completely combined.  Pour the batter into the prepared baking 8 x 8 pan.

For the Streusel Topping:

In another bowl, combine the flour, both sugars, and the cinnamon.  (I added my pecans at this point or you can add on top after the streusel is distributed).

Add the butter – using a pastry cutter, fork, or your fingertips, cut the butter into the mixture until coarse crumbs form.  

Sprinkle the topping over the batter, then sprinkle the pecans on top.

Bake until the cake is golden brown, about 35 minutes.

Glaze:

While the cake is cooking, make the glaze.  In a small bowl, whisk together the powdered sugar, honey, vanilla, milk and melted butter.

Drizzle the cake with the glaze, then let it cool for 10 minutes before cutting into squares.

Coffee cake with last up to 2 days covered.

Did you make this recipe?

Share a photo and tag us — we can’t wait to see what you’ve made!

Posted in: bread, breakfast, My Story Tagged: banana, breakfast, cake, coffee cake, glaze, Streusel

To My Daughter On Her 18th Birthday

January 31, 2022 by chrissy@mythankfultable.com

I’ll be honest with you, I haven’t had the bandwidth this year as a writer or a baker, there hasn’t been a lot of joy in it. The ever looming question is, “Who cares about what I have to say.”

I mean, we are still amidst a global pandemic, in a time of social change, political drama, and that’s just the headlines.

That’s not the people living day to day in the thick of things. After more than a year in public education Covid style, I too am more apt to go out and pull weeds than I am to engage in conversation. I don’t think I am alone in this.

So when my daughter graduated, I didn’t cry (don’t judge..I cry plenty). The whole college acceptance and scholarships so she could get there, end of the year parties and celebrations were like things we checked off. Card and check to this awesome kid. Done. Go to this dinner, and so on. Newly back in the realm of social gatherings, vaccinated, pre-Delta and Omicron. Let’s do all of the things and wrap up this chapter.

And then I got the gift of spending this entire summer working along side my kid. Up for five am. Harvesting or planting or setting up together at the best place I could ever imagine being lucky enough to work. With my daughter. Who actually liked the fact that we were together. We have always been close, and after a year of being home together, this gift was more than I could have dreamed.

She is full swing in college now, and even though I see her face daily, the time spent together is short. Assignments, schedules, work, and life all play a role in this.

As it should be.

Because, I have always known my children were on loan for a time, and then they were supposed to go and do their own thing. My job was to get them ready to be decent humans in the world and do good things. To be kind, but take no crap. To meet the need if they could, without being taken advantage of.

So slowly the bandwidth has come back. Just in time for me to let things go.

This past August, when she turned 18, I finally had the space to write the things that I probably should have written in her graduation card. The one I never gave her, because I just couldn’t find the words. I held onto this post a lot longer because I’m still grasping at the parts of me where creativity and words come together cohesively. This is also tender, and the world isn’t always a place to put forth the vulnerable parts. But here goes.

This is an adapted version, the total version of her love letter is hers alone. I am claiming the parts back that I feel work for every single young person I know. So therefore, it probably has an ever bigger audience. Overwhelmingly, I feel like our babies need to know more than anything, that they are loved. As they are. And we as parents need to get out of the way with our own “stuff.”

Our journeys aren’t over yet either.

So maybe we can read this letter to ourselves and know that we too, are just perfect…In all of our imperfection. Loved, even when we feel alone or unlovable. Accepted, just as we are.

Dear Emmy,

I need to start this letter to you by backing up about eight years, when my dad was first diagnosed with cancer. The one appointment I got to drive him to, we were heading to radiation- and it was in the beginning of things. 

My dad told me that he had written letters to important people in our lives saying all the things he wanted to say. He had mentioned family members and important friend’s names that he just wanted to say thank you to…for loving his family and taking care of us. 

And then there was a brief pause and he said to me, “But I didn’t write one for you… Because, you already know.”

I cannot tell you how many times I wish I knew what my dad would say to me if he had written me the letter. In my heart I do know all the things that he would say. I know them because his is the voice in my head. But it still would have been nice to see those words in print.

So today on your 18th birthday, two months after you have graduated, I want you to know all of the things.

Or, at least some of the things, the things that matter right now. 

One: You have been a gift from the start. You were wanted, and we are so so glad that you were born to us as parents. I say “us”, because even though Dad is not here anymore, his joy was you Emmy. He fought hard to be a part of your life, and he loved you so much. So, he is a part of this.  

Two: Who you are on the inside is as beautiful as who you are in the outside. You are not perfect, but you don’t need to be.

I thank you for the way you read a room, for the way you are polite and kind, for the way you meet the need when you see it. I thank you for your discipline and for your hard work and for your ability to stick with things even when they’re tough or stressful. I have seen you be beat down and yet you continue to work. There are things that I would have quit that you have persevered through. I am so proud of you for the things you have accomplished in your short life. And I look forward to seeing all of the things that you do accomplish moving forward. 

Three: I hope that one day you are loved by someone who loves you for exactly who you are and who you will grow to be. I hope your heart is open and you receive the love that you deserve. I hope you don’t settle or compromise in anything ever, but especially in this.

Four: In this life you will not have a perfect easy path. Sometimes (as you have already experienced), things are crappy before they are better. Don’t give up. Yes, things are hard – but you are strong.

Fifth and Lastly: no matter where I am in this life, you are loved until the last day of yours. I am so thankful for you. I am so excited for the path ahead of you and you will do great things. 

Of all of my life accomplishments, being your mom is by far the one I consider the most important and wonderful. I’m sure you’ll need therapy for many things LOL, but I hope you know I really did try my best.

You are everything I ever wished for in a daughter and so much more.

All my love,

Mom

I’ll get back to posting recipes soon. I have the photos edited and ready to go. But for now, I thank you for coming to the table. 🙂

Love,

C

Posted in: My Story Tagged: daughter, graduation, love, My story, parenting
1 2 3 4 5 … 12 13 14 15 16 Next »

Recipe Search

Recent Posts

  • Fluffernutter Cookies…You Heard Me April 12, 2024
  • On Nests July 30, 2023
  • Lemon Rosemary Shortbread Cookies April 24, 2022
  • Praline Sweet Potato Pie March 22, 2022
  • Italian Ricotta Cake March 13, 2022

Recent Comments

  • Cathy Carroll on To My Daughter On Her 18th Birthday
  • Maureen / Mimi on To My Daughter On Her 18th Birthday
  • Kathy G on To My Daughter On Her 18th Birthday
  • chrissy@mythankfultable.com on Cherry Crescent Moon Cookies and Finding the Joy
  • chrissy@mythankfultable.com on Cherry Crescent Moon Cookies and Finding the Joy

Archives

Categories

  • appetizer
  • bread
  • breakfast
  • Cookies
  • crockpot
  • crockpot
  • Dessert
  • Fruit
  • My Story
  • One Pan
  • Recipes
  • side dish
  • Side Dishes
  • soup
  • Vegan

Copyright © 2025 mythankfultable.com.

Lifestyle WordPress Theme by themehit.com