mythankfultable.com

Feeding the Heart, Body, and Family

  • My Pics
  • My Story
  • The Puppies
  • Contact Us

Author: chrissy@mythankfultable.com

Sparking Joy and Not Letting Go

February 23, 2019 by chrissy@mythankfultable.com
Em’s Flax

I’ve been in a Marie Kondo state since January. In fact, that’s the verb I use…I’m MarieKondoing my house. LOL. True story. Clothes, books (yes the books), kitchen stuff, basement stuff. It’s been going and it needs to still keep going. We’ve only been in this house for six years. How do people end up with so much stuff…I don’t know. But, I am combating it in the present tense as I purge and donate the stuff from the past. As long as I am working the process, I am ok. and just to be clear, my house isn’t messy.

Typically when I leave my home for work it is “Norma Ready.” That means, should my mother feel the need to stop by or come inside when she is helping me with rides for my daughter…she will not feel compelled to do anything. It is already done. Tell me I am not alone in this. I know I am not alone in this. My sisters in life confess the same madness. I will never be one of those people who can sleep with dishes in the sink. There is clutter, but essentially, everything has a home. I like clean counters, clean floors. The person who owned my home before me put bisque colored tile as the kitchen floor. It is my nemesis. But I will save that for a later post.

My poppies

It’s gotten me thinking, all of this asking “Does it spark joy?” about other areas of my life. Sometimes with the stuff, we can decide rather easily.

Sometimes, with relationships, with memories, not so much.

I am just over the cusp of mid forty.

What “sparks joy?” for real?

If you take a few minutes to sit down with yourself (which, believe me, is hard. I know. I get it…) you may see some blatantly obvious things that don’t have a place in your life. Not anymore.

I think it’s more than ok to say, “This, right here…does not make me happy.” To look that crap right in the face and say, “Yeah, you need to go.”

Regret.

Mistakes.

Apologies you didn’t get.

Approval you didn’t get.

Paths you shouldn’t have gone down.

Paths you should have, and yet you didn’t for some reason.

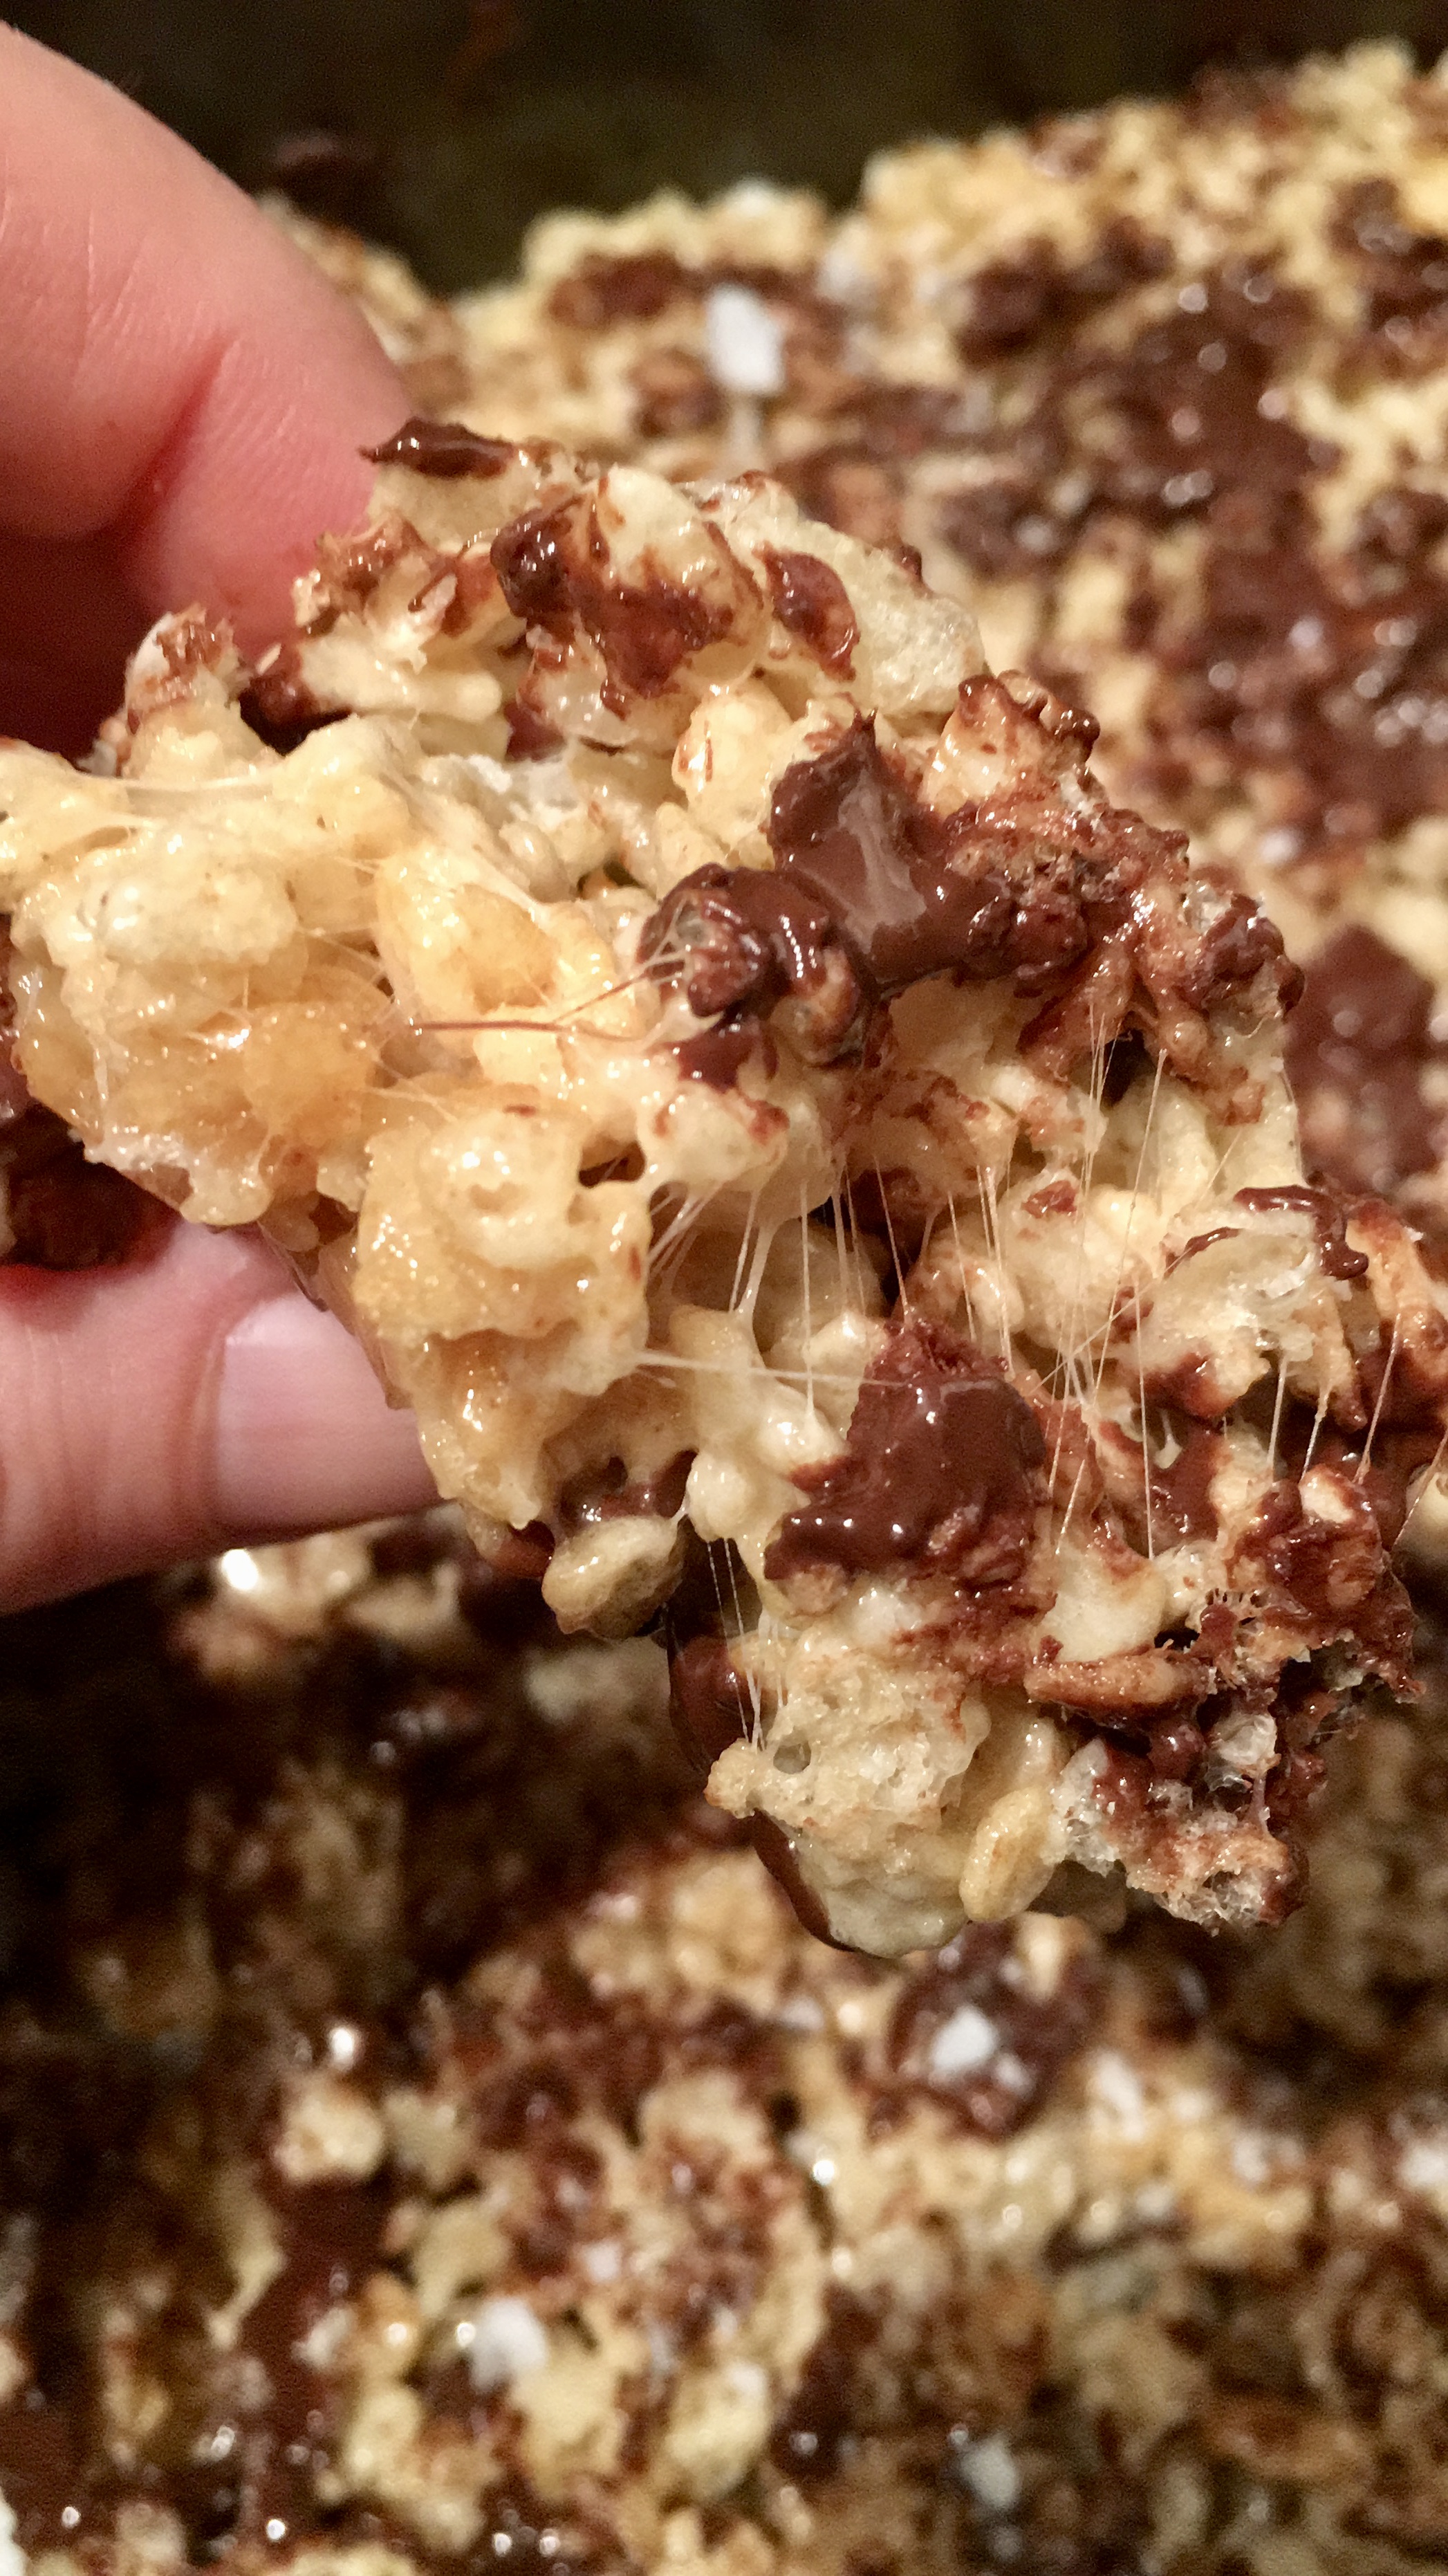
Toxic relationships. Not limited to people (no I don’t mean my obsession with Rice Krispy Treats…back off).

Just the stuff that weighs us down.

These Crocus are the first to show up every year. They are right by my Mom’s back door.

Lately, in conjunction with “Does it spark Joy?” I am asking, “Would I want my kids to think this about themselves/struggle with this?” and that’s where the line is drawn. If I wouldn’t want my babies to mentally struggle with it, I don’t deserve to either. If I wouldn’t want someone or thing in their life that causes them pain, why should I allow it in my own?

Big thoughts. Big actions. Cue the big scary.

Change is HARD. Changing a mindset is HARD. Living a life with joy should not be. So I ask, what sparks your joy?

Dad’s Stargazers

The reason I am writing…it’s not a big deal in the big picture…but it is, to me.

As I have mentioned, my dad passed away after his battle with cancer almost five years ago. His camera has been in my closet. The newly clean and organized and downsized closet. The camera that was hidden behind stuff. On purpose.

Cliff loved his toys. Whenever my dad got a hobby, he was all in. Fly fishing? Check. Golf? check, Art? Check. Photography? Check.

My dad has lenses and filters and books on photography that I am seriously working through to understand. I’ve been taking pictures since my first real camera three decades ago and I am still trying to understand all of the toys in his camera bag.

Even in the winter, I love my roses

While sorting through said camera bag, I found a smaller point and shoot he had stashed in a side pocket and just this morning I looked at the pictures.

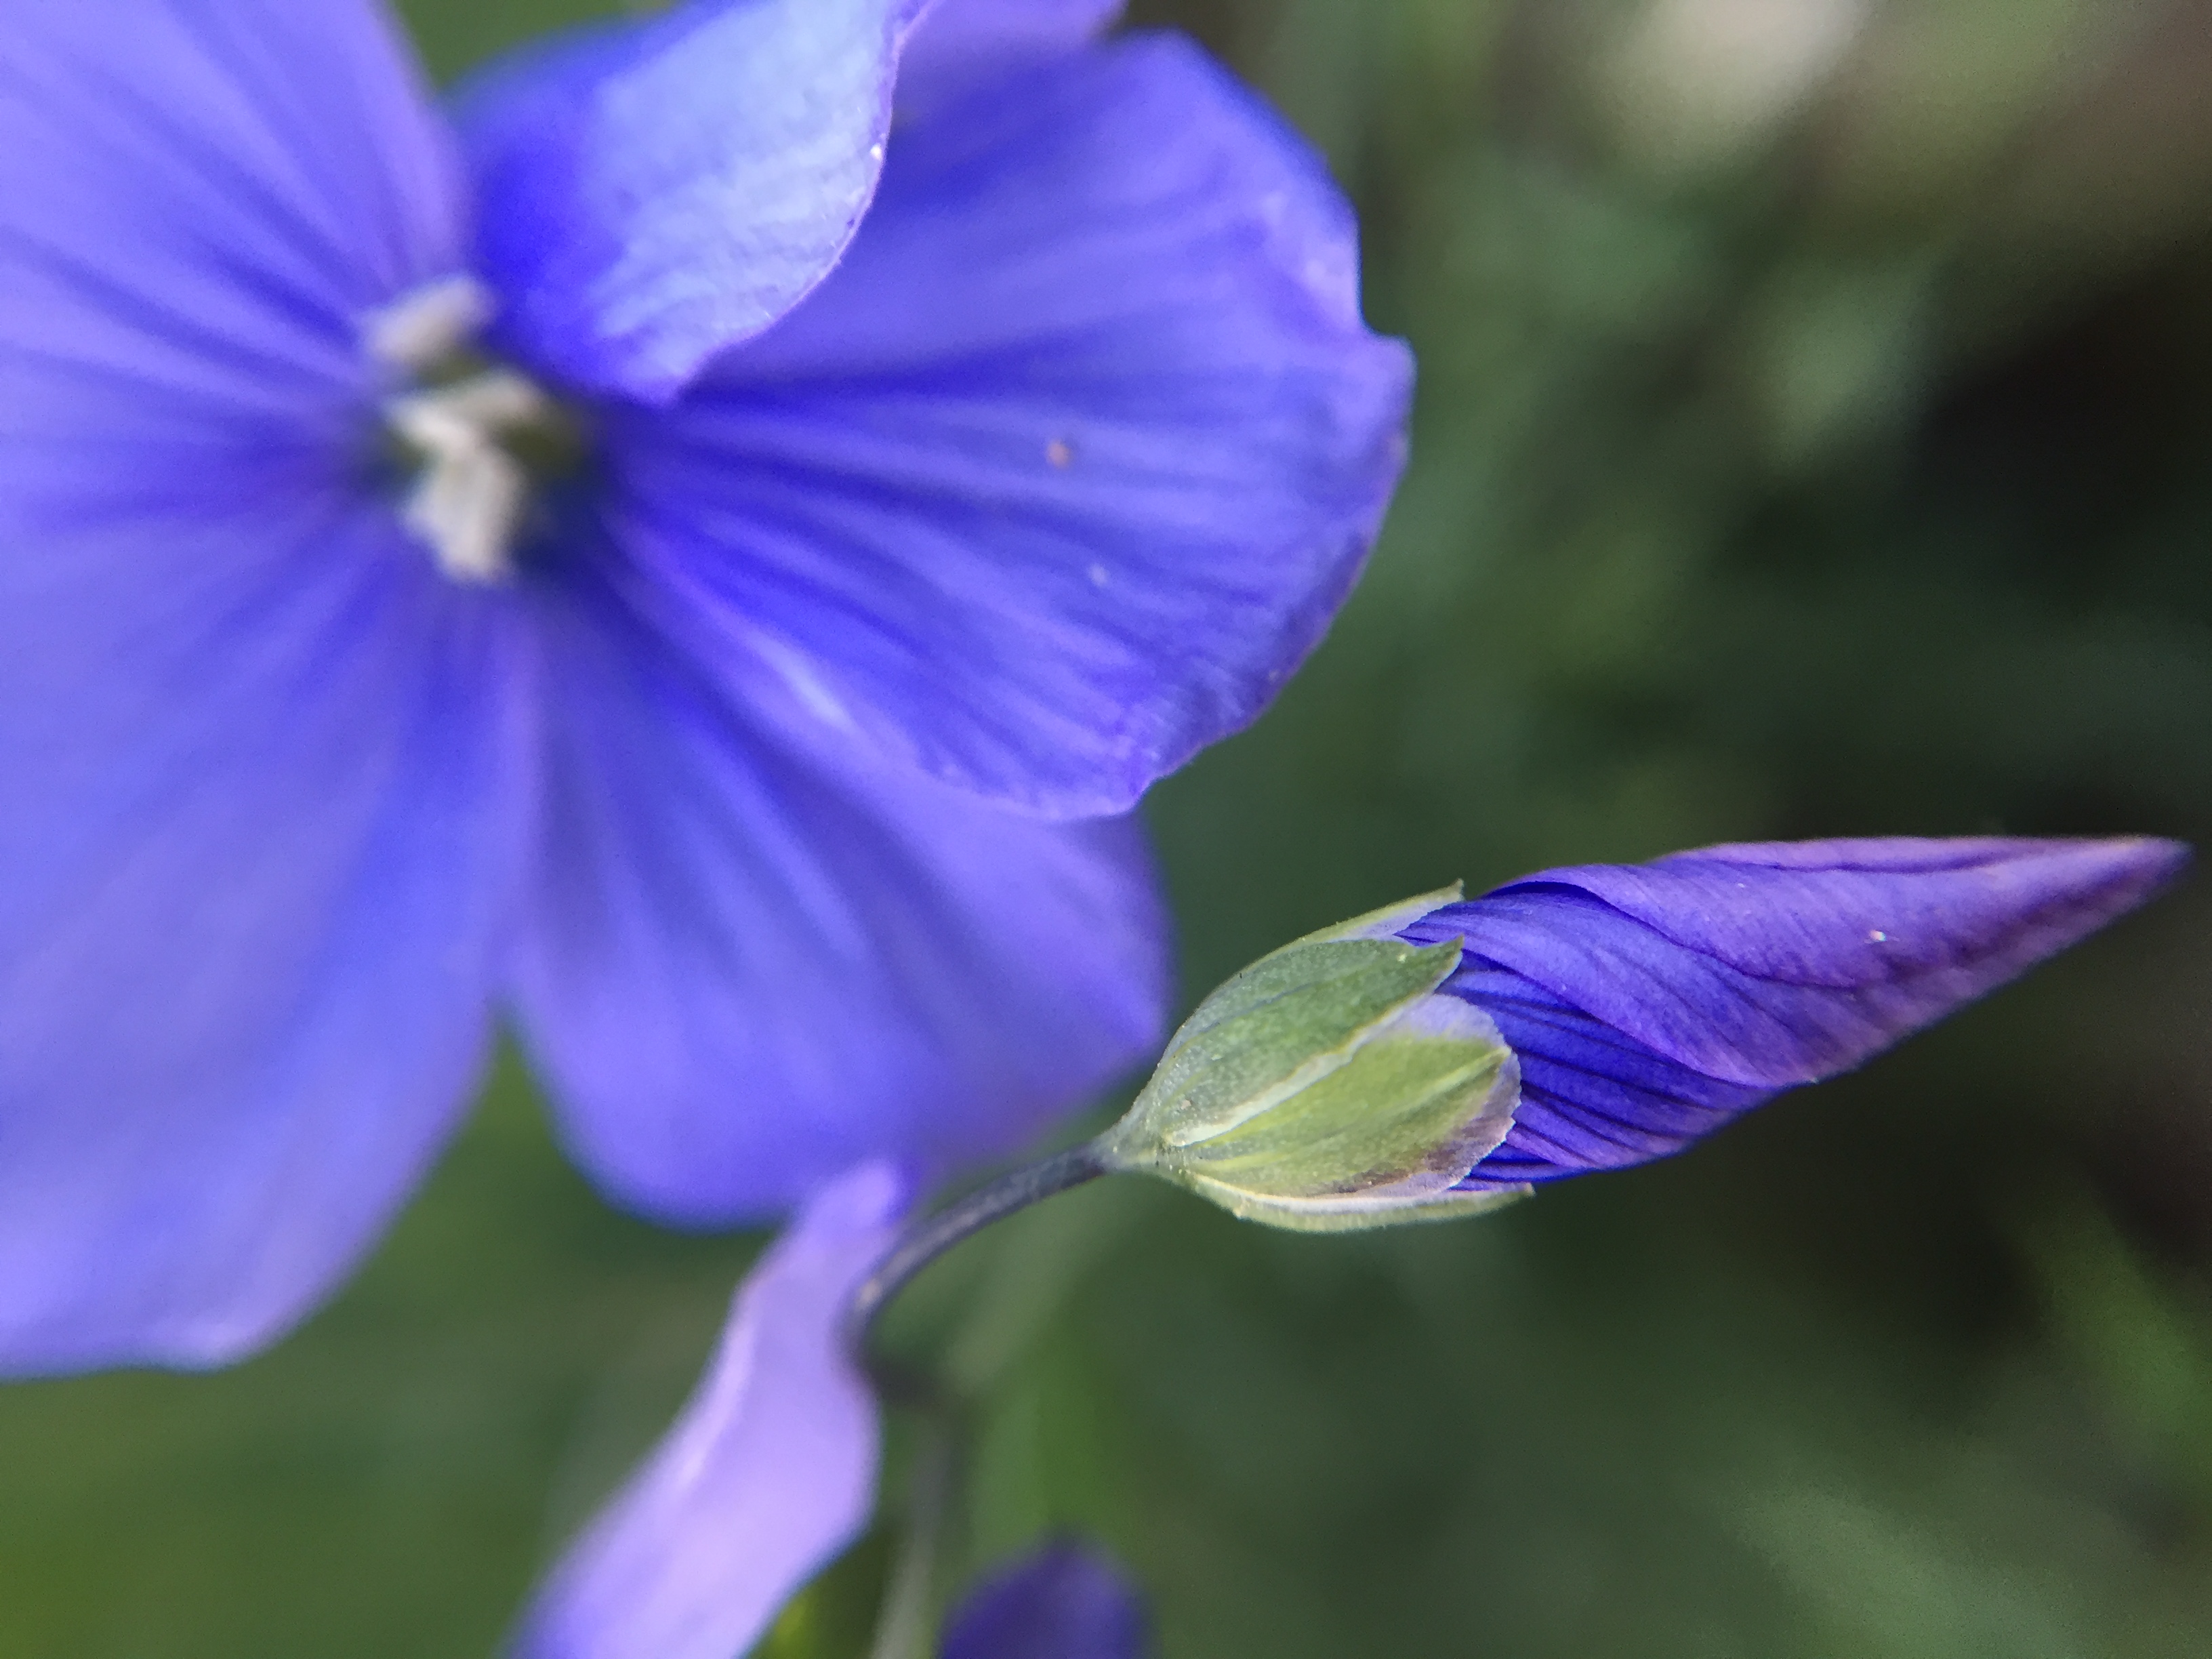
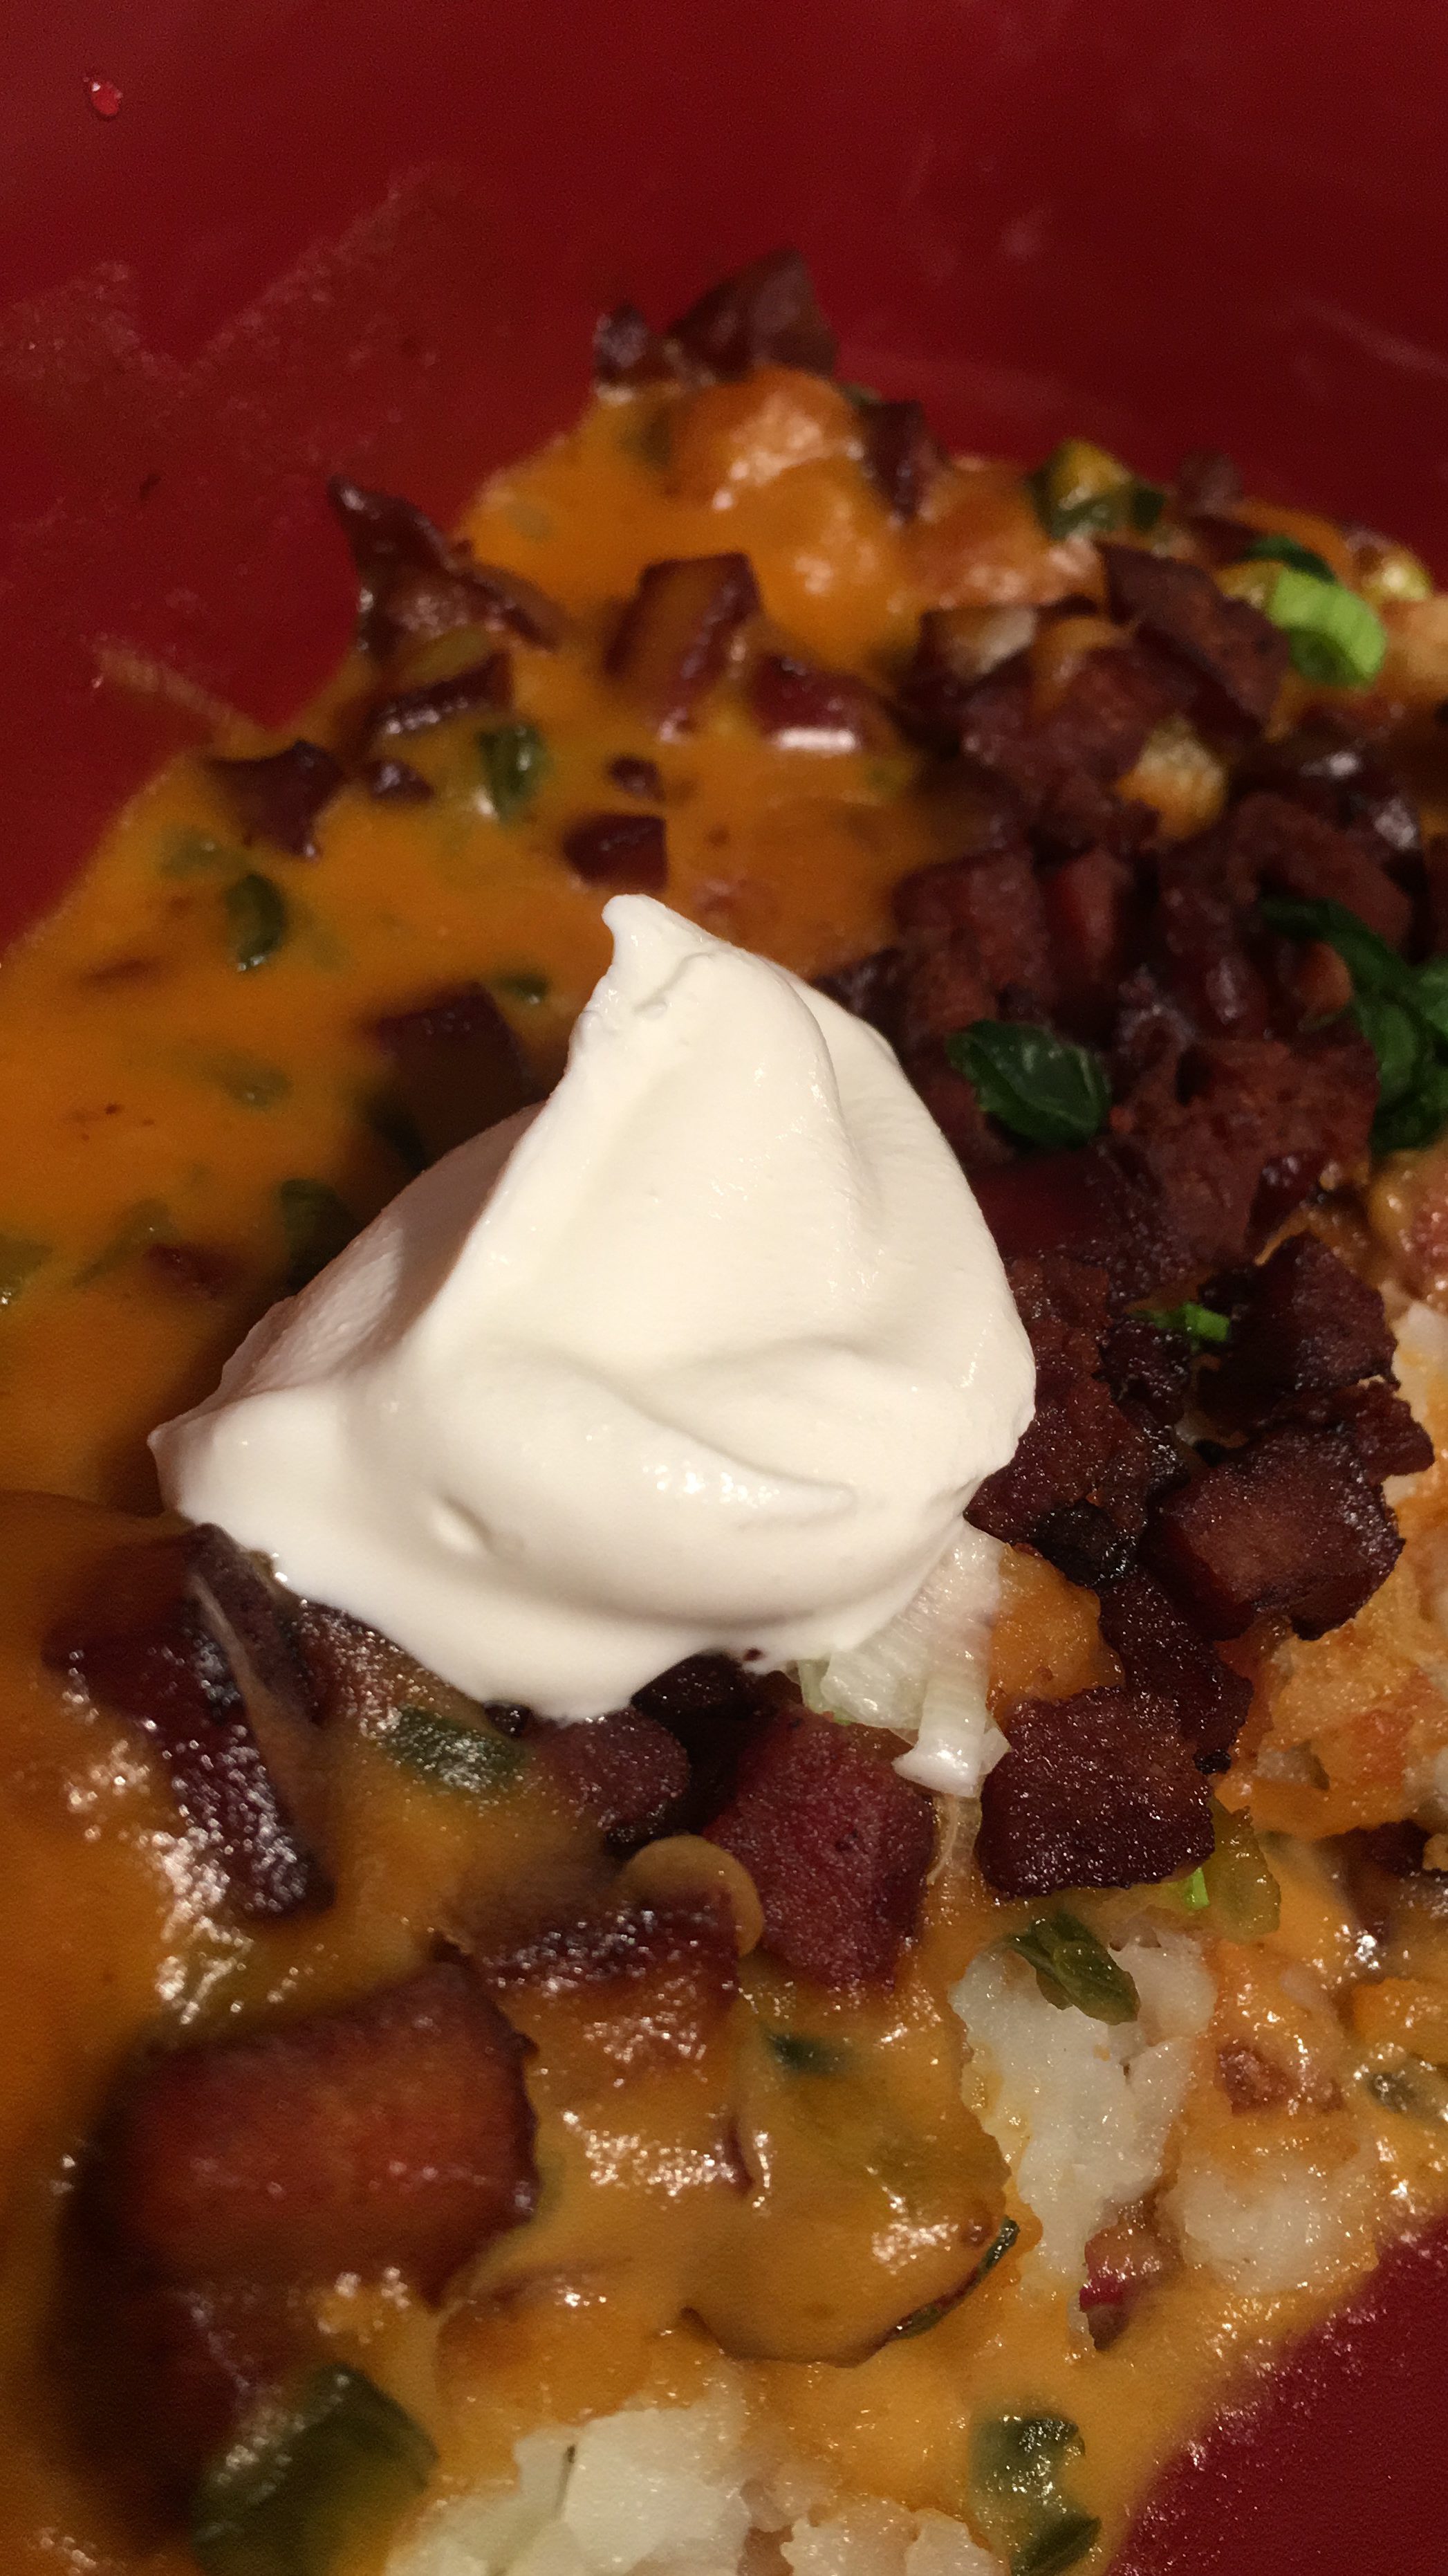
Flowers. Flowers. Flowers. My best friend’s wedding. My family. More flowers. Less than 100 pictures between two cameras and I find that my photos, are very very similar to the ones my father took. Mine are closer up and more in your face, but the subject matter…its the same. My family, my flowers, my great loves, including the food I create. I didn’t know. The things that spark my joy, sparked his joy too.

I think, there are things we need to let go. But, there are things we need to cling to with everything we have inside of us. The beautiful parts of this life that literally, cause us to glow inside.

Find those things.

Let the other stuff yell it’s way, tear it’s way, cry it’s way, chunk it’s way, fluff it’s way, or slink it’s way out of your life. Can we dare to live a life like that?

My Roses
My Roses

My son is not happy when I take pictures of the everyday life. He’s playing guitar with his best friend. My two kids are on the couch trying to see who can push each other’s legs farther…people laughing at the table. This morning I caught a glimpse of my son and the dog curled up together and if I didn’t restrain myself, it would be digitally captured because stuff like that fills my heart. That’s where I want to live.

I know as I write there is heartache. I know there is sickness and disease and wrong in the world that is undeserved. I know there is sorrow. I think we all own our share. But it shouldn’t define us. It’ll leave scars but it won’t detract from who we are.

Anyway, on this Saturday morning when the sun is reflecting off the snow and I am knee deep in chores I am making time to do two things: Write, and celebrate the thread that I didn’t really know I had with my dad who I miss every single day. My heart is grateful. Ever so grateful.

Sending you love, strength, and joy today. Thank you for coming to the table.

Chrissy

Early Morning Marigold


Posted in: My Story Tagged: Dad, me

Grown Up Rice Krispy Treats

February 21, 2019 by chrissy@mythankfultable.com
Grown Up Rice Krispy Treat

Rice Krispy Treats with Browned Butter, Dark Chocolate, and Sea Salt

Grown Up Rice Krispy Treat

I’ve been on a rice Krispy treat bender.

Ok, that may be an over exaggeration. Maybe. I may have bought the gigantic box at the store on Sunday (you know, the one that can feed the five thousand…) as a healthier option for breakfast foods.

But that would be a lie. I bought them for the delicious squares of chewy stickiness they would provide.

Last year it was biscotti in this kitchen. This year…Rice Krispy Treats. I promise you, I only allow myself to eat one or two and the rest are either divided up and given away or eaten by visitors to the house. So in a way, it’s good will. My comfort of cooking brings joy to others so it can’t be wrong. Tell me making the treats isn’t wrong…

At a recent time and place when I was required to sit for many hours (It may have been PD for the second day) I was sitting there, taking notes like a boss, being all professional when suddenly…I got to thinking about my next Rice Krispy treat endeavor. (don’t judge, there are worse topics on which to let your mind wander off) and I got to thinking…”what if I used browned butter first…and added chocolate and sea salt at the end?” So yes, in my notes that thought is written, circled, and I got right back to paying attention.

Hey I am a multi-tasker.

First of all, the miracle of browned butter…the nutty aroma in my kitchen is enough to draw attention. This recipe calls for three tablespoons total. That is not a lot of butter for a whole pan of desserts. It also browns up swiftly and leaves tiny bits of browned goodness.

I used mini marshmallows because I like the control factor and they melt quickly and evenly. I used a whole 10 ounce bag. At some point I will make these with homemade marshmallows but this was not that day. Truth be told, today I went grocery shopping and didn’t even cook supper. My daughter and her friend wanted pizza and I said, as all truly good mother of the years do, “Of course!” I also served it on paper plates. I have no shame.

Now the part I hate about making rice Krispy treats is the whole “It is starting to cool and I am covered in sticky and the marshmallows aren’t coating everything and there are threads everywhere of stickiness it is on me get it in the pan quick” moment. Or is that just me? I don’t like the stress of the crunchy and the not covered and the time factor.

But…

If I kept the warm mixture in the pan and slowly add the cereal in cupfuls, and mix them, then add more…the whole mess is contained in the pan and evenly coated. I know. Insert my genius crown here.

I use a big pan. It’s old and non stick but holds all six cups of the cereal mixture. In the pan (on the lowest heat setting) the whole mixture stays warm and soft and pliable. Then the whole mix gets dumped into the waiting vessel and then all you have to do is pat-pat-pat the mixture down. I am sure I didn’t invent this and I know I didn’t read this somewhere so I am going to think I am smart until proven otherwise.

I use a parchment lined 9X11 pan that I sprayed with cooking spray just because…sticky.

At the last second I dumped approximately 1 1/2 cups of dark chocolate morsels into the mix and folded my heart out. Some stayed solid, some stayed slightly melty, and some melted more than I cared for. It doesn’t matter. Say it with me -Melty Dark Chockey. There need be no apology.

Then, for a final attempt at glory, I sprinkled sea salt flakes on top of just 1/2 half of the pan…in case it was going too far.

It wasn’t. I need to mention here my daughter always says, “Mom, don’t go overboard with the salt.” So- you add as much as you feel is necessary.

Now, baker’s notes: upon cooling, these bars have a slightly crispy over chewy texture. I am not sure if this is due to the browned butter or the chocolate, but I am planning to remedy the next batch with a little more marshmallow to compensate.

Disclaimer: This entire pan will be eaten. I have staff who will find a wrapped treat today. They will not think, “Hmmm….wow these are more crispy! I don’t like them, thanks anyway.” They won’t. Because Rice Krispy Treats with Dark Chocolate and Sea Salt are swoon worthy. Even if they are slightly less chewy than the regular kind. Don’t get me wrong, they are still chewy, just the crisp is pronounced a little too.

Grown Up Rice Krispy Treat

Now my brain is kind of going down a Krispy Treat road. What if we incorporated butterscotch chips? Peanut Butter Chips? Peanut butter and chocolate chips? Potato Chips? Could we add nuts and fruit? Where does this road end? I don’t know people. I will let you know when I find out. I’m still making biscotti and that madness began a year ago.

I think, some days you may just be a regular Rice Krispy treat sort of person. Some days you jazz it up. But either way, the sweet things in life get celebrated. This gal leans toward bits of dark and salty in real life and in desserts for sure!

I hope you enjoy this recipe, and as always, thank you for coming to the table!

Chrissy

Click below for a printable recipe.

Print

Grown Up Rice Krispy Treats

Grown Up Rice Krispy Treat
Print Recipe

This original Rice Krispy Treat recipe is kicked up with the addition of browned butter, dark chocolate, and sea salt. 

  • Author: chrissy@mythankfultable.com

Ingredients

Scale
  • 3 Tablespoons Butter
  • 10 Ounces mini marshmallows (for chewier treats throw in an extra 1/2 cup)
  • 6 Cups Rice Krispy Cereal
  • 1 1/2 Cups Dark Chocolate Morsels
  • Sea Salt Flakes (to taste)

Instructions

  1. Bring butter to a soft melty browned state in a large pan. Once melted, swirl in the pan until it has a nutty aroma and is darkened in color.
  2. Add marshmallows and stir until melted and bubbly.
  3. With mixture in the pan, on the lowest heat setting, slowly add cereal in one cup measurements. Incorporate/coat cereal evenly before adding more until all six cups have been incorporated. 
  4. Turn off heat, and quickly fold in dark chocolate morsels. Some will melt, some will be soft, some will stay firm. Speed is your friend here!
  5. Press mixture into a prepared baking pan. (I used a regular cake pan with parchment and spray)
  6. When bars are still tacky, sprinkle with sea salt to taste.
  7. Allow to cool (I wasn’t able to, I ate mine warm) and cut and serve.

Did you make this recipe?

Share a photo and tag us — we can’t wait to see what you’ve made!

Posted in: Dessert, Recipes Tagged: bar, Dark Chocolate, dessert, rice krispies, rice Krispy bars, Sea Salt

Reese’s Pieces Peanut Butter Cookies

February 20, 2019 by chrissy@mythankfultable.com

These cookies combine the peanut butter base of a soft cookie with the melty crunch of baked chocolate coated peanut butter candies. Win-Win.

I don’t know about you, but there are certain foods I can not bring into my house. Purely because I know they are there, they whisper to me, and then I seek them out to eat them. Among this list I wish were celery and yogurt…you know, the stuff I buy because I am supposed to and they make me healthy. The real list is more like Kraft Caramels, Cheez-its, Caramel M&M’s and Reese’s Pieces. I save these purchases for when the will power is strong…or I need them for a recipe.

Maybe it is the fact that I was little when E.T. was in the movie theaters and this candy became insanely popular. Maybe it’s the idea of mixing up peanut butter cookies to include an extra kick. These cookies are amazing.

When I make cookies, I typically make the dough at least a day in advance, pre-scoop/roll into shapes ready for baking, and refrigerate overnight. These cookies are adorable pre-baked. I had to hide them in the back of the fridge, I was worried they would be consumed before I got the chance to bake them!

These cookies are simple to make, and deliver a real peanut butter punch. If you have a peanut butter lover in your life, these cookies belong in your cookie toolbox!

I hope you enjoy this recipe, and as always, thank you for coming to the table!

Chrissy

Click below for a printable recipe.

Print

Reese’s Pieces Peanut Butter Cookies

Print Recipe

Peanut butter cookie loaded with Reese’s Pieces candies. Original recipe from Simple Green Moms

  • Author: chrissy@mythankfultable.com

Ingredients

Scale
  • 1/2 Cup Creamy Peanut Butter
  • 1 Stick melted Butter (1/2 Cup)
  • 3/4 Dark Brown Sugar
  • 1/2 Cup White Sugar
  • 1 Large Egg (room temperature)
  • 1 3/4 Cup Flour
  • 1 Teaspoon Vanilla Extract
  • 1/2 Teaspoon Salt
  • 1 Teaspoon Baking Soda
  • 1 Cup Reese’s Pieces Candies

Instructions

  1. Combine peanut butter and melted butter in a mixer and combined. 
  2. Add in sugars and mix until light and fluffy.
  3. Add in egg and vanilla extract and mix.
  4. Combine flour, baking soda, salt and add to mixture.
  5. Add and incorporate Reese’s Pieces by hand until evenly distributed throughout the dough.
  6. Refrigerating dough is not necessary, but I pre-scoop my dough and refrigerate overnight.
  7. Preheat oven to 325*
  8. On a parchment lined baking sheet, place scoops of dough a few inches apart.
  9. Bake at 325* for 8-11 minutes, until puffy and light brown.

Did you make this recipe?

Share a photo and tag us — we can’t wait to see what you’ve made!

Posted in: Cookies Tagged: Cookies, Peanut Butter, peanut butter cookies, Reese's pieces

Mary’s (Sort of) Apple Cake

February 19, 2019 by chrissy@mythankfultable.com

This past year we were blessed at our school with the best intern anyone could ask for. When you work in a team, you count yourself lucky when every one who comes to the table (figuratively) is a contributing member.

In the world of primary education, we wear a lot of hats. We aren’t just teachers, we are so much more…but more on that in another post. You have to jump in with both feet and hit the ground running a lot of the time. You get a lot of great stories, and loving children is a gift in itself, but it’s like the ocean; you don’t turn your back on it.

When a new member joins the team, there is always that time period where you lean in and wonder if it is going to work. Then, you have someone like Mary who just fits right in, right away. Mary not only was kind, but also always did more than was expected, got the job done, and just grafted right into our school family (she is actually a first grade teacher in our building this year). Oh! and she shared this cake…which I then stole the recipe and made myself.

This recipe is the quintessential apple cake. Loaded with chunks of crisp apple and surrounded with cinnamon cake-y goodness, it is not only for autumn when the apples are abundant. I actually made this recipe in the spring, when the final snows were melting and it was time for the freshness of strawberries. To commit to a fall-is recipe when you can dream of sunshine and fresh berries says something!

This cake is one of those recipes that could be served for dessert, but is just as wonderful for breakfast with a cup of your favorite warm beverage. It is sweet, but in a naturally apple-y way. 

The original recipe is from Burdick Orchards of New Hartford, Connecticut. Some differences between the original and my changes…

The original called for for more than a cup of oil, which I reduced by reducing the amount and adding applesauce to make up the difference. It also calls for sliced apples and for the cake to be baked in a rectangular baking pan. I changed up the recipe a bit, adding more apples, tweaking the oil; I also baked my cake in a bundt pan and chunked my apples for more texture. 

This cake is so moist and flavorful, it doesn’t require a glaze or frosting. It doesn’t even need a dusting of confectioner’s sugar…though any of those would work. I loved that this versatile cake celebrates one of the best parts of New England, the season of apple picking. Yet, it can be made year round.

Just like our Mary, when you encounter something so precious, you tuck it away in your heart and are thankful the universe brings it to you.

I hope you enjoy this recipe. Thank you Mary for sharing! And as always, thank you for coming to the table!

Love,

Chrissy

Click below for a printable recipe.

Print

Mary’s (Sort of) Apple Cake

Mary's Apple Cake
Print Recipe

This delicious, apple and cinnamony cake brings together all of the wonders of fall, although truth be told, the first time I made this was spring! Original recipe is from Burdick’s Orchard, with some alterations by myself.

  • Author: chrissy@mythankfultable.com

Ingredients

Scale
  • 3 well-beaten Eggs
  • 1/2 Cup Vegetable Oil
  • 1 Cup unsweetened Applesauce
  • 2 Cups of Sugar
  • 3 Cups AP Flour
  • 1 1/2 Teaspoon Baking Soda
  • 1 Teaspoon Salt
  • 3 Teaspoons Cinnamon
  • 4 Cups chopped Apples
  • 1 Cup Chopped Walnuts (if desired)
  • 2 Teaspoons Vanilla

Instructions

  1. Preheat oven to 325*
  2. Prepare either a Bundt Pan or a 8 X 12″ pan with non stick spray.
  3. Combine Eggs, Vegetable Oil, Apple Sauce, and Sugar and Vanilla.
  4. Sift together Flour, Baking Soda, Salt, Cinnamon.
  5. Add Flour mixture to Egg mixture.
  6. Add Chopped Apple, and Nuts (if desired).
  7. Pour batter into prepared pan and bake at 325*
  8. Bake for 45 minutes or until cake tester comes out clean.
  9. Serve plain or with whipped, sour, or vanilla ice cream.

Did you make this recipe?

Share a photo and tag us — we can't wait to see what you've made!

Posted in: bread, breakfast, My Story, One Pan Tagged: Apple, Apple Cake, Applesauce, breakfast, Burdick's Orchard, cake, Cinnamon, Fall Dessert

Oatmeal Lemon Creme Bars

February 18, 2019 by chrissy@mythankfultable.com
Lemon Creme Bar with oatmeal based crumble top and bottom layers

There are two camps in the world of desserts. Those of us who love lemon…the tangier the better, and those who don’t.

Where I live in a world where I can not imagine the zesty bite of citrus in my desserts, there are many (my children included) who are content to have lemons in their water, zested over pan-seared broccoli, but not in their sweets.

Since I am of Team Lemon Everything, this dessert was made for me. A recipe from the Hungry Fan’s Game Day Cookbook, by Dana Falk (my cookbook book club pick of the month), this was one of those desserts I took a small square of and then thought about all week. The thoughts I was thinking sounded like this…why didn’t I take a bigger piece?

Lemon Creme Bar Filling lemon, egg, cornstarch and zest

Problem solved the following weekend, when I made a batch for myself. Now, disclaimer. I always use more zest than the recipe requires so this recipe has my zest measurement. I also packaged up 3/4ths of the final product so I could share immediately and not eat it all. (Here is where being my friend is a bonus).

I actually zested and squeezed the lemons the night before (I used at least four) and got those ingredients prepped and in the fridge – so this recipe came together fairly quickly and easily.

The crumbly layer forms both the bottom and top of the bar. The creme layer is mixed in one bowl and poured over the pre cooked layer, and then covered in more crumble and popped back in the oven.

If you find yourself embracing the lemons in life, instead of making lemonade…I highly suggest making these bars. They are superb. Find a few friends on Team Lemon and share them. Then you make someone else’s day brighter too.

I hope you enjoy this recipe, and as always…thank you for coming to the table!

Chrissy

Click on link below for a printable recipe.

Print

Oatmeal Lemon Creme Bars

Print Recipe

Crumbly lemon creme bars with a delicious oat mixture top and bottom. Zesty lemon creme filling meets the need for sweet and tangy. Everything a lemon dessert should deliver!

  • Author: chrissy@mythankfultable.com (original recipe from Daina Falk’s Hungry Fan’s Game Day Cookbook)

Ingredients

Scale
  • 1/3 Cup Freshly Squeezed Lemon Juice
  • 2 Tablespoons Fresh Lemon Zest
  • 1 (14 ounce) can Sweetened Condensed Milk
  • 2 Large Egg Yolks
  • 1 Teaspoon Corn Starch
  • 1 1/4 Cups AP Flour
  • 1 1/4 Cups Old Fashioned Rolled Oats
  • 1/4 Teaspoon Salt (recipe calls for sea salt- I used iodized)
  • 1/2 Teaspoon Baking Soda
  • 1/2 Cup Granulated Sugar
  • 1/2 Cup Packed Light Brown Sugar
  • 1 Teaspoon Vanilla Extract
  • 12 Tablespoons Butter, melted (recipe calls for unsalted I used salted)

Instructions

  1. Preheat oven to 350* Prepare an 8×8 pan with butter.
  2. Whisk together oats, flour, salt, baking soda, white and brown sugars. Mix until no clumps remain.
  3. Stir vanilla extract into melted butter. 
  4. Pour butter mixture into dry ingredients, stir until the mixture is moistened crumbs.
  5. Sprinkle half of crumble mixture into prepared pan and press into an even layer.
  6. Bake bottom layer for fifteen minutes. Remove and set aside.
  7. Whisk together sweetened condensed milk, egg yolks, lemon zest, lemon juice, and corn starch until combined.
  8. Pour lemon filling over bottom layer and smooth into an even layer.
  9. Sprinkle remaining crumble mixture on top of the lemon layer.
  10. Bake for 25 – 30 minutes until lightly golden. Remove from oven and let cool to room temperature.
  11. Once cool, cover and refrigerate for at least another hour, cut into squares, and serve.

Did you make this recipe?

Share a photo and tag us — we can’t wait to see what you’ve made!

Posted in: Cookies Tagged: Bar Cookie, crumble, dessert, Lemon Creme Bar, Oatmeal, Zest

Tachos and Twitter

February 17, 2019 by chrissy@mythankfultable.com
tachos

Let it be known that while I want to love all that is sports, I am fairly lost on most of it. I know the key players, and I know the basics. However, when it comes to my snacks, appetizers, and desserts, my game is strong.

I love twitter. It makes understanding what just happened possible for someone like myself. This year the Super Bowl was on. I was invested. I still checked my phone for a head’s up. Sometimes, you need to enlist the resources that make sense out of the world around you. There is no shame in following the NFL or the New England Patriots accounts. It makes me feel better about the fact that sometimes…I just missed whatever it was that happened. Yay team. Do the thing.

Combine major sports with Library Cookbook Book Club. I know- trust me there is a connection. Every month our club has either a theme or a specific cookbook from which to choose a recipe. We prepare, and share the final product in a round table fashion and review how the recipe worked, what we changed, etc. It’s a really fun monthly event for your adventurous cook.

This past month the book was “The Hungry Fan’s Game Day Cookbook” by Daina Falk. Well worth the read. So many options to up your game day table. My selection, TACHOS. Tater tots, beer based queso, spicy chorizo…need I say more?

We have never had tater tots in my house the six years we’ve lived here. So, indulgent…I will cave to make this recipe again. Now, I doubled this recipe right off the bat. It filled a good sized casserole pan, which would be perfect for a sports party. I did not make my own salsa, I could not find the beer or the pepper in the recipe, but I did substitute a milder pepper, fresh store made salsa, and a great dark ale and the world was set to right.

Other than making the queso- which was really easy, this recipe will call people back for more and over all it was simple to put together. I would highly recommend…and I didn’t even need twitter to walk me through the steps. That, my friends, is a win.

I hope you enjoy this recipe, and as always, thank you for coming to the table!

Chrissy

Tater Tots Tachos
Tachos

Print

Tachos and Twitter

Print Recipe

Crispy tater tots covered in a dark beer queso, chorizo, green onions, sour cream. There will be no leftovers!!

  • Author: chrissy@mythankfultable.com original recipe from The Hungry Fan’s Game Day Cookbook by Daina Falk

Ingredients

Scale
  • 6 ounces Chorizo, diced
  • 1/2 Cup dark beer (original recipe calls for Negra Modelo…I used Dogfish Head Ale Dark IPA)
  • 16 ounces Extra Sharp Shredded Cheddar Cheese
  • 1 Serrano Pepper (I used a Poblano) seeds and veins removed, chopped
  • 1 4 ounce can of diced green chiles, drained
  • 2 Tablespoons thinly sliced green onions
  • 2 Cups Tater Tots
  • 2 Tablespoons Sour Cream or Plain Yogurt
  • 1/4 Cup Salsa
  • 1 Tablespoon freshly minced Cilantro
  • Pepper (optional)

Instructions

  1. In a large saucepan, cook the disced chorizo until crisp and fat is rendered. Transfer cooked chorizo to a paper towel lined plate to drain and discard the rendered fat.
  2. Pour beer into the same saucepan (I did not wash between chorizo and beer phase) and heat for five minutes, to reduce just a bit. 
  3. Reduce heat to low, add cheese and stir until it has melted into the beer.
  4. Once the cheese has fully melted, add fresh pepper, diced green chiles, 1 Tablespoon of green onions, and half of the chorizo.
  5. Simmer sauce on the stovetop for at least 30 minutes to an hour.
  6. Cook tater tots in a preheated oven according to directions, making sure they are their crispiest.
  7. Arrange tater tots in container, top with cheese sauce, remainder of chorizo, add salsa and sour cream, cilantro, and green onions.
  8. Add ground pepper if desired, serve immediately.

Did you make this recipe?

Share a photo and tag us — we can’t wait to see what you’ve made!

Posted in: appetizer Tagged: appetizer, Cheddar cheese, Chorizo, game day, peppers, Sour Cream, Tater Tots

Pumpkin Bread (Super Moist)

December 4, 2018 by chrissy@mythankfultable.com

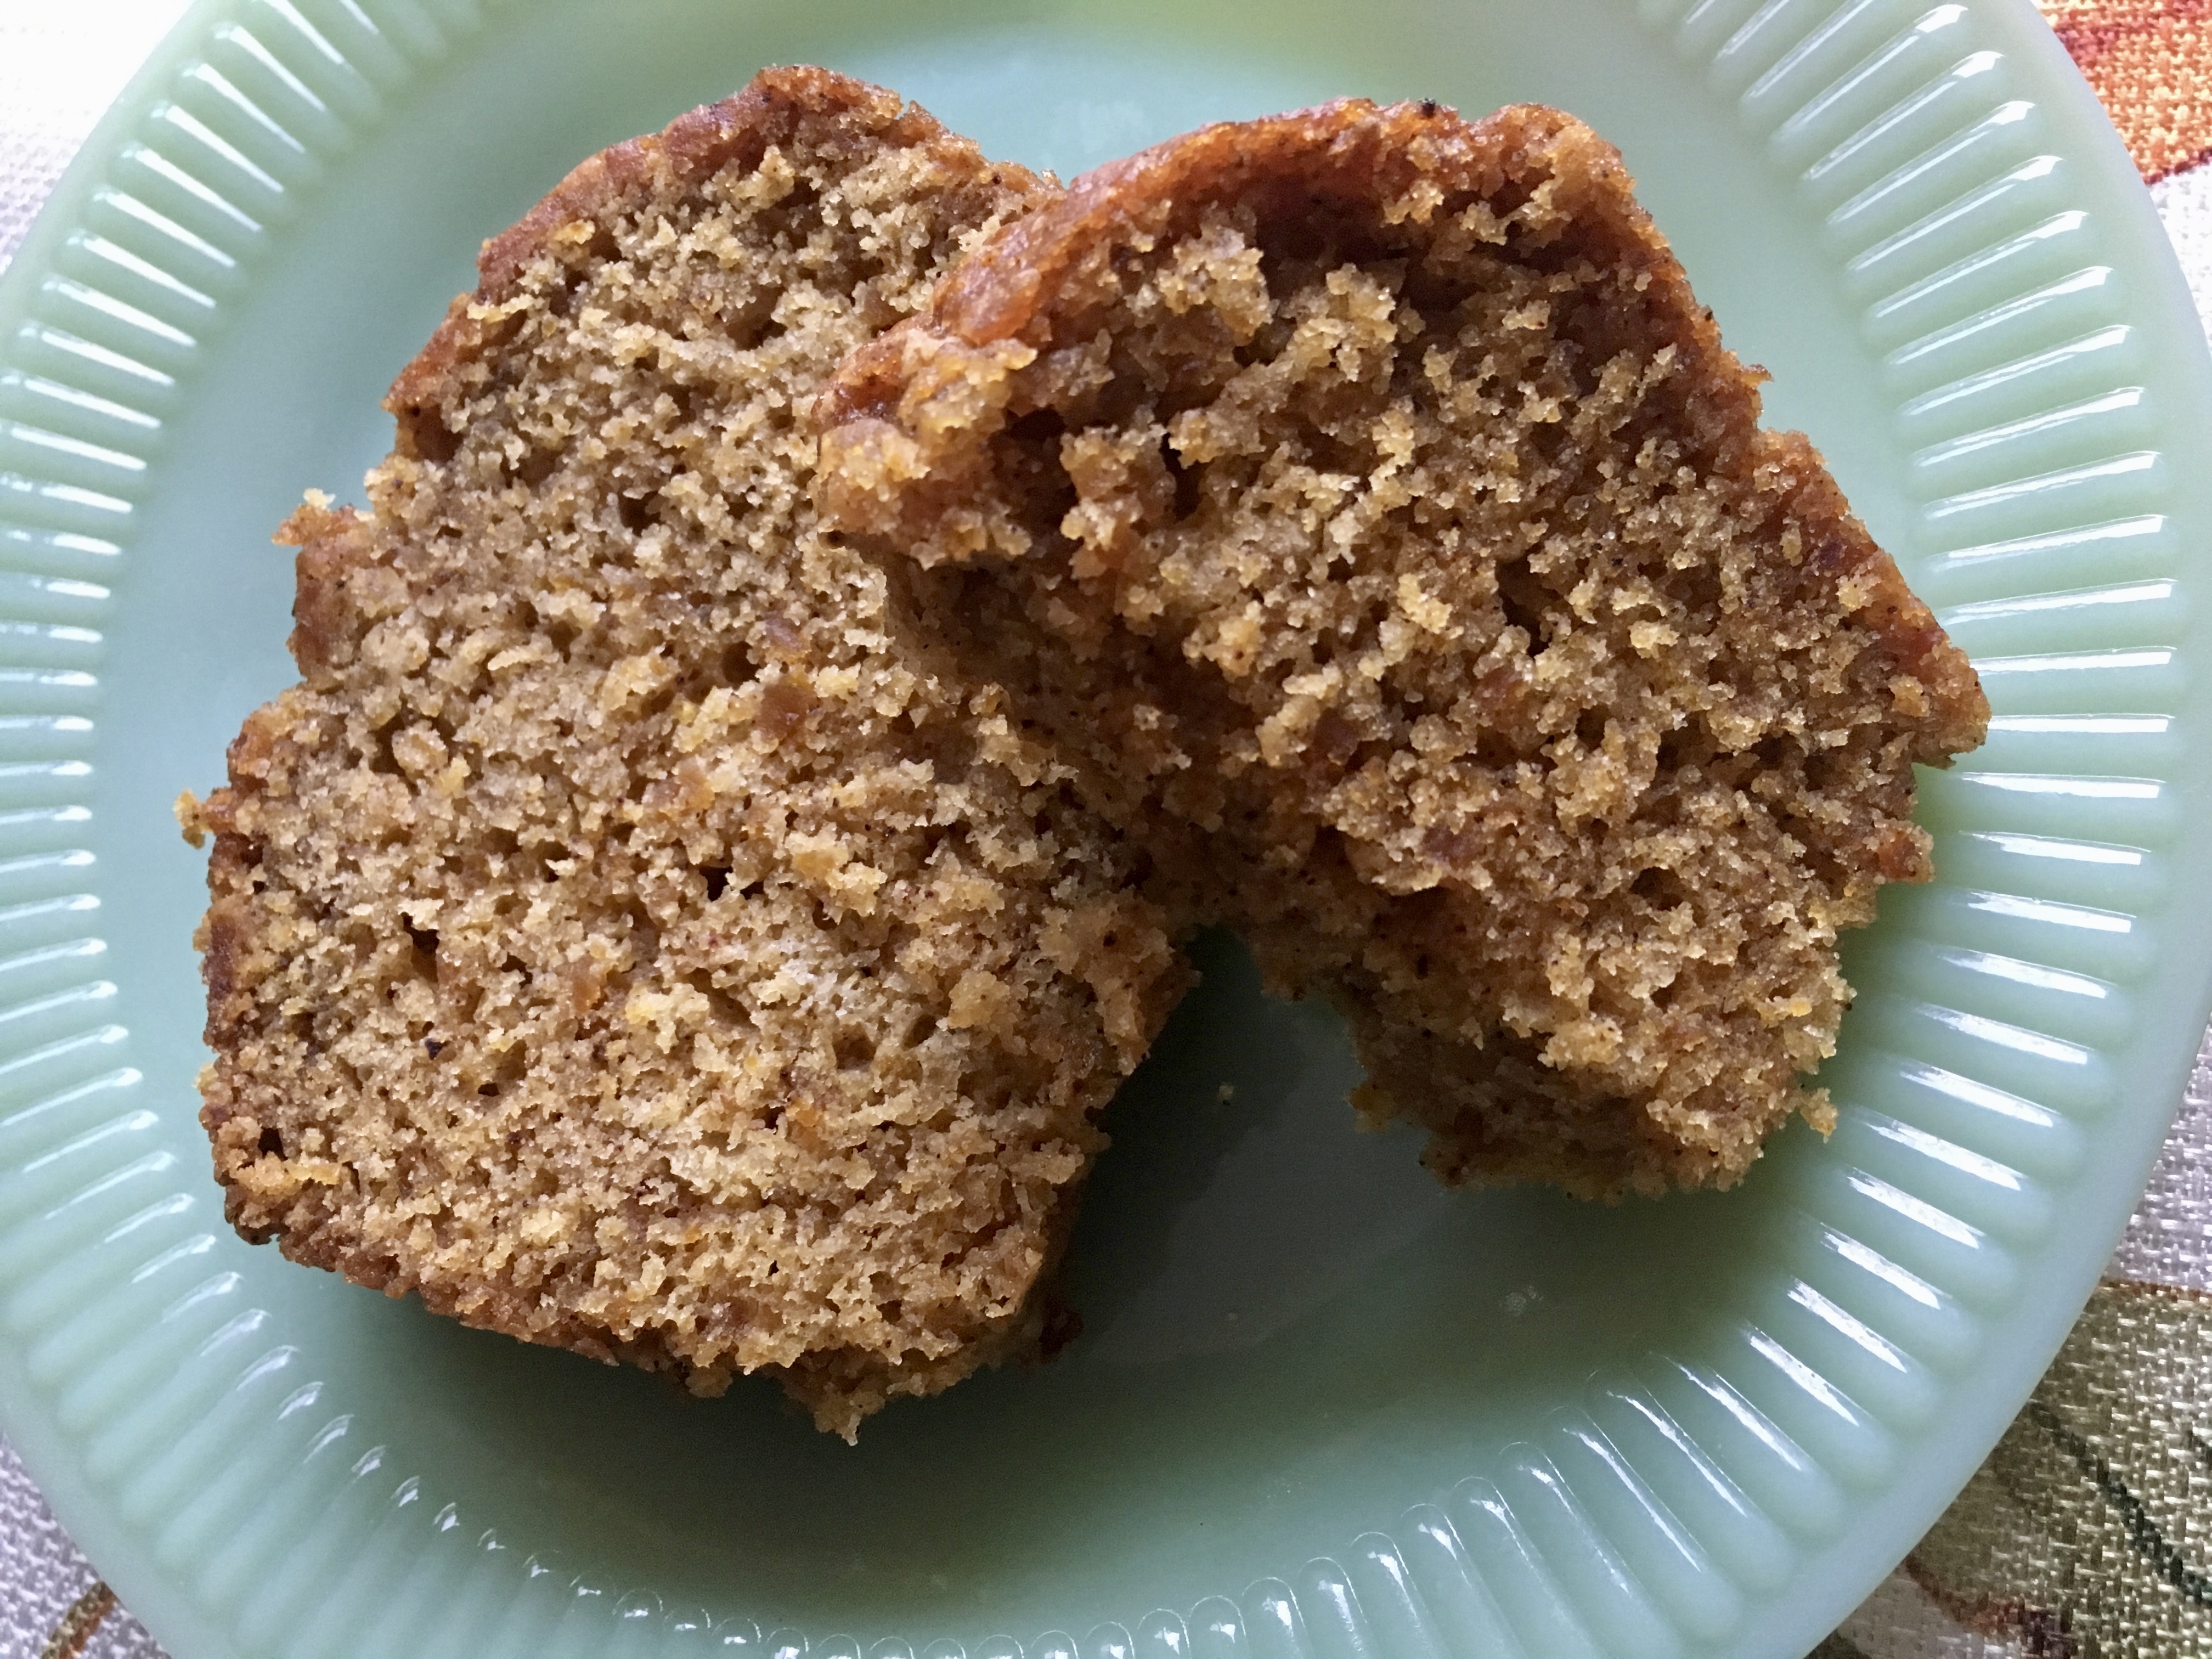
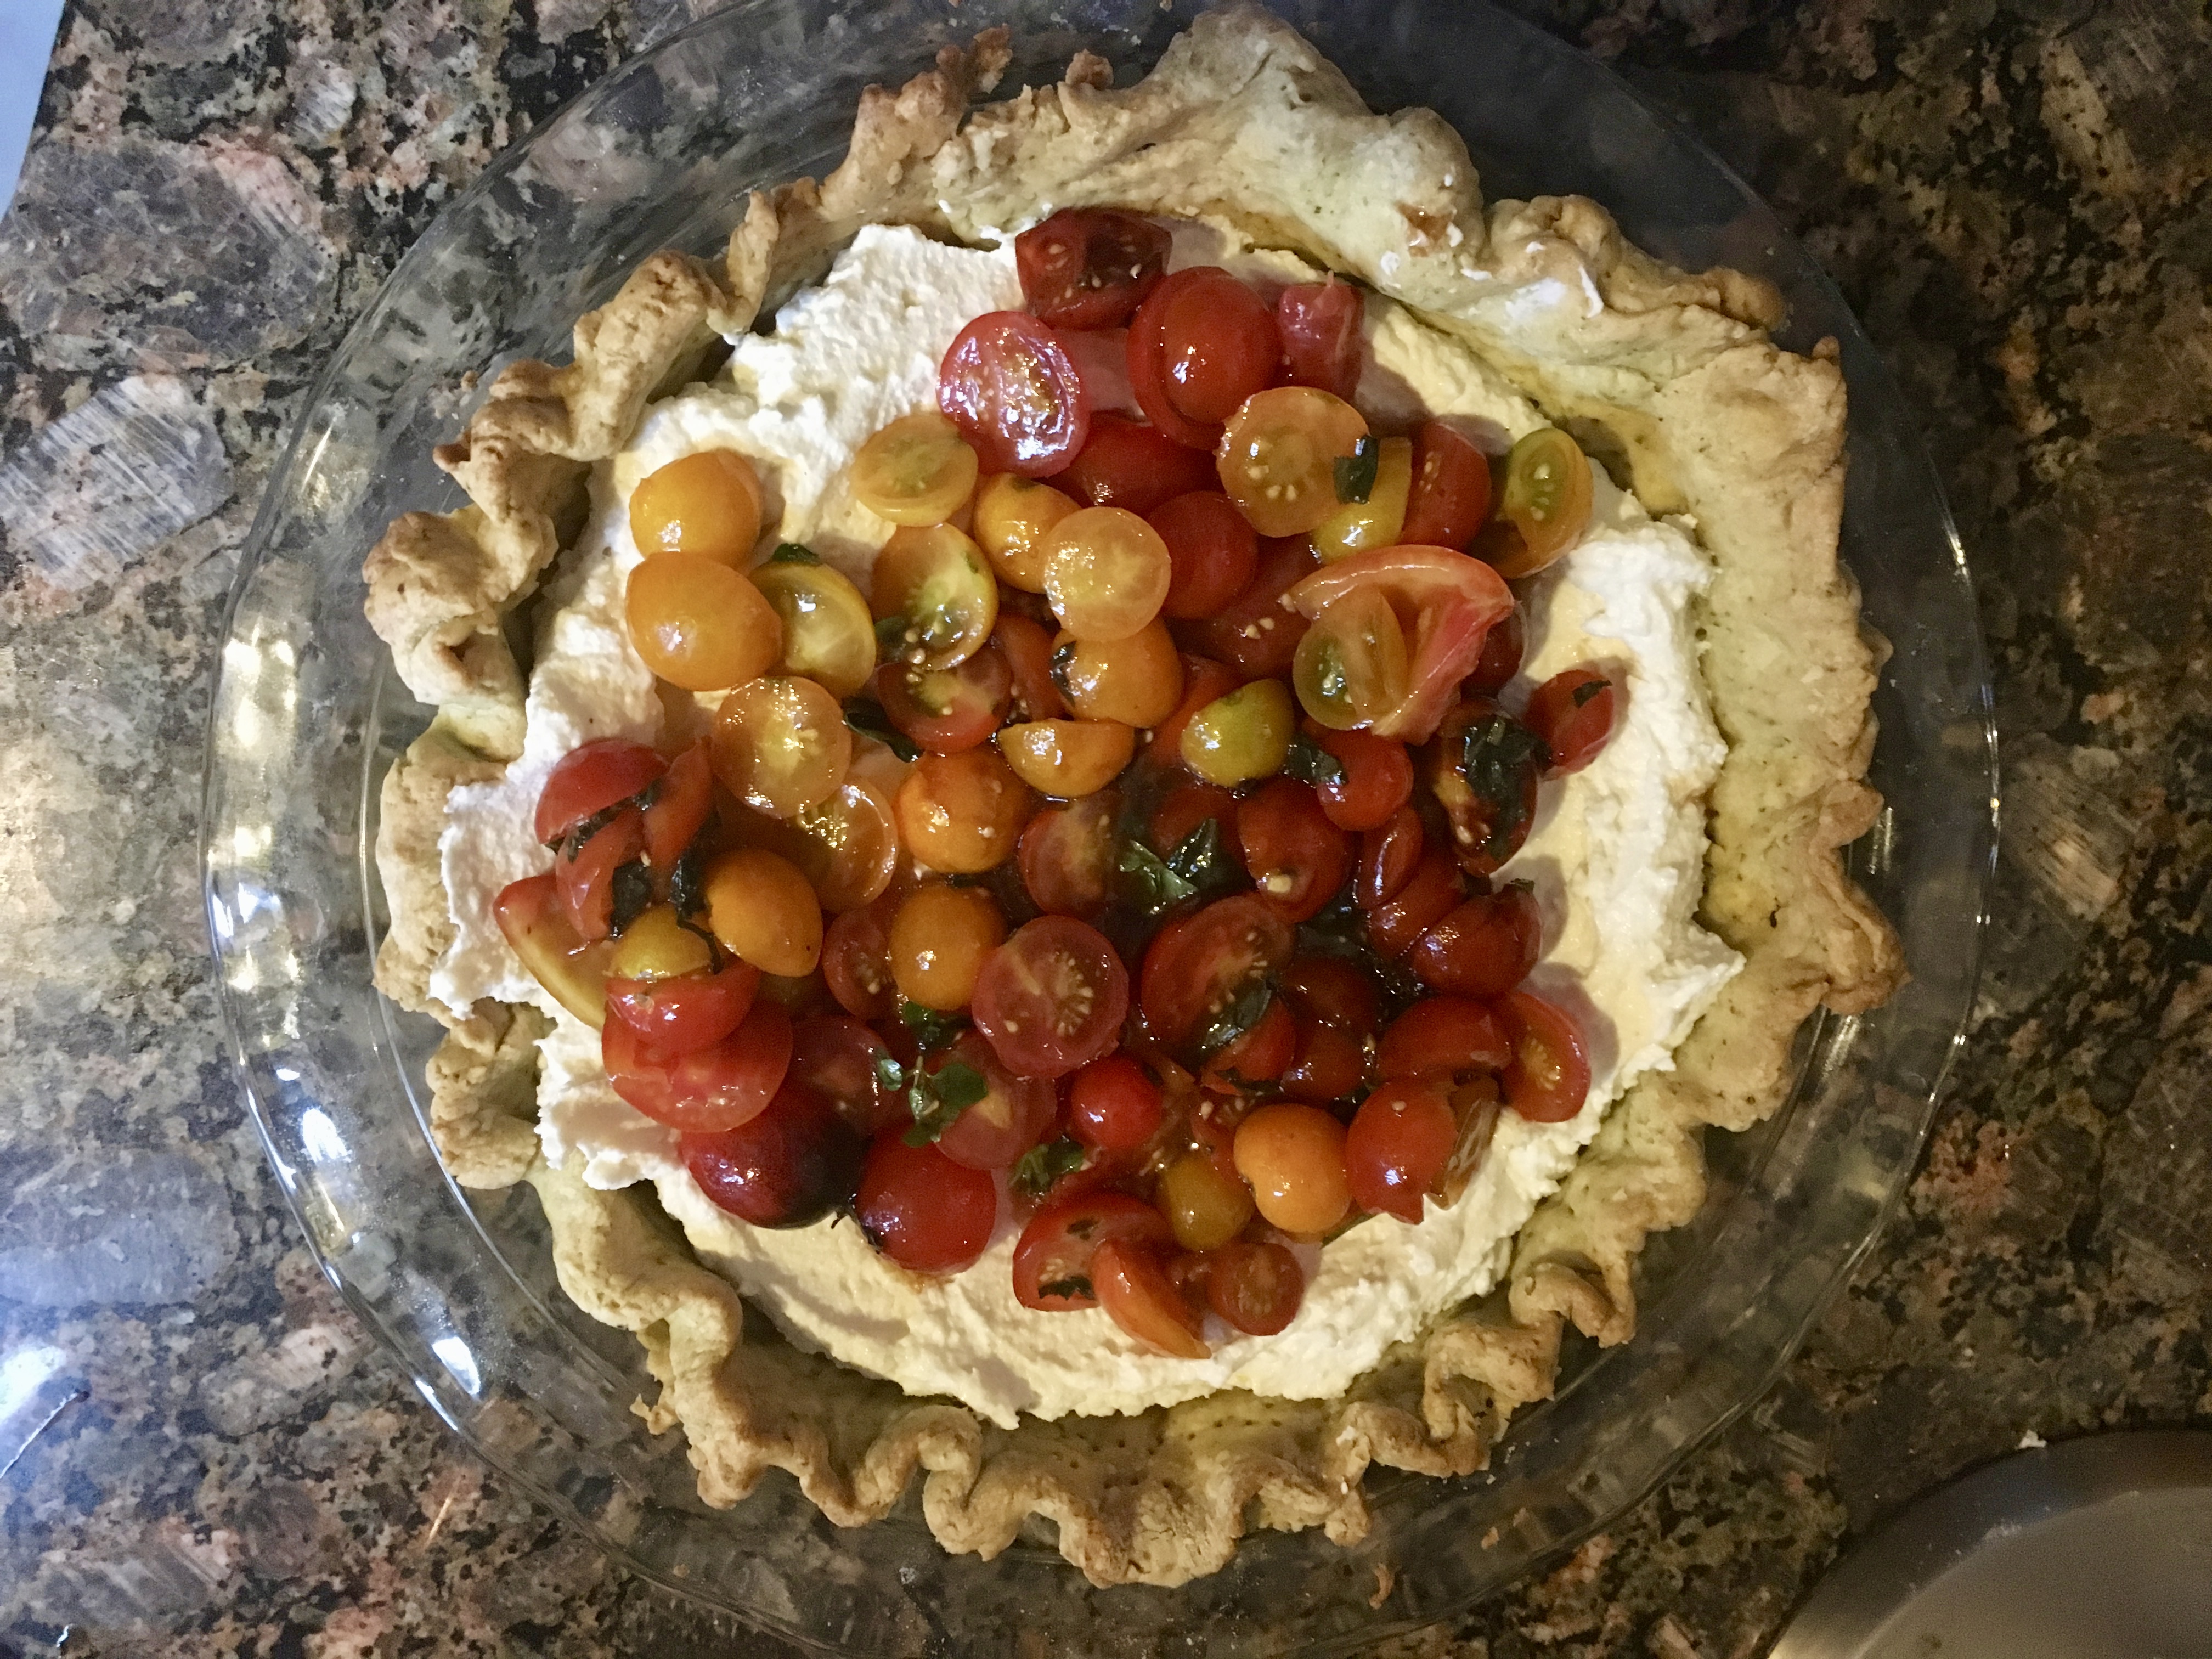
If for some reason you are not a fan of pie during the holidays, never fear, the world is filled with this fall-ish deliciousness. I have been whipping up pumpkin protein smoothies and muffins, and this spectacular bread made from the Key Ingredient Recipes website. This makes three full loaves or six smaller loaves, should you wish to share.

What I love about this bread is that it is super moist. As in, stays that way for a few days. It is fully cooked but somehow doesn’t dry out and get crumbly. I’m a fan. Another bonus is that even though I was reticent to add as many spices as the recipe called for, I followed the recipe to the letter and found it was just enough without being too much. I always consider myself heavy-handed in the spice department, but for some reason I shy away from cloves. Cloves seem to be a heavyweight and a bossy pants when added to a recipe. In this recipe, clove reigns supreme. It is enough to bring out the fall-ish celebration that is pumpkin bread.

And wait…did I mention it is EASY? As in one bowl throw together mix and pour into pans easy? It is. I know the directions say to add the dry ingredients at once, but I mixed my wet ingredients and moved from small to large in dry quantities (I ended with the flour) and did it all in one bowl. I have done this more than once, it has not impacted the quality of the bread. It is still delicious.

This bread freezes nicely, and the recipe makes enough to share. It’s perfect with a cup of coffee or tea, it is perfection still warm from the oven. I will tinker with the recipe to add less sugar, and maybe even a cream cheese swirl because, hello, cream cheese and pumpkin.

I am so thankful for the holidays and for a time to gather with the family you are born into and the family you are grafted into. The people you love and hold close to your heart. I am for sure adding this amazing bread recipe to my table.

I hope you enjoy this recipe, and as always, thank you for coming to the table!

Chrissy

Click below for a printable recipe!

Print

Pumpkin Bread (Super Moist)

Print Recipe

This recipe from Key Ingredient Recipes is an amazing moist pumpkin bread full of flavor!

  • Author: chrissy@mythankfultable.com

Ingredients

Scale


  • 3 Cups Sugar
  • 3 1/3 Cups Flour
  • 2 Teaspoons Baking Soda
  • ½ Tablespoon Baking Powder
  • 1 ½ Teaspoon Salt
  • 1 Teaspoon Nutmeg
  • 1 Teaspoon Ground Cloves
  • 1 Teaspoon Cinnamon
  • 4 Whole Eggs
  • 15 Ounces *1 Can Pumpkin
  • 1 Cup Oil
  • 1 Cup Water

Instructions

  1. Preheat oven to 350*
  2. Mix dry ingredients in a bowl, set aside.
  3. Combine eggs, oil, water, pumpkin in another bowl.
  4. Add wet ingredients to dry ingredients all at once.
  5. Mix well, prepare three 9×4 or six 3×5 bread pans.
  6. Bake at 350* for 45 minutes -an hour (when knife or toothpick comes out clean).

Did you make this recipe?

Share a photo and tag us — we can't wait to see what you've made!


Posted in: bread, breakfast, My Story Tagged: Bread, Cinnamon, Cloves, Fall, Nutmeg, Pumpkin, Pumpkin Bread

Harvest Salad

November 7, 2018 by chrissy@mythankfultable.com

I have embraced all that is butternut squash of late. Bake it and make it into soup, roast it as a side dish, or use it in this autumnal salad.

I have not loved kale, however, ever. But chop it up, use it as a base with some delicious ingredients, and use a little lemon dressing…I find, I look forward to my kale-based lunch. No, seriously, I am slowly falling in love with this vegetable. (Does anyone else think of the chard solicitation in the Farmer’s Market episode of Parks and Recreation? No?) Well, maybe I’m falling in like with this vegetable…

This salad is a full-course meal in that it incorporates a lot of vegetables, quinoa (I like tricolored for the visual) and crunchy apples, cranberries, and creamy goat cheese. It is also sort of weight watcher’s friendly as it is veggie based and if you only use a little cheese/cranberries you get a solid meal for not a lot of points.

The beauty of this kind of salad is it is interchangeable. As in, you don’t like dried cranberries or goat cheese you can eliminate or swap them out. You don’t have quinoa but have farro on hand, same deal. You make the meal unique in what makes you happy and is available in your pantry.

For this recipe, I cubed up butternut squash, tossed it in a little maple syrup and olive oil, roasted it up for an hour or so (Think glorious orange cubes of tastiness). While that is happening, I am first cooking a quinoa in a little butter on the stove top, then adding chicken stock to cook. In my research, I read that browning the quinoa adds depth of flavor and “sets” the protein. While I like quinoa as is, even cooked in water, I definitely like the flavors of the butter and the stock. (Again, you do you). Meanwhile I am tearing up kale, dicing apple, red peppers, and even this time, raw thin asparagus stalks, and getting ready to combine.

I have made this where I do the squash and quinoa the night before, and assemble the rest the next day, and I have made it when the quinoa is still slightly warm when assembling. Both turn out great. I also like that in a land of meal prepping on Sunday, this salad holds up, unlike the regular lettuce or baby spinach salad, which can’t really be made too many days in advance (nothing is worse than the smell of spinach turning…blah).

For the dressing, I combined lemon juice, olive oil (I used blood orange olive oil but any will do), salt, pepper, and a little bit of maple syrup (can also leave it out). I shake it up in a mason jar and keep it on hand for when it’s time to serve. I am not a fan of pre-dressed salad, but you could certainly dress the salad prior to serving and it will hold up.

If you are like myself in that you try to pack healthy lunches ahead of time and stay on track during the day (I won’t pack the halloween candy so I can’t be tempted and then around two I am asking myself why…) this is a salad for you. If you don’t love kale, this is the salad for you. My children aren’t fans but I make it anyway. It’s a recipe for Chrissy. And we need those in our lives. Recipes that make us healthier and stronger and happier, right?

I hope you enjoy this recipe, and as always, thank you for coming to the table!

Chrissy

Click below for a printable recipe.


Print

Harvest Salad

Print Recipe

Other options of this delicious fall salad could include chopped raw asparagus, pecans or walnuts (raw or roasted) or any additional seasonal vegetable/fruit. It is hearty, healthy, and versatile!

  • Author: chrissy@mythankfultable.com

Ingredients

Scale
  • 1 Butternut Squash, Cubed
  • 2 Tablespoons Maple Syrup
  • 2 Tablespoons Oil
  • Salt and Pepper
  • 1 Cup Tri-Color Quinoa
  • 2 Tablespoons Butter
  • 2 Cups Low Sodium Chicken Broth
  • 1 Diced Granny Smith Apple
  • ½ Cups Craisins (Dried Cranberries)
  • 1 Diced Red Pepper
  • 2 Cups Kale, Washed and Chopped
  • 2 Ounces Crumbled Goat Cheese

Dressing:

  • 1/3 Cup Olive Oil
  • Juice of 1 Lemon
  • 1 Tablespoon Maple Syrup
  • Lemon Zest

Instructions

  1. Toss Butternut Squash Cubes in maple syrup and oil, season with salt and pepper.
  2. Spread out Squash on a sheet pan and bake for 375* until roasted. (45-60 Minutes).
  3. In a pan, melt butter and add quinoa, stirring until slightly toasted.
  4. Add Two cups chicken broth and simmer until quinoa is cooked.
  5. Wash and roughly chop Kale, add remaining ingredients to the salad and toss.
  6. Combine dressing ingredients and add to salad (I put mine in a mason jar on the side).

Did you make this recipe?

Share a photo and tag us — we can't wait to see what you've made!

Posted in: My Story Tagged: Apple, butternut squash, Cranberry, Harvest, kale, quinoa, red pepper, Salad

Tomato Ricotta Tart in an Herbed Crust

September 4, 2018 by chrissy@mythankfultable.com
Tomato Ricotta Tart

“Mom, you haven’t blogged in a while…” the comment was innocent, but accurate.Ricotta Tart

I haven’t blogged in a while.

I took the summer to regroup. I would say summer is normally a time to get stuff done. In a way, and I did get stuff done. Just not the writing stuff.

Every now and then our lives get full. Ok, most of us have full lives…a lot of the time…most of the time…, OK all of the time. Go. Go. Go.

Many nights I sit and promptly fall asleep in the chair. I am super fun. My alarm goes off early and all of the stuff has to get done before work, then work stuff, then family stuff, then supper stuff, then more house stuff. You know the drill. I am not one to let things go undone. Things need to get done. It’s how I roll.

Except.

herbed crustExcept, by the end of the school year this time around, I was weary in my core. This year was tougher for some reason. Across the board. We weathered a few major storms at home. I got sick, like a lot. Our school year had a lot of transitions. I looked out at my gardens this late winter/early spring and thought, “I’m not doing it this summer.”

Now, if you follow my Instagram feed you know, I dig in the dirt and take pictures of my flowers. So, something was definitely wrong.

I wouldn’t call it depression. I would call it exhaustion?

Soul tired. Have you every been soul tired?

Yeah, its kind of ugly.

SO this summer, when the graduation party was over and friends  were hanging out in the dining room, and swimming, and having fun being kids and the world slowed down a bit, I chose to stop. I chose to embrace the break.whipped ricotta

I listened to books (I love audible and free audio library books/apps). I went to the gym, or walked outside as much as possible. I worked outside. I played the dumb game I am addicted to on my phone. I watched bad television. I cooked with no blogging agenda. I had meals with people I love from long ago, from work, from book club, from life.

I just stopped with the overwhelming get everything done immediately mindset. For a little bit.

I’m not going to lie. A lot of the checklist got done. I just did a gut check before I did it. And, it happened after I worked out. After I took care of myself. Guess what? it was all waiting for me.

I researched. I took out a million cookbooks. I listened to successful bloggers podcasts. I filled my soul.

Tomato Ricotta TartBecause even soul’s get hungry, and one year in, mine needed nutrition.

Now, we are back to school and life is the treadmill again but I am different.

I’m choosing joy and not the drama of the day-to-day. I’m working hard to love more. Including me. I’m exercising daily. I’m drinking Kale Smoothies. (Yeah, I know…). I am saying NO to stuff. No to the stuff that can wait. It’s all going to be ok.

I did cook all summer. I didn’t bake as much (more on that later) but with the abundance of tomatoes I found this perfection of a recipe from www.foolproofliving.com. So beautiful. So the essence of all that summer savory tarts should be, and hello, ricotta.

I tweaked the recipe in that I added fresh basil and oregano the crust. (Summer research paying off). I used multi colored cherry tomatoes because I have them in every container I can put them in. (Hooray for small tomatoes that excel all summer long). I used high quality balsamic, because it’s an indulgence to buy pretty olive oils and balsamic vinegar on road trips instead of trinkets. Life is good.

The crust is easy to prepare in advance (even though it looks like a lot of steps it really isn’t) and is baked, and awaits the filling. The filling is quick to make. Assembling on site is a matter of spread filling, top with tomato topping, drizzle. If ever there was a recipe that looked hard but secretly isn’t…you have it here. Tomato Ricotta Tart

Now, if you don’t like ricotta or tomatoes…why are we friends? Seriously. Ricotta is so, so lovely. Tomatoes are mouthfuls of summer. (One of my children loathes tomatoes. The other despises ricotta. So I know the jury is out readers. But just not with this gal).

For my educator friends, my mommas of school aged children friends, and anyone else impacted by the academic calendar, the year is just beginning. We have full hearts and our hands our busy. Our students/children and staff/colleagues need us strong and calm. Souls filled. Imagination ready. Inspiration accessible. Make sure in the midst of the “stuff” you remember to take care of yourself and feed your souls and minds as well as your bodies. And make this tart. You won’t be sorry.

As always, I hope you love this recipe, and thank you for coming to the table!

Chrissy

Click below for a printable recipe.

Print

Tomato Ricotta Tart in an Herbed Crust

Ricotta Tart
Print Recipe

This gorgeous summery tart takes an herb infused crust, filled with lemony ricotta, and topped with tomatoes and balsamic vinegar.

  • Author: chrissy@mythankfultable.com from www.foolproofliving.com (minor changes in crust)

Ingredients

Scale

Herbed Dough:

  • 3 tablespoons almond flour/meal
  • 1 ¼ cups all-purpose flour, plus more for rolling
  • Pinch of salt
  • ½ cup unsalted butter, cold, cubed or grated
  • Handful of basil and oregano leaves, roughly chopped (will pulse with dough ingredients to become pulverized in food processor)
  • 2–4 tablespoons ice-cold water, depending on how much it takes to come together

For the Filling:

  • 1 generous Cup Fresh Ricotta, at room temperature
  • 4 ounces Cream Cheese, softened
  • ½ cup grated Romano or Parmesan Cheese
  • 1 teaspoon Lemon Zest (I used one lemon)
  • 1 teaspoon lemon juice

For the Tomato Topping:

  • 2 cups tomatoes, (I used a combination of multicolored cherry tomatoes, halved)
  • 1 tablespoon olive oil
  • ½ Teaspoon Kosher Salt
  • ½ Teaspoon freshly Ground Black Pepper
  • ¼ Cup leaves of fresh Basil, loosely packed
  • 2 tablespoons fresh Oregano leaves
  • 1 tablespoons Pine nuts (optional)

Instructions

To make the dough:

  1. Combine almond flour, all-purpose flour, and salt in a food processor.
  2. Add Fresh Herbs.
  3. Cube or Grate Butter and add to the food processor with flours, salt, and herbs.
  4. Pulse the cold butter into flour/herb mixture.
  5. Slowly drizzle the cold water into food processor while pulsing, gradually adding as much water as you need to make the dough come together.
  6. Turn dough out into a piece of plastic and shape it into 4-inch disk. Cover tightly and refrigerate for 30 minutes or until ready to use.
  7. When ready, remove chilled dough from the fridge. If it is too cold to roll out, let it sit on the counter for a few minutes. Uncover before rolling.
  8. Using a rolling pin, roll it into 11-inch circle on a well floured surface.
  9. Place the dough into 9-inch tart pan with a removable bottom (or a pie pan)making sure the dough is evenly distributed throughout the pan.
  10. Using your fingers be sure to push the dough in the corners of the pan.
  11. Prick the bottom of the tart all over with a fork.
  12. Place pie pan/tart pan with dough in the freezer for 15 minutes. (Don’t use glass or you will have to let it sit out before you place in hot oven).
  13. Preheat the oven to 400 F degrees.
  14. Remove the pie/tart pan from the freezer.
  15. Place a sheet of parchment paper on top and fill it with dried beans (or pie weights).
  16. Place in the oven for 15 minutes, then remove the beans and parchment paper and bake for another 20-25 minutes, until lightly golden brown.
  17. Let it cool on a cooling rack for at least 15 minutes before filling.

Ricotta Filling:

  1. Using a mixer with the silicone/rubber spatula attachment, combine Ricotta, Cream Cheese, and Pecorino Romano in a bowl.
  2. Fold in the lemon zest and juice.
  3. Season it with ½ teaspoon kosher salt and ¼ teaspoon freshly cracked black pepper.
  4. Refrigerate until assembling tart.
  5. Half or quarter the tomatoes and place it in a bowl. Stir in the olive oil, salt and pepper.

When ready to serve:

  1. Remove the tart from the pan (unless it is in a pie plate) and place it onto a large dish.
  2. Spread the ricotta filling evenly over the top smoothing the top with a spatula.
  3. Top it with tomato filling, garnish with basil, oregano, and pine nuts (if preferred).
  4. Drizzle balsamic vinegar, garnish with pine nuts if you desire.

Did you make this recipe?

Share a photo and tag us — we can't wait to see what you've made!

Posted in: My Story, Recipes Tagged: Cherry Tomato, Herbed Crust, pies. balsamic, Ricotta, romano, savory tarts, Side Dishes, Tart, tomato

Lemon Blueberry Zucchini Bread

July 21, 2018 by chrissy@mythankfultable.com
Lemon Blueberry Zucchini Bread

Lemon Blueberry Zucchini BreadI’m just going to put it out there, the word “moist” does not have a big following. But in a bread, loaded with freshly picked (I picked mine but hey picking a carton out at the grocery store counts too) blueberries, the zing of lemon, and a superhero ingredient of zucchini, this bread is so good, sweet and tart and yes, moist.

When you add zucchini to anything, even if you squeeze the liquid out before hand, it still adds to the texture of a bread. I shred mine on a box grater (actually it is a six-sided grater – so a hexagon grater) on the fine shred side. You can do this and pop it in the freezer or the refrigerator before hand. I give the shredded zucchini a squeeze to remove extra liquid but don’t make a big deal out of it. (There is no wringing it out in a towel  or setting out overnight). Because I use a finer shred, not only is it barely detectable, the bread maintains the integrity of being lemony and blueberry without looking or tasting like a zucchini bread.Lemon Blueberry Zucchini Bread

This recipe calls for two key ingredients that you can find in abundance right now where I live. The first round of berries (bigger and sweeter) are ready, and everybody who has a garden with squash has one or two or ten extra to give away. So bake it up into a bread and put some glaze on it.

The bread uses lemon extract as well as the punch of zest. I go overboard on the blueberries because that’s how I roll, but you can certainly reduce the berries, use vanilla extract, and switch up the oil as well. I used a mixture of vegetable oil and greek style yogurt (I like what it adds to the texture of the bread). I used Siggis Vanilla yogurt, but if I had Lemon flavored yogurt on hand I would have used that, or plain-no flavor yogurt.

If I am going to cave for a sweet at my local coffee shop, it will be for the glazed lemon loaf. It better taste like lemon. Not yellow bread. So, I will be heavy-handed in the zest. You will find it in the bread as well as the glaze.

The glaze…oh you sweet lemony goodness. Glaze is temperamental in the fact that you don’t want a mouthful of sugar. You want balance of sweet and tart. You want it to not be sticky and gross all over your bread. It’s not frosting. So, you play with it. If it needs more lemon juice or heavy cream, add it. Ideally, you want it loose enough to spoon into a plastic baggie, snip the end off, and drizzle. It will firm up after a bit and maintain it’s pretty design on the top of your bread.

Fresh picked blueberriesIn a world where I can not only be productive and useful, utilizing berries I picked and fresh zucchini from the farm stand, I want a little sweet. A bread with the tart of lemon, the jewel-like blueberries, which visually and taste wise are remarkable, and the ninja like skills of hidden zucchini will get my vote every time.

I hope you enjoy this recipe, and as always, thank you for coming to the table!

Chrissy

Click below for a printable recipe!

Print

Lemon Blueberry Zucchini Bread

Lemon Blueberry Zucchini Bread
Print Recipe

This deliciously moist bread combines the flavors of lemon, blueberry, with finely shredded zucchini to combine the flavors of the season. Recipe yields two loaves, or one large loaf and three smaller loaves of bread.

  • Author: chrissy@mythankfultable.com

Ingredients

Scale
  • 2/3 Cup Vegetable Oil
  • 1 container (5.3 ounce) Greek Style Yogurt
  • 3 Eggs
  • 3 Cups AP Flour
  • 2 1/4 Cup White Sugar
  • 2 Cups Finely Grated Zucchini
  • 2 Teaspoons Lemon Extract
  • 1 Teaspoon Vanilla Extract
  • Zest of one Lemon (OK- I use three lemons but it is because that is my thing)
  • 1 Teaspoon Salt
  • 1/2 Teaspoon Baking Soda
  • 1 Teaspoon Baking Powder
  • 4 Cups Blueberries

Lemon Glaze:

  • 1 Cup Powdered Sugar
  • Zest of 1/2 Lemon
  • 1 Tablespoon Lemon Juice
  • 1 Tablespoon Whipping Cream

Instructions

  1. Preheat oven to 350*
  2. Prepare either 2 loaf pans or four small loaf pans with cooking spray or oil.
  3. In a mixer with a paddle attachment, combine oil, yogurt, and sugar.
  4. Add eggs and combine.
  5. Add zuchinni, extracts, zest, flour, salt, baking powder, and baking soda until combined.
  6. Fold in blueberries.
  7. Pour batter into prepared pans.
  8. Bake for 50 Minutes.

Did you make this recipe?

Share a photo and tag us — we can't wait to see what you've made!

Posted in: bread, breakfast, Recipes Tagged: blueberry, Bread, breakfast, lemon, Lemon Blueberry Zucchini Bread, Zucchini
« Previous 1 2 3 4 5 6 7 8 … 12 13 14 15 16 Next »

Recipe Search

Recent Posts

  • Fluffernutter Cookies…You Heard Me April 12, 2024
  • On Nests July 30, 2023
  • Lemon Rosemary Shortbread Cookies April 24, 2022
  • Praline Sweet Potato Pie March 22, 2022
  • Italian Ricotta Cake March 13, 2022

Recent Comments

  • Cathy Carroll on To My Daughter On Her 18th Birthday
  • Maureen / Mimi on To My Daughter On Her 18th Birthday
  • Kathy G on To My Daughter On Her 18th Birthday
  • chrissy@mythankfultable.com on Cherry Crescent Moon Cookies and Finding the Joy
  • chrissy@mythankfultable.com on Cherry Crescent Moon Cookies and Finding the Joy

Archives

Categories

  • appetizer
  • bread
  • breakfast
  • Cookies
  • crockpot
  • crockpot
  • Dessert
  • Fruit
  • My Story
  • One Pan
  • Recipes
  • side dish
  • Side Dishes
  • soup
  • Vegan

Copyright © 2025 mythankfultable.com.

Lifestyle WordPress Theme by themehit.com