mythankfultable.com

Feeding the Heart, Body, and Family

  • My Pics
  • My Story
  • The Puppies
  • Contact Us
Feeding the Heart, Body, and Family

Recipes

Here is the recipe!

Praline Sweet Potato Pie

March 22, 2022 by chrissy@mythankfultable.com

Every Thanksgiving, I make too many desserts. I am a big believer in, “Swing by the house and have dessert if you have room” on holidays. Until the whole pandemic thing happened. However, as the world has slowly emerged and people are doing bigger family gatherings, I look forward to that being an option again.

My one Aunt is the type of cook that had an open door and a serving station where all of the menu items were kept warm and you ate when you got there. One of my favorite memories of the holidays was knowing Aunty Johanne would make a “to go” plate for me when I was working…and specifically didn’t add turnips. I love them now, but then, not so much.

I love the idea of a beautiful sit down dinner. But lately, I am more in love with the idea that people who have busy lives and other family members to see can think one less person is putting pressure on them to be somewhere. I like being able to say, “If it works and you want pie, we have a LOT.” It’s not a horrible situation to find oneself in, if ever.

I also love the idea that if you make different pies, there are more options, and a person could say, sample several pies and it really equals one or two slices. I also like the idea that a person could technically cut into the pies pre-Thanksgiving dinner, as in for breakfast that day. Because, life is short. Eat pie for breakfast if it makes your heart happy.

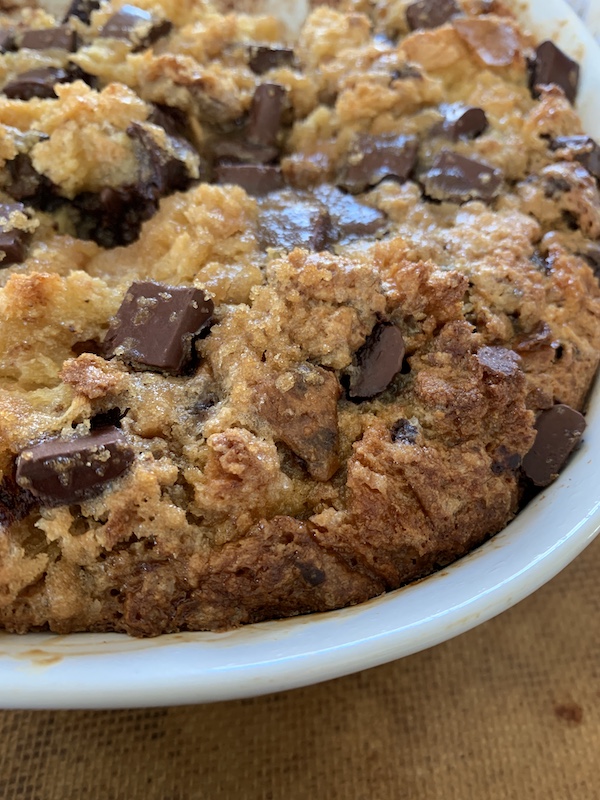
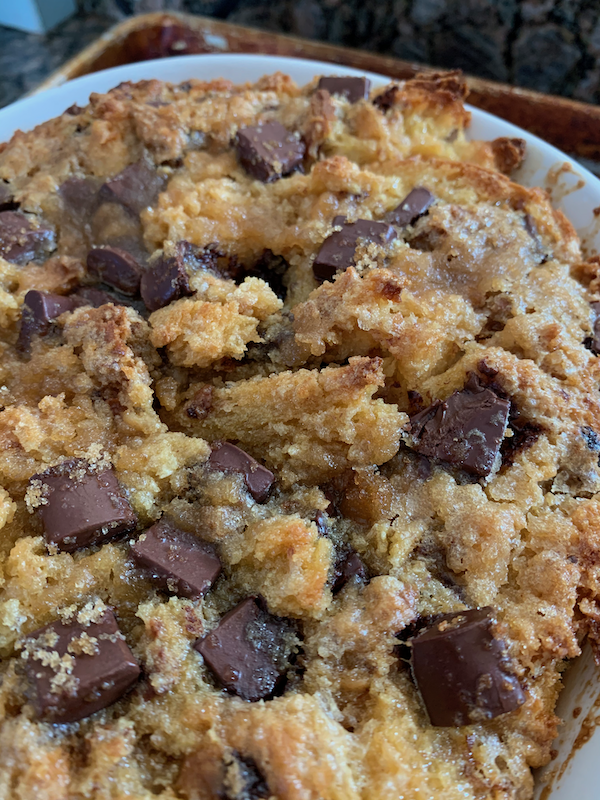
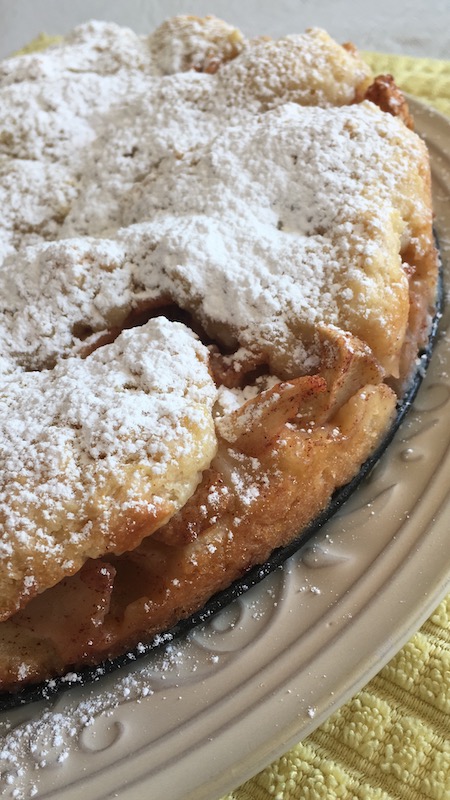
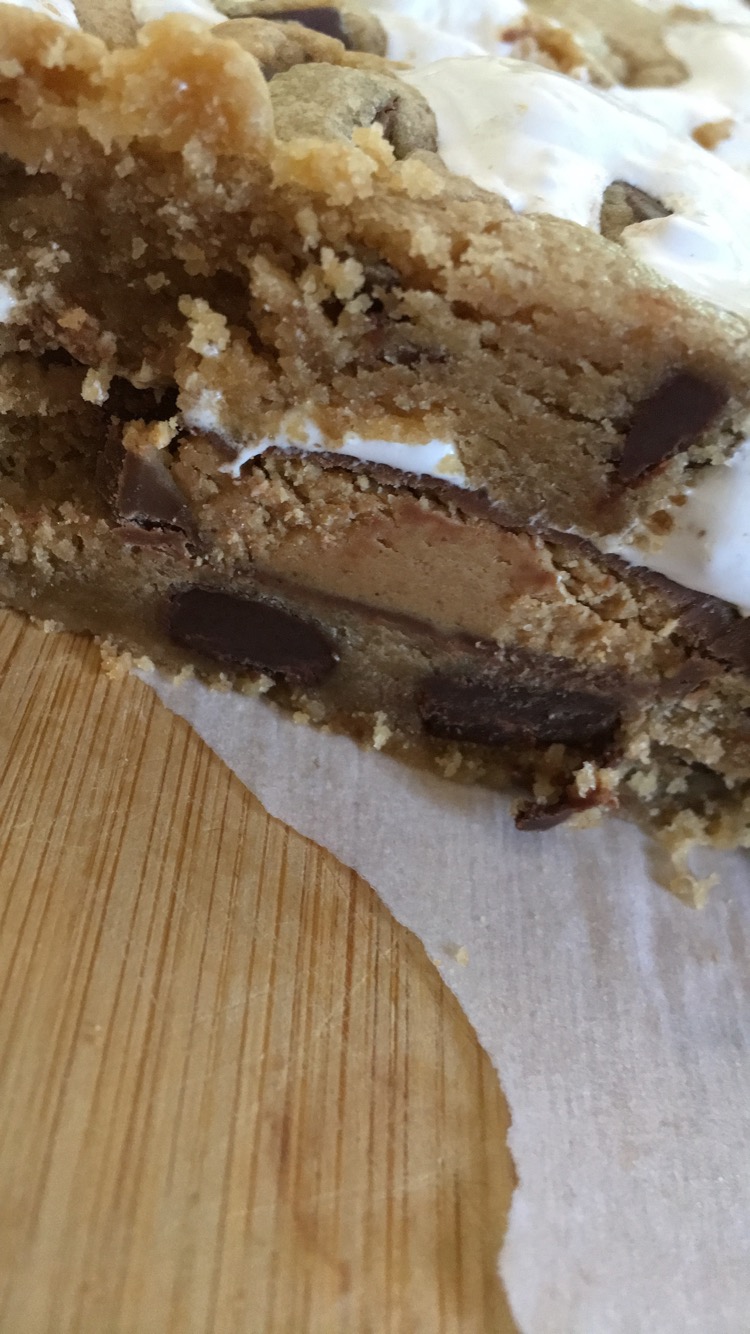
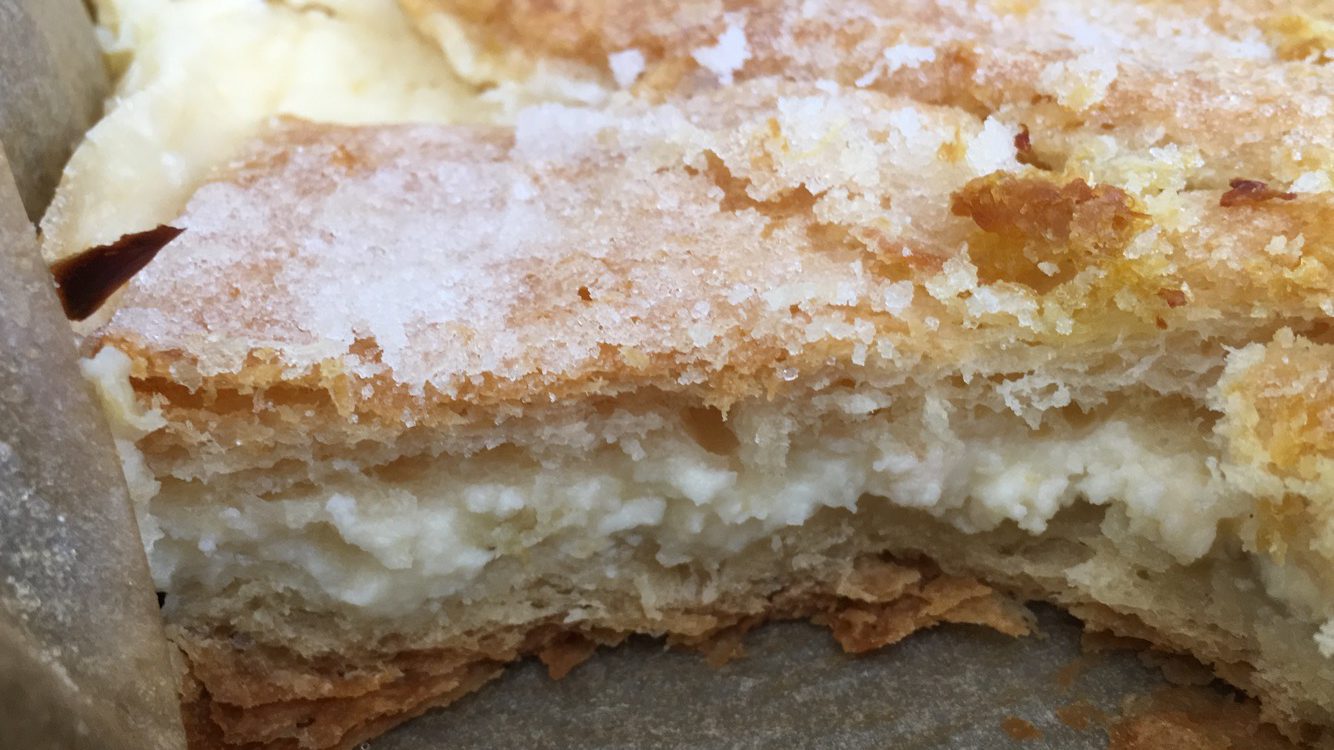
One thing I do every holiday is print out a menu for myself and a timeline. I like lists. Like REALLY LIKE LISTS. I always refer to what worked, didn’t work, and have a folder of recipes for what I want to try next time. Desserts have more room for flexibility here, because as long as I have the basics covered: Pumpkin, Chocolate Bourbon Pecan, Tollhouse Cookie, and my Aunty Cathy’s Cheesecake…I can add any crazy pie I want. This was the new endeavor this year.

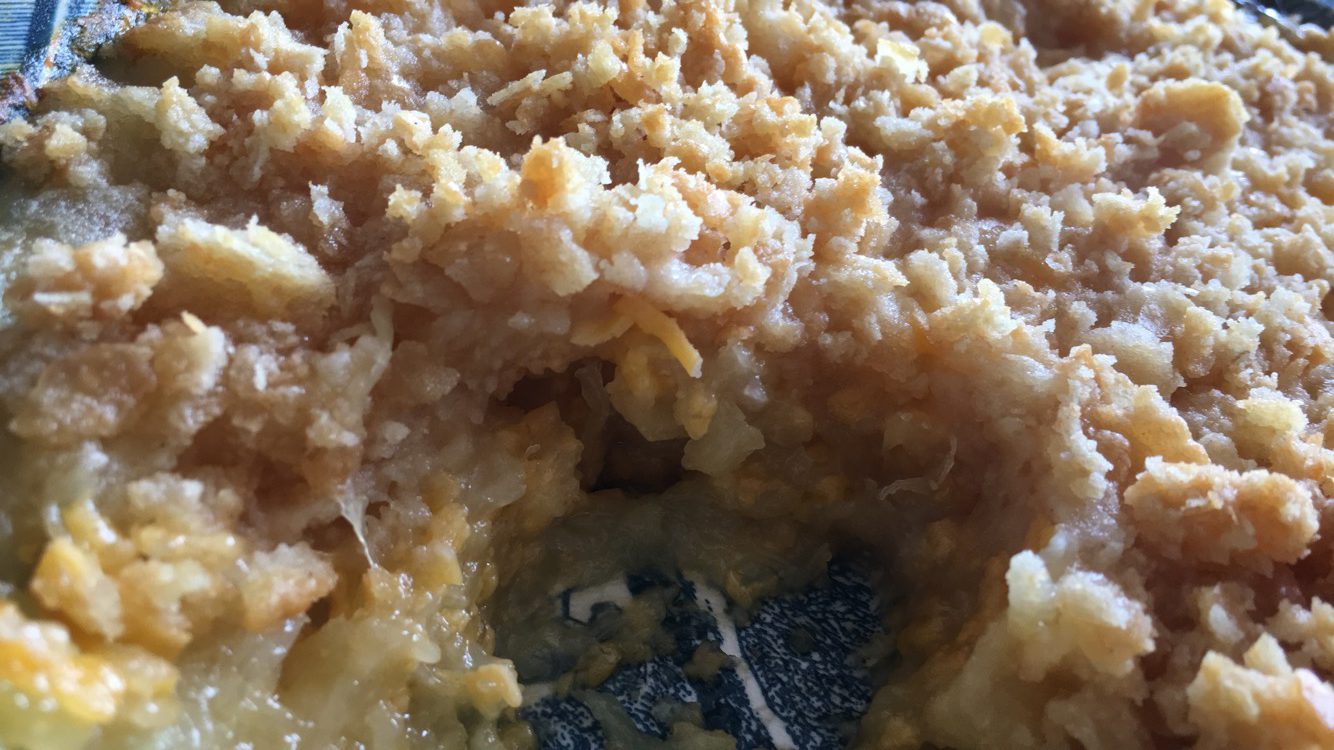
Sweet Potato pie has always intrigued me. As in, how is it different than pumpkin or squash pie (I never really got the difference between squash and pumpkin). And what does a praline topping really mean? When I make a sweet potato casserole it is the Ruth Chris recipe- with a pecan streusel topping…but baby marshmallows? This was new to me, but I will not shy away from a dessert with a praline topping.

I don’t have the benefit of southern relatives to share this specialty with me. I wish I did. I’m still trying to work my way into my best friend’s fiance’s family from the south. I need to learn everything they want to teach me. (Because, when you visit family up north you want to spend your whole time teaching a stranger all the family cooking secrets…but I digress).

I chose the trusty recipe from Joanna Gaines and Magnolia because they are from Texas, and if she says this is what she makes for her family, it is good enough for me.

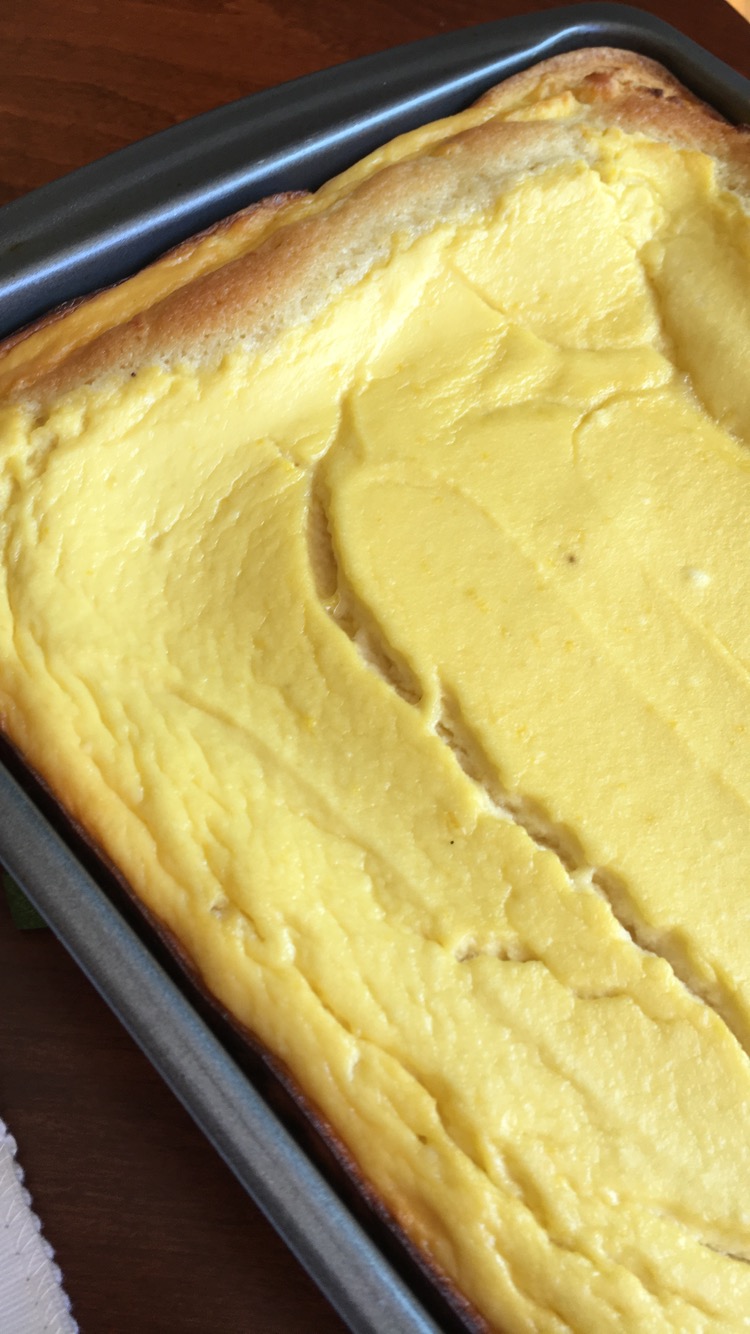
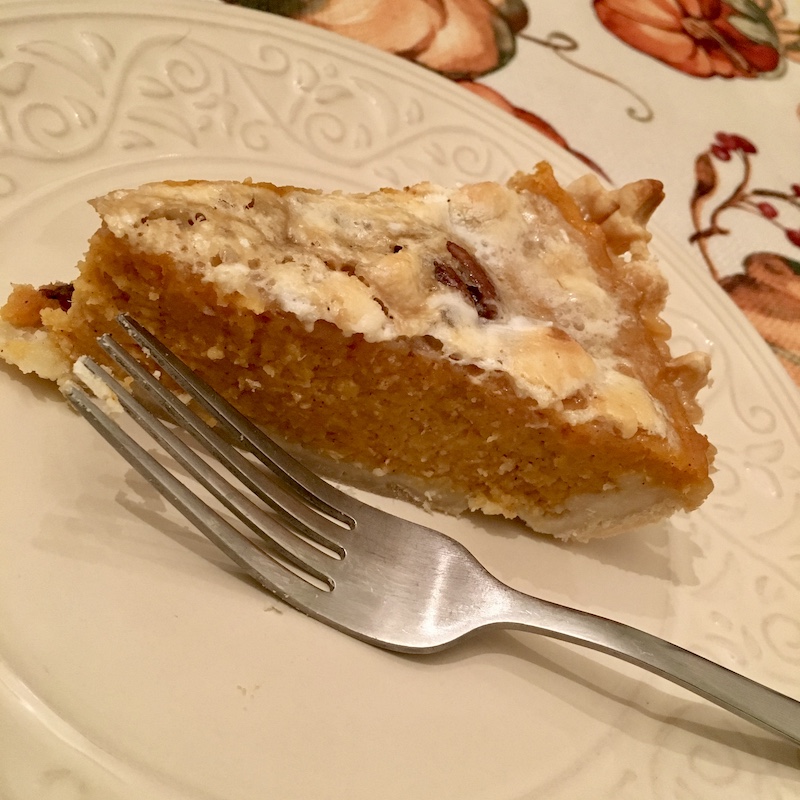
This recipe requires pre-blind baking the crust, making a sweet potato filling (not unlike pumpkin pie), and baking. Then topping with a mixture of butter and brown sugar and marshmallows. Had I stopped there, this pie would be amazing. However, I put it back in the oven and toast/melt the topping all together. It is rich and decadent. For me, maybe not a pretty pie before you cut into it…but it’s delicious.

Here’s my take: Sweet potato filling is similar to pumpkin and yet it isn’t. The flavor is bright, there is a nice mix of sweet but not too sweet (which is hard to believe considering there is a gooey marshmallow topping), and I like it in the wildcard pie position at my table. It incorporates a typical Thanksgiving menu item in a new way. I would maybe, moving forward, make some sort of marshmallow meringue and use that as a topping…making the topping lighter and prettier…but I’m saving that for next year’s wild card pie. I made a note in the folder on the list. 🙂

The recipe is simple and precise, and I did not change one word. It is a Magnolia recipe as printed.

In life, I wish for you a dessert table and life table filled with the basics and the spontanteous choices. The ones we know we need and the ones we want to try. Like I mentioned earlier…Life is short. Have a slice of pie for breakfast.

Sending love and light to you. I hope you enjoy this recipe, and as always, thank you for coming to the table.

Love,

Chrissy

Print

Praline Sweet Potato Pie

Print Recipe

This recipe is originally from the Magnolia Journal. A single crust sweet potato pie with a marshmallow brown sugar and pecan topping. This pie was a welcome addition to our Thanksgiving table, and will be made again!

  • Author: chrissy@mythankfultable.com

Ingredients

Scale
  • Pastry for a single-crust pie
  • 1 2/3 Cup Cooked, mashed Sweet Potatoes or one 17.2 ounce can of Whole Sweet Potatoes, drained and mashed
  • 1/3 Cup Granulated Sugar
  • 1/4 Cup Pure Maple Syrup
  • 1 Teaspoon finely chopped Crystallized Ginger or 1/2 Teaspoon Ground Ginger
  • 1/2 Teaspoon Ground Cinnamon
  • 1/2 Teaspoon freshly grated Nutmeg or 1/4 Teaspoon Ground Nutmeg
  • 1/4 Teaspoon Allspice
  • 1/8 Teaspoon Salt
  • 3 Eggs, slightly beaten
  • 1 Cup Buttermilk or Sour Milk

Praline Topping

  • 2 Tablespoons Butter
  • @ Tablespoons Packed Brown Sugar
  • 2 Tablespoons Pure Maple Syrup
  • 1 Tablespoon Milk
  • 1/2 Cup Chopped Pecans
  • 1 Cup tiny Marshmallows

Instructions

  1. Preheat oven to 450* Prepare pastry for single crust pie.
  2. Place Pie Crust into pie plate and prick bottom of pie crust with a fork.  Line pastry with a double layer of foil and bake for 8 minutes covered. Remove foil and bake for an additional 6-8 minutes or until golden. (You can use an alternate blind baking option that works for you)
  3. Cool on wire rack.
  4. Reduce oven to 375*
  5. For the filling, stir in mashed sweet potatoes, sugar, maple syrup, ginger, cinnamon, nutmeg, allspice, and salt. 
  6. Add eggs, beat lightly with a fork until just combined. 
  7. Gently stir in buttermilk/sour milk until thoroughly combined.
  8. Place pastry shell on a foil lined baking sheet. 
  9. Carefully fill pie shell, and bake in the oven for 30 minutes.
  10. In a small saucepan combine butter, maple syrup, brown sugar, and the milk. Cook until the mixture comes to a boil.
  11. With pie on oven rack, carefully sprinkle pecans and mini marshmallows over the surface of the pie. 
  12. Carefully pour hot brown sugar mixture over top.
  13. Bake 15-20 minutes or more or until center of the pie appears to be set when jiggled. 
  14. Cool on a wire rack at least 1 hour. 
  15. Cover and chill two hours before serving.

Did you make this recipe?

Share a photo and tag us — we can’t wait to see what you’ve made!

Posted in: Dessert, My Story Tagged: dessert, Gaines, Ginger, Magnolia, Magnolia Table, maple syrup, marshmallows, pecan, pie, praline, sweets, thanksgiving

Italian Ricotta Cake

March 13, 2022 by chrissy@mythankfultable.com
Italian Ricotta Cake

Spring is days away, and yet today has been a cluster of snow and sleet. The bulbs are peeking out through the soil, and my favorite crocus at my Mom’s house has bloomed as a sign that yes, life is returning to New England. I am already pulling Easter recipes. I don’t even know the plan for that holiday except, I will be cooking for however many/whenever. It’s enough to sift and sort through the recipes for ideas at this point. Hence, Ricotta Cake!

I need to preface this recipe with a few thoughts. Like the fact that if you are Italian, my way of saying ingredients such as prosciutto, marscarpone, and ricotta would make you cringe. Think soft “a” sounds, and pronouncing all of the syllables. I know the real deal people say “Ricot” with a strong abrupt tone and such…but I am one of those people who say it wrong and know I am not bold enough to say it right. I own it. I say ri-cot-ta. (It sounds as nasally as it reads in real life too).

I will say this. My childhood memories in an Italian family include making tortellini from scratch and a huge table covered with a white bedsheet that became covered with beautiful little belly button pasta as the family worked together to roll, stuff, cut, and pinch. Tortellini soup was a staple, as were many Italian traditions. I have yet to travel abroad, but one day the dream is to visit Italy and absorb every beautiful thing.

Growing up, we had Sunday dinners, and Easter Bread with the egg baked in the middle. (In our family we called this Angootie…I have researched this bread and have yet to find this name or this recipe-although I have found many with other names and ingredients). While I may say ricotta wrong, I do have enough of the Italian memories in my past to know that ricotta it is amazing and to never, ever, use the kind made with skim milk. One of my good friends makes her own. Which, is kinda impressive.

In my growing up though, I had never heard of Ricotta Cake. We were local-bakery-Rum-Cake-people (I am not one of those anymore as a result). In all honesty, one of my children always requests a fudgey chocolate cake from the Italian bakery down the street. But Ricotta Cake? New to me!

A few years ago, a friend at work mentioned she was making it for her family Easter dinner.

Now, I have had ricotta in all sorts of pasta dishes or on pizza in big dollops, on toast both as sweet or savory, (heck I have eaten it from a spoon out of the container-no shame), but never baked in a cake. So try this recipe I did!

This cake is easy to assemble and so amazing. My photos do not do it justice. It is indulgent. It is a butter, sugar, and egg laden recipe. We are not low calorie anything here. It is made in two layers, though it almost resembles a cheesecake-y blondie type texture. It is dense, and creamy, and delicious. I want to liken the top layer to a cheese danish type consistency- but it is so much better.

There is a slight lemon tang to the ricotta layer that balances out the sweetness. My final cake split a little while cooling, even though I ran a knife around the edge as you would a cheesecake before letting it cool. I am not sure if this is typical, and welcome any comments on it! I have made this multiple times and always get the “crackin.”

My theories are in the incorporation stage, or I am over cooking, the heat is too high, or something with the cooling process. (So basically any of the steps I am causing this…) It’s a work in progress. Regardless, this cake is SOOOOO GOOOD. When I served it, I cut it up so the cracks didn’t show…and there were no complaints!

I hope you enjoy this recipe. There is something special about a recipe that is written in a friend or relative’s handwriting, that add to the beauty of the occasion. I always think when we sit down at a table where other people’s recipes are present, it is like they join us for the meal. I am all for a full table, whether in person or in spirit. It is good for the soul.

I am sending you light and love and a big slice of this heavenly dessert.

I hope you enjoy this recipe, and I thank you as always, for coming to the table.

Love,

Chrissy

Print

Italian Ricotta Cake

Print Recipe

This Italian Ricotta Cake recipe is from a friend Suzanne. A sweet, slightly lemony ricotta layer atop a cake base. It is so good. We use this recipe around Easter time, but it is perfect for any time of year.

  • Author: chrissy@mythankfultable.com

Ingredients

Scale

Cake Base:

  • 1 Cup Butter
  • 2 Cups Sugar
  • 4 Eggs
  • 2 2/3 Cups sifted lour
  • 1 1/2 Teaspoon Baking Powder
  • 1 Cup Milk
  • 1 1/2 Teaspoon Vanilla Extract

Ricotta Topping:

  • 2 Lbs Ricotta Cheese (Whole Milk)
  • 4 Eggs
  • 1/2 Cup Sugar
  • 2 Tablespoons Flour
  • 2 Tablespoons Lemon Juice (freshly squeezed if possible)
  • 1 Teaspoon Vanilla Extract

Instructions

  1. Grease a 13x9x2 baking pan and set aside.
  2. Preheat oven to 350

For the bottom layer:

  1. In a separate bowl, sift together dry ingredients (flour and baking powder)
  2. Cream together butter and sugar and blend through, making it light in color.
  3. Add eggs one at a time, and incorporate after each.
  4. Stir in sifted dry ingredients alternately with milk and vanilla.
  5. Pour combined batter into prepared pan

Top Layer:

  1.  Mix ricotta, eggs, sugar, flour, lemon juice and vanilla together. 
  2.  Pour over top of unbaked cake layer.
  3.  Bake in 350* for one hour.
  4. Run a knife dipped in warm water around the edge of the pan to loosen the edges and hopefully avoid cracking. 
  5. Allow cake to cool completely before serving.

4. Allow cake to cool in pan.

  1. Stir in sifted dry ingredients

Did you make this recipe?

Share a photo and tag us — we can’t wait to see what you’ve made!

Posted in: Dessert, My Story Tagged: cake, dessert, Easter, italian, Ricotta

Siblings and Skillet Cookies

February 9, 2021 by chrissy@mythankfultable.com
skillet cookie

True story, my brother is one of the funniest and tender hearted people I know. As kids, we used to fight a lot. We were your average born in the 70’s, four-square and kickball in the neighborhood, come home when the street lights turned on kids. We rode our bikes and got lost in the woods. We fought over who would sit in the front seat, who’s feet got to rest on the bar under the table, and lord only knows what else. But mostly, even when we were arguing, we were laughing.

He was organized, I was not. He was the math brain, I wrote stories. He loved video games, I didn’t. We were different, for sure. But family is like that. I see it in my own two children- their similarities and differences, and the way they laugh and look out for each other amongst those things.

I will say this, when I had my wisdom teeth removed, he held half of the ice pack for me in the car ride home. (Thankful we didn’t have cell phones or for sure he would have recorded me).

When my children lost their father, he jumped on a plane to meet us. For the rest of my life I will remember the sense of relief when he walked into that funeral home. One spot of lightness amidst chaos.

He’s that kind of man.

The gift of being older is instead of seeing your differences, you see the similarities and honor the wonderful things you find in your siblings the longer you share this life’s journey.

Now we exchange parenting stories. We both enjoy leadership roles, and have puppies, and even give each other a heads-up and great podcasts or books we’ve listened to and read. I trust him implicitly with the stuff I share. And we both have a Momma we love and joke with. There are moments when I am down and I will call or FaceTime my brother just because I know I will feel better when I hang up. There is a fellowship in sibling hood that is singular in nature.

So, when on one of the many social media platforms on which we follow each other my brother sends a picture of a larger than life skillet cookie, I ask for the recipe. When he sends it to me from Tiktok, I slowly rewatch so I can catch all of the ingredients because, hey we are in the middle of the longest, loneliest winter in the middle of the pandemic, and sometimes, the concept of a skillet cookie is magical.

Who am I kidding, when is a skillet cookie NOT magical?

This is a one-bowl cookie dough you press into a skillet and bake. It is beautifully crispy on the edges and soft and tender in the middle. I, of course changed stuff up and added extra things because I am me. I did not add walnuts (even though that addition would have been amazing) because my children do not like walnuts in dessert. I did add butterscotch chips because they add a little extra something that was delicious, but not necessary. You can mix up the add ins because there are no rules to this cookie except you eat it warm (it is just as good fully cooled but I recommend heating it up a bit first). I also suggest a good quality ice cream. listen, if we are going there, let’s go big.

I think, if the last year has taught us anything, it is the importance of loved ones and spending time with them. We are fortunate to live in a time where technology makes seeing someone half way across the country in a heartbeat possible. Where we can see the funny faces that go with the sarcasm. Where we can check in to see how someone is and laugh as well. If we can share a recipe along the way, aren’t we blessed?

As always, I hope you enjoy this recipe, and thank you for coming to the table.

Chrissy

(Click on link below for full recipe)

Print

Chocolate Chip Butterscotch Skillet Cookie

Print Recipe

This one bowl mix cookie dough is easy to make and so delicious. You need to get a bowl and scoop of ice cream ready! you are going to want to eat this when it has sightly cooled, but still warm.

  • Author: chrissy@mythankfultable.com

Ingredients

Scale
  • 16 Tablespoons of butter (2 sticks)
  • 1 1/2 Cup packed Brown Sugar
  • 1/4 Cup White Sugar
  • 1 Egg
  • 1 Egg Yolk
  • 1 Tablespoon Vanilla Extract
  • 1 Teaspoon Salt
  • 1 Teaspoon Baking Soda
  • 2 1/4 Cups Flour
  • 2 Cups Chocolate Chips or Chunks
  • Additional add ins:
    • Chopped Walnuts or Pecans
    • White Chocolate Chips
    • Butterscotch Chips (Which I used in my recipe – 1-2 Cups)

Instructions

  1. In the skillet you plan to cook the cookie in, melt two sticks of butter. You can continue to cook until the butter is browned to add another layer of flavor. Set aside to cool.
  2. While butter is cooling add sugars to a bowl, then add melted cool butter to sugars and mix.
  3. Combine with vanilla extract, egg and egg yolk, and dry ingredients.
  4. Stir in chocolate chips, additional add ins (I added 1 -1 1/2 cups of Butterscotch chips)
  5. Preheat oven to 350*
  6. Press combined cookie dough into pan.
  7. Bake in 350* oven for 15 Minutes (If you think it is too doughy you can cook additionally but it should be slightly doughy in the center.

Did you make this recipe?

Share a photo and tag us — we can’t wait to see what you’ve made!

Posted in: Dessert, My Story, Recipes Tagged: Butterscotch chips, Chocolate Chip, Cookie, cookie dough, dessert, Easy, One Bowl, skillet cookie

Angel Food Cake and Macerated Strawberries with Vanilla Bourbon and Brown Sugar

June 23, 2020 by chrissy@mythankfultable.com
Fresh Picked Strawberries

Father’s Day in our house is weird, as the both my Dad and my children’s Dad are no longer with us. We are in this mode for a few years now so the sting isn’t as strong but it is for sure not the big family get together so many people we know celebrate. Add to it Covid and sheltering at home. Add to it the world being angry and unfolding. Things just look really really different this year.

I have been pondering the many father figures throughout my life and those who have impacted my children’s lives. It’s the everyday things that have touched my heart as a mom that I’ve centered on. Like the one time when things were rougher , a family friend ventured way out onto the sand bars with my son to talk and just see how far out they could go. Or the one who volunteered every year to bring my daughter to the Father/Daughter dance. The coaches and teachers who have stepped up to practice or check in, the friends who have given advice or just asked the questions. It is a reminder that in a time of isolation, we are not and have never been alone.

So many reasons to grieve on Father’s Day for some. For those who never knew their Dad, or for those who did and it was a disappointment. For those who were lucky to have a wonderful father taken away too soon, or those who have a Dad with them now but wait while sickness is a slowly fought battle. It’s this life, this beautiful heart breaking life, that makes us or destroys us, and kind of transcends all of the other things. We all have fathers. We all come from some family story.

My Dad was not a berry picker. He was however, a fan of strawberry shortcake. I have never really chosen this as my ideal dessert, it’s a dry biscuit to juicy berry and whipped cream thing. I haven’t loved it. However, my brain got to thinking…could we make this better?

This year I wondered if there would be berry picking, so many things are slowly opening up and when they do…it all looks different. I understand the reasons and I am a mask wearer social distance pro, soap and sanitizer freak. But berry picking, if at all possible, is a go out in the field isolated event. So when I heard my local farm was allowing you pick, I was there. Early. With the rest of the weirdos who like that thing. It was glorious.

I was listening to the people around me. The older women speaking in another language. The two friends talking about their grown children, families with little ones shouting “I found the perfect strawberry!” It was wonderful. Now, I understand that to MANY the idea of kneeling in the hay picking berries in the early morning sun may seem like a horrible task…but for me, I’m pretty happy in that scene. I’ve embraced it. Even flying solo, there is a peaceful rhythm to it all.

A flat of berries and two batches of freezer jam later, I still had berries. So, shortcake it is.

Only…

What if I took an angel food cake recipe and then made the berries darker and boozier?

Angel food cake is easy to make. It’s egg whites whipped until stiff peaks form and then sifted dry ingredients are folded in. The mixer does most of the work. For a Schitt’s Creek fan, the phrase “fold in the cheese” comes to mind. You gently fold in flour and sugar that’s been sifted several times to be light and fluffy and bake.

The berries are simply mixed with brown sugar and bourbon and left alone. When you are ready, slice the cake, spoon the berry mixture on top, and if you like whipped cream, add it. I would like to say I made homemade whipped cream for this. I did not. Hey, I made the cake. I also like mine without. But if I did make the whipped cream, I would be adding maybe a little of the same bourbon to that, because I can.

My Dad loved Angel Food Cake. We haven’t had it since before he passed, and it was a treat to spend Father’s Day thinking of him, using his mixer, and assembling something I think he would have enjoyed.

We don’t get to chose our Dads. If we are lucky, we get a good one. If we aren’t, we get to decide what we do with the hurt that comes along with it. We get to decide how we raise our children, whether it be similarly or vastly different. We get to choose the next part of our story. We get to map out the next steps, even if we don’t see the whole path ahead.

Friends, I wish you light and love today. For those who have been hurting and broken, I feel you. I have been more humbled and fragmented lately than ever, but the best way. The kind where you realize all the stuff you didn’t know and work on doing the right thing. The place where you unearth the junk and figure it out. Which is hard stuff. But, if we are going to be home with our thoughts for say months on end, we might as well do the hard work, right?

So get to cracking those eggs and separating out the whites. Put your mixer on, sift and fold. And then, slice a big piece of heaven and cover it with sweet berries. It’s a beautiful thing. It really is. And if for some reason you decide to eat leftovers fro breakfast, that’s totally okay too. Fruit, egg whites…it’s all good.

I hope you enjoy this recipe, and as always, thank you for coming to the table.

Love, Chrissy

Print

Angel Food Cake and Macerated Strawberries with Vanilla Bourbon and Brown Sugar

Print Recipe

Light, spongy cake covered in a sweet bourbon strawberry sauce.

  • Author: chrissy@mythankfultable.com

Ingredients

Scale

Mascerated Strawberries:

  • 2–3 Cups of sliced fresh Strawberries (more if you want more)
  • 1/3 Cup to 1/2 Cup Brown Sugar (depending on how sweet you want them)
  • 1/4 Cup Vanilla Bourbon (again, you can adjust this to taste)

Angel Food Cake

  • 1 1/2 Cups Egg Whites (approximately 9 Large Eggs)
  • 1 Teaspoon Cream of Tartar
  • 1 Teaspoon Almond Extract (this can also be 1/2 Teaspoon Vanilla, 1/2 Teaspoon Almond, or 1 Teaspoon Vanilla)
  • 1/4 Teaspoon Salt
  • 1 1/4 Cups Flour (I used regular, you can also use Cake Flour – you are sifting either way)
  • 1 3/4 Cups White Granulated Sugar 


Instructions

  1. Prepare a Tube Pan with spray and flour and set aside.
  2. Preheat oven to 325*
  3. Separate Egg Whites and with a mixer, beat until stiff peaks form. 
  4. Add Cream of Tartar, and extract. Beat until combined.
  5. Sift Flour, Sugar, and Salt several times to combine and make lighter. (I did this approximately five times)
  6. Gently fold dry ingredients into egg white mixture. 
  7. Pour cake mixture into tube pan and place in the oven.
  8. Bake for approx. 45 – 50 minutes. 

Berries:

 1. Slice berries and combine with bourbon and brown sugar. (I used a vanilla bourbon but that’s what I had on hand).

2. Mix thoroughly and set aside in the refrigerator to allow flavors to blend until ready to eat. I am a firm believer that you can add more or less of any of these ingredients to taste.

Notes

I have seen recipes where you can place the cake pan in the cold oven and bake at 325* for 60 minutes. 

Did you make this recipe?

Share a photo and tag us — we can’t wait to see what you’ve made!

Posted in: Dessert, My Story, Recipes Tagged: angelfood cake, Brown Sugar, cake, egg whites, shortcake, strawberries, Strawberry, vanilla bourbon

When Life Gives You Stale Bread…Make Bread Pudding ;)

March 27, 2020 by chrissy@mythankfultable.com

I’ll say this…we are using what we have, and I am loving it. My children aren’t big fans of leftovers. Yet, here we are eating them. This momma made a fresh loaf of bread because, bread is life and therapy for me. I took the uneaten bread, cubed it up, along with the rest of the borderline-toss-bread and made this little treasure. You too can make this magic with whatever you have on hand.

Bread pudding is the ultimate comfort food. It is warm, and sweet. It has crunchy parts (my favorite) and the soft parts (my daughter’s favorite). This one is literally a hodgepodge of the stuff I had to use in my pantry. No complaints friends, no complaints.

The basics in the recipe are: old bread, eggs, milk, sugar. I used part 2% milk and part almond milk, because it is what I had. You can alter the recipe to suit your supplies. I also added Vanilla Bourbon because, why not add booze to your bread pudding? I threw in chocolate chunks because I always have some sort of bagged chocolate in my baking stash. I sprinkled straight brown sugar on top, without nuts or anything else mixed in. Think little rivers of melty brown sugar puddled in the mix. But, if you have walnuts or pecans on hand, add away. You can even melt some butter and add that to the topping, if you want. There is nothing spectacular in making bread pudding, and yet…it is glorious.

You could share your stale bread with the critters outside… or you could take a few minutes and make this dessert. Which, by the way, could also be considered a breakfast of sorts…think French toast casserole.

Cube up your older bread and leave to get stale overnight. Butter a casserole pan of choice. Mix together eggs, milk, bourbon, vanilla extract, sugar. Add your goodies, chocolate chunks, pecans, raisins (never in my world but you do you), what have you. Sprinkle a topping on top if you want. Then bake. It is that simple.

I find that depending on the size dish you use to bake, you may have to cook a little longer. I do not like the idea of raw egg mix hanging out in the middle of my bread pudding. I bake it for additional 5-7 minute increments based on how it looks. It should not be runny, it should not look done. The edges should be golden and it will smell like deliciousness.

I will say that in this time of being home the salty has called out to me, the sweet has not. I also just haven’t wanted to bake. One, I am taking this meal-by-meal. Two, I can’t have an abundance of sweets in this house to be divided by three people, two of whom are new to leftovers. That said, when I did pull this out of the oven the kids emerged from their spaces and we all had a dish, warm from the oven. It was lovely.

Right now life is imperfect and different. We are making some things up as we go. And there are soft bits and crunchy bits. We mix and match and do the best we can. So hey, why not give that crusty bread a second chance to be something warm and delicious? You won’t regret it. I promise.

I hope you enjoy this recipe, and as always…thank you for coming to the table.

Love, Chrissy

Click below for a printable recipe.

Print

When Life Gives You Stale Bread…Make Bread Pudding 😉

Print Recipe

This is a throw together, left over, waste-not-want-not dessert that is making the best of this time of COVID-19. There is no wrong path here…

  • Author: chrissy@mythankfultable.com

Ingredients

Scale
  • 5 Large Beaten Eggs
  • 1 Cup White Sugar
  • 1 Cup Brown Sugar
  • 1 Cup Milk
  • 1 Cup Almond Milk
  • 3 Cups Cubed Stale Bread
  • 1 Bag of Chocolate Chunks/Chips (or whatever you want to throw in)
  • Butter to coat inside of casserole paper
  • Additional Brown sugar to top

Instructions

  1. Cube bread and leave out to get stale overnight.
  2. Preheat oven to 350* and lightly butter a casserole dish (I used an oval Corelle ware white casserole, you can use anything up to a 13×9″ baking pan).
  3. Mix together eggs, milk and vanilla in a bowl, incorporate sugars and mix thoroughly.
  4. Pour egg mixture over bread mixture and combine. Let sit for 10 minutes to soak in.
  5. Add chocolate chunks or other mix ins and put in casserole dish. (I actually poured the egg mixture over the bread in the casserole dish and let it sit…whatever is easier for you).
  6. Sprinkle additional brown sugar over the top of the saturated bread.
  7. Bake for 45 minutes minimally- check and continue to bake until it is set.

Did you make this recipe?

Share a photo and tag us — we can’t wait to see what you’ve made!

Posted in: bread, breakfast, Dessert, My Story, Recipes Tagged: almond milk, Bourbon, Bread, bread pudding, chocolate, chunk, eggs, milk

Sunday Dinners and Irish Apple Cake

March 24, 2020 by chrissy@mythankfultable.com
Irish Apple Cake

Sunday dinners are still a thing. Well, at the moment they are a smaller thing, but typically we eat together on Sunday. With work schedules, school schedules, and life in general, we try to all eat together before the week kicks off again. If I am lucky, I don’t have to cook (Sunday I meal prep for the week so the idea of creating something specific for dinner does not bode well). Even if I do, sitting together with my family and puppy at my feet, that’s the norm. I look forward to it. It’s the little things.

My heart is always thankful for the family that gathers together, but once in a while we get to eat with our chosen family, and that is a special treat. It starts with a group text, evolves to a Facebook event with a sign up sheet, and ends with a driveway full of cars and me having someone back my car out when I leave because I am afraid of hitting someone’s truck. True story. There are packaged up leftovers, drinks and laughter. You can move from one room to another and there is always someone to talk to. Those are the extra special Sunday dinners.

This cake made an appearance at last year’s Saint Patrick’s Day Dinner. When the menu included items such as corned beef and cabbage, shepherd’s pie, bangers and mash, and the like…I was on the hunt for a more traditional dessert. We did have a selection of bailey’s cupcakes and trifle, but for some reason, this simple apple cake called out to me.

Flash forward to now. Here we are at the onset of an “essential trips only” stay in place advisory. I find myself asking if I really need anything…or can we make do? Do we risk exposure to this virus or worse, endangering others if we don’t need to? No. Our family is staying put.

That said, I don’t want to waste one thing. I usually have a large bowl of fruit in the middle of the table and I am finding myself with some apples I need to turn into something and quickly. Enter this recipe.

This simple apple cake is layers of dough and prepared cinnamon sugar apples. It is easy to prepare, and if you make it in a spring form pan, looks really pretty when plated. A quick note about making the cake part, if you grate the butter ahead of time and stick it back in the refrigerator to chill, when you cut in the butter to the dry ingredients, it goes really quickly.

While the dough is light and slightly sweet, this dessert isn’t overly so. The apples retain their texture and so there is a nice tooth to this recipe. In a world of crazy sweets, this cake brings a change to the table. You also don’t feel overly guilty having a slice because hey, its mostly apples.

I don’t know when the next big Sunday dinner will be. I know I will be thankful for the invite. I know there will be laughter and friendship. I know we will be changed by what we are living now. I also know that the hearts of those people were already precious and tethered before something like this came into our lives. Because, those are the types of people I am lucky enough to have in my life. I may swim in my own lane, but I know who is with me in the pool. And while I don’t get to go to every thing, they can have my toilet paper if they find themselves without.

To the next family dinner, when we are hearty and hale, and together again. Sending you love friends.

I hope you enjoy this recipe, and thank you for coming to the table.

Print

Irish Apple Cake

Irish Apple Cake
Print Recipe

This lightly sweet apple cake combines spicy apple chunks between two doughy layers, sprinkled with confectioner’s sugar. It can be served with a caramel or custard sauce, but it is delicious on its own. Adapted recipe from Irish Traditional Cooking.

  • Author: chrissy@mythankfultable.com

Ingredients

Scale
  • 3 Granny Smith Apples, peeled and chopped
  • 2 Cups All Purpose Flour
  • 2/3 Cup Sugar
  • 8 Tablespoons Butter, Chilled and Cut/Grated
  • 1 Egg
  • ½ Cup Milk
  • 2 Teaspoons Sugar
  • 1 Teaspoon Cinnamon

Instructions

  1. Peel and chop apples into chunks. You could do slices if you prefer. 
  2. Toss apples with cinnamon and sugar to coat. Set aside.
  3. Preheat oven to 350* and spray springform pan or cake pan with cooking spray.
  4. In a bowl, combine flour, baking powder, and sugar. 
  5. Cut in butter using a pastry blender or two knives. until pieces are no larger than pea sized.
  6. In a separate bowl, mix egg and milk together.
  7. Pour wet ingredients into dry ingredients.
  8. Mix until just combined.
  9. Pat one half of mixture into prepared baking dish.
  10. Spread apple cinnamon sugar mixture over the dough.
  11. Cover apples with remaining dough. It is ok if this is imperfect looking.
  12. Bake for 40 minutes. Cake will be lightly brown on the top.
  13. Remove and let cool.
  14. Right before serving, dust with confectioner’s sugar. 

Did you make this recipe?

Share a photo and tag us — we can’t wait to see what you’ve made!

Posted in: bread, Dessert, Fruit, My Story Tagged: Apple, cake, Cinnamon, dessert, Holiday, Irish, powdered sugar

Double Chocolate Peppermint Cookies

February 12, 2020 by chrissy@mythankfultable.com

The season for peppermint crunchy topped chocolate cookies may have passed…no wait, it hasn’t.

While traditionally a this is considered a Christmas peppermint cookie, I dare to say these little darlings can still find a place in February. The smart marketing people of the world determined that pre crushed peppermint candies make this possible. Starlight mints (I think that’s what they used to be called) are available year round as well, so if the combination of chocolate and peppermint makes your heart flutter, this cookie is for you.

There is something to be said about the way mint complements the dark chocolate, red and white are for sure in with Valentine’s theme, and no one will say no to cookies. Unless your sweetheart is one of those not into sweets people. I know they are out there.

My return to writing the blog has been slow, and I am going to ease myself back in, but this recipe was too nice to wait for my thoughts to get lofty to blog about. I switched up Broma Bakery’s recipe to include dark chocolate chips instead of white, mine are drizzled instead of dipped, but the essence of the recipe is the same and they get all of the credit. I also bake my cookies at 325* because that is what I do. I like a cookie with no brown on the bottom, a soft chewy cookie that is just ever so slightly under-baked and left to continue cooking on the cookie sheet tends to make perfection for my taste. If you are a 350* baker, watch the cookies so they don’t overcook while baking!

Hopefully this new year has brought all good things, and this cookie recipe will find you with happy hearts.

I hope you enjoy it, and as always, thank you for coming to the table!

Chrissy

Print

Double Chocolate Peppermint Cookies

Print Recipe

This dark chocolate peppermint cookie is drizzled with white chocolate and crushed peppermints…perfect for the holidays and for your favorite minty valentine. Original recipe found on Broma Bakery’s website. Their cookies use white chocolate chips and are dipped in additional white chocolate. I used dark chocolate chips and drizzle…but the options are limitless. 

  • Author: chrissy@mythankfultable.com

Ingredients

Scale
  • 1/2 Cup Butter at room temperature
  • 1 Cup packed Dark Brown Sugar
  • 1 Large Egg at room temperature
  • 3/4 Cup Flour
  • 1/3 Cup Dark Cocoa Powder
  • 1/2 Teaspoon Salt
  • 1/2 Teaspoon Baking Soda
  • 1 Teaspoon Peppermint Extract
  • 1 Bag Dark Chocolate Chips
  • 7 ounces White Chocolate
  • 1 Teaspoon Coconut oil or Crisco
  • 1/2 Cup Crushed Peppermint Candies

Instructions

  1. In a mixer with a paddle attachment, cream together butter and sugar until light and fluffy.
  2. Add in Egg and Peppermint Extract.
  3. Sift together dry ingredients in a separate bowl.
  4. Add dry ingredients carefully into butter mixture, until combined. 
  5. Fold in Chocolate Chips.
  6. Scoop dough into balls and chill dough (I do this with almost every cookie dough I make- it isn’t necessary but I like the way the cookies turn out after the dough has been chilled).
  7. Preheat oven to 325*, prepare cookie sheet with parchment or silicone mats.
  8. Place chilled dough balls on the cookie sheet and bake for approximately 10-12 minutes.
  9. Allow cookies to come to room temperature.
  10. Combine white chocolate and crisco or coconut oil over a double boiler or microwave and stir gently until melted.
  11. Drizzle white chocolate over cookies and sprinkle with crushed peppermint candies while chocolate is still soft.

Did you make this recipe?

Share a photo and tag us — we can’t wait to see what you’ve made!

Posted in: Cookies, My Story, Recipes Tagged: chocolate, Cookies, Dark Chocolate, Peppermint, peppermint cookies, White Chocolate

And Then There Were Fluffernutter Bars…

May 27, 2019 by chrissy@mythankfultable.com

I’m going to make this post quick. It’s Memorial Day, most of you are heading somewhere to eat at someone’s cookout if you didn’t already, and time’s a wasting. Get to baking.

The Fluffernutter is the quintessential New England sandwich, made with peanut butter, and Fluff (not marshmallow creme, and yes, there is a difference). I am not saying it is the most nutritious food item to put in a lunchbox for your kid, but I do know anyone raised in Massachusetts knows what it is…and likes it. If you were lucky you got it on soft white bread, and maybe even got the crusts cut off.

Tuck those Peanut
Tuck those Peanut Butter Cups into their bed of Cookie Dough

Fast forward to now: My bread is typically sprouted grain. My peanut butter is natural. Oh, but there is a brand new container of Fluff in the cabinet at all times. For you know, life emergencies. Some days a woman needs to stand in her kitchen with a spoonful of fluff and giver her dog the stink eye because she is not sharing.

To the recipe: the original recipe is from soccer mom.com. When a friend sends you a Pinterest posted recipe and you have a cookout to be the next day, you try it. I am glad I did. I am also glad I fiddled with the proportions and made MORE. I am also glad I left them at the campsite where our cookout was because they are like a siren song to me. All good.

This recipe is a basic peanut butter dough with chocolate chunks, divided into two parts. Press one part on the bottom of a pan and add FULL SIZED Peanut butter cups. Add Fluff! Add more dough! Bake and leave to cool. Sound simple? It is. Do people need to know this deliciousness wasn’t an all day process? No. You can keep that little secret to yourself.

If you were one of us who embraced sugary marshmallow and peanut butter, loves peanut butter cups, or just needs to feel like a gooey dessert is essential for a cookout, you have met your match. I hope you make these. Today.

I hope you enjoy this recipe, and as always, thank you for coming to the table!

Chrissy

Click below for a printable recipe

Print

Fluffer Nutter Bars

Fluffernutter Bars
Print Recipe

This delicious creation of peanut butter, peanut butter cups, and fluff originally was posted on thesoccermomblog.com. I changed the proportions to make a larger batch. You will not be disapointed!

  • Author: chrissy@mythankfultable.com

Ingredients

Scale
  • 1 Cup Butter
  • 2/3 Cup Plain Peanut Butter (I used Creamy Jif)
  • 12 Unwrapped FULL SIZED Peanut Butter Cups
  • 2 Cups packed Dark Brown Sugar
  • 2 large Eggs
  • 2 generous teaspoons Vanilla Extract
  • 2 1/2 Cups All Purpose Flour
  • 1 bag Nestle Chocolate Chunks
  • 1/2 Container Marshmallow Fluff

Instructions

  1. Preheat oven to 350* and prepare a 9×13″ baking pan by lining it with parchment paper.
  2. in a mixer with a paddle attachment, cream butter and sugar until light and fluffy.
  3. Add peanut butter and combine. Add eggs and vanilla and continue to combine until uniform.
  4. Add flour until mixed in, fold in chocolate chunks (I just add mine while the mixer is running on low)
  5. Divide dough into 2/3 and 1/3.
  6. Press 2/3 of dough into prepared pan. Distribute Peanut butter cups evenly into dough.
  7. Cover peanut butter cups with Marshmallow Fluff, smooth to create an even layer.
  8. Break apart remaining dough and cover the mixture. Press down.
  9. Bake in 350* oven for 25-30 minutes until golden brown, do not overcook.
  10. Leave bars in pan until cool (they will continue to cook in the pan and you want this!)
  11. Pull bars out of pan with edges of parchment paper and slice!
  12. These will keep in an airtight container for a few days…but they won’t last that long!

Did you make this recipe?

Share a photo and tag us — we can’t wait to see what you’ve made!

Posted in: Cookies, Dessert, My Story Tagged: bar cookies, Chocolate Chunks, Fluff, fluffernutter bars, marshmallow, Peanut Butter

On Church Ladies and Shirley’s Pineapple Gratin

April 15, 2019 by chrissy@mythankfultable.com
Pineapple Gratin
Pineapple Gratin

Once upon a time, another life ago, I encountered this recipe at a church pot-luck supper. I am not sure how many churches still do this tradition, an event where people sign up and gather together with covered dishes and casseroles…that somehow end up working even though they contain potentially ingredients that may or may not work with the dish it is sitting next to. It’s alway’s somewhat magical, or maybe miraculous loaves and fishes style…there is enough food and enough diversity for all to share and break bread together, figuratively and literally.

This isn’t a post about religion. It is however, a post about family. The family you choose and make your own. I’m drawn to and want to be all about authenticity. Even though I am no longer a member of that church from long ago – there are women in my life today that still own a place in my heart. They are the most authentic, loving individuals. When you meet someone like the lady who shared this recipe with me…it isn’t so much about the side dish as it is about those who’s dish it is.

This recipe is easy and pineapple-y but cheese and crunchy. I know, sounds weird, right? It isn’t.

Think ham dinner with pineapple and Au Gratin potatoes. You put them on your plate and they go. Well, this recipe takes out the potato part. Or those of us who live in New England and eat cheddar cheese on top of apple pie. It works. This recipe is also topped with a crunchy, crumbly, buttery, ritz topping. It is a simple side for an Easter dinner, which, in my world is the only time I bake a big ham.

This recipe basically combines pineapple tidbits, shredded cheddar cheese, crushed cracker topping. SIMPLE. It’s something I throw together in a deep dish pie plate, and adds to round out the sides of the meal. It isn’t too sweet, its a warm fruity option at the table. Truth be told, I make it because it reminds me of sitting along side strong women who lifted me up as a young minister’s wife long ago.

I am so thankful for those women, those pot-luck suppers, and the way my life was made better by sharing meals and recipes. They shaped me to be who I am today.

I hope you enjoy this recipe, and as always, thank you for coming to the table!

Chrissy

Click below for a printable recipe.

Print

Shirley’s Pineapple Gratin

Pineapple Gratin
Print Recipe

This side dish combines sweet pineapple tidbits with melty cheddar cheese and is topped with buttery crunchy Ritz crackers. It is the essential side dish for a ham dinner, and makes for a great potluck addition!

  • Author: chrissy@mythankfultable.com original recipe from Shirley in Clarks Summit, PA

Ingredients

Scale
  • 1 Can Pineapple Tidbits (you can also use crushed pineapple)
  • 1 Cup White Sugar ( I have never tried light or dark brown sugar but I bet it would work well)
  • 3 Tablespoons AP Flour
  • 1 Cup Grated Sharp Cheddar Cheese
  • 1/2 Sleeve Ritz crackers
  • 4 Tablespoons Butter, melted

Instructions

  1. Drain pineapple, reserve juice.
  2. Combine sugar, flour, and pineapple.
  3. Mix in cheddar cheese and incorporate.
  4. Put in a baking dish. (I use a pie plate but it an be made in a bigger dish depending on if you double recipe)
  5. Crush Ritz crackers and sprinkle on top of mixture, and then pour melted butter over the top of the crackers.
  6. Bake at 350* for at least 30 minutes.

Did you make this recipe?

Share a photo and tag us — we can’t wait to see what you’ve made!

Posted in: Fruit, One Pan, Recipes, side dish Tagged: Gratin, Pineapple, Potluck Favorite

Easy Lemon Cream Cheese Bars

April 14, 2019 by chrissy@mythankfultable.com
Lemon Cream Cheese Bars

Lemon, you belong in my life. Easy lemon recipe? Game on. This recipe could pass for either a breakfast treat or a dessert, depending on the time of day you choose to serve it…if that even matters. Basically it is a light, cream cheese batter zingy with lemon zest and juice, with a flaky pre-made crescent dough top and bottom. As in, the hardest part of this recipe is the pat pat pat of stretching out the dough you popped out of a can, and blending the cream cheese part.

While your cream cheese filling is in the mixer, press your crescent roll dough in the bottom of a parchment lined pan (you can skip the parchment but I like to be able to slice/serve and it makes it so much easier).

Smooth the cream cheese mixture over the dough, then cover with another layer of crescent dough.

I wasn’t super careful about the making sure the top was sealed together, because you end up brushing the dough with butter and sprinkling with sugar and additional lemon zest, which…covers the mistakes.

This simple, light, lemony dessert is the perfect addition to any spring table, bringing a sweet, tangy, creamy, pastry combination to your meal.

I hope you enjoy this recipe, and as always, thank you for coming to the table!

Chrissy

Print

Easy Lemon Cream Cheese Bars

Lemon Cream Cheese Bars
Print Recipe

These delicious Lemon Cream Cheese Bars combine the sweet cream cheese lemon layer sandwiched in between crescent dough. Very much like a danish, this easy recipe  is light and tangy and sweet.

  • Author: chrissy@mythankfultable.com

Ingredients

Scale
  • 2 containers of refrigerated Crescent Roll Dough (8 ounces)
  • 2 packages of Cream Cheese (8 ounces)
  • 2 Lemons, Zested and juiced (I used more lemon zest because I like it)
  • 1/2 Cup White Sugar
  • 2 Tablespoons Melted Butter
  • 3 Additional Tablespoons White Sugar

Instructions

  1. Preheat oven to 350*
  2. Line the bottom of a 9×13 baking dish with parchment paper and spray with cooking spray.
  3. Take one container of crescent roll dough and press into pan (try to keep it as one whole piece-rectangle)
  4. Mix cream cheese, sugar, zest, and juice together until smooth and creamy.
  5. Spread cream cheese mixture evenly over the bottom layer of crescent roll.
  6. Unroll the second container of crescent roll dough and carefully stretch over the lemon cream cheese layer.
  7. Brush melted butter on top of crescent dough top.
  8. Mix remaining sugar (3 tablespoons) and additional lemon zest together and sprinkle on top of the butter.
  9. Bake for approximately 30 minutes, until the top is golden brown and the sugar/butter mixture is crackly.
  10. Allow to cool for at least 20 minutes. Chill in the refrigerator until ready to cut into bars.
  11. When cool, use the parchment paper to lift the bars out the pan, and transfer to cutting board.
  12. Cut into squares and serve.

Did you make this recipe?

Share a photo and tag us — we can’t wait to see what you’ve made!

Posted in: Dessert, My Story, Recipes Tagged: breakfast, cream cheese, Danish, dessert, lemon, Lemon Cream Cheese Bar
1 2 3 4 5 … 8 9 10 11 12 Next »

Recipe Search

Recent Posts

  • Fluffernutter Cookies…You Heard Me April 12, 2024
  • On Nests July 30, 2023
  • Lemon Rosemary Shortbread Cookies April 24, 2022
  • Praline Sweet Potato Pie March 22, 2022
  • Italian Ricotta Cake March 13, 2022

Recent Comments

  • Cathy Carroll on To My Daughter On Her 18th Birthday
  • Maureen / Mimi on To My Daughter On Her 18th Birthday
  • Kathy G on To My Daughter On Her 18th Birthday
  • chrissy@mythankfultable.com on Cherry Crescent Moon Cookies and Finding the Joy
  • chrissy@mythankfultable.com on Cherry Crescent Moon Cookies and Finding the Joy

Archives

Categories

  • appetizer
  • bread
  • breakfast
  • Cookies
  • crockpot
  • crockpot
  • Dessert
  • Fruit
  • My Story
  • One Pan
  • Recipes
  • side dish
  • Side Dishes
  • soup
  • Vegan

Copyright © 2025 mythankfultable.com.

Lifestyle WordPress Theme by themehit.com