 My son made it to States. We are newbies to the wrestling world in that, this love started his sophomore year.
Some people on the team have wrestled since kindergarten, some of the kids at this competition come from long lines of wrestlers and dads who coached youth programs.
It is an amazing, taxing, hard to watch (sometimes) sport. It is not for the meek, and they make two minutes seem like two hours. Endurance, stamina, all of that. Even better though, I have seen strong, tough young men help each other up, chat before they take their spots on the mat, and shake hands with opposing coaches, win or lose. It’s pretty spectacular. It is a gift to watch my children as athletes. It is a greater gift to watch talented athletes who are also great human beings.
Back to States. We got to the hotel late, I checked into my room and promptly crashed as all good moms do.
But this morning I woke up to a ray of light in the room darkening curtains, can see the dust motes shimmering, can hear my daughter breathing softly, and so I write. 
The last year of our lives has been difficult. A year ago some pretty ugly things surfaced and not only did I need to face some things as a parent, my children had to face some things that made them grow up quickly.
As a mom, you want the world to be perfect and your children to be healthy and happy. It isn’t an easy task on a regular day, but this year it seemed an overwhelming uphill battle. I am a life-is-blessed-search-for-the-blessing- girl and I am not going to lie, since December it has been a dark place.
On a regular basis when things seem tougher than normal, I kick into what I call “Chrissy Kick Ass Mode” (sorry if I offend but that’s what I call it). Where I buck up and put on my big girl panties and do my job. I’ve still kicked into that mode, but like a battery that is dying, sometimes the turn over is slow and sounds bad too.
 The hard part about grief, and also joy, is when it takes us by surprise.
When your son makes it to States and you go to text someone, and that person isn’t there anymore. Or you realize that this is the first February vacation that doesn’t include a drop off or a pick up, or an argument about going, or any of the hard stuff you are used to. It isn’t liberating like you’d expect. It’s just plain …sad and weird.
But the joy part, the deep love part, the part that makes you see the light in the darkness part, is why we wake up and do our job and make it to States. We do the thing that gets us there. We do. Verb-and-Noun-Do. We search for the light.
Because the light makes it worth it.
I have been told that if you can get through all of the “Firsts” it gets easier. Having lost my own Dad, I can say it gets different, or you get tougher, but easier is a relative term.
Maybe we just get stronger, and the lifting gets lighter as a result. As a mom watching your kids go through the “firsts,” it is so much harder.
Some things, I can not fix. I can make it better, but the fixing is the work; and the work, we have to do ourselves.
I can shine the light. I can hold up the light. I can make the journey brighter. But, they have to find it.
I am not a wrestler, I could never be a wrestler, it is hard work. I am happy to take my place on the treadmill or bike path and WALK. I’m not lazy, but I don’t feel compelled at all to push like my son and his teammates push on the mats.

My Sports Mom Pose
However, I am seeing, I need to push harder, do the work, find the light, in every moment. Be the inner wrestler I need to be, to be the mom I want to be, to be the daughter I want to be, to be the friend I want to be, to be the teacher I want to be, to be the blogger I want to be, to be the Chrissy I want to be. Because, when we push, we make States. Even if we don’t win States, we get there. I want to get there, my “States” in life.
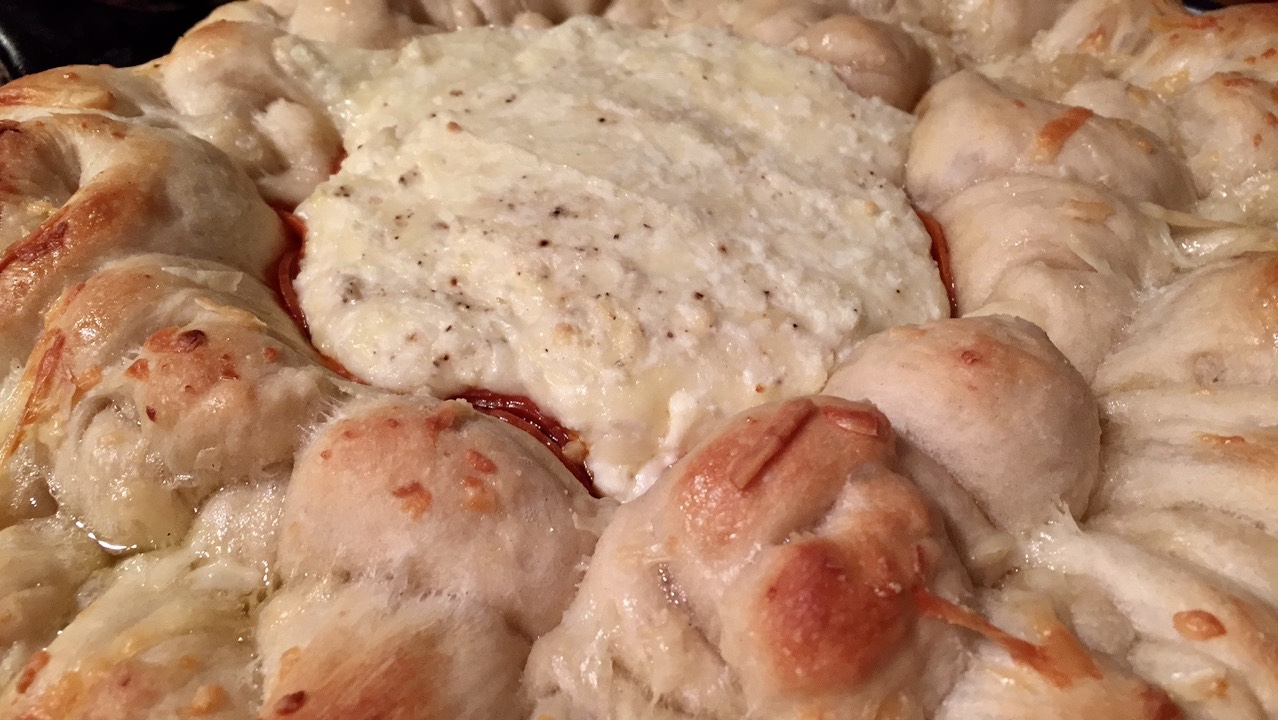
There is no proper way to segue into Skillet Pepperoni Pizza dip. It is just this awesome recipe I made for the Super Bowl. Except, in a way, the Super Bowl of life aligns with this post. It takes a lot of hard work to get there, oh, and a team. So yeah, here we go. We are a team and we work hard. Boom. Now make this dip.

Pizza dip requires purchasing pre-made pizza dough in the deli section of your store. You can make your own, but this is about making your life easier. Buy two balls of dough, this recipe-be-banging.
Tie the dough into knots and line an oiled skillet. You can use a baking pan if you don’t have a skillet and it will still be amazing.
Mix cream cheese, ricotta, mozzarella, parmesan, red pepper flakes, garlic, and make a magical dip.
Line the pan with the knots, line the knots with pepperoni, scoop the dip in the middle. Brush the dough with olive oil and fresh crushed garlic and more cheese if you want. Then stick that gloriousness in the oven and bake until the dough is golden and the cheese is bubbly.
 You can serve this with sauce or without it. It will disappear and you will have no left overs. It is that good.
In life, for me anyway, making the dip and serving the dip is part of the work but also part of the joy. Writing about it is also part of the joy.
I realized today, that a-year-ago-Chrissy would have never taken a chance to start a blog. She would have never thought she could. But she did. See? The Joy part can surprise us too.
I’m not going to lie, the next batch of recipes are not low cal but in the pushing part on my end, they will be getting healthier, because that’s my next step too. Don’t fear, my biscotti love is still going strong. You can pry my biscotti from my clenched up exercising hands.

Pepperoni Pizza Skillet Dip
This could be the heavy hitter for the calories and indulgence scale but for all that is decent and holy you need to make this dip. Because, it is the type of recipe you make and your kids stand around it saying “This is amazing.”
And every momma needs to hear that, especially the momma bears who want their kids to have joy and find the light, every day, too.
Much love readers. You’ve got this day. Find the light.
I hope you enjoy this recipe and as always, thank you for coming to the table.
Chrissy
Print
Pepperoni Skillet Pizza Dip
AMAZING Pepperoni and garlic knots with a bubbly, cheesey dip baked to golden perfection. You will be a highly revered party attender if this is your contribution to the table.
- Author: chrissy@mythankfultable.com
- 2 packages pre-made pizza dough (I purchase mine in the deli section of the grocery store near the pizza shop part)
- 4 Ounces of Cream Cheese (1/2 block)
- 1 Cup Mozzarella Cheese, shredded
- 1 Cup Parmesan Cheese, shredded
- 1 Cup Ricotta
- 1 teaspoon-tablespoon (you control the heat) of red pepper flakes
- 1 Tablespoon crushed Garlic
- 1/2 Cup Butter, melted
- 1 Cup sliced Pepperoni
- Fresh basil, cut into thin ribbons
- Preheat oven to 350*
- Take dough out of package and let sit to rise, then cut into strips, tie off into knots.
- In a pre-oiled skillet or baking pan, line dough knots around the perimeter. Allow to sit somewhere warm while you mix the dip.
- In a bowl, mix cheeses, some of crushed garlic, red pepper flakes, salt and pepper to taste, mix thoroughly. (You should sample it. Just saying).
- Line dough ring of knots with sliced pepperoni to create a pepperoni border/bowl.
- Spoon filling into center of pan.
- Add remaining garlic to melted butter and combine. Brush over dough knots. If you want to add additional shredded cheese on top of garlic knots, do so!
- Bake at 350* for 30 – 35 minutes, until dough is golden and the inner cheese dip is melted and bubbly.
- Sprinkle basil on top of finished dip.
- Serve with marinara sauce if desired
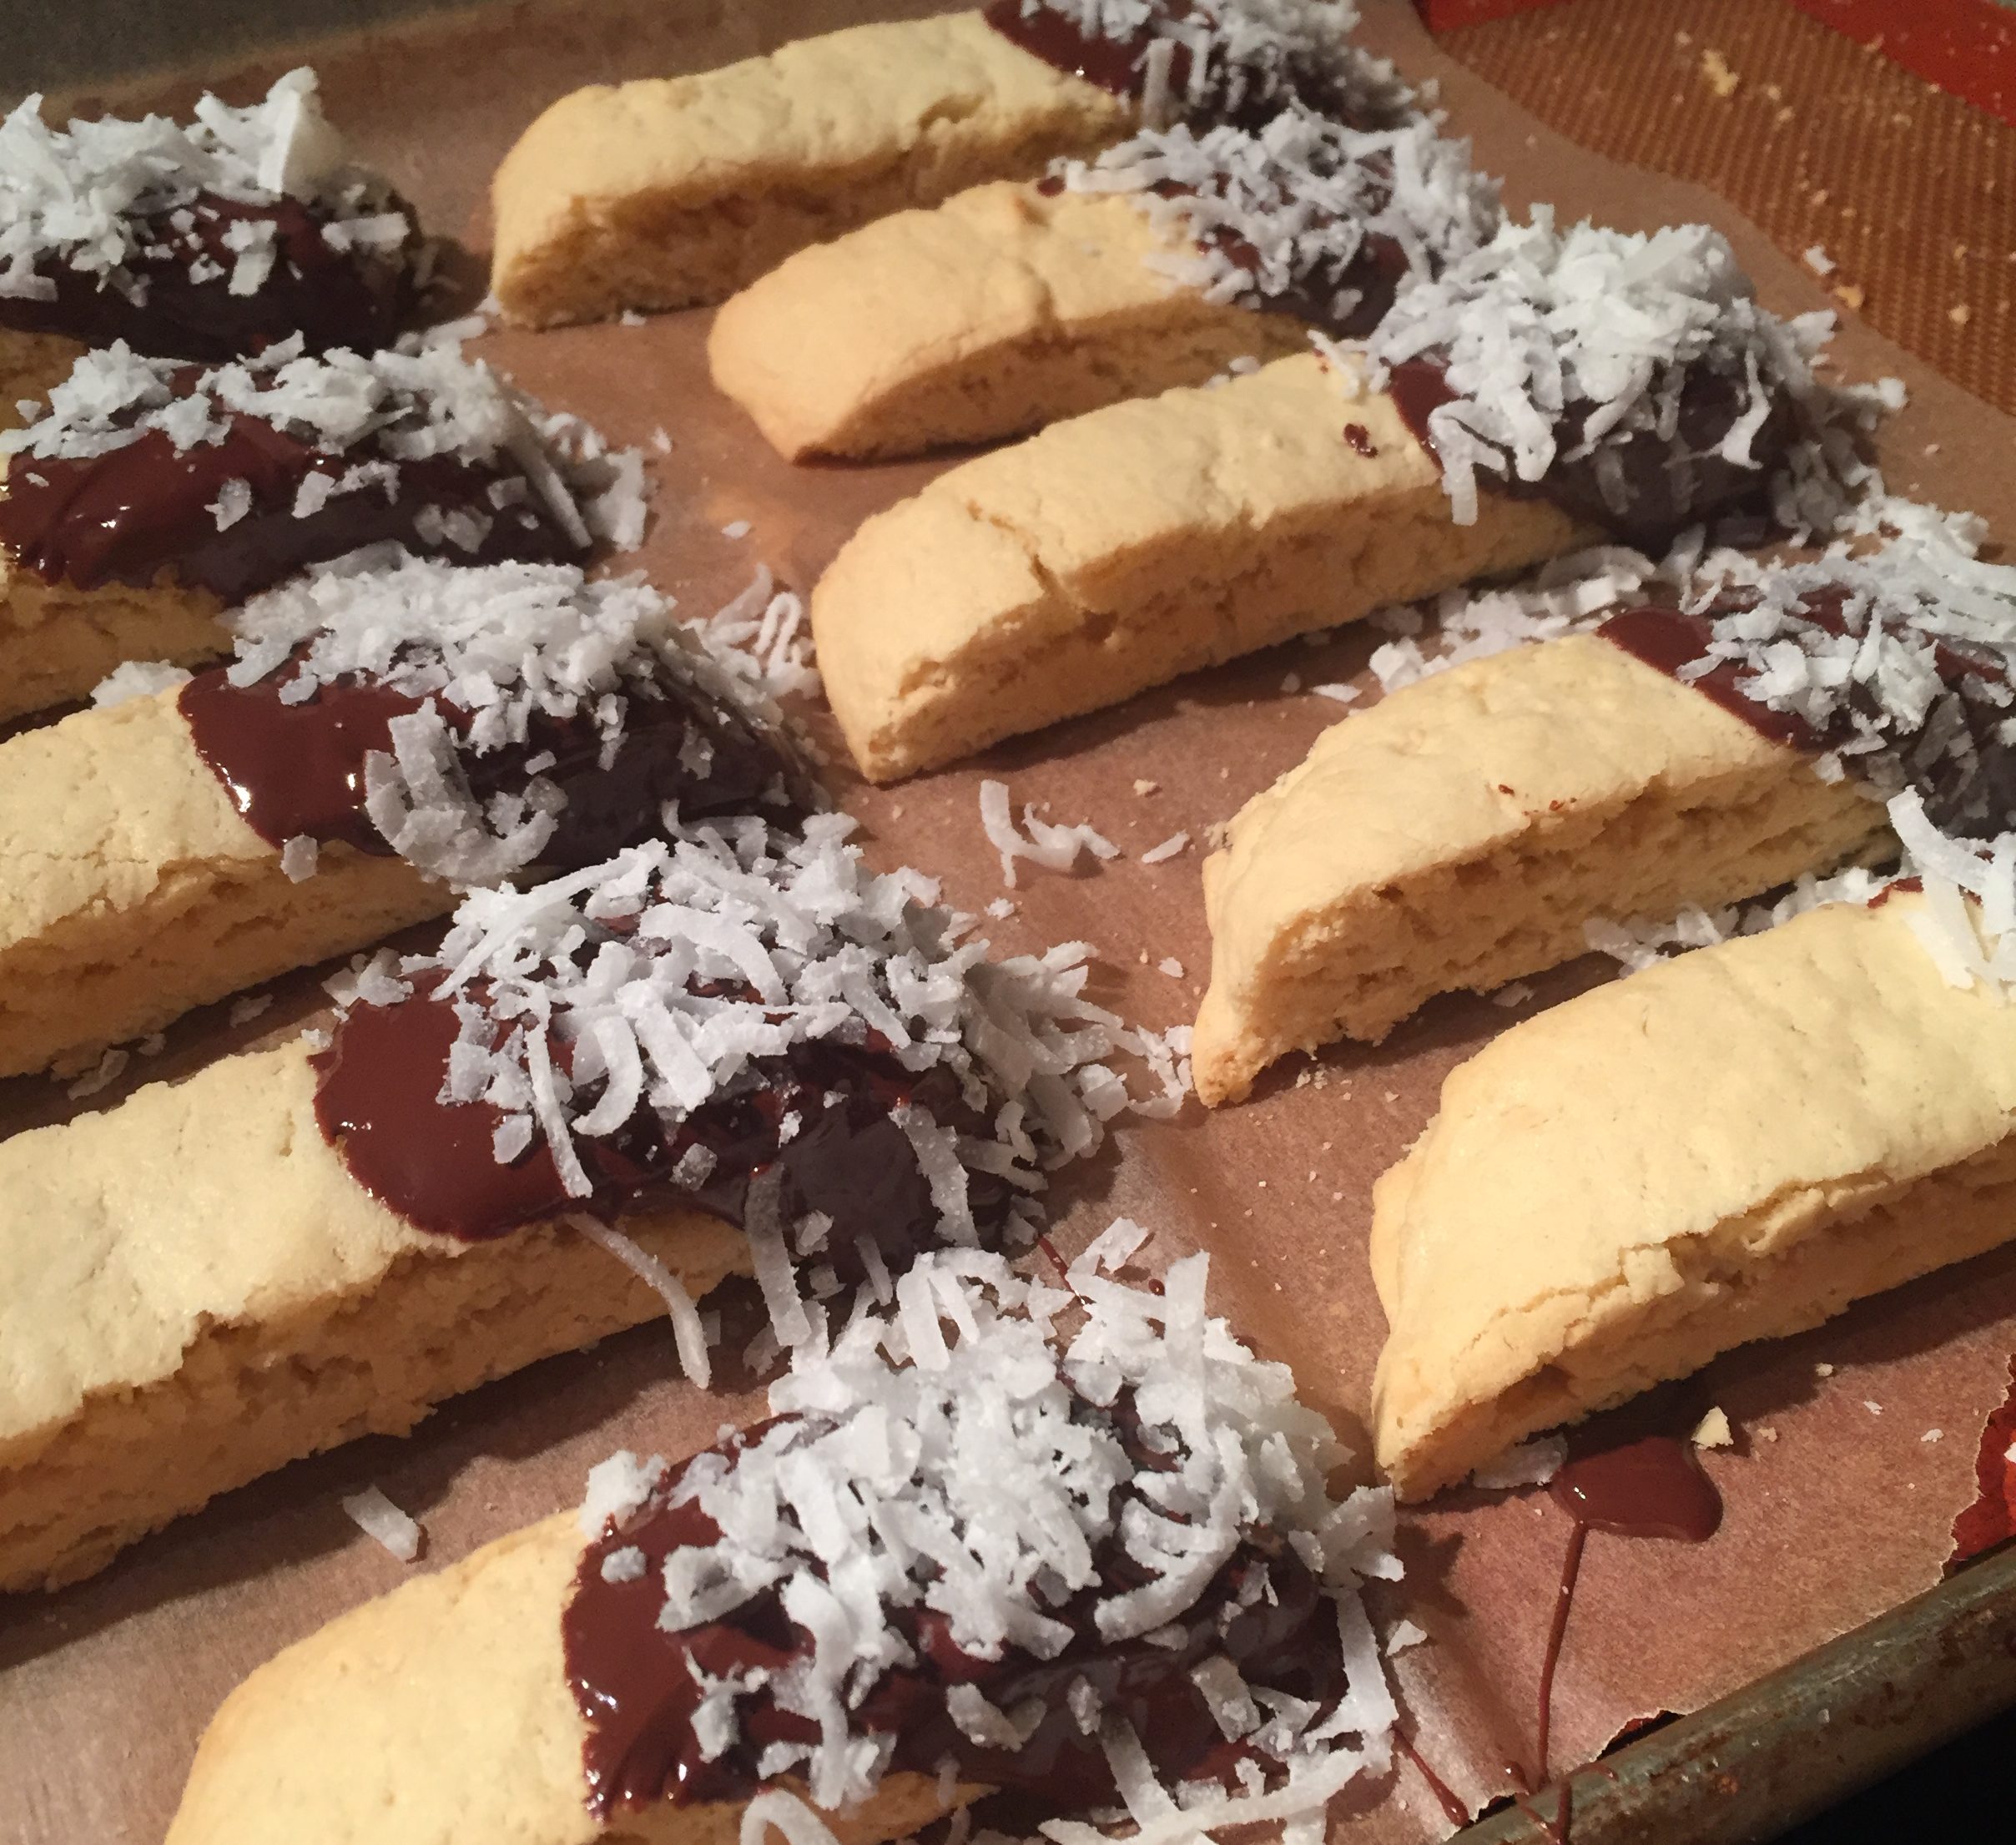
 Coconut has so much potential. Growing up, I remember begging my mom to buy a coconut at the grocery store so we could drill holes in it and drain the water out of it. I remember being thrilled as she hammered a big nail into the coconut and tipped it over a glass.
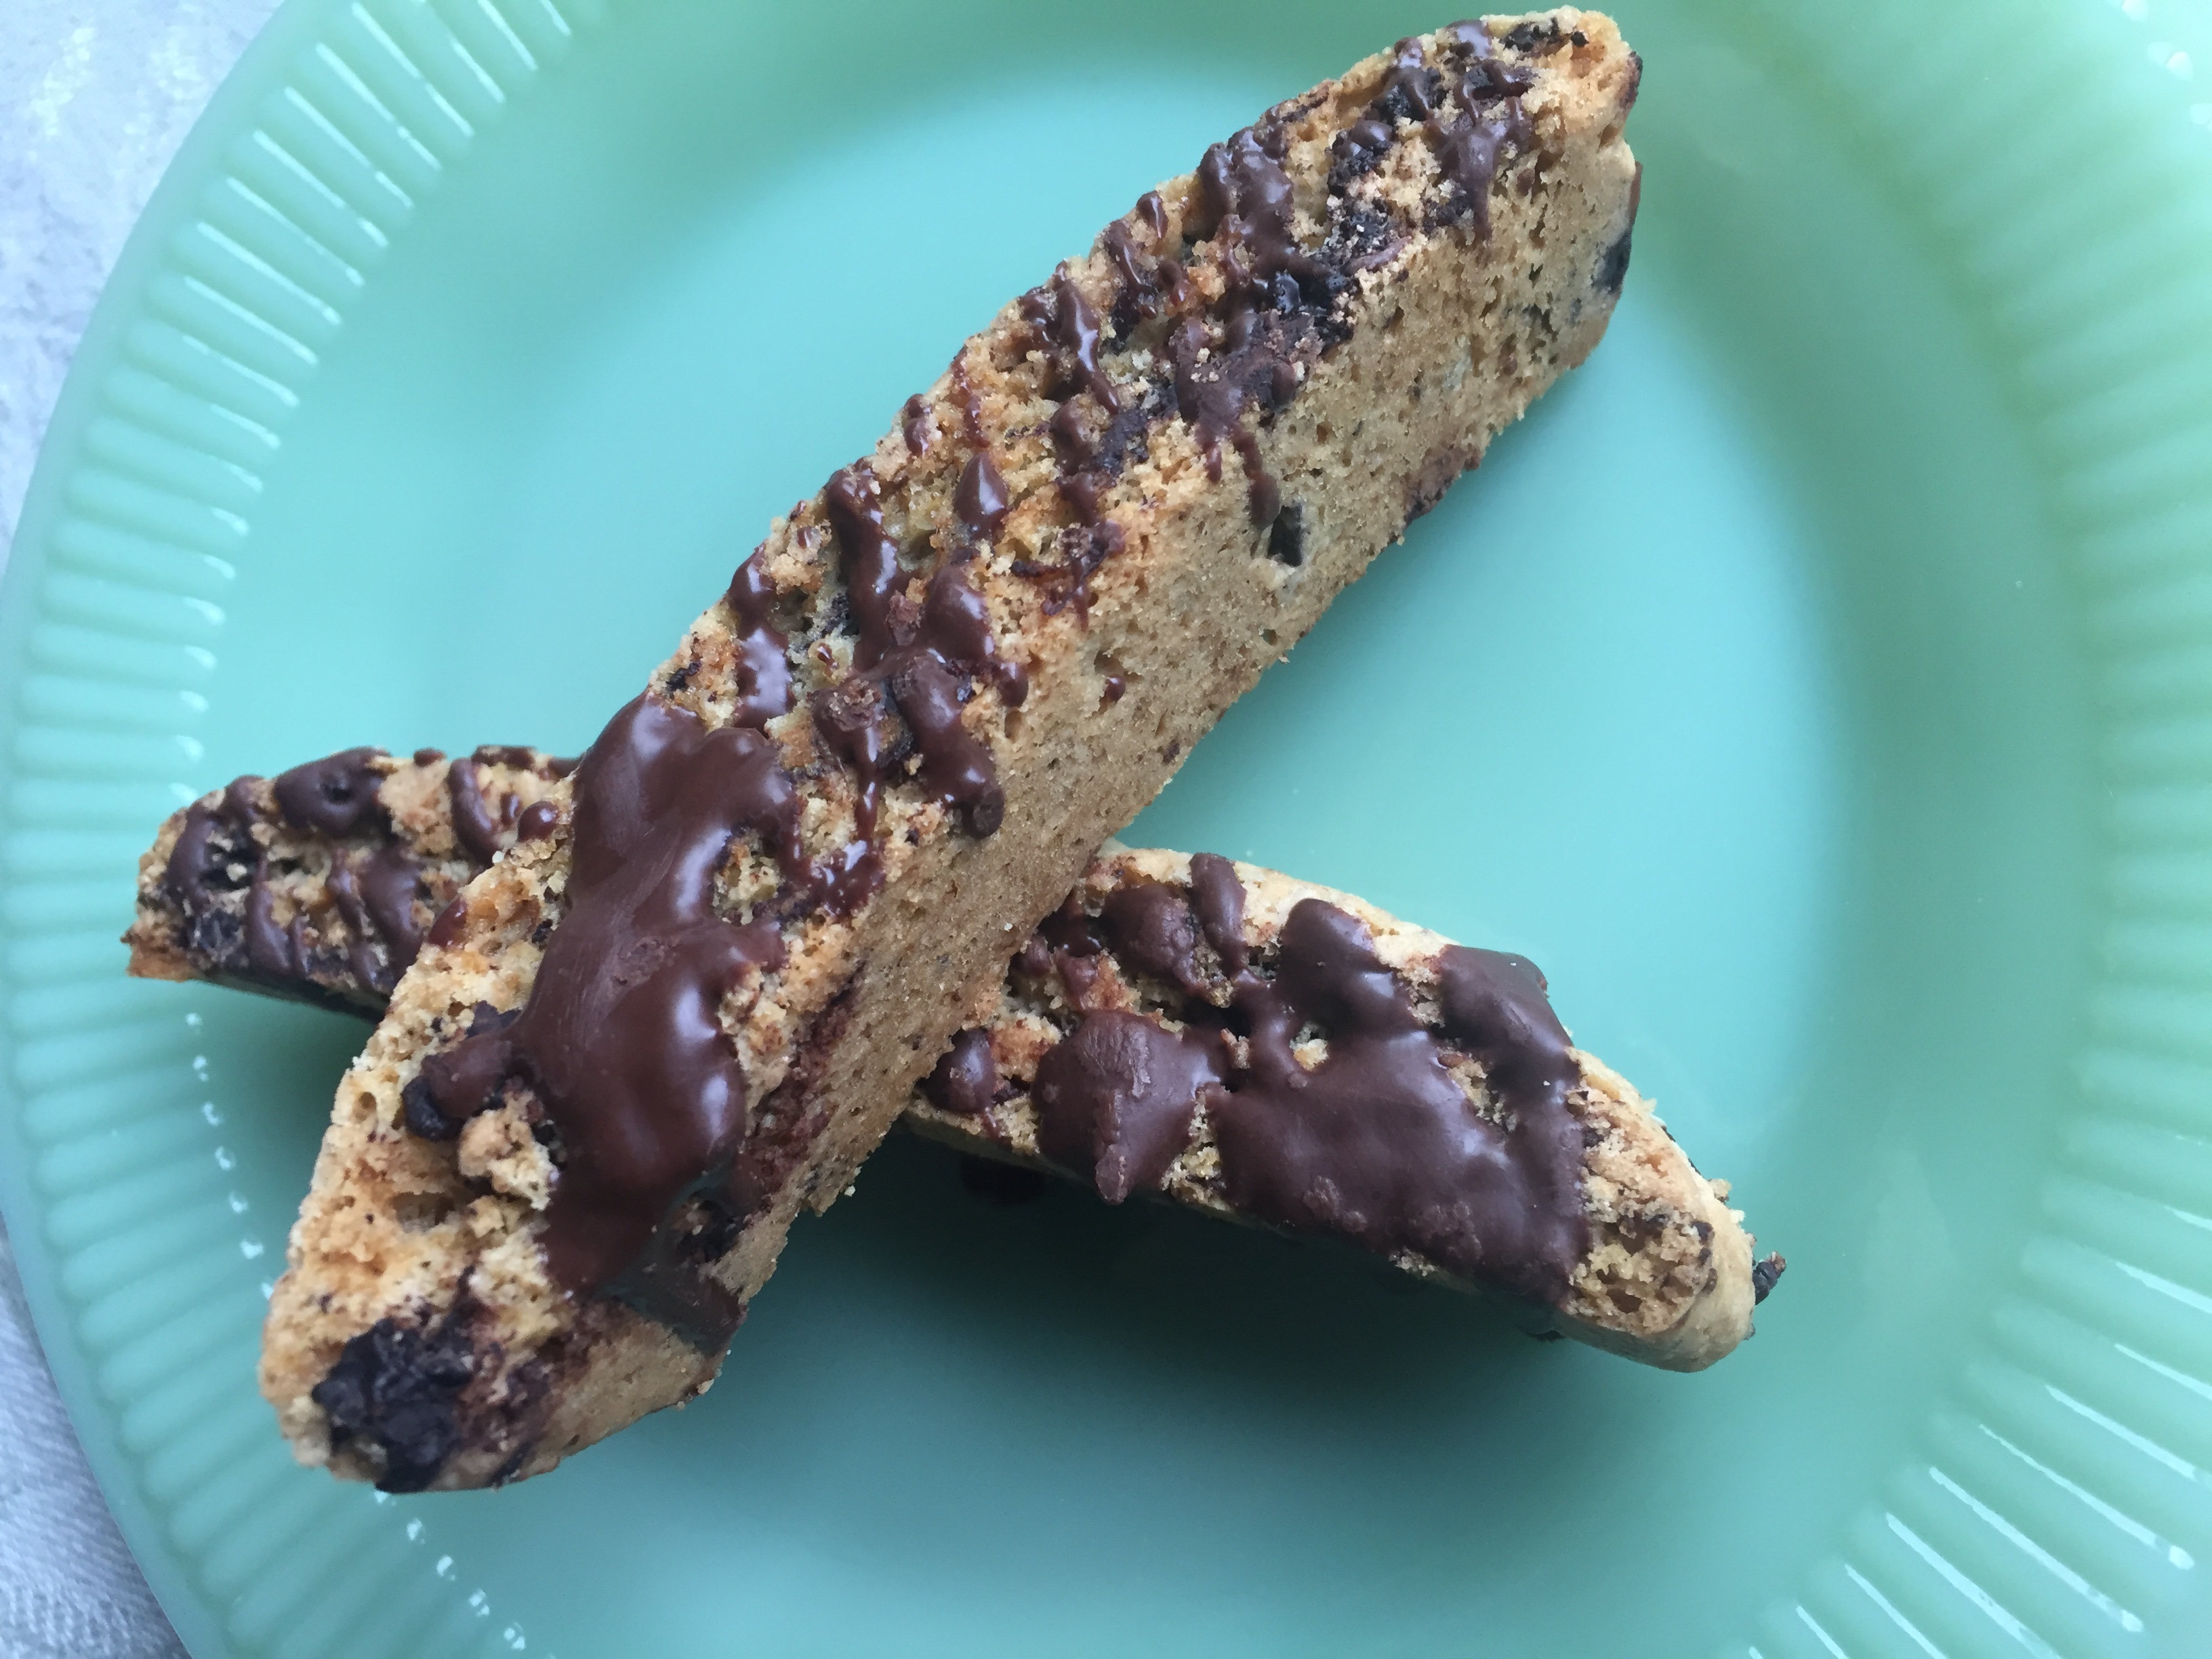
 It would make sense that this would lead to me baking coconut biscotti. I am over the top obsessed and until I hit a clunker, I will keep moving forward with this strange compulsion to make every biscotti known to man.
 Don’t judge. Some cookies need dark chocolate. Think Mounds Bars.

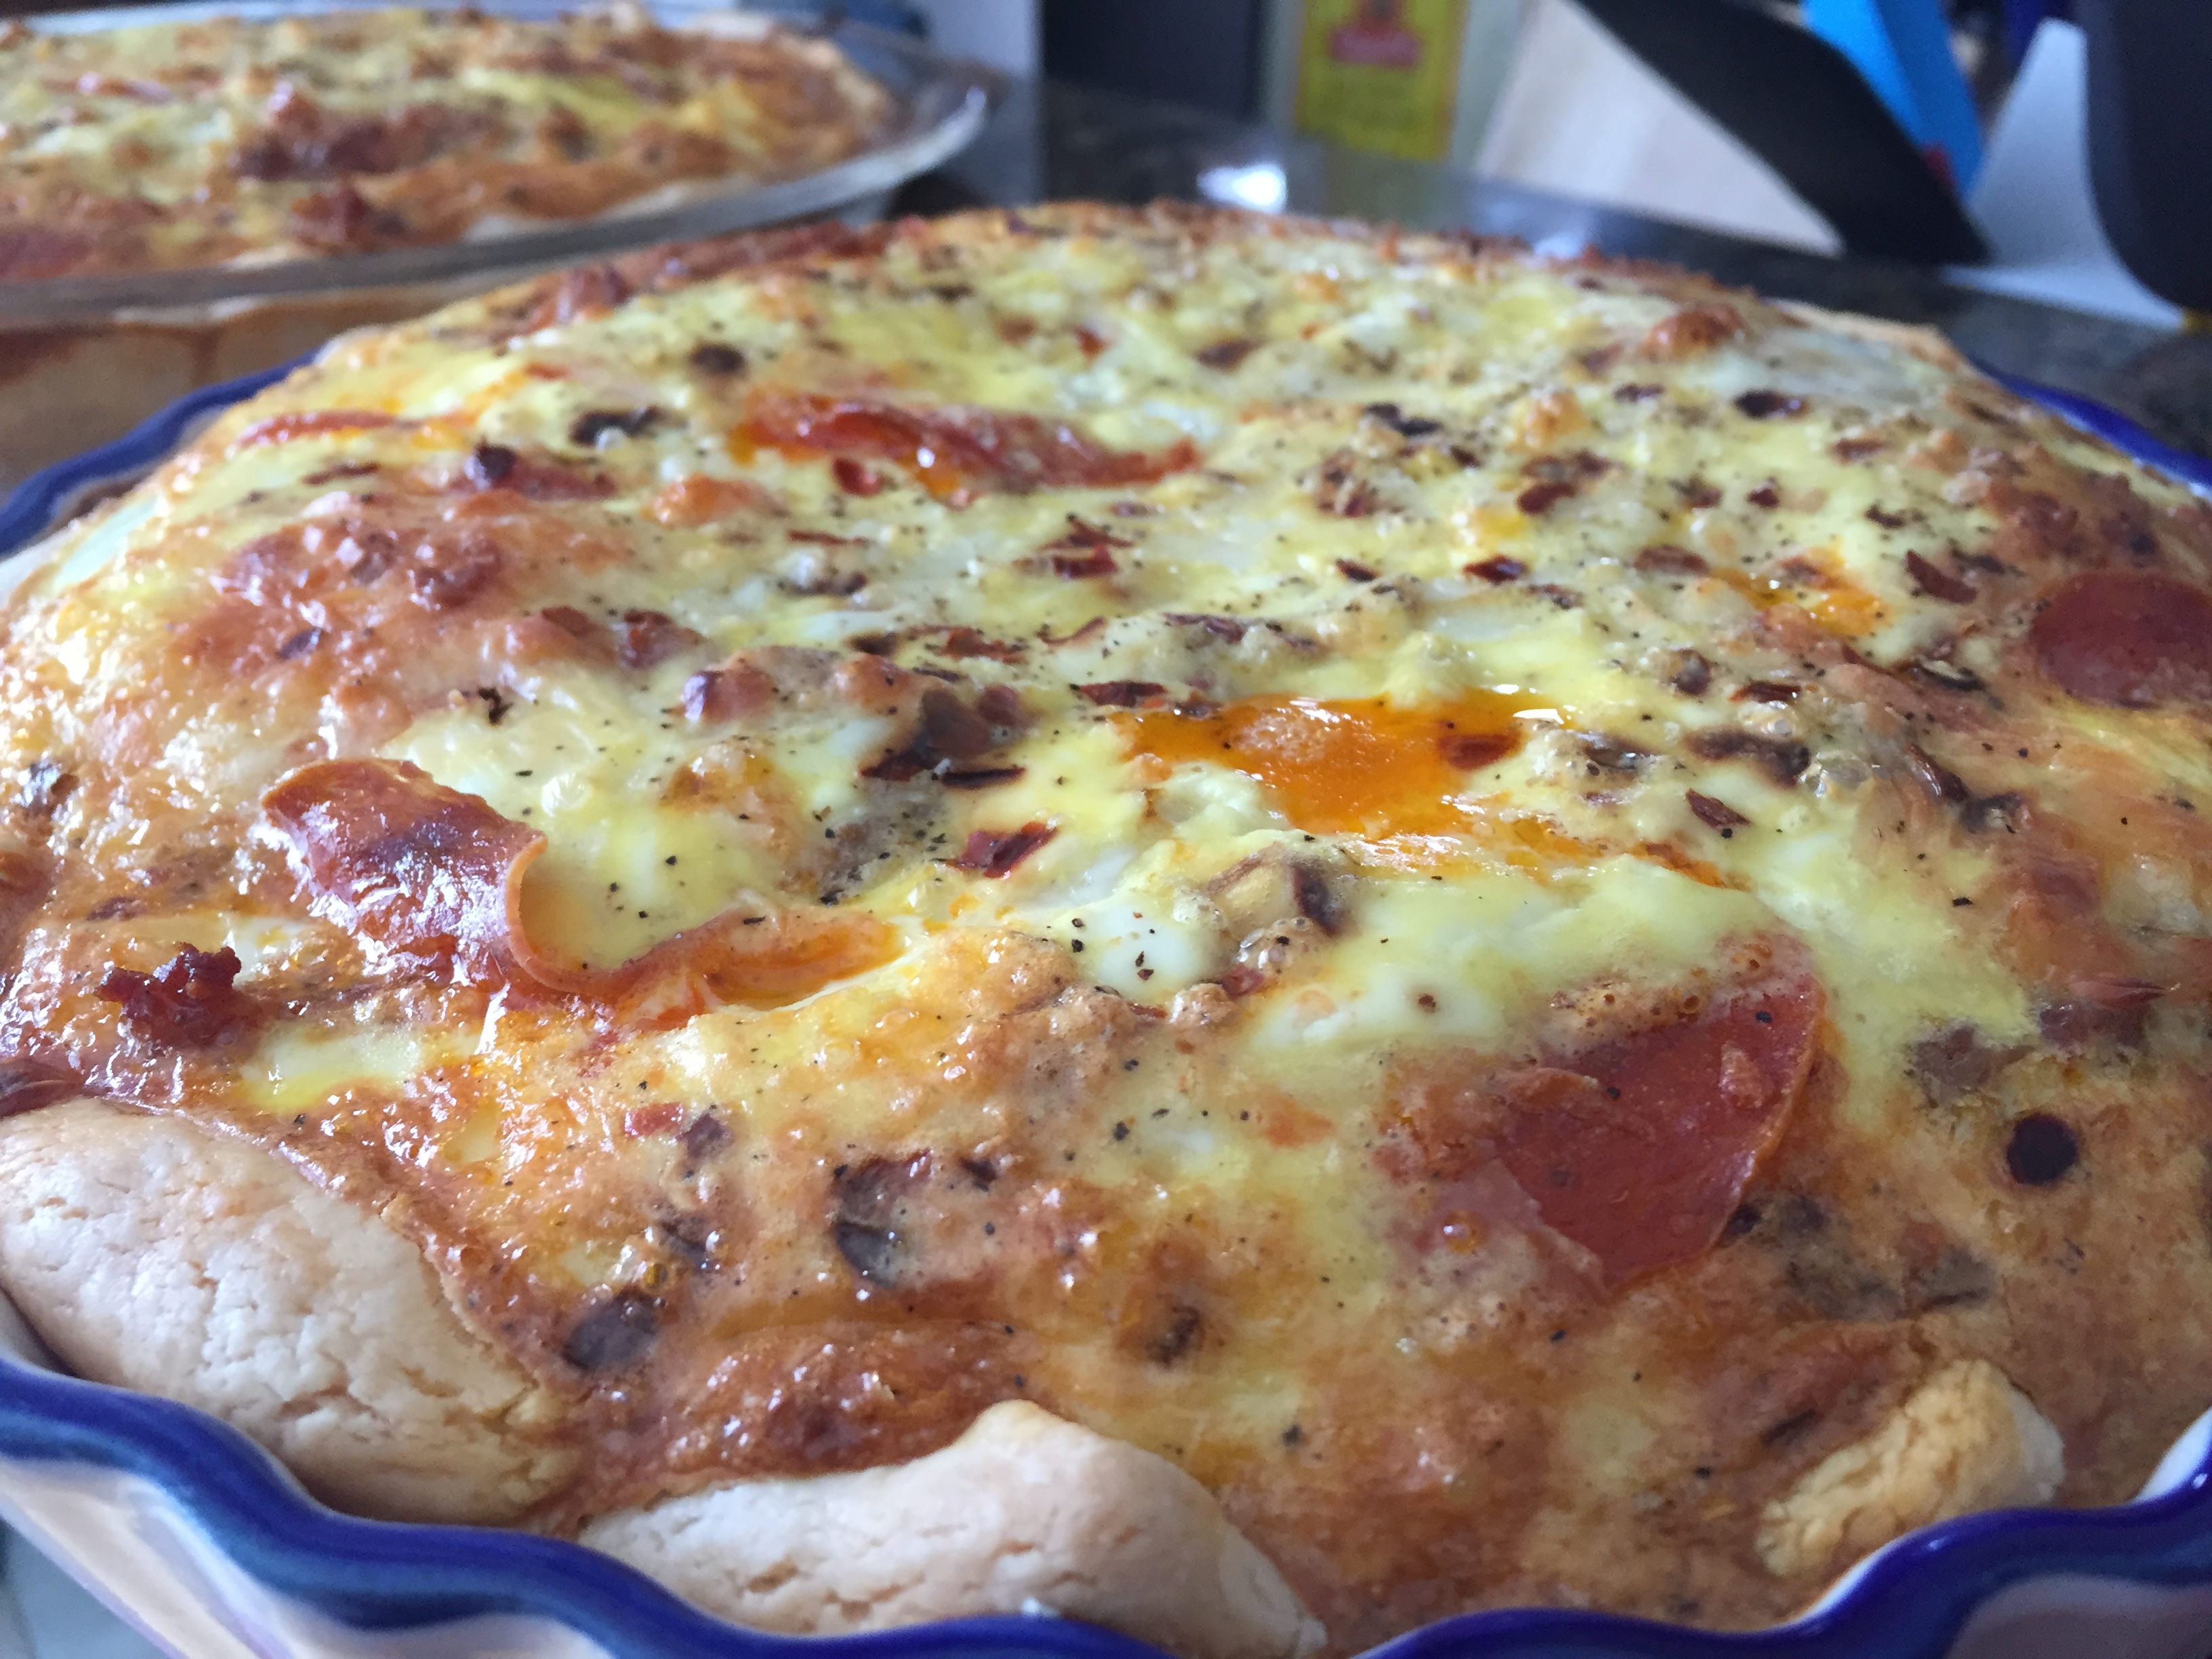


 This Quiche combines eggs, ricotta, and milk as a base. You can upgrade to half and half or cream, but milk works well. The ricotta thickens up the base and adds that creamy flavor that I love about ricotta. I also like the fact that no matter how well you whisk it, there are still little lumps of ricotta in the mixture, which then melt into ricotta-y pockets amongst the melted cheese and meats.
 It can be served warm or cold, I store in the refrigerator and it will keep for a few days wrapped well. I divide it up into containers for lunches too.


 Now, if I were to add yet another layer, (and I will, and I will post when I do) what I would have added was bacon. Or, peanut butter. Because a banana bacon Nutella muffin is just insane. Insane enough for me to try to make it. Or, a banana peanut butter fluff muffin. OOOOh my wheels are spinning. Hey, banana, peanut butter and bacon worked for Elvis. They didn’t call him the King for nothing.
 These muffins keep for several days in an air tight container, if they last that long. The Nutella drizzle is just enough, not too much, but you could always add more if you wanted.


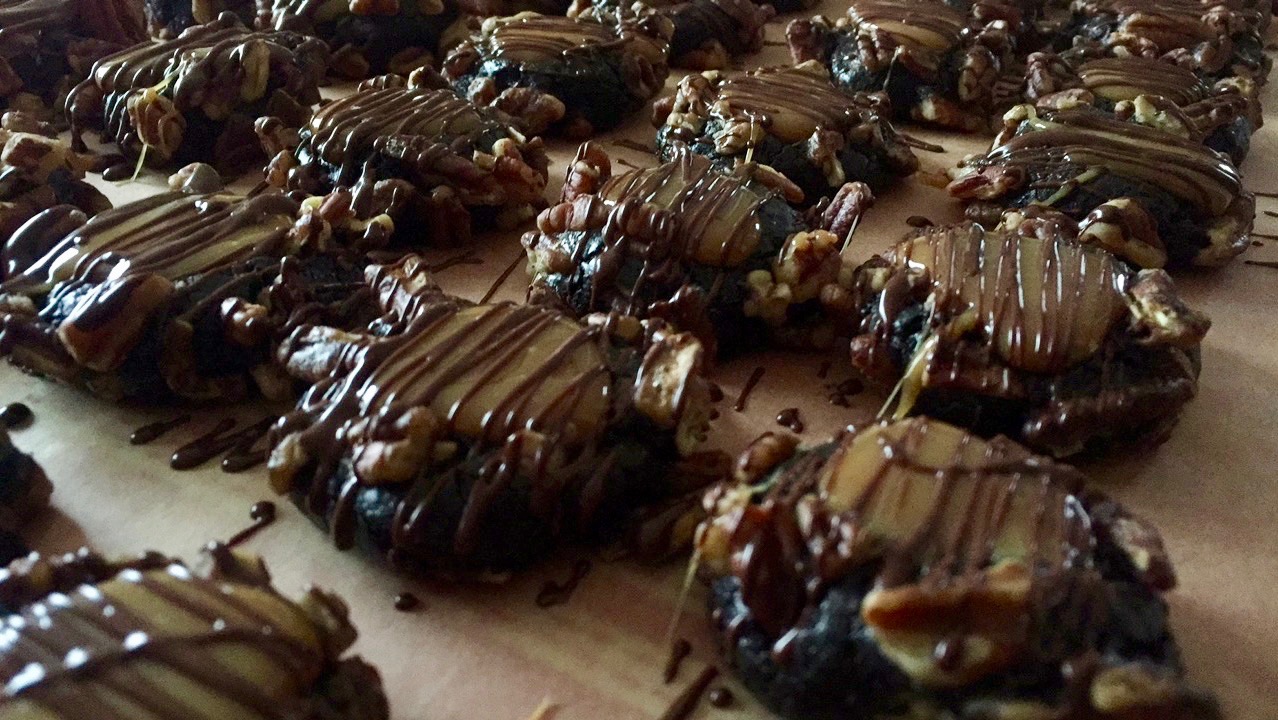


 Bake, then set to cool, make your caramel and fill. Then a simple chocolate drizzle is added to say, “Hey baby, you know you want me.”
 If you need to break up the task of making these (and I love this when baking anything that requires multiple steps…thus my profound respect for biscotti, so easy). I say, mix and roll day one, roll in pecans and bake and indent, then caramel and drizzle. This can be spread over a few hours or a few days. The cookies keep in an air tight container and the caramel can be added right away or the next day, your choice.
 I hope you enjoy this recipe (you will), and as always, thank you for coming to the table!
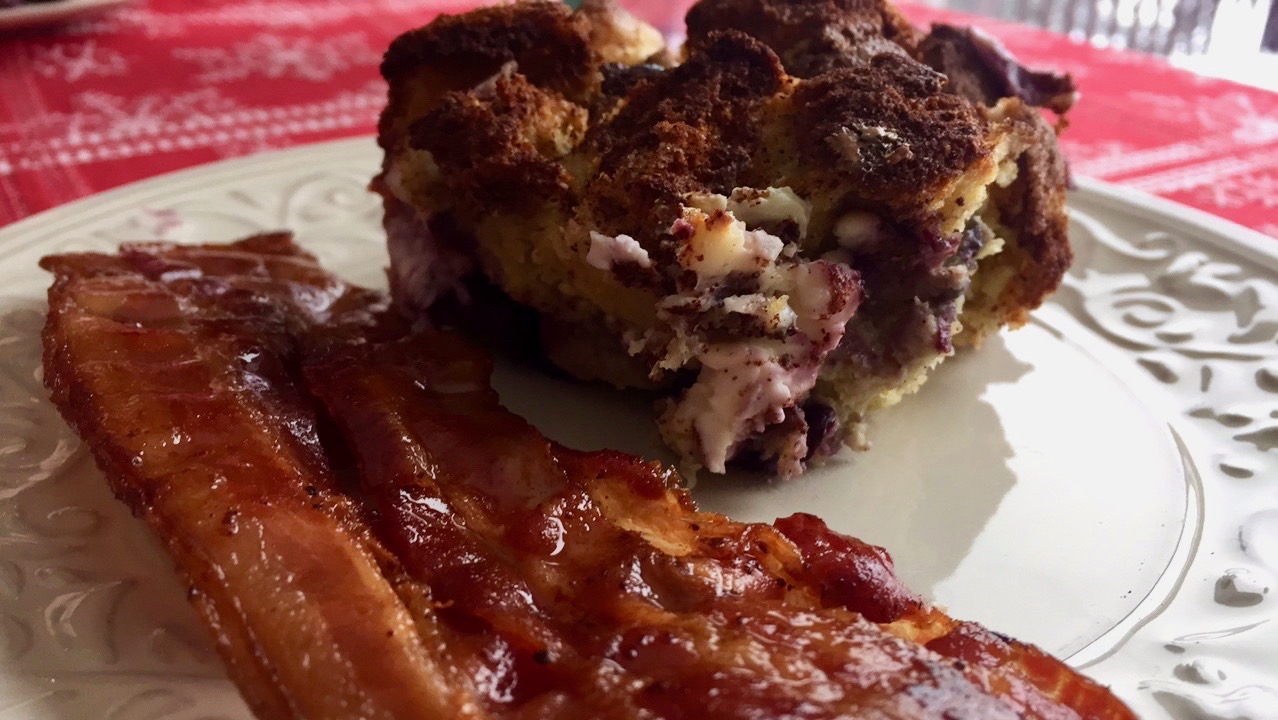

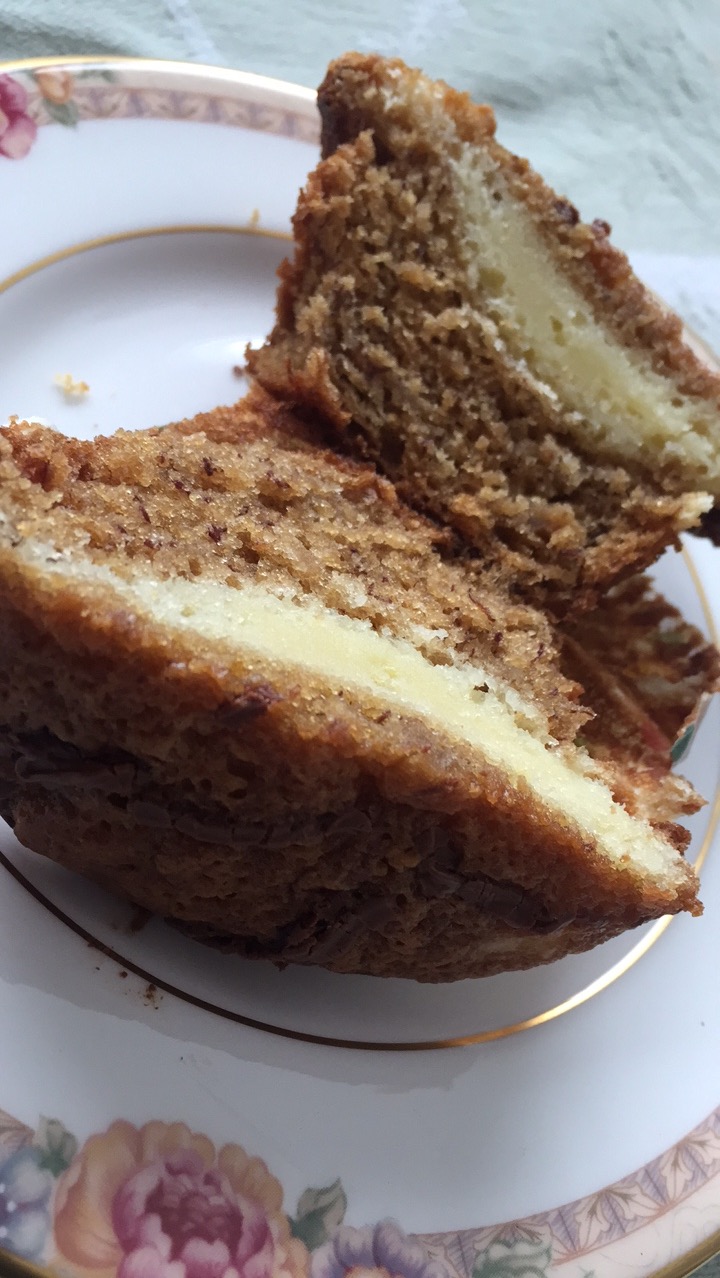
 This casserole was as much a part of our Christmases as was a special luncheon, finding the pickle (German tradition),my mother-in-law putting on her Christmas socks to signal the present opening could begin, and the general celebratory traditions that happen in a family during a holiday.
 I make this casserole one day a year. Once. Probably because we all eat our own thing for breakfast and for the most part, it doesn’t ever include maple syrup or cinnamon and sugar and cream cheese. But hey, this once a year treat is over the top indulgent and worth every bite.
 So I am not going to lie, this Christmas was a little heavy. We have suffered a major loss, and having navigated this kind of thing with losing my own dad a few years ago, the weight of the worry “Are the kids going to be ok?” and “Is everybody having a good Christmas?” along with my making sure my momma enjoyed the day and everyone was ok, I didn’t want to spend my day in the kitchen. I had enough to deal with.


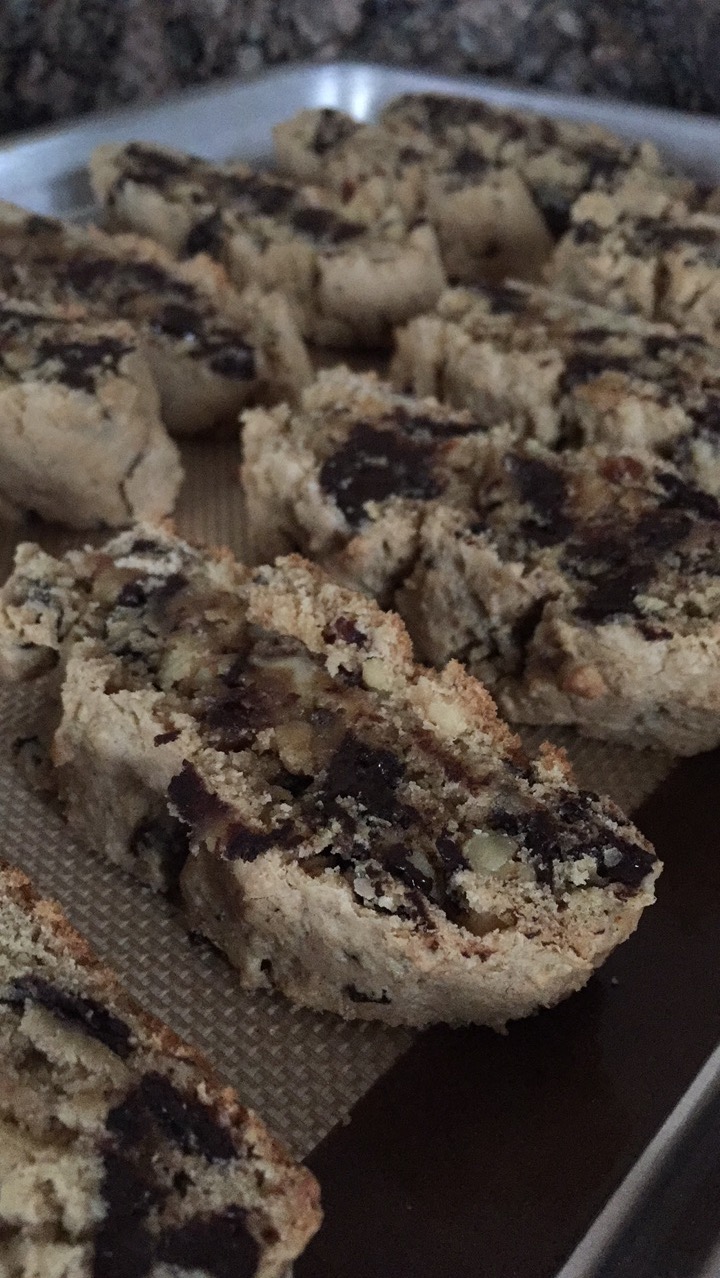
 The unsweetened cherries (which are a perfect snack food on their own) chopped up give the extra chew and slight sweetness to match the cookie base and dark chocolate melty chunks.


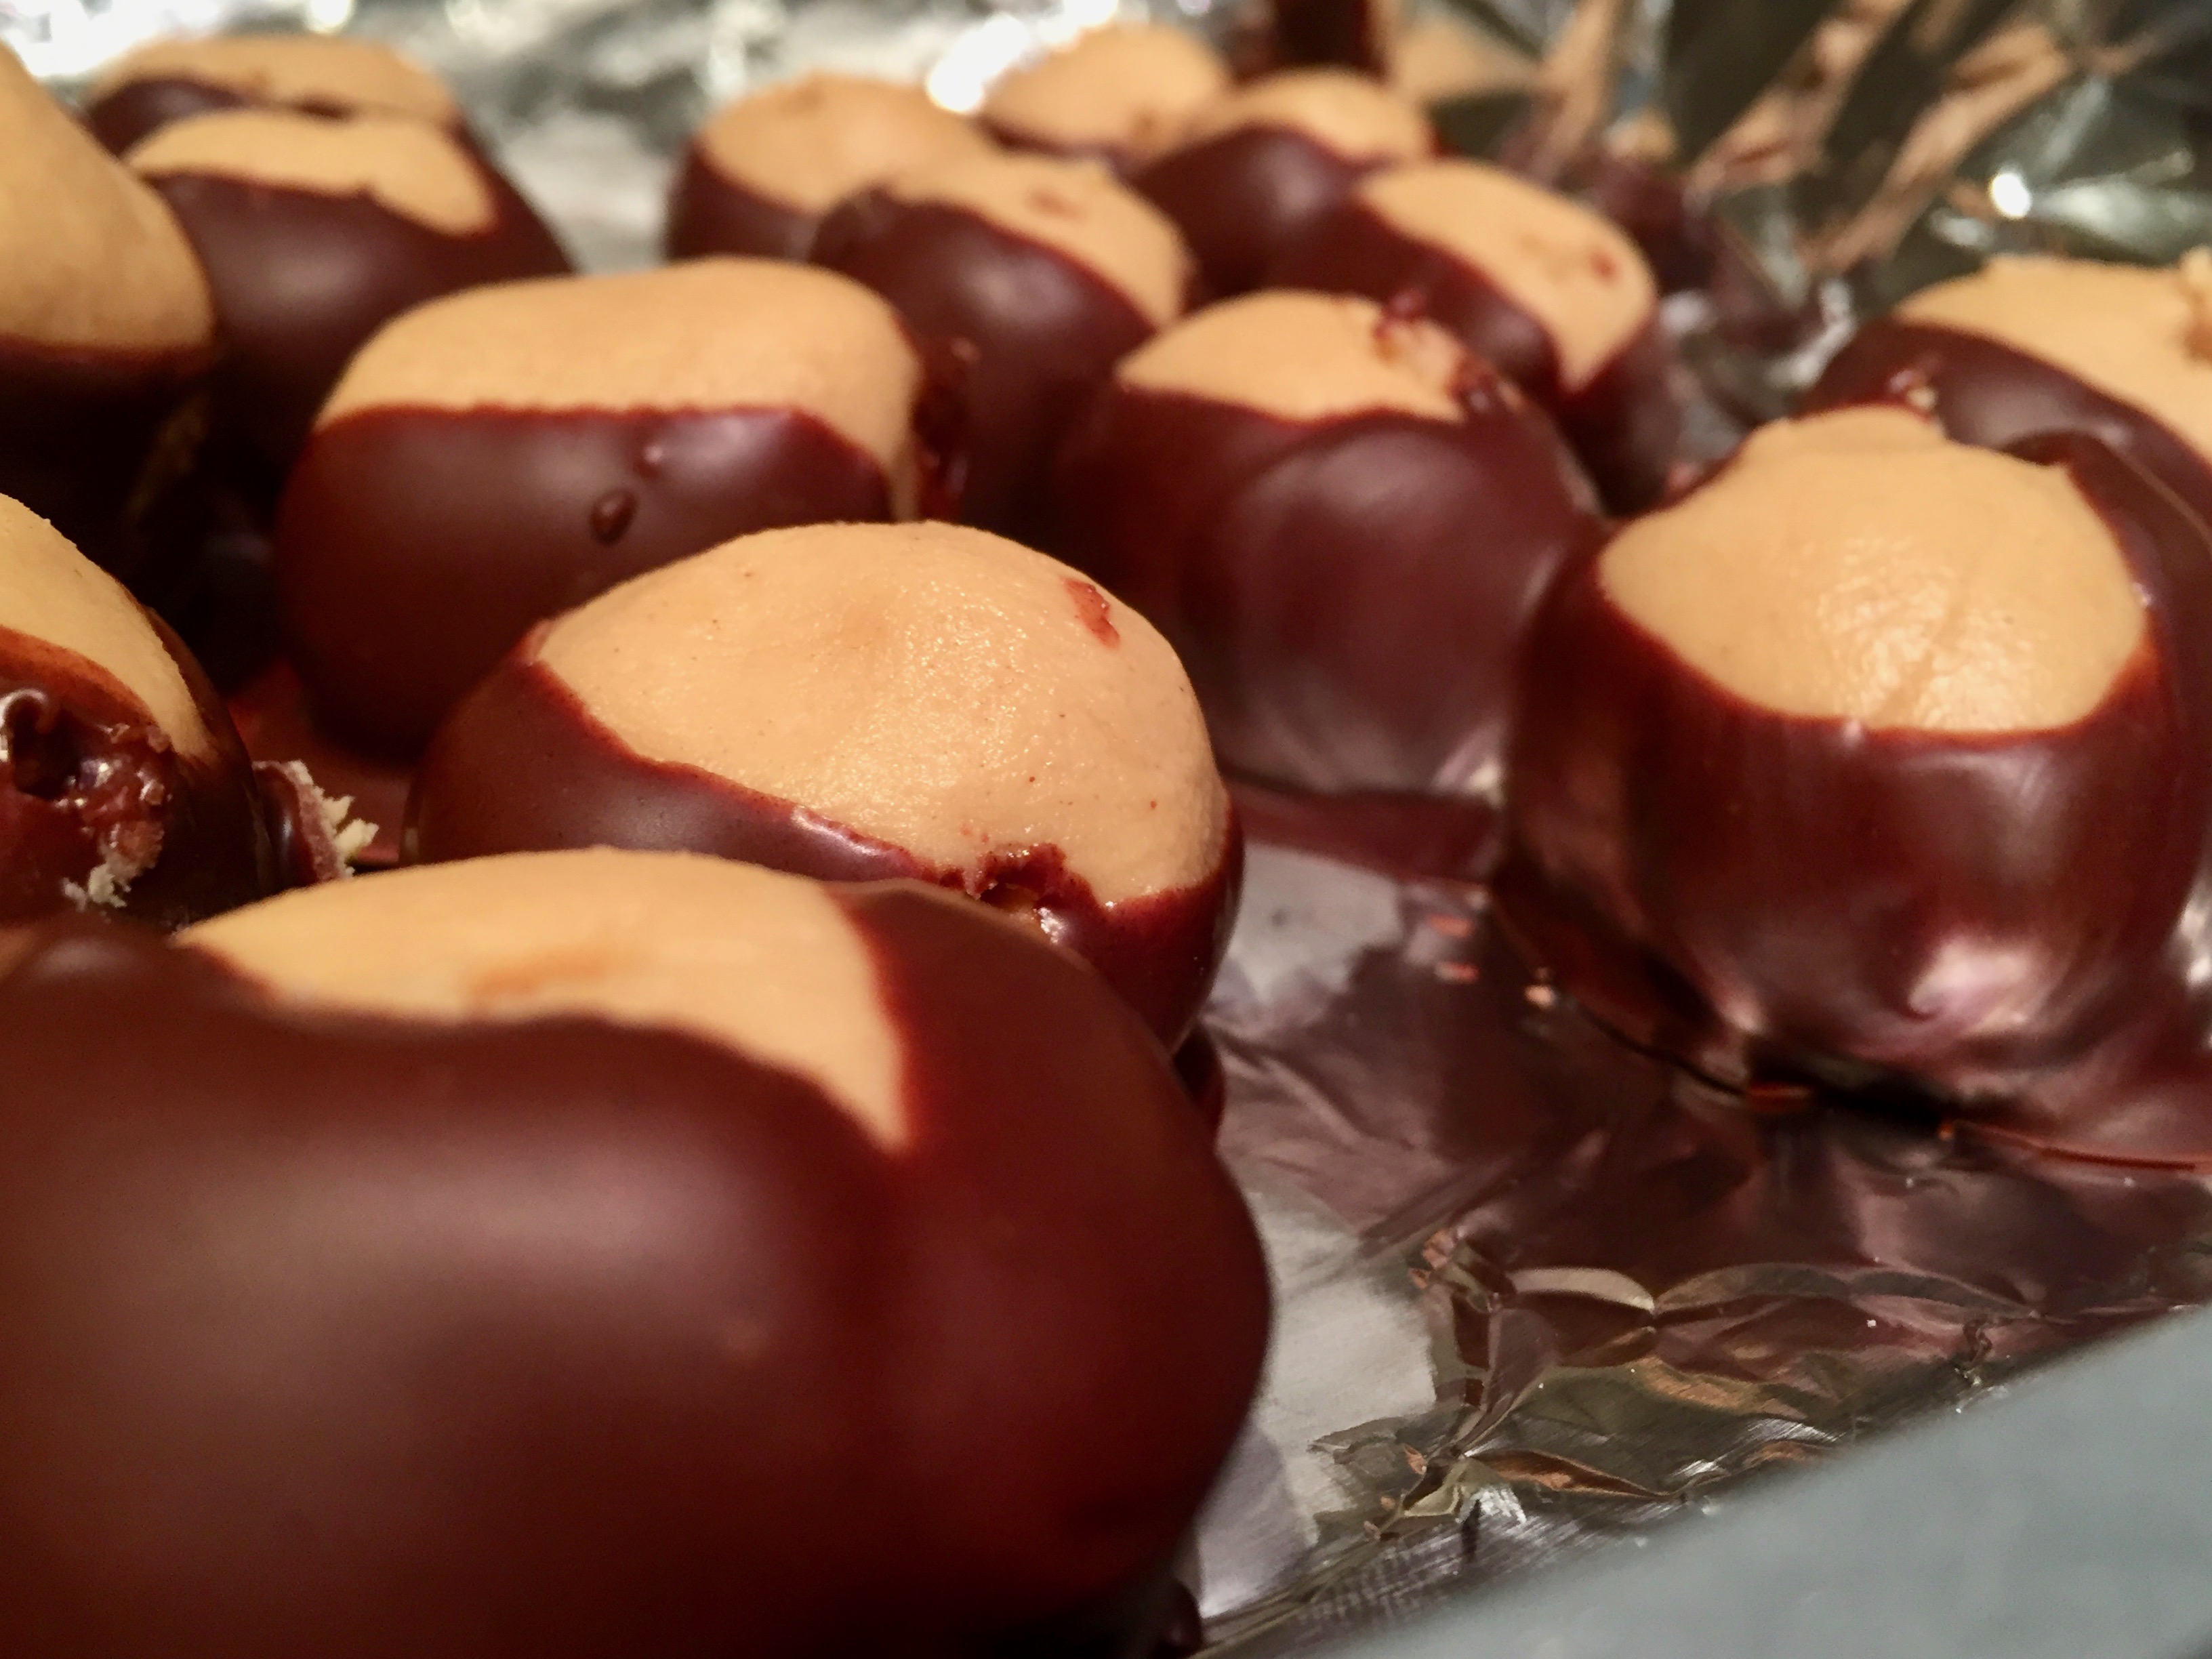

 Oh the magic of peanut butter balls. You bring out the chefs in us all.

 I am not what you would call a maudlin person. At least to the outsider. I tend to be a #blessed kind of girl.
 coincidences in your life?
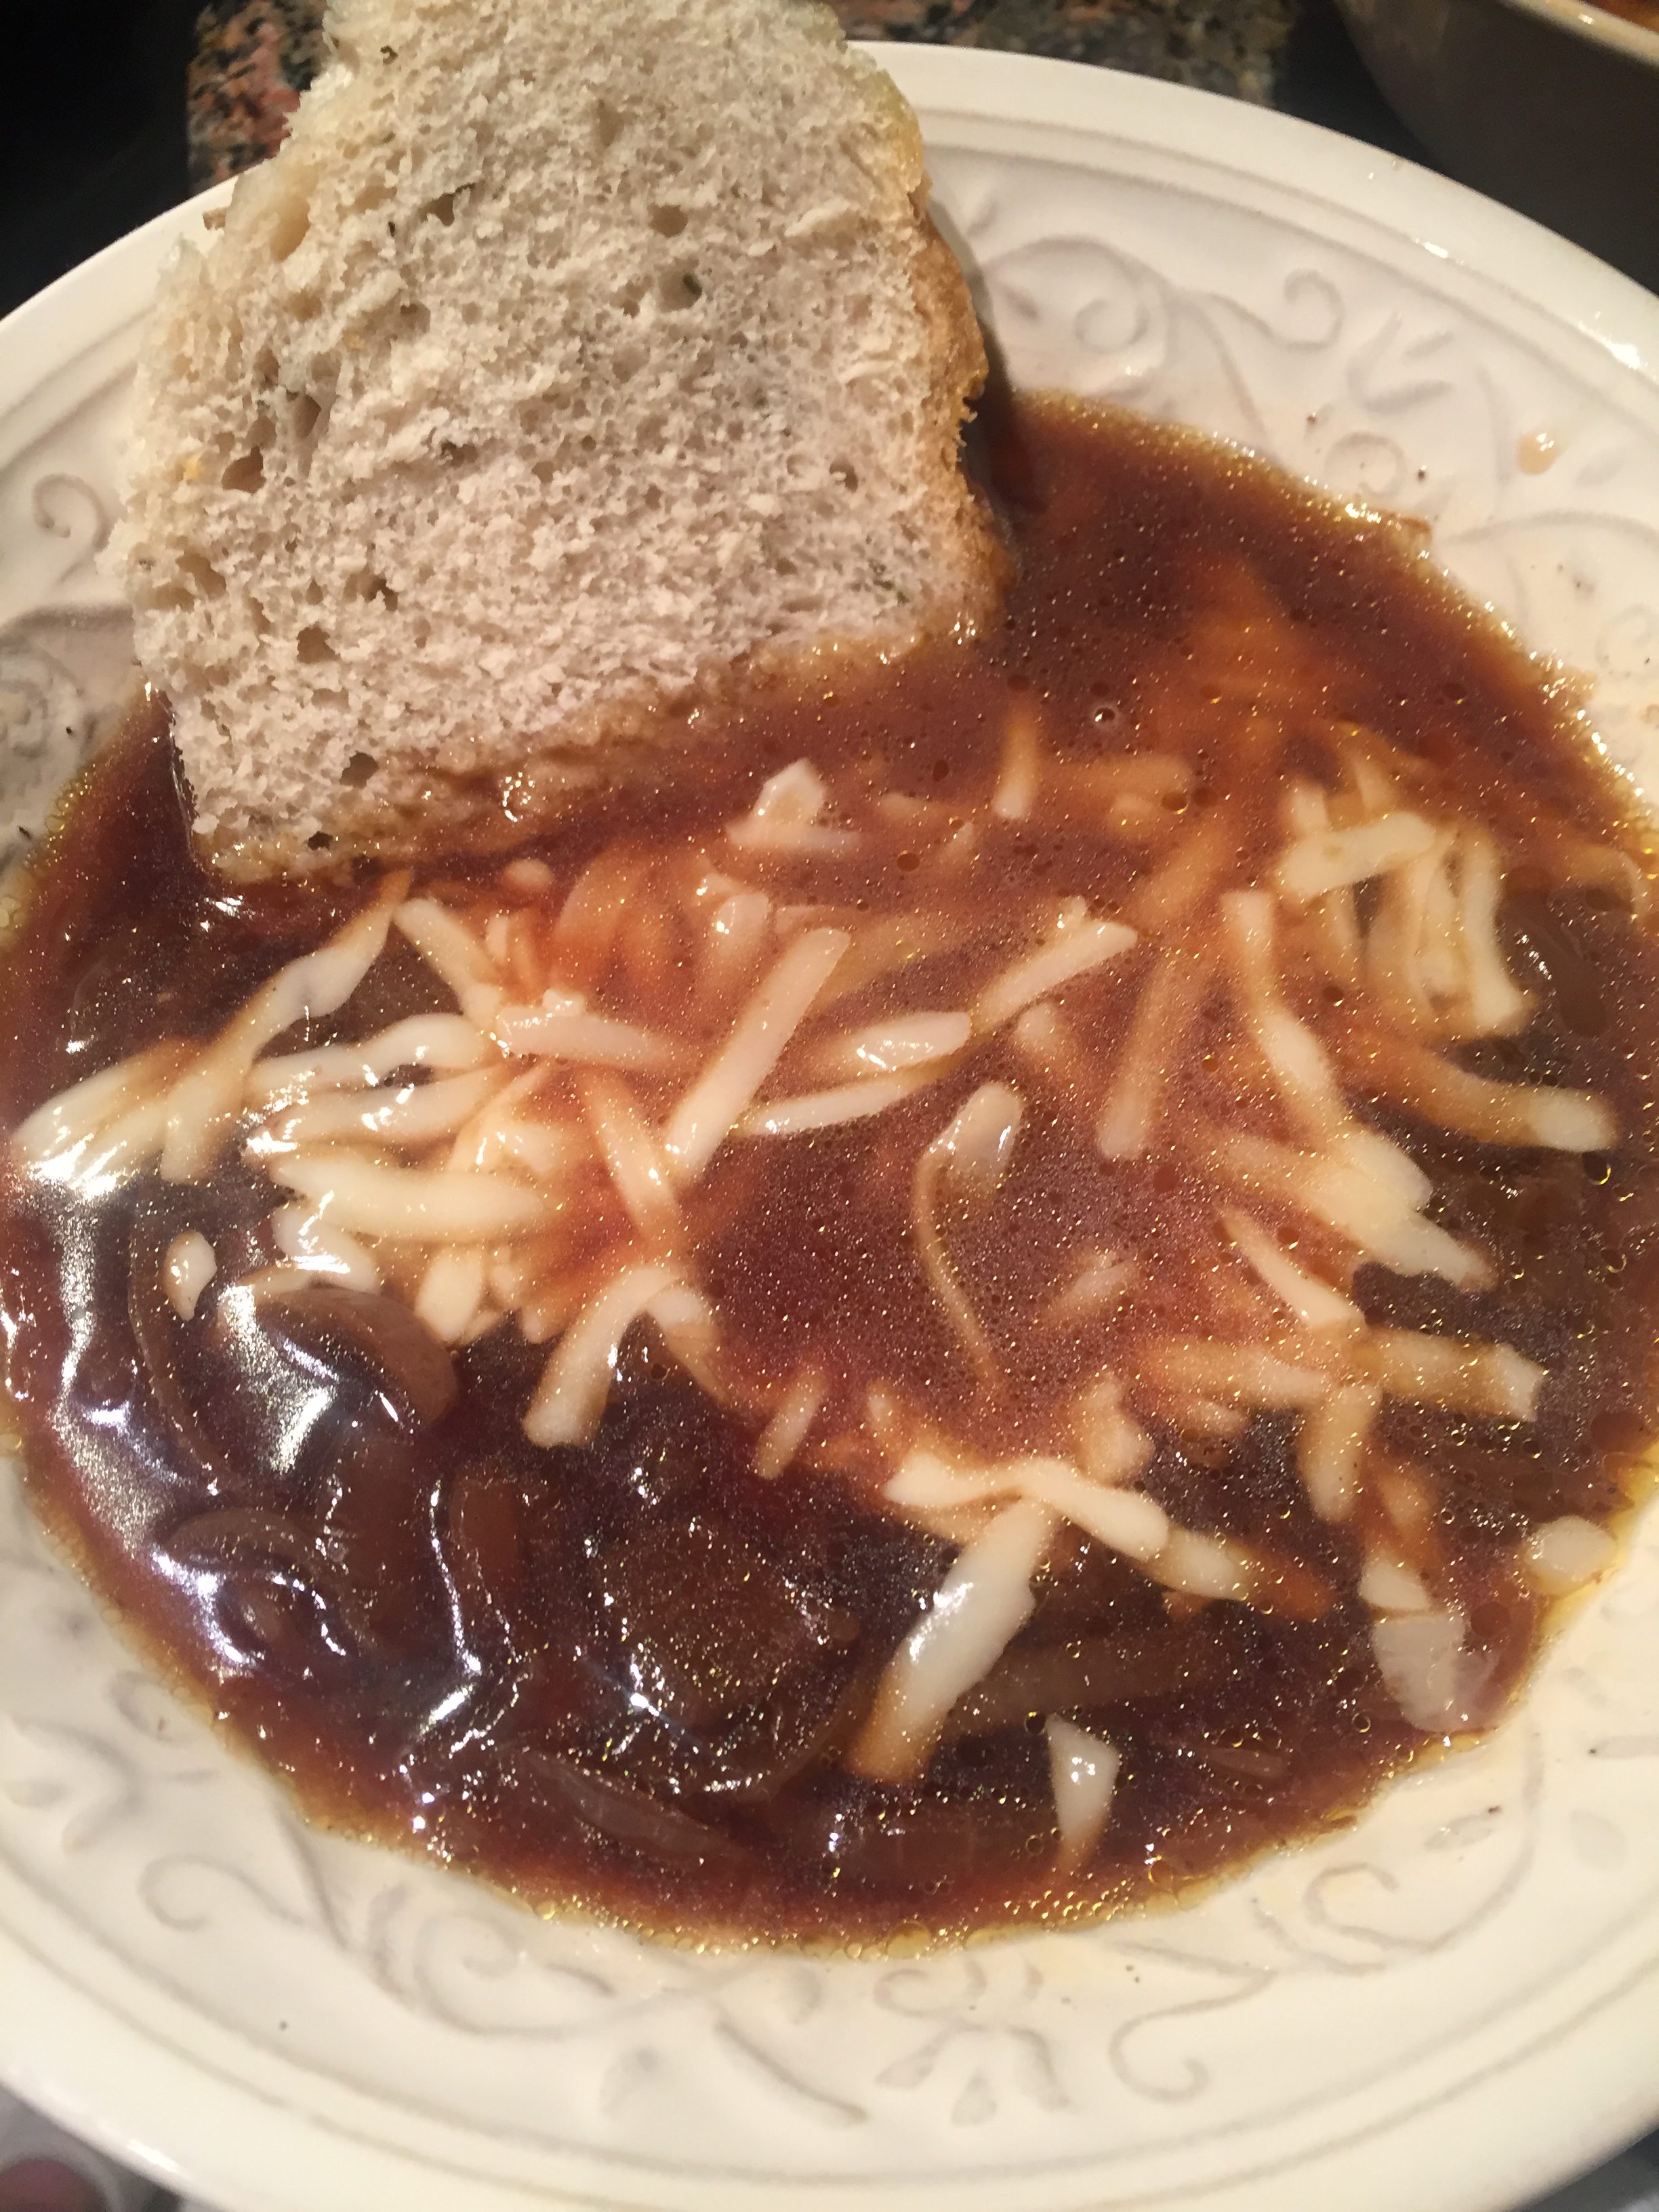
 We had less than a year with my Dad from the point of his diagnosis to his passing. His prognosis was not spectacular, and a second round of chemo had started, when I got a text that Dad had made French Onion Soup and were we coming for supper?