mythankfultable.com

Feeding the Heart, Body, and Family

  • My Pics
  • My Story
  • The Puppies
  • Contact Us
Feeding the Heart, Body, and Family

Recipes

Here is the recipe!

Double Chocolate Peppermint Biscotti and Being Kind

December 16, 2017 by chrissy@mythankfultable.com
Double Chocolate Peppermint Biscotti

Double Chocolate Peppermint Biscotti

In a time of year where stress is running high and we are making lists, and scurrying to do this and that amidst all the other stuff we already do, we can get lost in the “do” and lose sight of the bigger picture. The being kind part.

So, I have a sarcastic side and sometimes make comments I maybe shouldn’t. If you do know this about me, it’s because I am close enough to you to show you my cold heart (welcome to the club). I am from Massachusetts, I am my father’s daughter, sarcasm is a part of my DNA. In fact, I have a sweatshirt that belonged to my father: National Sarcasm Society…Like We Need Your Support.

However, there is a fine line. I need to watch it. In my years of teaching I have picked up the saying, “Is it truthful? Is it necessary? Is it kind?”

Double Chocolate Peppermint Biscotti

I find lately, my three question filter needs to be reapplied. I find myself in lines of unhappy people, crowded spaces, and faces are grumpy. I may not like it, but I can try to fix it.

So, I am making it my personal challenge to be kind ON PURPOSE. I know, mic drop.

Double Chocolate Peppermint Biscotti

Should be a given, but needs to be in the forefront of my brain because otherwise…I’m adding to the problem. Some things may be true, but not kind or necessary. Sometimes, shutting my mouth is the better choice. That goes in conversation, that goes on social media, it’s just a good idea.

Now, for these cookies…

Double Chocolate Peppermint Biscotti

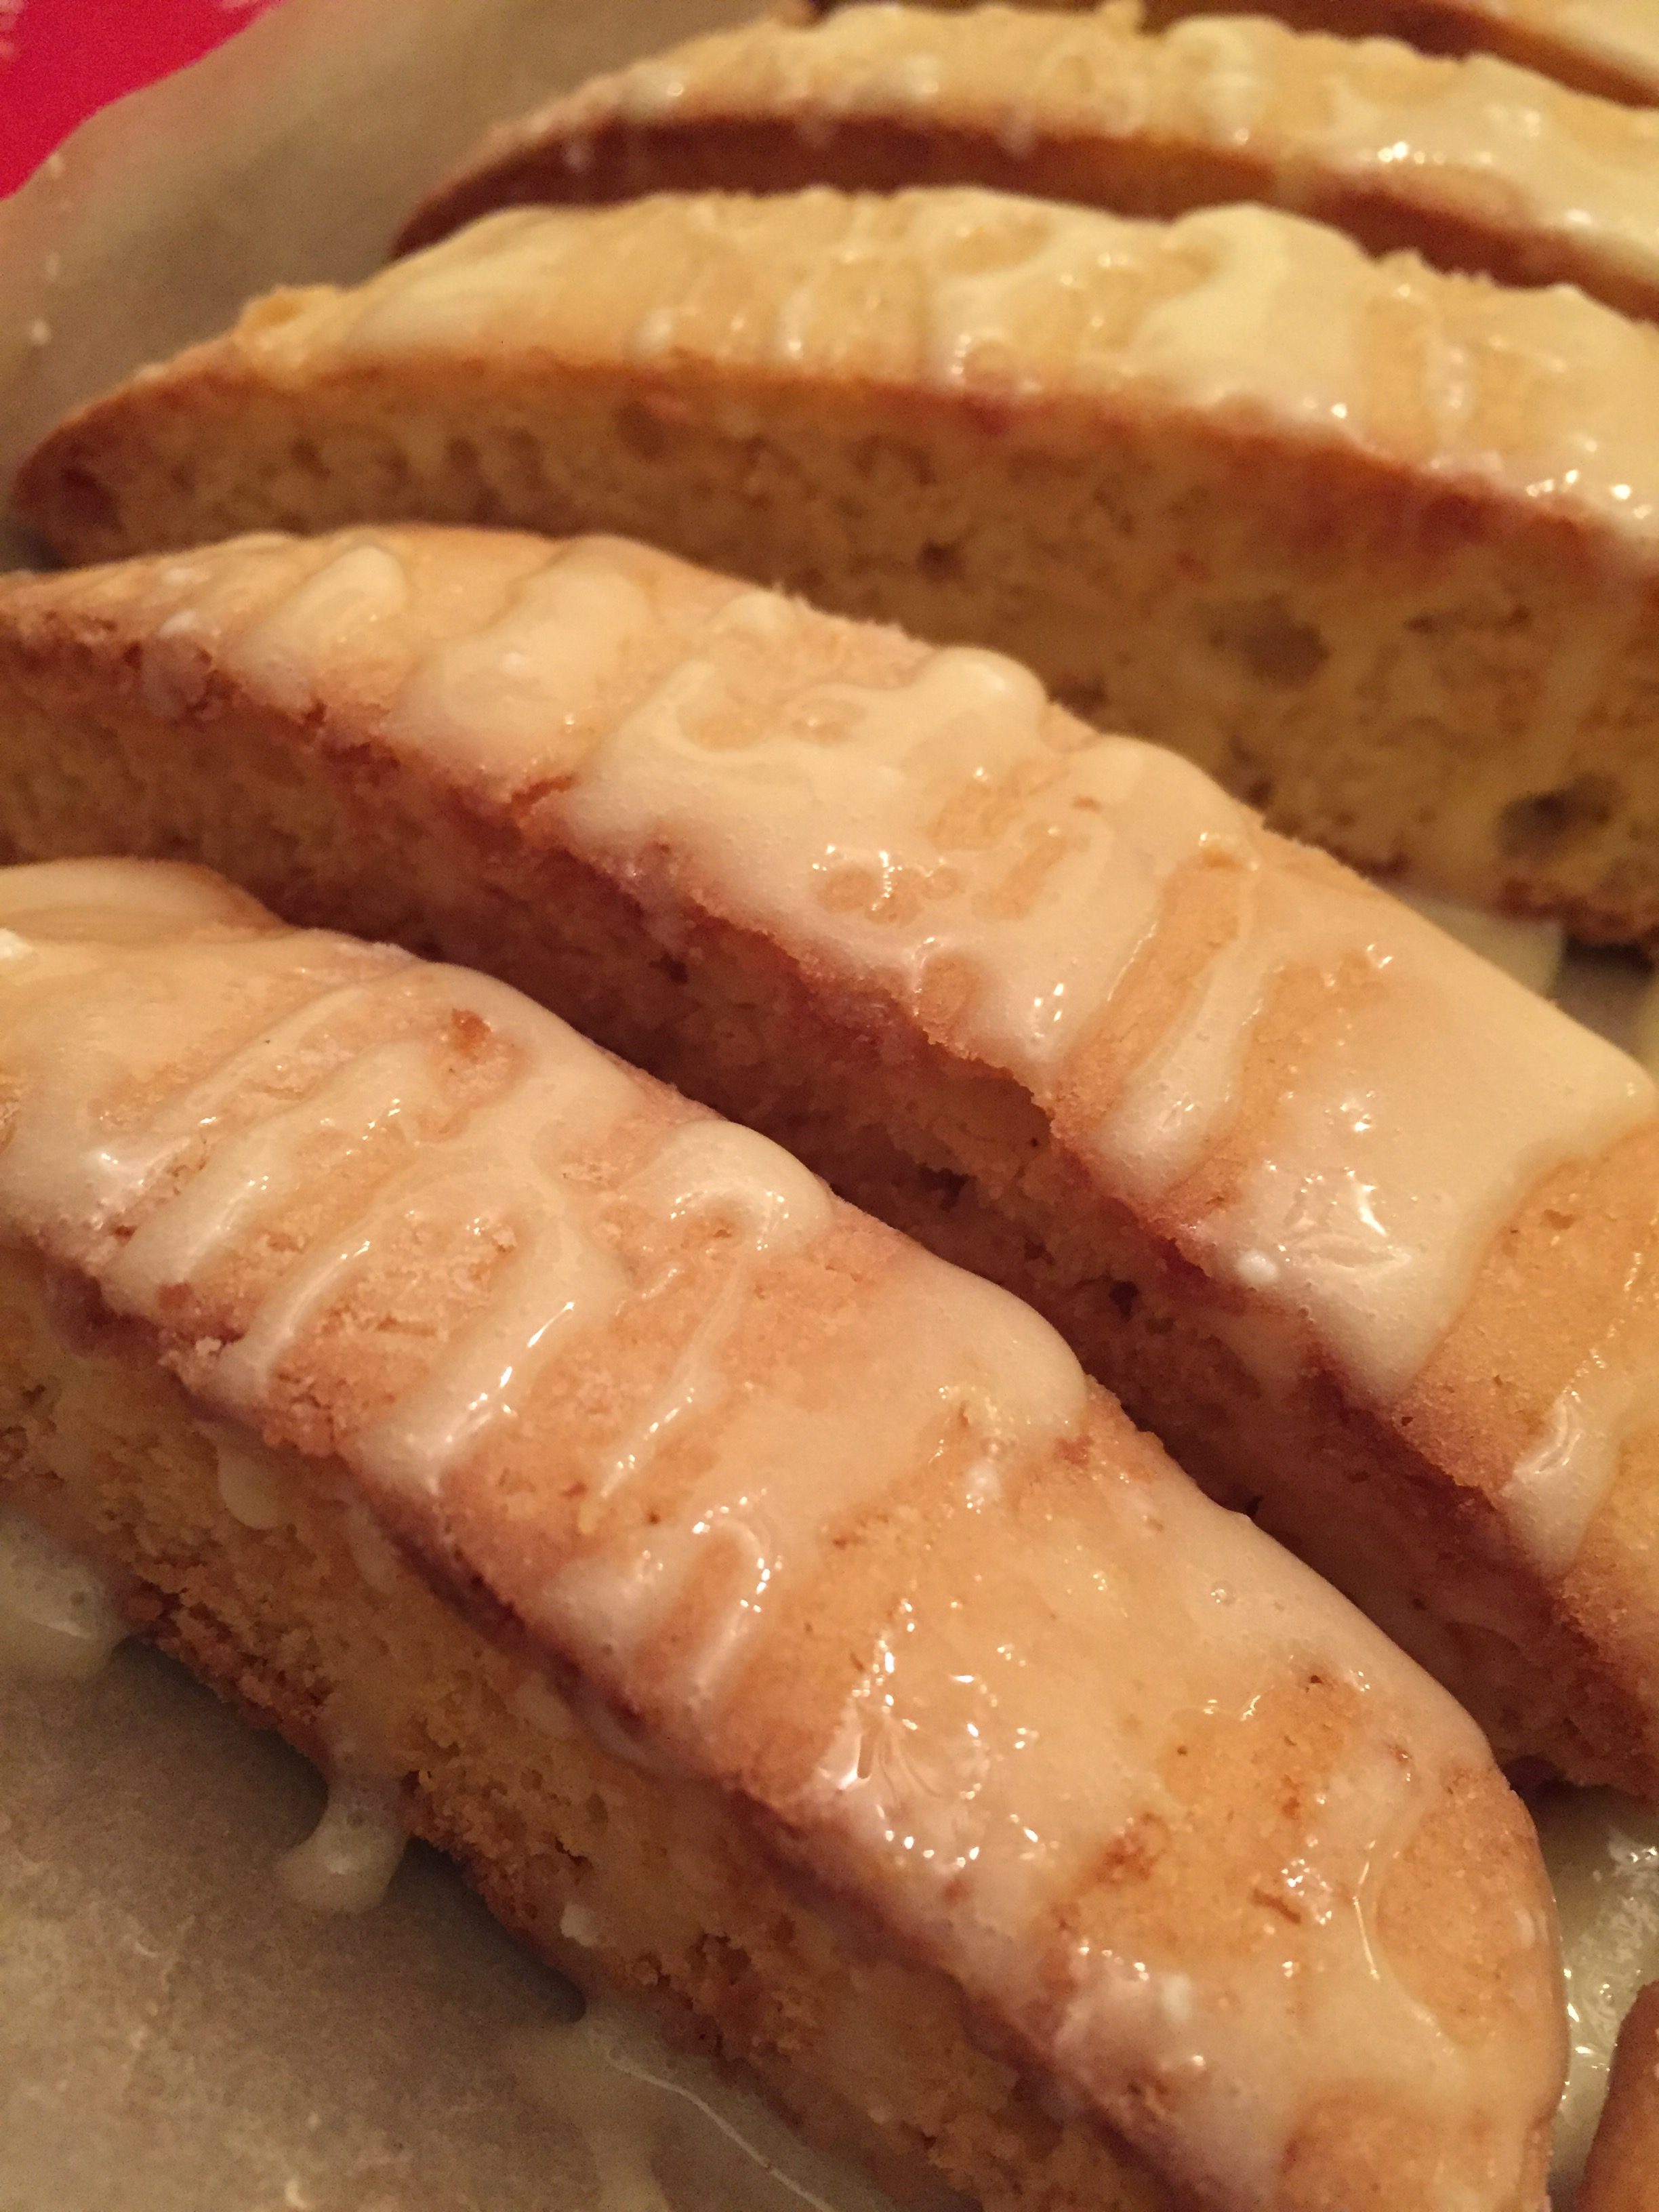
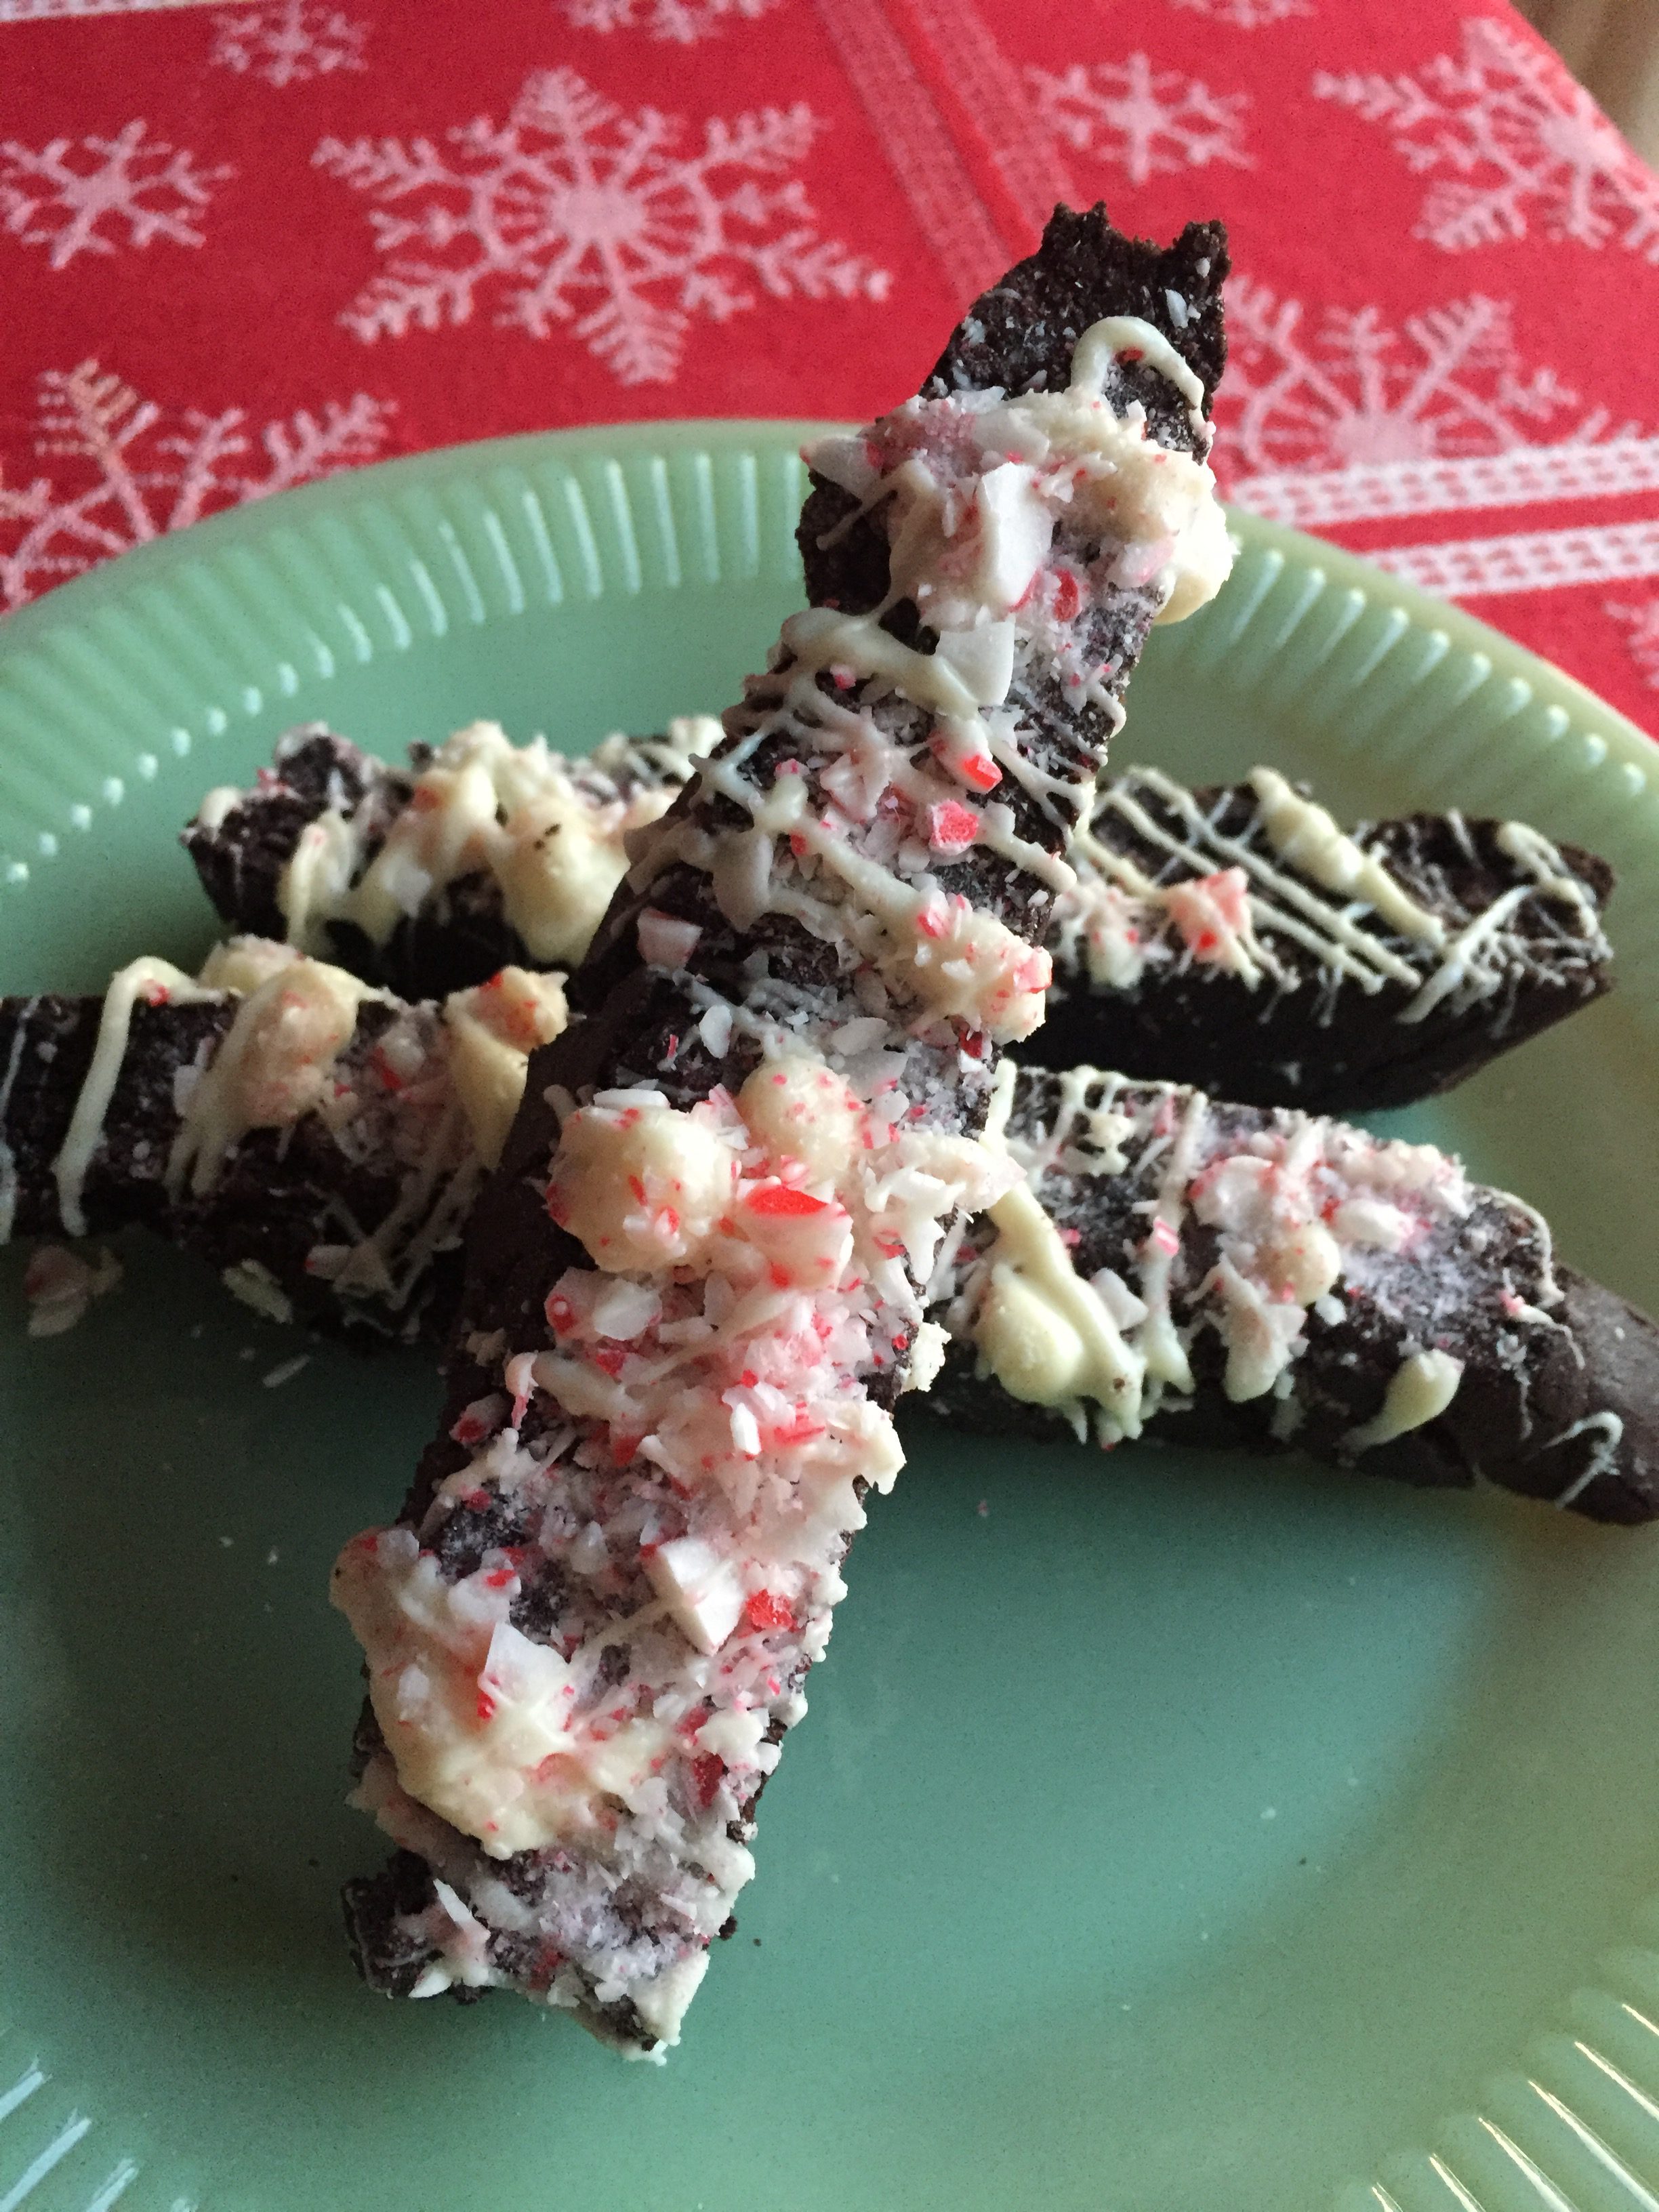
These biscotti are dark chocolate with a mix of vanilla and peppermint extract and an additional boost of chocolate morsels. Baked twice, and drizzled with white chocolate and crushed peppermints, they are so perfect for the holidays.

They are a little heavier than the regular biscotti, but the trade off is richer chocolate flavor and a combination of three kinds of chocolate.

Double Chocolate Peppermint Biscotti

Dark chocolate base, semi sweet morsels, and white chocolate drizzle.

Add the peppermint crunch that kind of melts and gives the chew to the crisp cookie, it is a winner.

The test of a great cookie is when you take a taste, walk away, and think, “Wow, give me another bite of that.” These are good without being a side kick to a warm drink- but pair it with coffee and I am a happy girl.

Double Chocolate Peppermint Biscotti

Double Chocolate Peppermint Biscotti

I won’t carry on with my soap box sermon on being kind, (I need to post this recipe asap) but suffice it to say when you stop and actually try to change your mindset, you actually are the one who is gifted the blessing.

So bake these cookies and be nice out there friends, we still have a week to go!

I hope you enjoy this recipe, and as always, thank you for coming to the table!

Chrissy

Click below for a printable recipe!

Print

Double Chocolate Peppermint Biscotti

Double Chocolate Peppermint Biscotti
Print Recipe

Chocolate biscotte with chocolate chips and a white chocolate drizzle and crushed candy canes!

  • Author: chrissy@mythankfultable.com

Ingredients

Scale

Biscotti:

  • 1/2 Cup (One stick) Butter
  • 1 1/4 Cup Granulated White Sugar
  • 2 Eggs
  • 3/4 Cup Dark Cocoa Powder
  • 1/2 Teaspoon Vanilla Extract
  • 1/2 Teaspoon Peppermint Extract
  • 1/2 Teaspoon Salt
  • 1 Teaspoon Baking Soda
  • 2 Cups of Flour
  • 1 12 ounce bad of Semi-Sweet Morsels

Topping:

  • 1 Cup of White Chocolate
  • 6 Crushed Candy Canes (you will have extra – but that’s ok too!)

Instructions

  1. With a mixer, beat together butter and sugar until light and fluffy.
  2. Mix in dark cocoa powder.
  3. Add eggs and extracts, mix until combined.
  4. Add in salt, baking soda, mixing well, then add in flour slowly.
  5. Fold in chocolate chips.
  6. Turn dough out onto a lightly floured surface.
  7. Form two 14X4″ logs and place on a parchment or silpat lined cookie sheet.
  8. Bake at 325* for 30-35 minutes.
  9. Allow dough to cool slightly and slice on an angle approx. 1/2 to 3/4 inches.
  10. Flip cookies- cut side up and bake for an additional 5-10 minutes.
  11. Allow the cookies to cool.
  12. Crush candy canes (I use a ziploc baggie and a hammer for this…)
  13. Melt white chocolate and drizzle over cooled cookies.
  14. Sprinkle crushed candy canes while the white chocolate is still melty.

Did you make this recipe?

Share a photo and tag us — we can't wait to see what you've made!


Posted in: Cookies, Dessert, Recipes Tagged: Biscotti, Candy canes, Cookies, Dark Chocolate, Double Chocolate Peppermint Biscotti, Peppermint, Semi Sweet Morsels, White Chocolate

Eggnog Biscotti with Rum Glaze (Even if You Don’t Like Eggnog or Hallmark Movies)

December 15, 2017 by chrissy@mythankfultable.com

Eggnog Biscotti with Rum Glaze

Eggnog is one of those things I associate with the holidays even though I may only take a taste. If I had to choose flavors and food items to have in my arsenal of holiday goodies, I have to admit, eggnog would get a nod, a, “Oh eggnog is out, it’s the holidays” (in a sing-song voice) but then my shopping cart and I would keep-on-a-walking.

I don’t want to come out and say I don’t like eggnog. It’s a texture thing. It’s a I’m-not-a-milk-drinker thing. But, I’m kinda not a fan. However, at my latest cookie swap with my amazing baker friends I came across a new to me cookie – an Eggnog Log.

Eggnog Biscotti

Eggnog Biscotti

I will be baking these for the blog soon (especially since I bought eggnog for this biscotti recipe), but the knock out flavor those cookies delivered may have changed my mind.

What a cool tasting cookie. Nutmeg, festive, sweet, and my wheels got spinning. Of course you also know I am slightly obsessed with biscotti and my new love of baking them now that they don’t terrify me. So, in my recipe search I came across this recipe for a glazed Eggnog Biscotti, which required the addition of a new Rum Extract to the baking pantry. Sign me up.

Eggnog Biscotti

Eggnog Biscotti

Again, biscotti is a simple process comparatively. Where you would chill the dough with any other cookie, you bake biscotti the first time right away. Where you would scoop or roll, you are slicing with a knife. Where you would be exchanging one tray of baked cookies for the next, you are cooking the whole batch at one time. It’s pretty cool. Oh, and the smell these cookies give off when baking is perfection. It tastes like what you would imagine the Hallmark movie houses smelling like…

Ok, I don’t actually watch Hallmark movies but everyone around me does. I’ve seen enough to know. Give me my on-demand of Playing House Seasons 1-3 and I am happy. I’ve also been sucked into the Stranger Things series by my son, who told me we need to watch it. Which, I agree we do. (I am only up to episode four in season one).

But back to the biscotti.

Eggnog Biscotti

Eggnog Biscotti

This biscotti is mixed up, formed into logs, baked, sliced on an angle, and baked a second time at a lower temperature until dry and lightly golden.

Then, the glaze is a simple mixture of confectioners sugar, eggnog, and rum extract.

I will say, give yourself time for the glaze to dry before packing these beauties up. I personally don’t like sugary sugary glazes, as in, all you taste is the sugar. So- I made my glaze/drizzle a little thinner. It was worth waiting for the glaze to dry to eat it. Although, who are we kidding, I tasted it as soon as it was on the completed batch. Listen, you will smell these and you will want to eat them.

What I really liked about this biscotti is I connected with fellow eggnog haters, I mean, other people who don’t swig eggnog like water. People who said, just like me, “You know, I don’t really like eggnog, but these, these I like.” Which is a great thing. Just like the day someone says, “I really don’t like vegetables but I like your Brussels sprouts.” Major win.

Even if you don’t LOVE eggnog, you will LOVE this recipe. If a recipe could give you a kiss in the snow or save a town of Christmas toy makers, or find the perfect new nanny, like on Hallmark…this is that cookie. Or, at least, make your house smell like Hallmark movies and make your cookie platter diverse.

I hope you enjoy this recipe, and as always, thank you for coming to the table!

Chrissy

Click below for a printable recipe!

Print

Eggnog Biscotti with Rum Glaze

Print Recipe

Delicious biscotti with eggnog, delicious nutmeg and rum notes. Eggnog and rum drizzle. Original recipe by Brandie Valenzuela, with slight modifications.

  • Author: chrissy@mythankfultable.com

Ingredients

Scale

For Biscotti:

  • 1 Stick or 1/2 Cup Butter
  • 1 Cup Granulated Sugar
  • 2 Eggs
  • 2 Teaspoons Rum Extract
  • 1/2 Cup Eggnog
  • 2 Teaspoons Baking Powder
  • 1 Tablespoon Nutmeg (I used fresh nutmeg with a microplane)
  • 1/2 Teaspoon Salt
  • 3 1/4 Cup Flour

Glaze:

  • 1 Cup Powdered Sugar
  • 1 Teaspoon Rum Extract
  • 2–3 Tablespoons of Eggnog

Instructions

  1. Preheat Oven to 350*
  2. Line a large baking sheet with parchment paper or silicone baking sheet.
  3. In a mixer, cream together butter and sugar until light and fluffy.
  4. Add eggs, and mix until combined.
  5. Add eggnog and rum extract.
  6. Add salt, baking powder, and nutmeg to the mix.
  7. Slowly incorporate flour and mix until well combined.
  8. On a floured surface, divide the dough to into two portions.
  9. Shape dough into two long rolls/rectangles, approximately 12-14 ” long.
  10. Place dough on the cookie sheet, with a few inches apart (dough rises as it bakes).
  11. Press down on each roll until it is 1/2″ high.
  12. Bake for 25 minutes at 350* and the biscotti is golden brown.
  13. Allow biscotti to cool, then transfer to a cutting surface and cut on the diagonal.
  14. Reduce oven to 325*
  15. Return biscotti to the oven, cut side up for a second baking time of 10 minutes on each side. Finished cookies should be slightly crunchy and golden brown.
  16. Cool cookies completely.
  17. To make drizzle, combine ingredients to the right consistency.
  18. To drizzle the biscotti, use either a small spoon or fork and drizzle over biscotti.
  19. Allow glaze to dry before packaging up.

Did you make this recipe?

Share a photo and tag us — we can't wait to see what you've made!


Posted in: Cookies, Dessert, Recipes Tagged: Biscotti, Cookie, Eggnog, Eggnog Biscotti, Rum

Chocolate Dipped Orange Biscotti and Fear of Doing New Things

December 13, 2017 by chrissy@mythankfultable.com
Chocolate Dipped Orange Biscotti

Chocolate Dipped Orange Biscotti

So…true confession, biscotti has always terrified me as a baker.

I know, that sounds foolish, because terrified is a very strong word for a baking adventure, but there it is. It’s a dough that you divide in two and bake all at once, then slice and REBAKE? As in, risk brown bottoms not once but twice? Yeah…hard pass.

In every cookie swap I join, it’s the biscotti I hide for myself. (Come on, you all hide stuff from your children). If I am having coffee at a pastry shop with a friend, the biscotti winks at me and says, “Hey girl, you know you want me to come along. You can dip me in your coffee and my chocolate will get all melty.”

Orange Zest with a Microplane

Ok, sorry if I just made biscotti sound like porn or a bad meme. But it’s true. It’s the one cookie I love that I have never made.

Until last night.

At my Library Cook Book Club Cookie Swap (I brought the Dark Chocolate Crinkle Cookies), when I confessed my fear of biscotti, I was challenged by my wonderful cooking friends to try my hand at biscotti for the blog. “A blog challenge if you will.” (I just said that in the Project Runway season sixteen “twins” voice in my head). So I began my research. Turns out, there are a lot of biscotti options out there.

Orange Biscotti DoughPleasant surprise, biscotti turns out to be one of the easiest, most beautiful cookies to make, and did I mention easy already? because they are. If you have attempted the Dark Chocolate Sea Salt Caramel Cookies or the Browned Butter Sea Salt Caramel Cookies, you have already superseded the cookie hard to make expectations.

So, here I am with another major life lesson, you don’t know until you try. Easy to dish out as a parent, not so easy to do as a grownup.

Truth be told I am not good with new or uncomfortable. I am not a fan of icebreakers, I do not like to have to get up and be silly unless it is spontaneous or I initiate it.

I am a team player, I have done fun things like swim with dolphins and ride the slide that goes through the shark tank. We’ve had kitchen dance parties. I’ve been known to see how many different beaches we can walk on in a day. Don’t get me wrong. I’m not totally rigid and predictable.Orange Biscotti Dough Ready for the Oven

But new things? No. I have a mantra I made for myself years ago when it came to new jobs or adventures, “You can try anything for two weeks.” (then reevaluate the situation to see if it sticks or I was right in my initial mindset of NO).  Or in this situation, I could try to make biscotti. I couldn’t really judge how difficult it is until I tried, right?

Orange Biscotti DoughSo, I tried. I selected Chocolate Dipped Orange Biscotti, because chocolate and orange are two of my favorite flavors. The original recipe from www.portandfin.com seemed pretty straightforward. I switched out the extract and of course added more orange zest. I also used semisweet chocolate because it is what I had in my pantry.

One bowl mix, one stick of butter, about an hour of my life in the kitchen, very little risk.

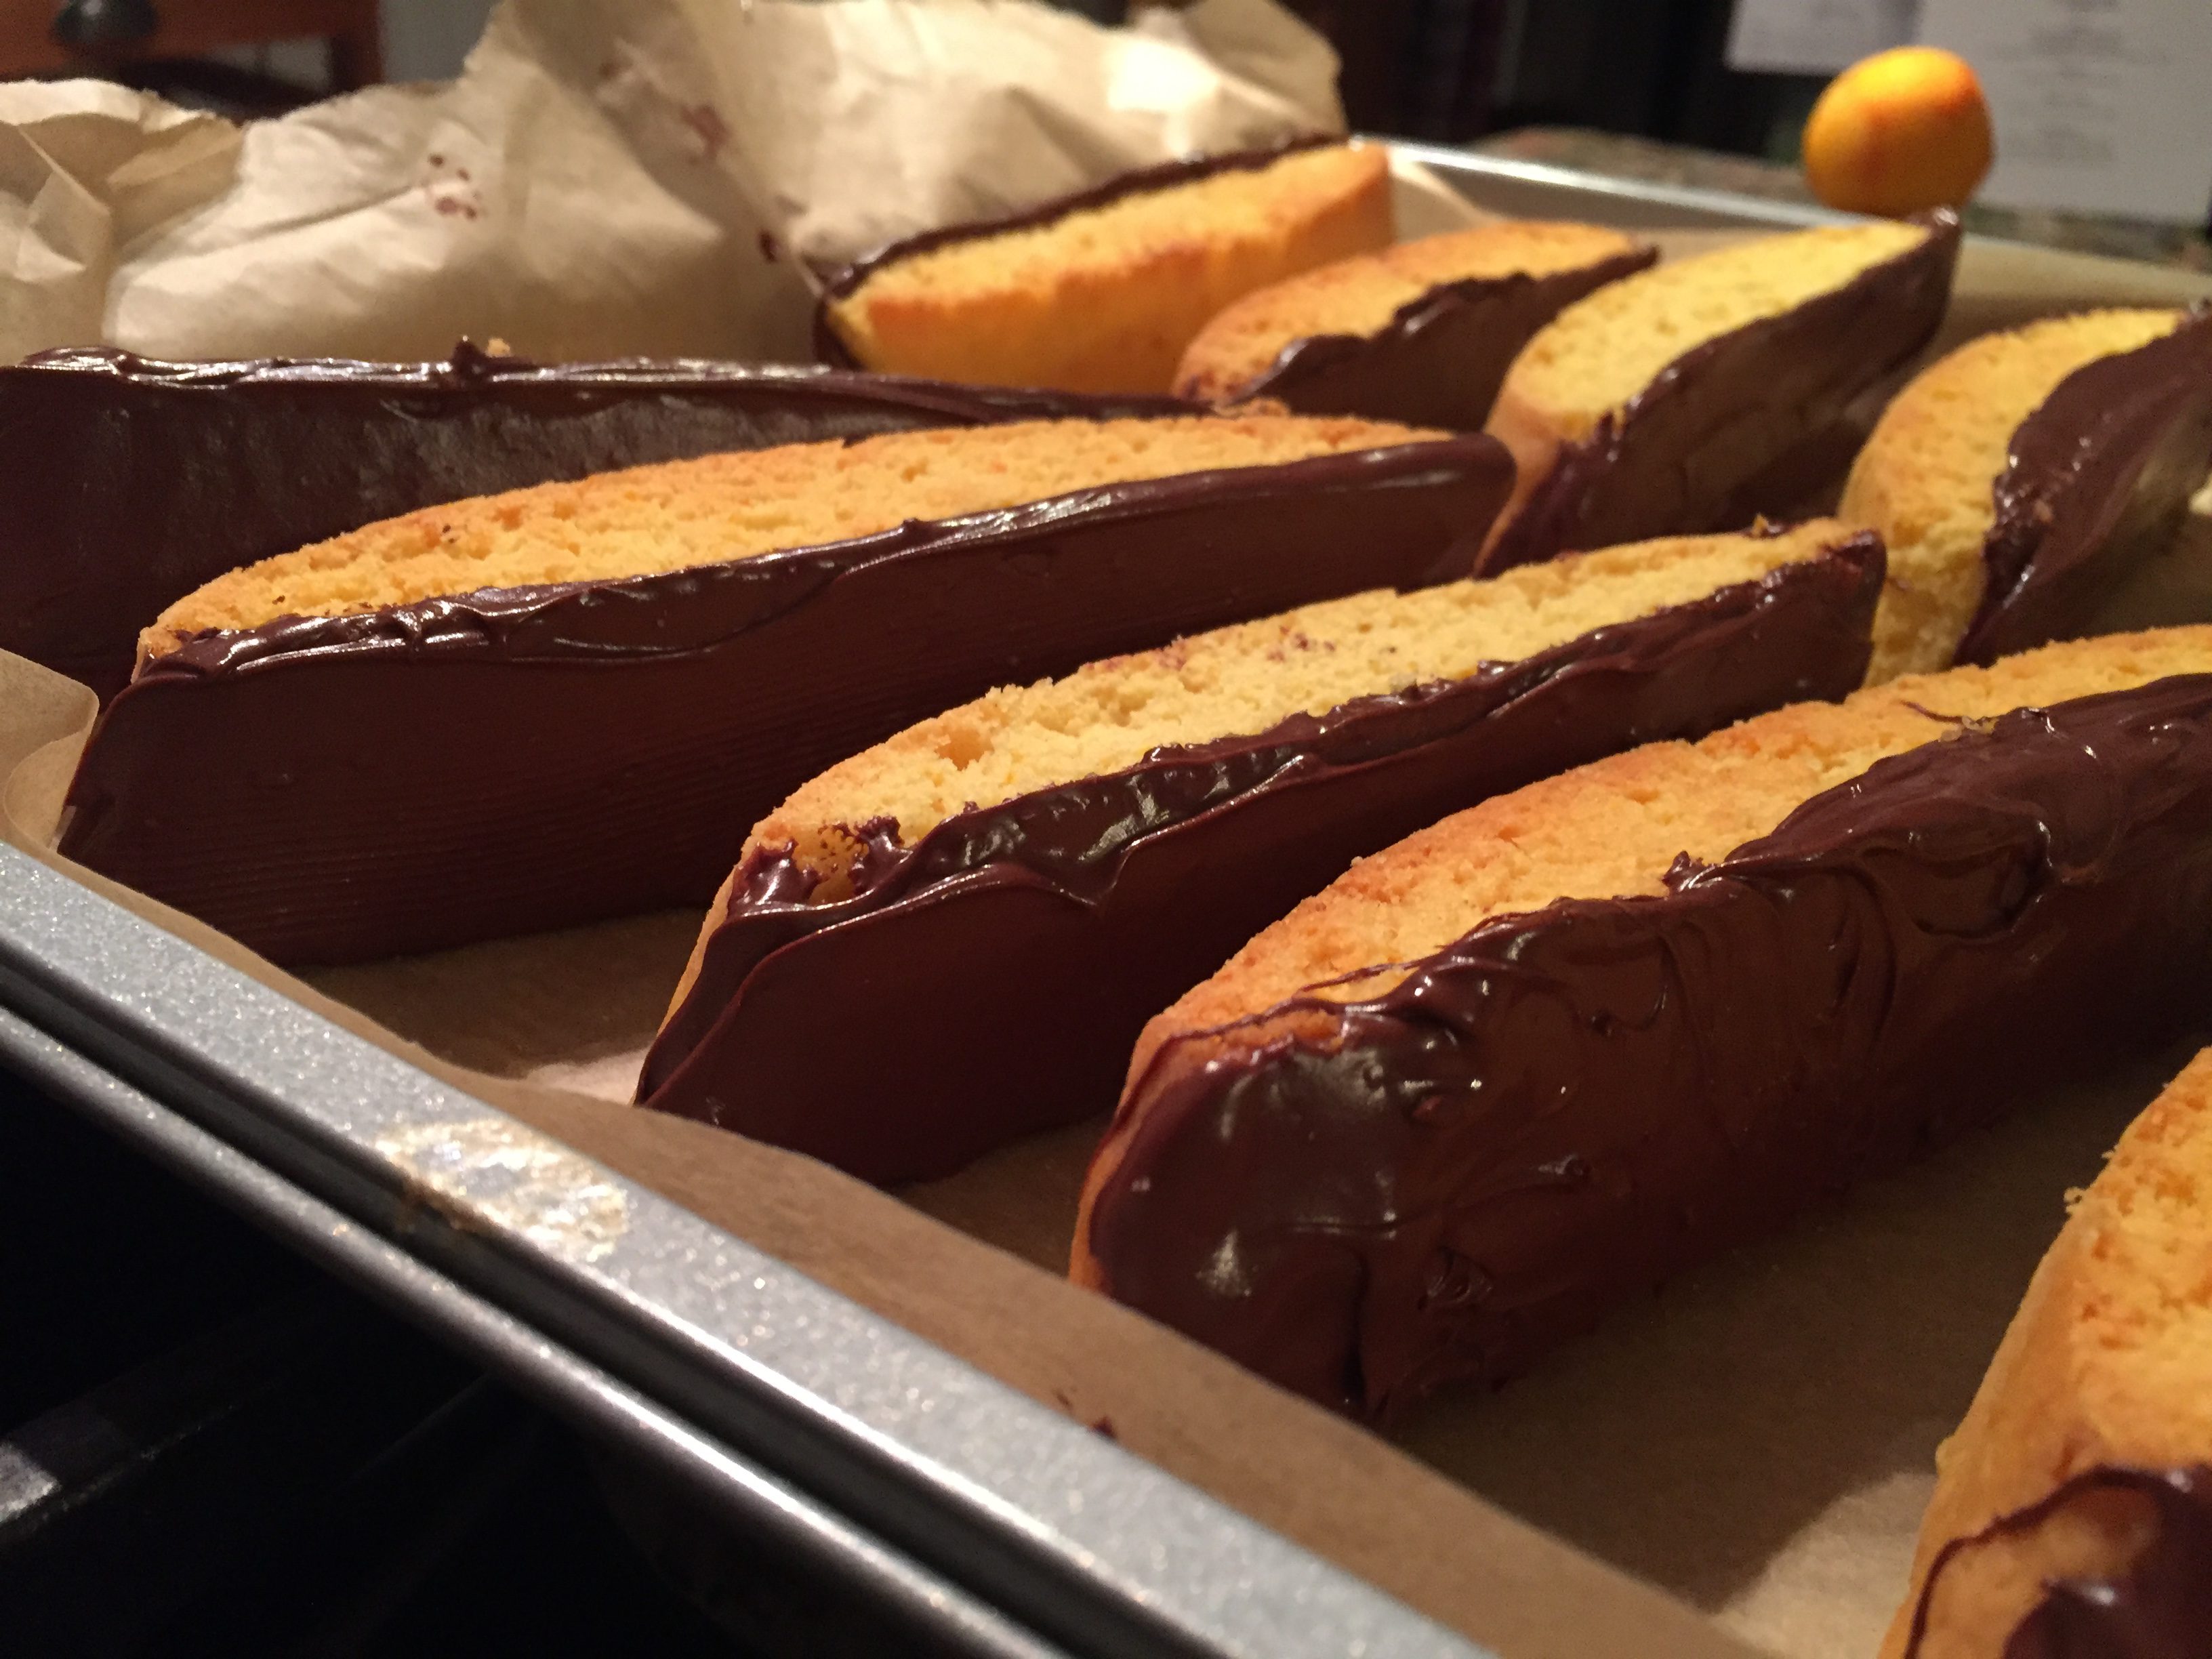
The dough comes together quickly, and is turned out onto a lightly floured surface and formed into two long rectangles. Then it is baked. Surprisingly the small rectangles not only get bigger but also puffier, which was very cool. I had intended smaller shaped biscotti and ended up with the “normal” sized biscotti.

Let the bars cool for about ten minutes, take out that big knife and slice on the angle. Then place them back on the cookie sheet sideways (middle side up) and bake a second time.

I used parchment paper, and followed the baking time closely. The great thing about biscotti is it is supposed to be a drier cookie. It is also supposed to be more golden than the average cookie, so the fear of brown bottoms has to go. And by brown bottoms I am talking about slightly darker than the cookie itself, not like a burnt sienna crayon.

Orange BiscottiOnce the cookies are done baking a second time and cool, melt that chocolate and dip away.

SO GOOD.

So here’s the funny thing that happened as soon as I bit into my first baked biscotti. All of these memories of biscotti came flooding into my mind.

Like anisette sponge cookies which I think was the closest I can remember to biscotti as a kid.

Like the first time I had biscotti with my dad with coffee like a real grown up.

Or the many conversations over coffee with my good friend Beth and the variety of biscotti she used to have at my disposal, (thanks friend).

Or that one time George and I ran away from home to Newport and got caught in the rain, and bunkered under the porch at The Coffee Grinder on Bannister’s Wharf and sipped our lattes and shared a biscotti. Which, to this day, is one of my favorite moments. (As documented on the Instagram pic below).

Biscotti in the rain with George

I got to thinking, how many other things am I afraid to do that are actually really easy but I’ve built up in my head to be scary (hello spin class/cross fit/trip to Europe/redoing my bathroom on my own/setting down a patio path) that I might be able to do just as easily as bake these cookies? Ok, some things require a professional, but you get my meaning.

All this to say, make the biscotti. You won’t be sad you did.

Bonus: my son, who is currently wrestling and watching everything he eats, ate one and said, “Mom, so good.” Which, as a momma, is the best compliment. Or at least, to me it is.

I might even go as far as to say my baker pride inched up a notch. Which, is good for the soul. Probably not as good as the spin class that I am afraid of and should take would be for my figure, but hey. I’ll take my romance of the biscotti for now. Baby steps and conquering fear and all that.

As an aside, I will also be posting about the Eggnog Biscotti with Rum Drizzle ASAP, as I couldn’t stop with one type of cookie. Because, baker fear issues. I’m also planning a chocolate peppermint biscotti and I probably won’t stop there. I may be slightly obsessed, just saying. That’s what happens when you find yourself newly in love with something or someone. You just have to know more, and biscotti, I am all heart emoji eyes for you.

I hope you enjoy this recipe, and sit yourself down with one and a warm beverage of choice, because they are a kick your feet up and enjoy yourself cookie if ever there was one.

Chocolate Dipped Orange Biscotti

Chocolate Dipped Orange Biscotti

As always, thank you for coming to the table!!!

Chrissy

Click below for a printable recipe.

Print

Chocolate Dipped Orange Biscotti

Print Recipe

Delicious Orange Biscotti Dipped in Semi Sweet Chocolate. Original recipe found on www.portandfin.com with some minor changes.

  • Author: chrissy@mythankfultable.com

Ingredients

Scale
  • 1/2 Cup (One Stick) of Unsalted Butter
  • 1 Cup Granulated Sugar
  • 2 Eggs
  • 1/2 Teaspoon Orange Extract (If you don’t have this you can use vanilla or almond)
  • 2 Tablespoons of Orange Juice
  • 3 Tablespoons Orange Zest
  • 2 Teaspoons Baking Powder
  • 1/4 Teaspoon Salt
  • 2 1/2 Cups of All Purpose Flour
  • 1 Egg White mixed with 1 Teaspoon of Water (For brushing the dough before first baking)
  • 1/2 Bag of Semi-Sweet or Dark Chocolate morsels.

Instructions

  1. Preheat oven to 325*
  2. using a mixer, combine butter and sugar until fluffy.
  3. Add Orange Zest and combine.
  4. Add Orange Juice, Eggs, and Extract (Orange or Vanilla) and mix until well combined.
  5. Add Baking Powder and Salt.
  6. Slowly incorporate the flour, mixing until just combined. The dough will appear sticky- that’s how you want it.
  7. Turn dough out onto a lightly floured surface and divide into two portions.
  8. Roll each portion to a rectangle approximately 12 inches long by 4-5 inches wide.
  9. Place each rectangle on a parchment lined baking sheet with a few inches in between (dough will spread and rise as it cooks).
  10. Brush tops of both rectangles with Egg White and Water Mixture
  11. Bake for 30 minutes in 325* oven until lightly golden and firm to the touch.
  12. Cool for ten minutes.
  13. Lower oven heat to 300* at this time.
  14. With a chefs knife or other longer knife, slice through the rectangles on an angle to the size preferred. (I made mine about 3/4″ wide and yielded about 20-24 biscotti).
  15. Stand each slice on its side, (cut side up) and bake at 300* for an additional 30 minutes or until dried and lightly browned.
  16. Let cookies cool completely.
  17. Melt chocolate in microwave or in a double boiler, watching the chocolate doesn’t burn.
  18. Dip biscotti in chocolate or using a knife, spread a layer of chocolate on the biscotti.
  19. Allow chocolate to set, this can be done in the refrigerator or in a cool location.
  20. Store in an airtight container in a cool location.
Did you make this recipe?

Share a photo and tag us — we can't wait to see what you've made!

Posted in: Cookies, Dessert, My Story, Recipes Tagged: Biscotti, chocolate, Chocolate Dipped Orange Biscotti, Cookies, dessert, Orange

Cherry Almond Shortbread Cookies with White Chocolate Drizzle

December 12, 2017 by chrissy@mythankfultable.com
Cherry Almond Shortbreads with White Chocolate Drizzle

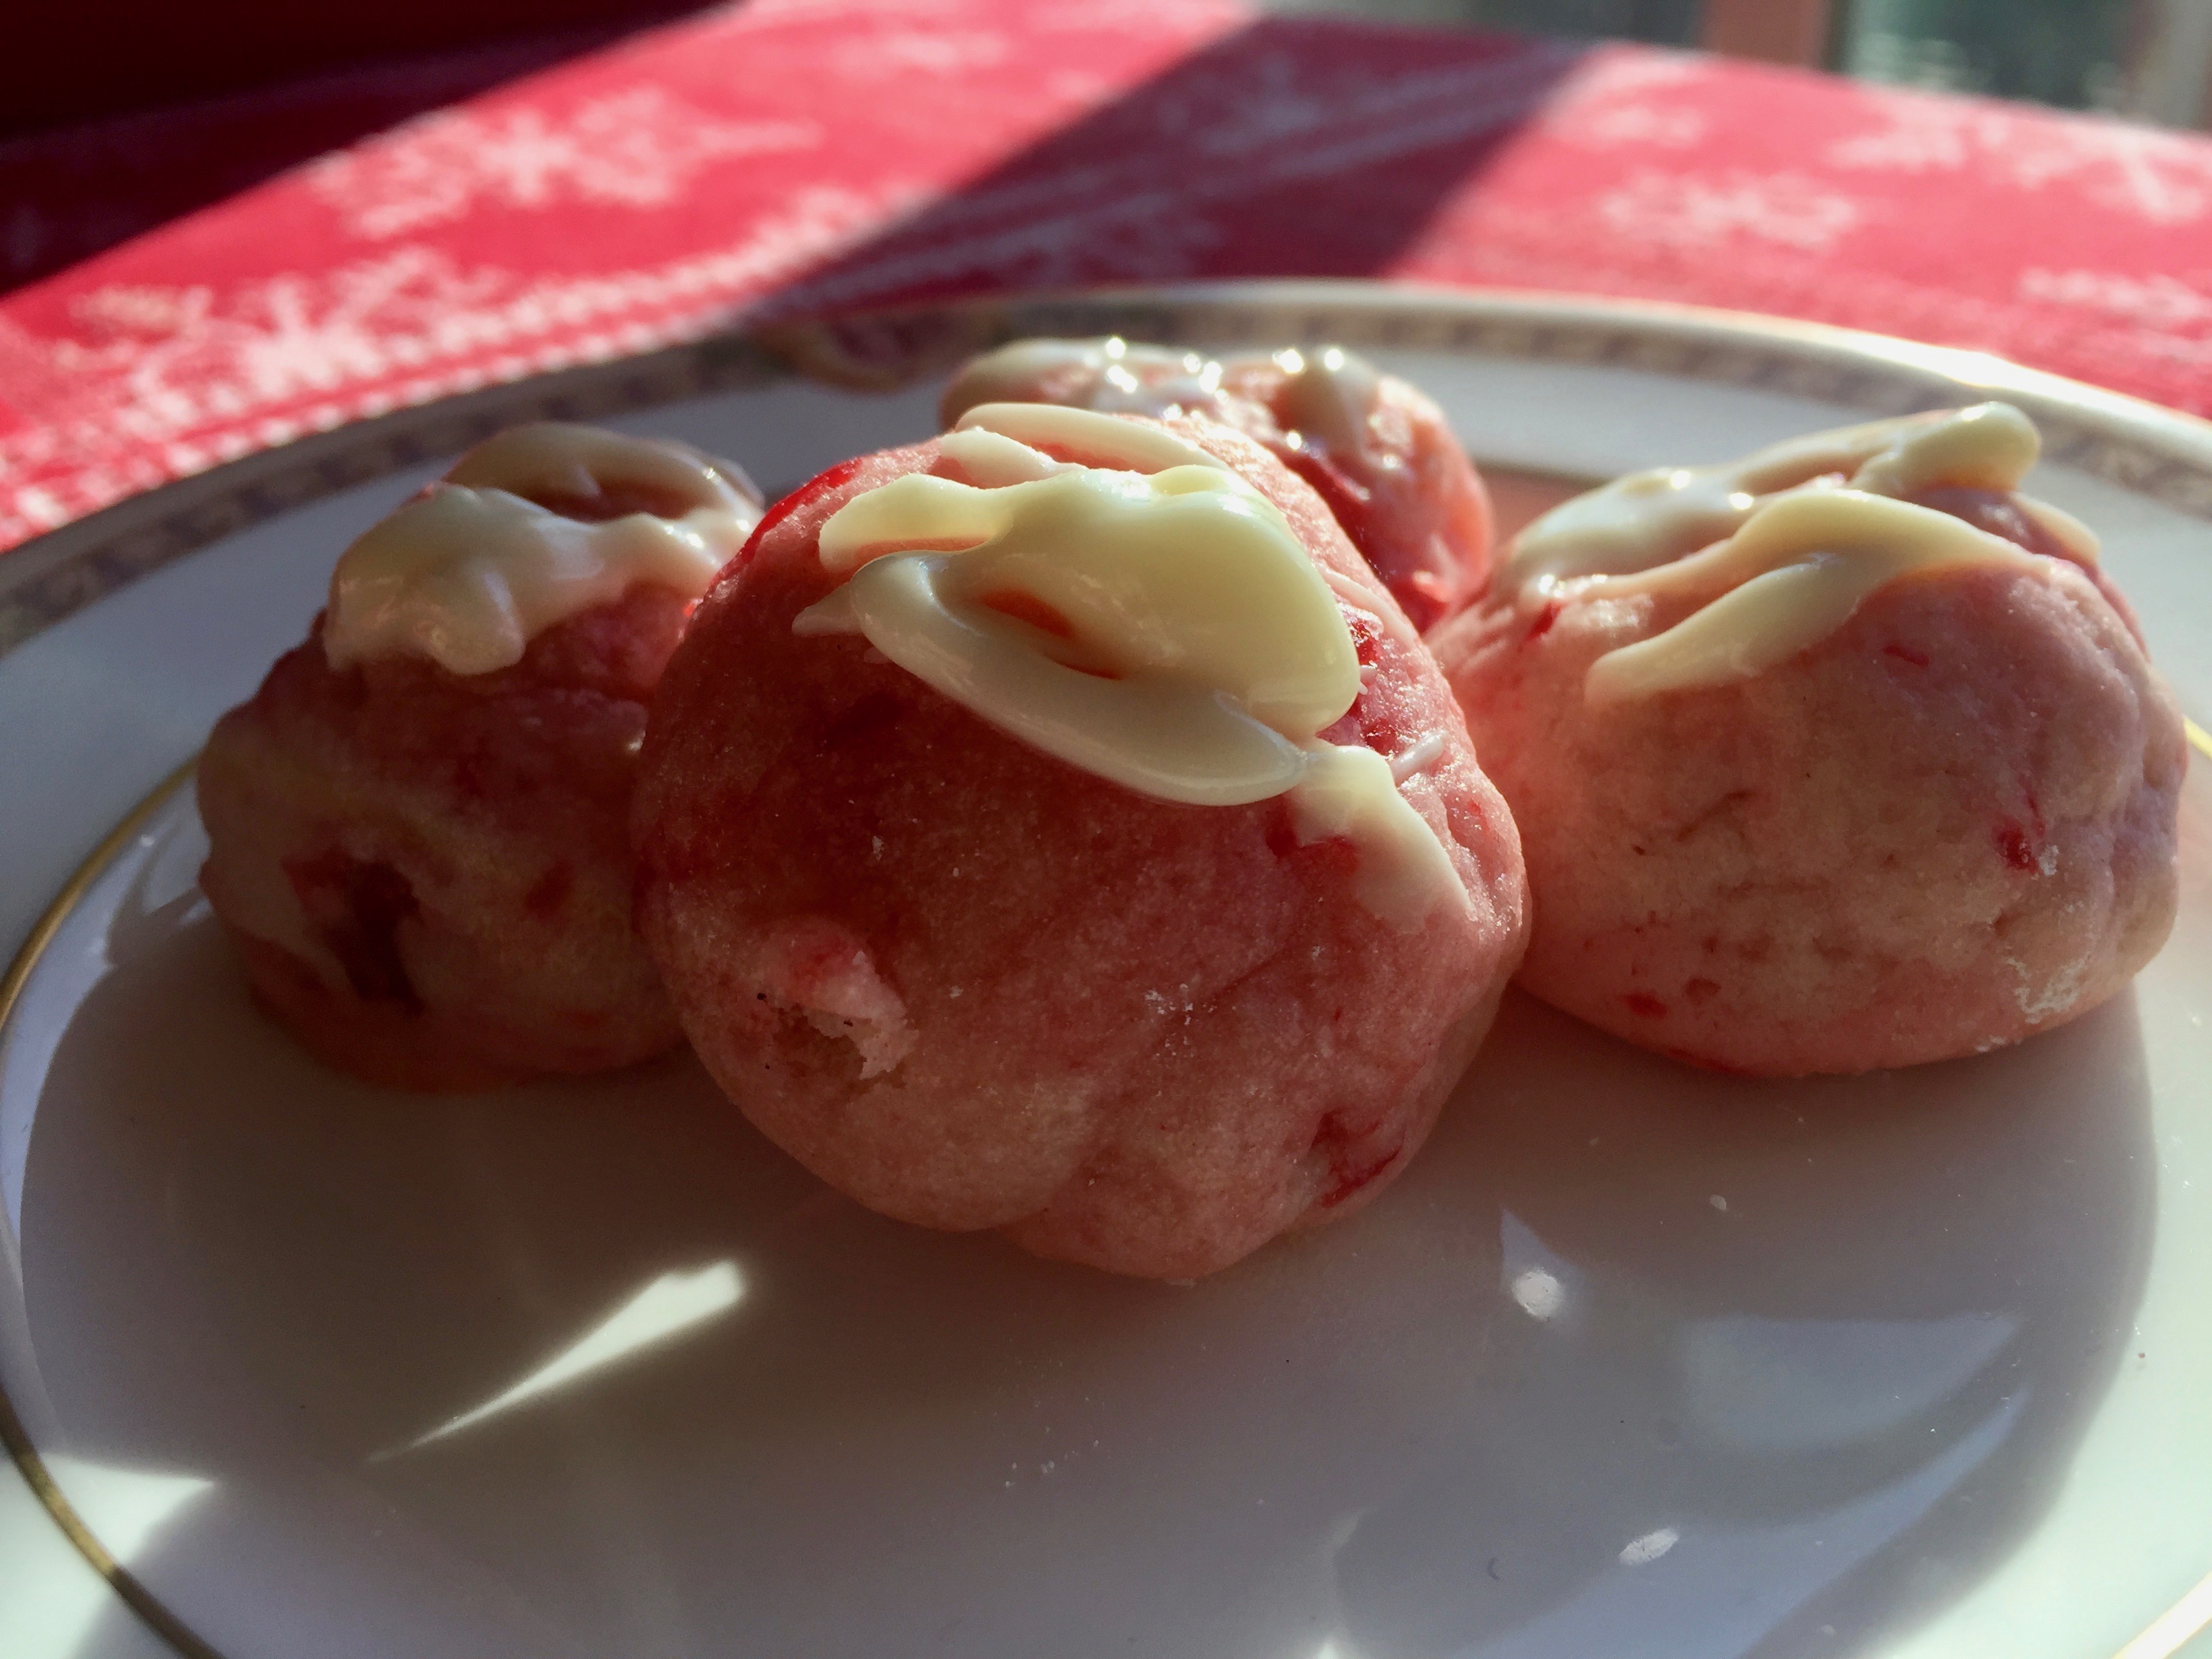
Oh the sweet pinkness of these cookies. Tender sweet, bite-sized mouthfuls of cherries and almond. A shortbread cookie that presents itself in a little pink mound with white chocolate icing.

Cherry Almond Shortbreads with White Chocolate Drizzle

Cherry Almond Shortbreads with White Chocolate Drizzle

I love how these are shortbread cookie without being dry and flat. Even with the two main ingredients being flour and butter, the sweetness of the cherry juice and the diced maraschino cherries give these cookies the jewel like quality and color.

Cherry Almond Shortbreads

Cherry Almond Shortbreads

While a pink cookie for me is more decorative and makes the cookie platter so much prettier…I am also impressed with the flavor. A cookie has to bring more to the table than a pretty face.

I also wondered about the white chocolate drizzle. I mean, does a cookie that is pink and filled with cherry bits and almond extract really need an additional white chocolate drizzle? The answer is yes. Yes it does.

Cherry Almond Shortbread Cookies

Cherry Almond Shortbread Cookies

I think the thing about different cookies is that each one really should top the last. Nobody wants a dry or boring cookie. If you are going to put it in your mouth, it should be worth the caloric trade off. And if it is a sweet, especially if it is a sweet, it should definitely be worth it. So, while these little darlings were good without the drizzle, the tiny bit of white chocolate was just what they needed to be front and center.

This cookie is fairly simple in that the hard parts are chopping the cherries, and waiting for the dough to chill.

For this recipe you make and chill the shortbread dough.  Then, when thoroughly chilled, you form small round scoops or roll into balls. Personally, I use a cookie dough scoop, then roll them to make them smooth. These baked up at 325* in about 10-12 minutes. I took the first batch out at ten, and liked the extra minute or two – I don’t like a browned bottom cookie at all- so watch your oven and don’t wander too far while baking.

When you remove them from the oven, they are perfect little pink mounds. They are not fluffy or cloud like- they are a denser cookie- as they are actually a shortbread. But the almond and cherry add a really nice flavor that works with the size and color of these little cookies. I wish my daughter were younger and we still played tea party. This would be the cookie I would serve, for sure.

When the cookies are cool, the white chocolate drizzle is just enough to finish them off. If you are freezing these cookies, hold off on the white chocolate drizzle until ready to serve.

I hope you enjoy this recipe, and as always, thank you for coming to the table!

Chrissy

Click below for a printable recipe.

Print

Cherry Almond Shortbread Cookies with White Chocolate Drizzle

Cherry Almond Shortbreads with White Chocolate Drizzle
Print Recipe

Delicious pink shortbread cookies that pack a cherry and almond punch. Original recipe from www.sallysbakingaddiction.com

  • Author: chrissy@mythankfultable.com

Ingredients

Scale
  • ¾ Cup Unsalted Butter
  • 2/3 Cup Granulated White Sugar
  • 1 ½ Teaspoon Almond Extract
  • 1 Tablespoon Maraschino Cherry Juice
  • 2 Cups All Purpose Flour
  • 20 Maraschino Cherries, drained chopped
  • 4 Ounces White Chocolate

Instructions

  1. Using a mixer, beat the butter at a high speed until light an fluffy.
  2. Add to medium speed, and add sugar, and almond extract.
  3. Scrape down the sides of the bowl, and drizzle in cherry juice.
  4. Turn off mixer and incorporate dry ingredients. A soft dough will form.
  5. Add chopped cherries and mix until they are distributed throughout the dough.
  6. Wrap dough in saran wrap or wax paper and refrigerate.
  7. Preheat oven to 325*
  8. Scoop and shape dough into balls.
  9. Bake for 10-12 minutes on parchment lined baking sheets.
  10. Cool cookies on wire rack.
  11. Melt white chocolate and drizzle over cookies.

Did you make this recipe?

Share a photo and tag us — we can't wait to see what you've made!

Posted in: Cookies, Dessert, Recipes Tagged: Almond, cherry, Cookies, dessert, Shortbread, White Chocolate Drizzle

Orange Cranberry Shortbread Cookies

December 11, 2017 by chrissy@mythankfultable.com
Cranberry Orange Shortbread Cookies

Orange Cranberry Shortbread Cookies

No New England cookie platter would be complete without something cranberry. Or, I should say, my cookie trays need to have cranberry somewhere. I think, to make a pretty cookie presentation there has to be a mix of colors and textures, and where the sweet has a different twist from one offering to another.

While I am more of a chocolate or salted caramel cookie fan, I do think shortbreads have a place in this world. Especially when they are lightly dusted with sugar, and packed with the sweet tangy punch of cranberries and orange zest.

Cubed Chilled Butter on a Cutting Board

Cubed Chilled Butter

The tricky part about shortbread cookies is the perfect consistency. Cutting the cold cubed butter into the flour until the dough has a sandy texture, then adding just enough liquid to bring the dough together without being too moist.

Cranberries and Sugar

Cranberries and Sugar

This recipe has been in my cookie file for a long time, and I do not know where on the internet I found it. I did make some changes, including the amount of orange juice involved. I have in the recipe up to 1/2 Cup of freshly squeezed orange juice (I zested the orange and squeezed it for the juice). I add the juice in tablespoon at a time measurements because it really does depend on the flour and how much liquid the shortbread dough will take to hold together and still be tender. It’s a watch and feel game- you want it to stick together but not be stick-y, ya know?

Shortbread Dough

Shortbread Dough

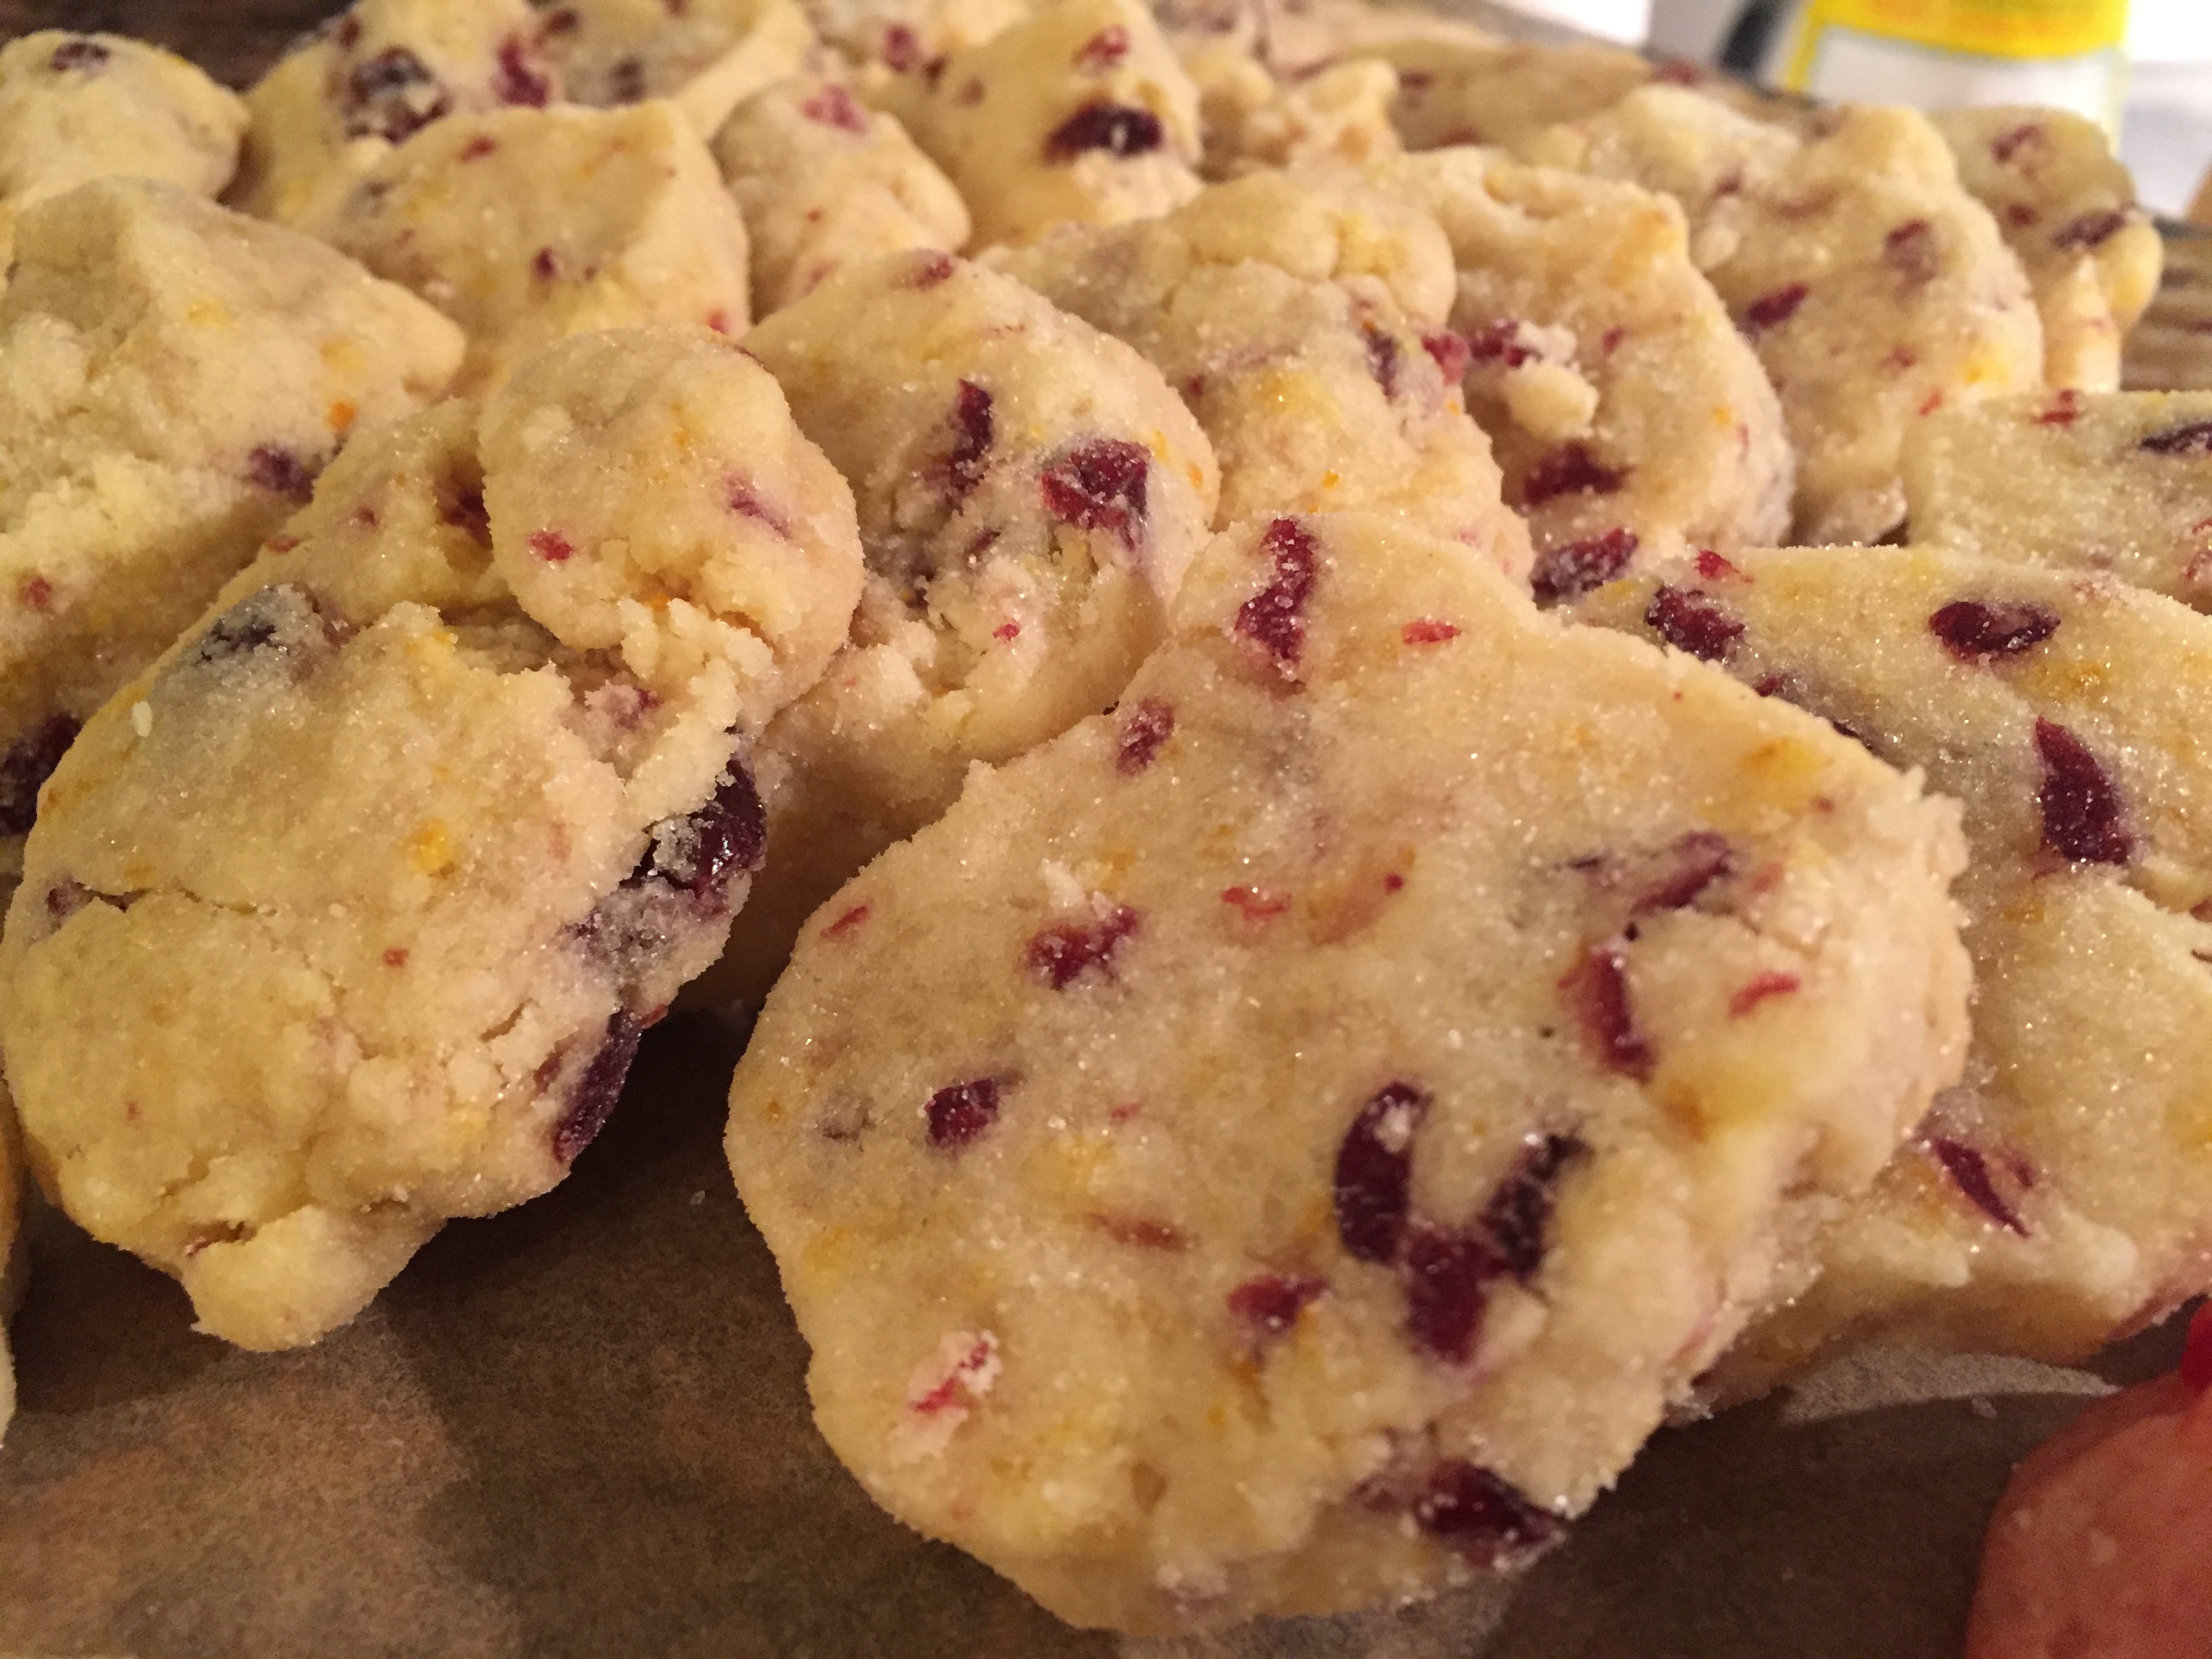
The cranberries are dried (I used Craisins) and pulsed in a food processor with some sugar and added to the dough. I find the zip of orange and cranberry together add a perky flavor to the otherwise traditionally buttery dough of shortbread.

I’m not going to lie. When it comes to this kind of cookie, I am a believer that more is more. I will always be heavy handed when using zest or something like that. If you find that there is extra zest or an additional 1/4 cup of cranberries, throw them in the dough. The cookies won’t lack for that extra teaspoon of orange zest.

Once the dough comes together, form into logs and refrigerate for a few hours or overnight in parchment or wax paper. The key to this is making sure the wrapper is tightly sealed around the dough. Any open edges, you run the chance of the dough drying out- and this is not the dough to have dry out. (Think play-doh after the lid wasn’t put on correctly).

Once the dough is chilled, slice the logs into 1/4 inch slices (I do not use a ruler for this…no one has time for that). Then coat the disks of dough in sugar, and place on a parchment or silicone mat lined cookie sheet. (Have I mentioned Santa is bringing me new Silpats? Can’t wait!).

These cookies are tender and so when they are baking- you need to be on it. These cookies are essentially butter, flour, and sugar, with your decorative mix ins. While the butter melts into the dough making light little pockets of air-it can also burn or brown quickly, which, is bad. Unless you like browned bottom cookies, in which case we can’t be friends. (Kidding! I’m kidding…sort of).

Once the cookies have cooled, they will freeze nicely for at least a month, or stay fresh in a sealed container for a few days. Shortbreads don’t have that chewy consistency, but these do hold their own, the buttery base kind of melting in your mouth with the chew of the cranberry.

Personally, I love the way these cookies smell and look more than anything. They smell so citrusy, and the sugar glints off the dough in just the right way…they really are pretty little cookies fit for this New England girl’s table.

I hope you enjoy this recipe, and as always, thank you for coming to the table!

Chrissy,

Click below for a printable recipe!

Print

Orange Cranberry Shortbread Cookies

Cranberry Orange Shortbread Cookies
Print Recipe

Delightfully fresh shortbread cookies with the sweet tart of cranberries and orange zest. Dusted with sugar right before baking.

  • Author: chrissy@mythankfultable.com

Ingredients

Scale
  • 1 Cup Dried Cranberries
  • 1 ½ Cup Granulated White Sugar
  • 5 Cups Flour (spooned and leveled- not scooped)
  • 2 Cups Butter, Chilled and Cubed
  • 2 Teaspoons Almond Extract
  • 2 Tablespoons Orange Extract (I used more in my cookies- I love orange zest)
  • 1/4 – 1/2 Cup fresh squeezed orange juice (add by teaspoonful until dough comes together)
  • Additional Sugar to coat cookies before baking

Instructions

  1. Combine cranberries with ½ Cup of sugar in a food processor and pulse just until cranberries are broken down into smaller pieces and combined with the sugar.
  2. Combine flour and remaining sugar in a different bowl.
  3. Using a pastry cutter, cut butter into the flour and sugar mixture until resembles fine crumbs.
  4. Stir in cranberry sugar mixture, extract, and orange juice by teaspoonful and using hands, knead dough into a ball.
  5. Shape dough into a log, and chill in wax paper or parchment paper (four hours to two days).
  6. Preheat oven to 325*
  7. Slice logs of dough into ¼ inch slices. Coat cookie slices with sugar.
  8. Bake cookies on parchment lined cookie sheet for 10-12 minutes or until cookies are set.
  9. Let cookies cool for several minutes on baking sheet before moving to a cooling rack.
  10. Store in airtight container for three days or freeze for up to three months.

Did you make this recipe?

Share a photo and tag us — we can't wait to see what you've made!

Posted in: Cookies, Dessert, Recipes Tagged: Cookies, Cranberry, dessert, Orange, Orange Cranberry Shortbread Cookies, Shortbread

Dark Chocolate Crinkle Cookies

December 10, 2017 by chrissy@mythankfultable.com
Dark Chocolate Crinkle Cookies

Dark Chocolate Crinkle Cookies

In a time of year when all things sugary sweet make a grand procession, I am not going to waste any time with cookies that aren’t amazing.

Dark Chocolate Crinkle Cookies

Dark Chocolate Crinkle Cookies

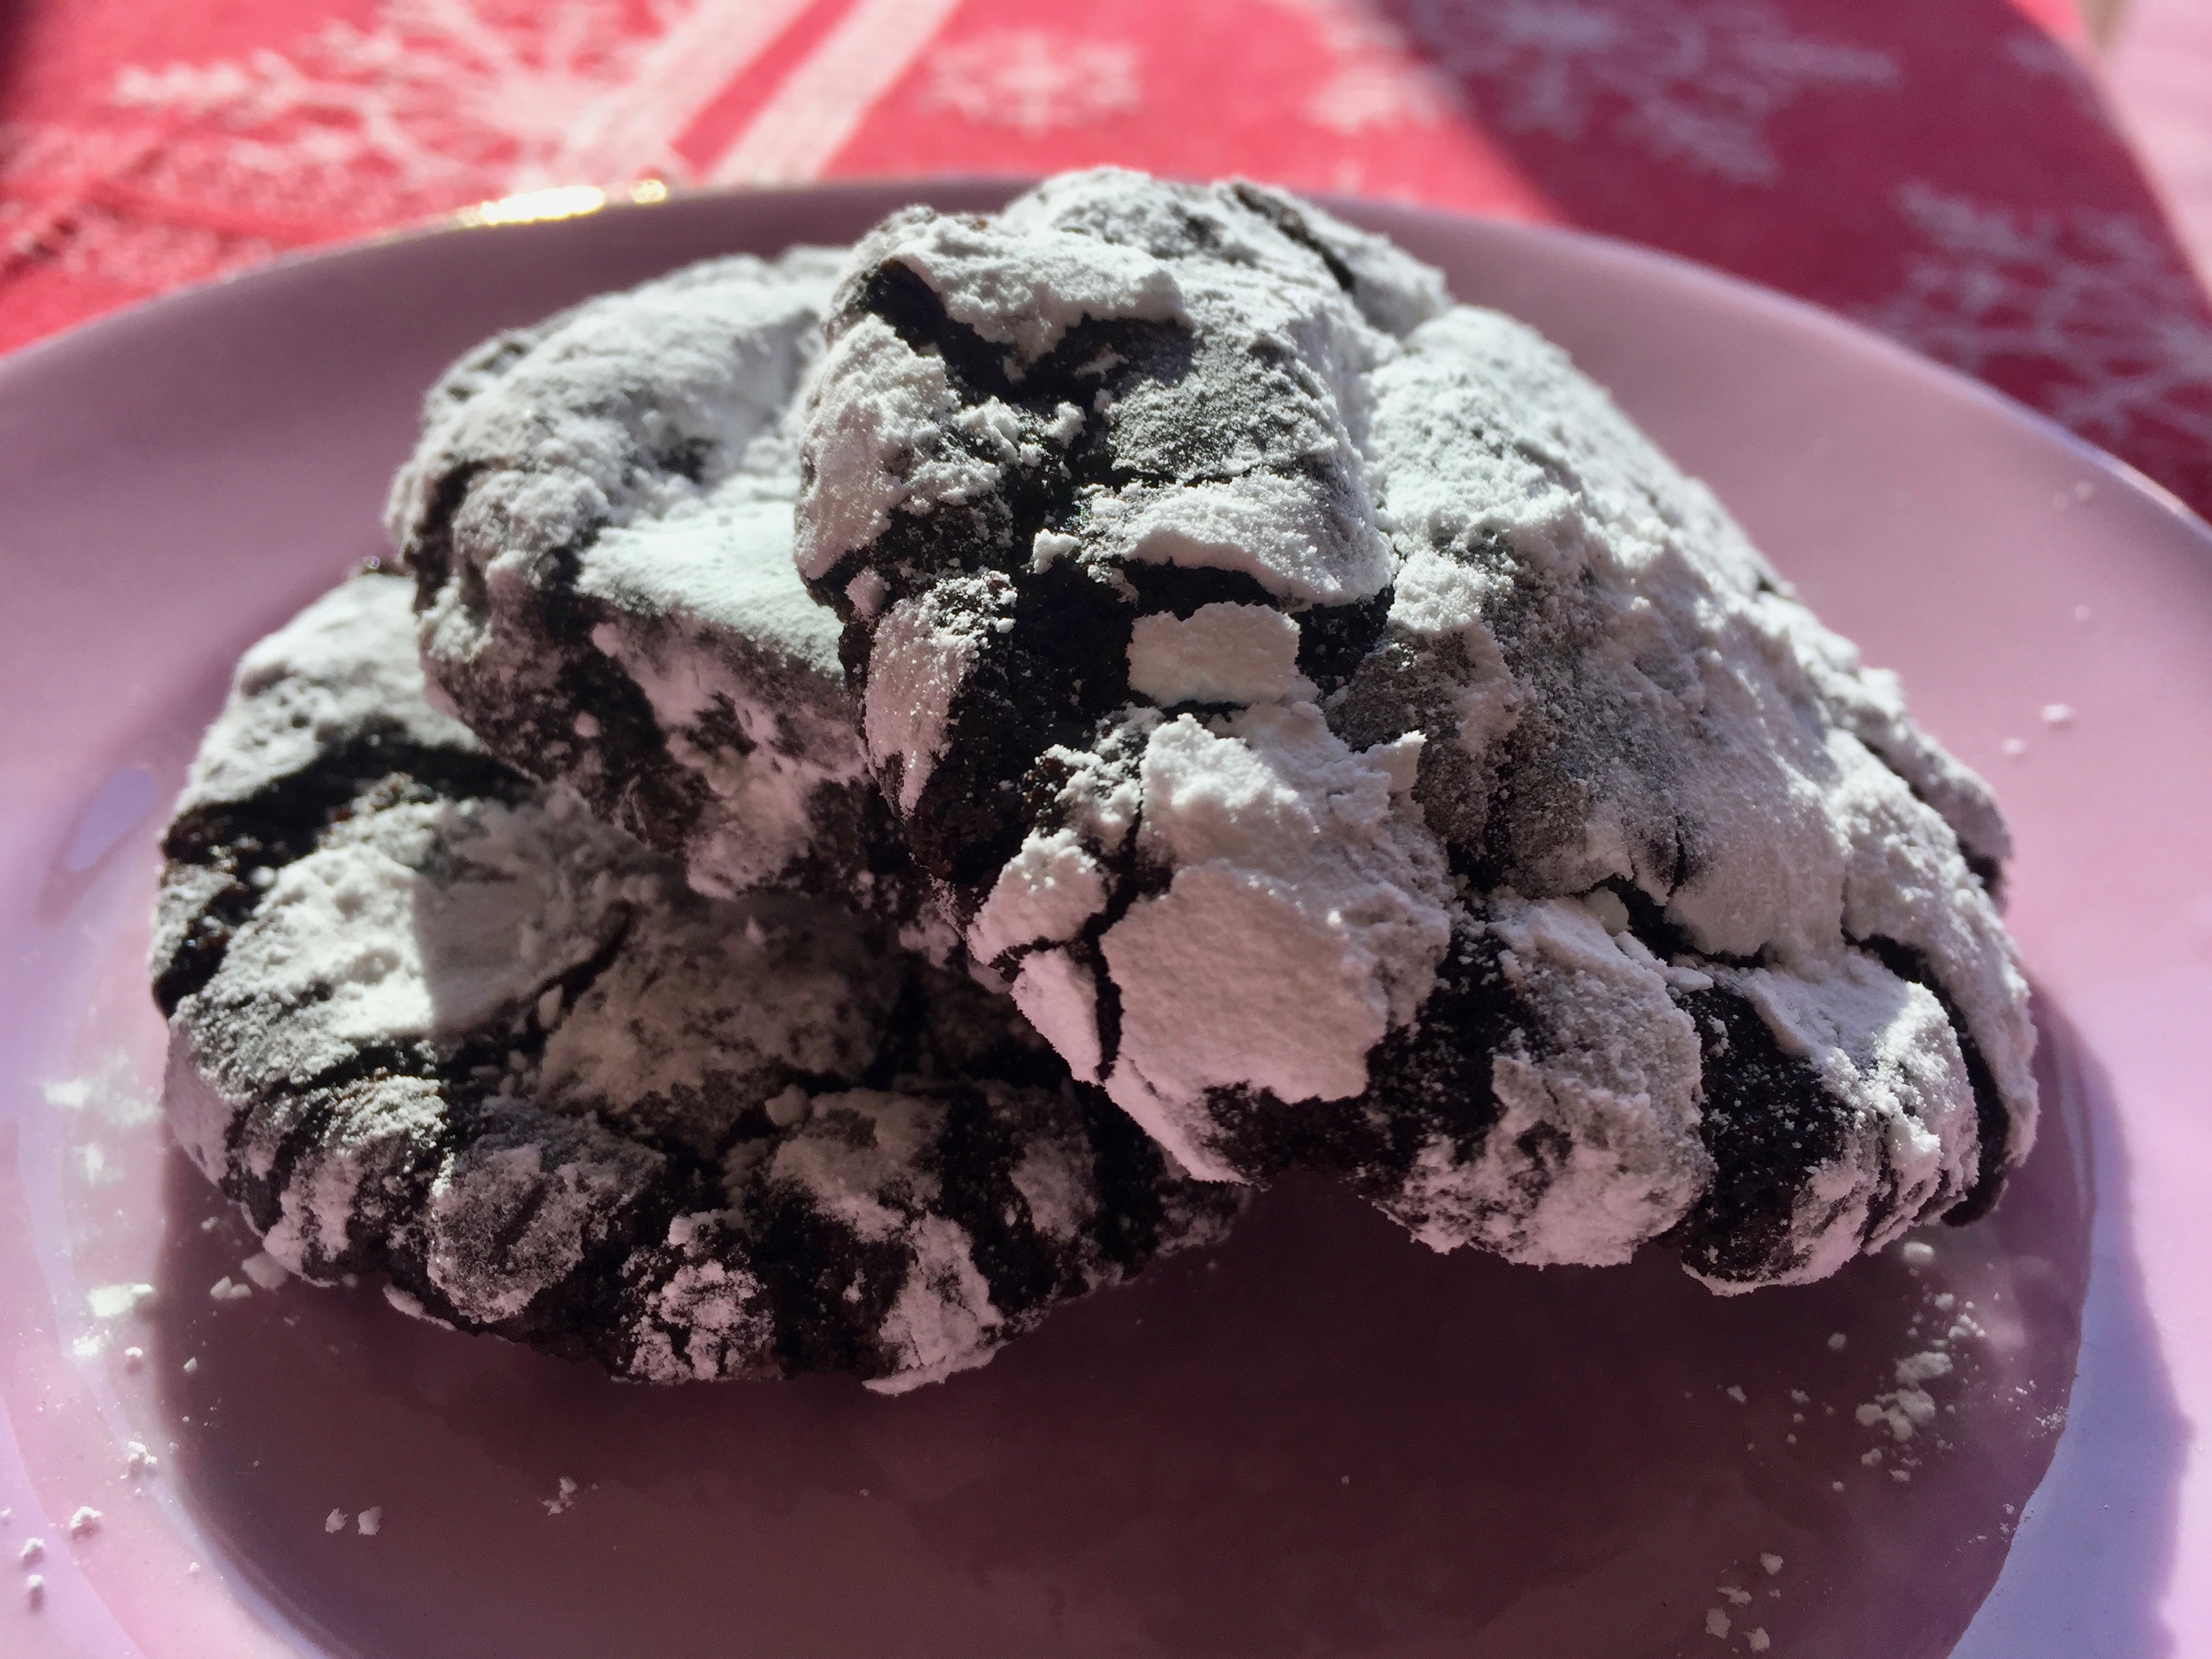
These simple crinkle cookies have the texture of a cookie outside and a brownie inside. The powdery sugar outside coating mixes with the dark chocolate chewy center to make one of the favorites of my household.

I also exchanged the vanilla extract for almond extract- because there is something spectacular about almond and dark chocolate. The dark chocolate in these cookies comes from dark chocolate cocoa powder- regular cocoa powder could be used, but I like the richness of the darker cocoa myself. I mean, if we are going to go chocolatey, why not go big or go home?

This cookie is also interesting in that it bypasses butter or crisco and uses vegetable oil. For a hot second I thought,

Dark Chocolate Crinkle Cookies

Dark Chocolate Crinkle Cookies

“Hey, these are sort of vegan” but then I remembered, no, there are eggs involved.

Not vegan. Delicious, but not vegan. However, with an egg substitute- these could be.

The dough needs to be thoroughly chilled, and then it is scooped, or rolled into balls. The balls are then rolled in powdered sugar.

Dark Chocolate Crinkle Cookies

Dark Chocolate Crinkle Cookies

These cookies bake at 325* for ten minutes. Then, they cool on the baking sheet for a few minutes before cooling completely on a wire rack or parchment paper. They are a tender cookie until they cool- so you need to be careful when moving them.

The neat thing about this cookie is when they bake they make the “crinkle.” A combination of the cookie spreading and the powdered sugar not- they are the prettiest little things.

Dark Chocolate Crinkle Cookies

Dark Chocolate Crinkle Cookies

The powdered sugar does have a tendency to get…everywhere. It is a necessary evil but oh so worth it.

These cookies were my contribution to the Library Cook Book Club Cookie Exchange and I am so glad these turned out better than the Thai Peanut Noodle Soup that never made it, due to an unfortunate not-plugging in of the crock pot situation. In fact, as I was baking them my cookie tasters were hovering until I had baked enough for the exchange…and wondering how many more I had to set aside before they could have one. Thankfully there were enough left over for my counter top snack container.

Dark Chocolate Crinkle Cookies

Dark Chocolate Crinkle Cookies

If you consider that the mixing of the dough part is pretty easy, then you take a break before rolling them and giving them the confectioner’s sugar coat. Baking is easy and then the hardest part…waiting for them to cool enough to eat.
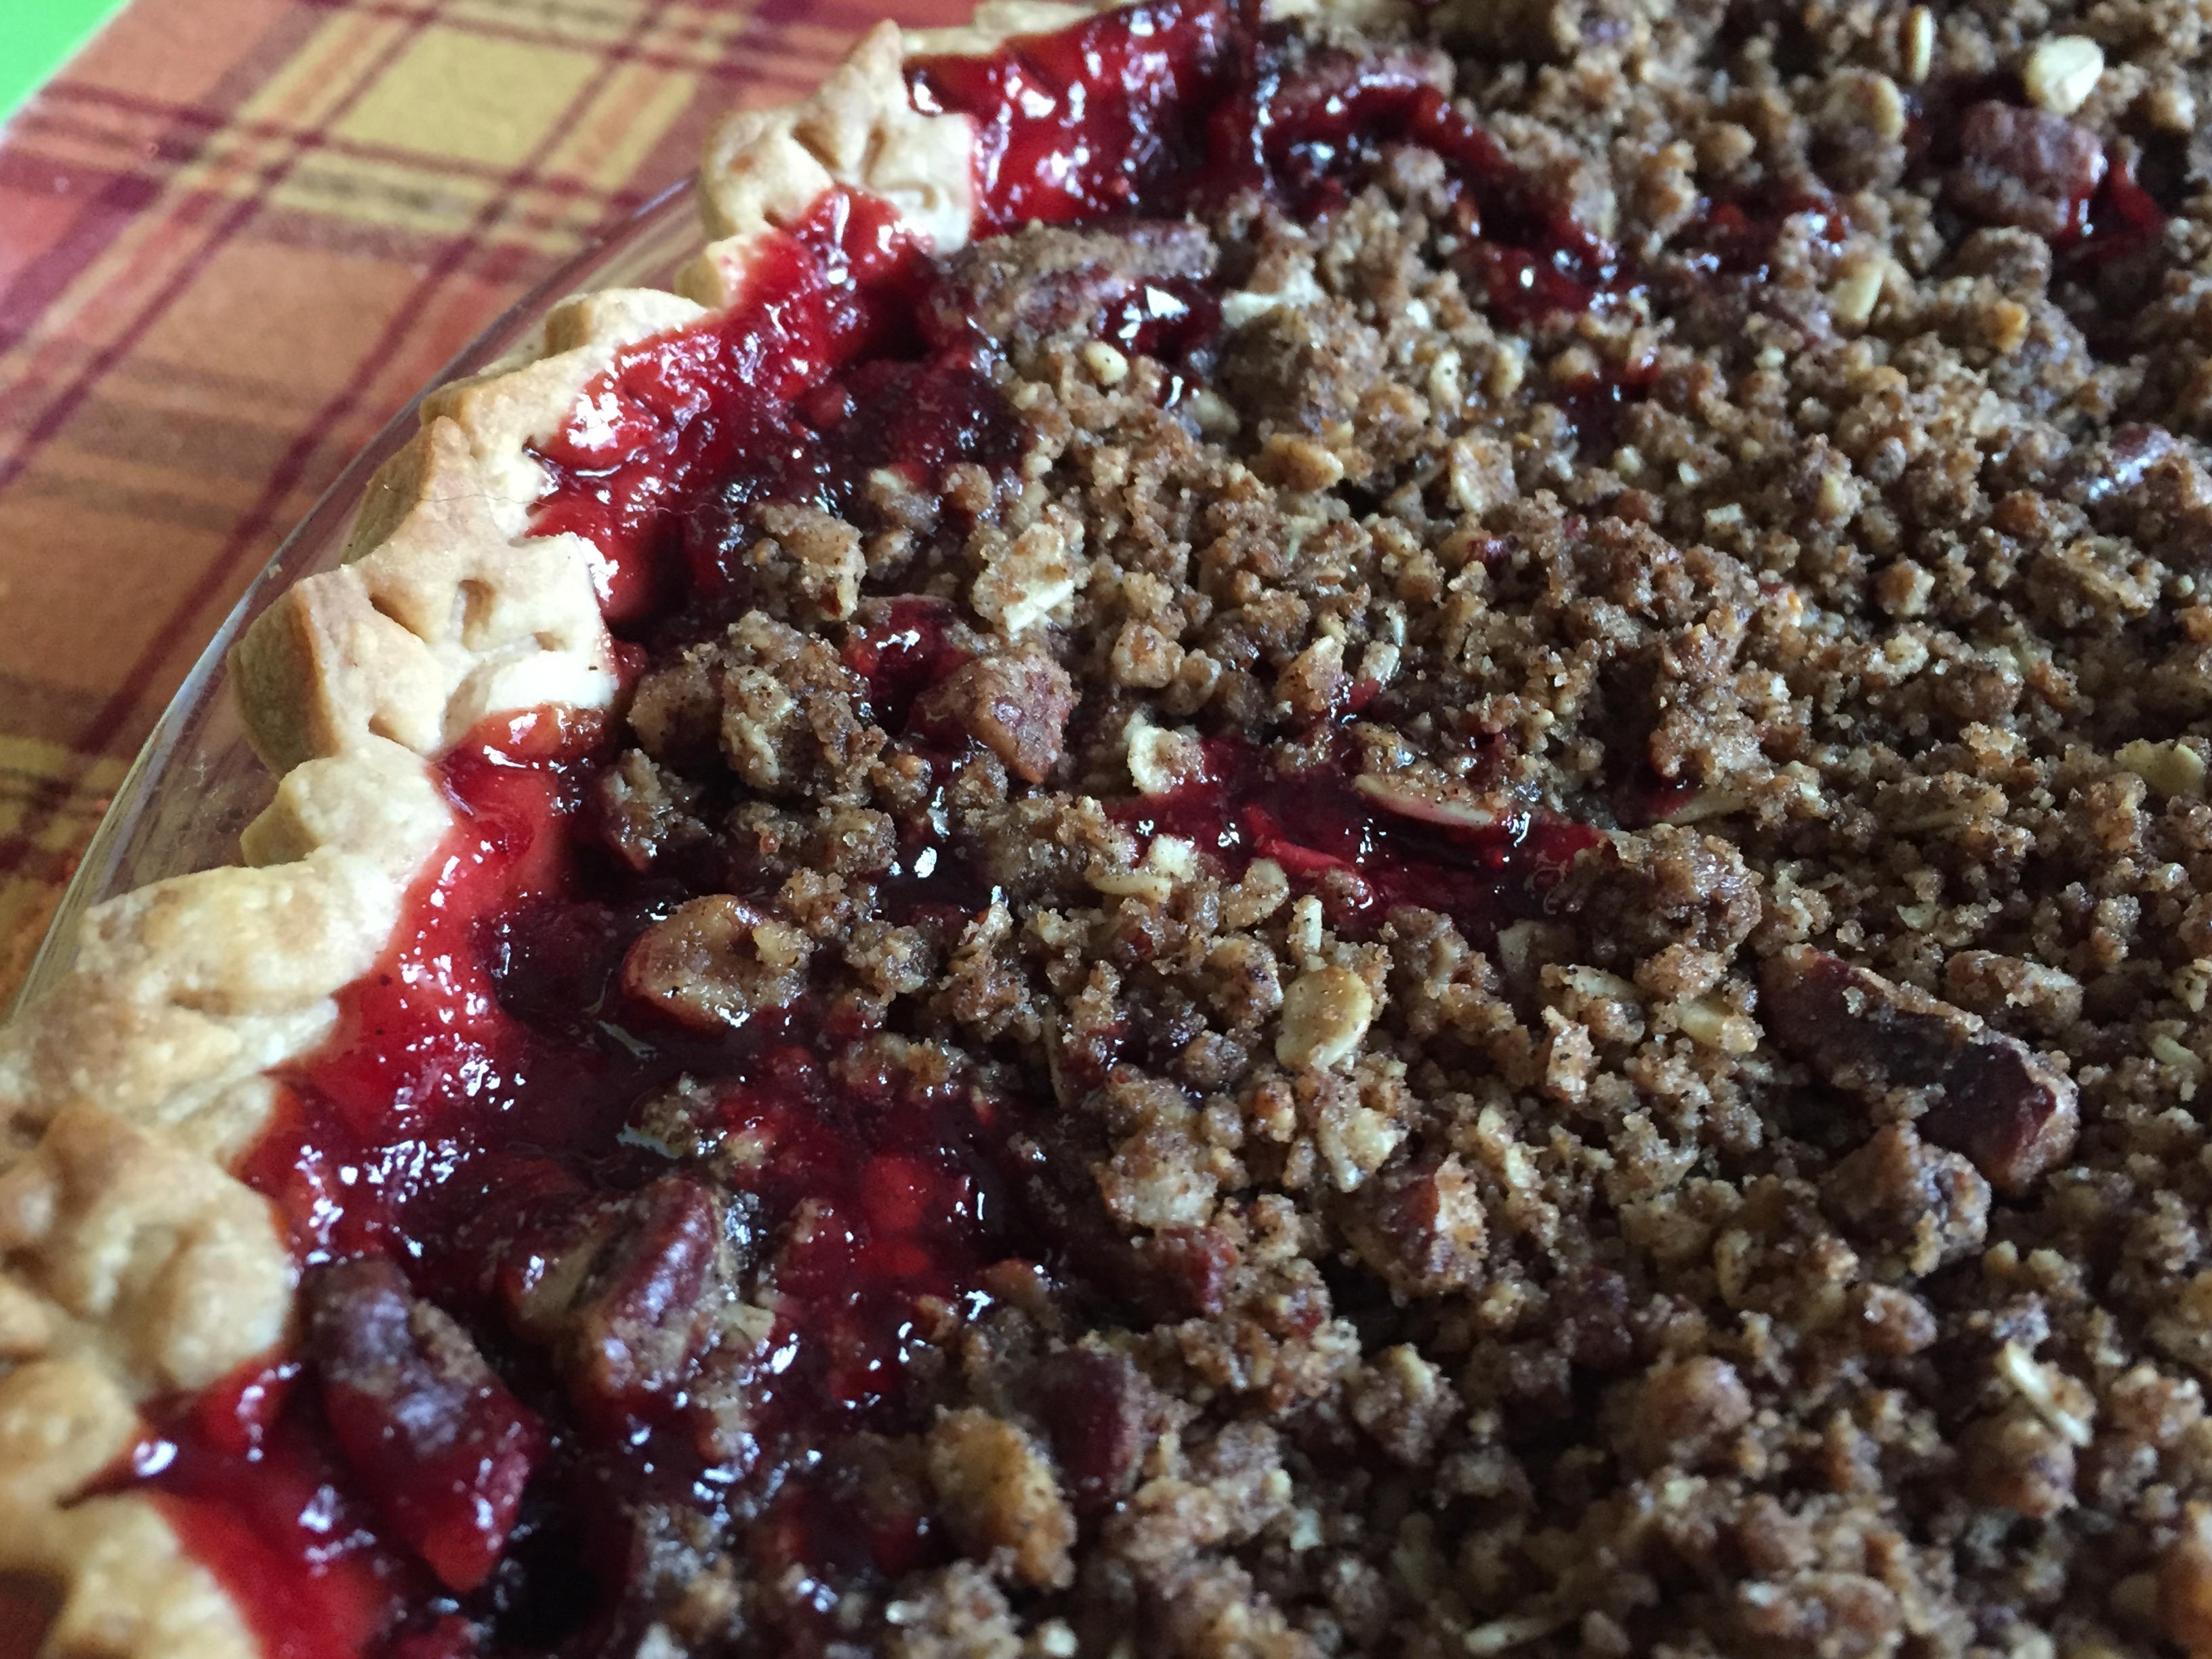
These cookies I have yet to freeze- partially because they disappear and there aren’t usually enough to freeze. They are easy enough to do right near cookie tray assembling time. The amount of time it takes to make these are so worth the end result.

Of all the cookies, these simple chocolate crinkles are really one of my favorites. I hope you enjoy them.

Enjoy this recipe, and as always, thank you for coming to the table!

Chrissy

Click below for a printable recipe.

Print

Chocolate Crinkle Cookies

Print Recipe

Deliciously soft dark chocolate crinkle cookies with a dusting of confectioner’s sugar.

  • Author: chrissy@mythankfultable.com

Ingredients

Scale
  • 1 Cup Dark Unsweetened Cocoa Powder
  • 2 Cups White Granulated Sugar
  • 1/2 Cup Vegetable Oil
  • 4 Eggs
  • 2 Teaspoons Almond Extract
  • 2 Cups Flour
  • 1 Teaspoon Salt
  • 2 Teaspoons Baking Powder
  • 1/2 Cup Confectioner’s Sugar (for rolling the cookies)

Instructions

  1. In a mixer, combine cocoa powder, sugar, and oil.
  2. Add eggs, and Vanilla Extract.
  3. Combine Baking Powder, Salt, Flour and slowly combine with Cocoa mixture.
  4. Cover dough and refrigerate for a few hours or overnight.
  5. Preheat oven to 325*
  6. Roll dough into 1-2″ balls according to preference. Roll balls in confectioner’s sugar.
  7. Place onto a parchment lined baking sheet.
  8. Bake for 9-12 minutes depending on size of cookie. Let cook on cookie sheet for 5 minutes before removing from cookie sheet.
  9. If cookies do not have a crinkle appearance, drop the cookie sheet to a hard service from approx. six inches, causing the cookies to flatten and crinkle.

Did you make this recipe?

Share a photo and tag us — we can't wait to see what you've made!

Posted in: Cookies, Recipes Tagged: Chocolate cookies, Chocolate Crinkle Cookies, cocoa, Crinkle cookies

Fresh from Iowa (Illinois) Pumpkin Pie

December 9, 2017 by chrissy@mythankfultable.com
Pumpkin Pie

Pumpkin Pie

Pumpkin Pie, you are a wonder. You hold within your delicate pie crust all that is representative of fall and New England. Except, Libby’s the actual pumpkin canning king, lives in Morton, Illinois. In fact, annually the Libby’s Pumpkin (owned by Nestle) Company holds a giant festival in Morton, Illinois to celebrate all that is pumpkin.

Once upon a time, I used to buy sugar pumpkins at the farmer’s market, bake them down, scoop out the flesh in pre-measured 2 cup portions, and make my pumpkin pie with the real thing instead of the canned stuff…

However, even when I used my own pumpkin, prepared with my loving and farmer’s market fresh produce, I still used, the Libby’s Pumpkin Pie recipe.

Pumpkin Pie Shell

Pumpkin Pie Shell Awaiting Pumpkin Goodness

Years later, my brother lived in Illinois for a spell, but then returned to his original transplant location of Iowa. (Let’s Go Wes Des!) I heard about the Pumpkin Festival and it’s traditions. Give me all of the fall festivals. I will shed my Massachusetts love (temporarily) for a pumpkin festival such as this.

The best part about this recipe is, it is easy. It is all over the internet, it is tried and true, and it makes 2 pies! Why is this important?

I make a deep dish pumpkin pie for the family dessert table…and a second, smaller one, to sample first. You know, in case there is anything wrong with this recipe…or in case I get tempted to try the pie destined for the dessert table.

Pumpkin Pie

Pumpkin Pie

This recipe also makes a beautiful pumpkin custard which sets up nicely, so when you cut into it- you have the perfect wedge of orange goodness. I also use real nutmeg and a microplane (ask for these for a stocking stuffer if you don’t have them already) which smells like nothing you have ever smelled. Fresh nutmeg is divine. Truth be told nutmeg isn’t actually in the recipe- but I put it in my pumpkin pie anyway.

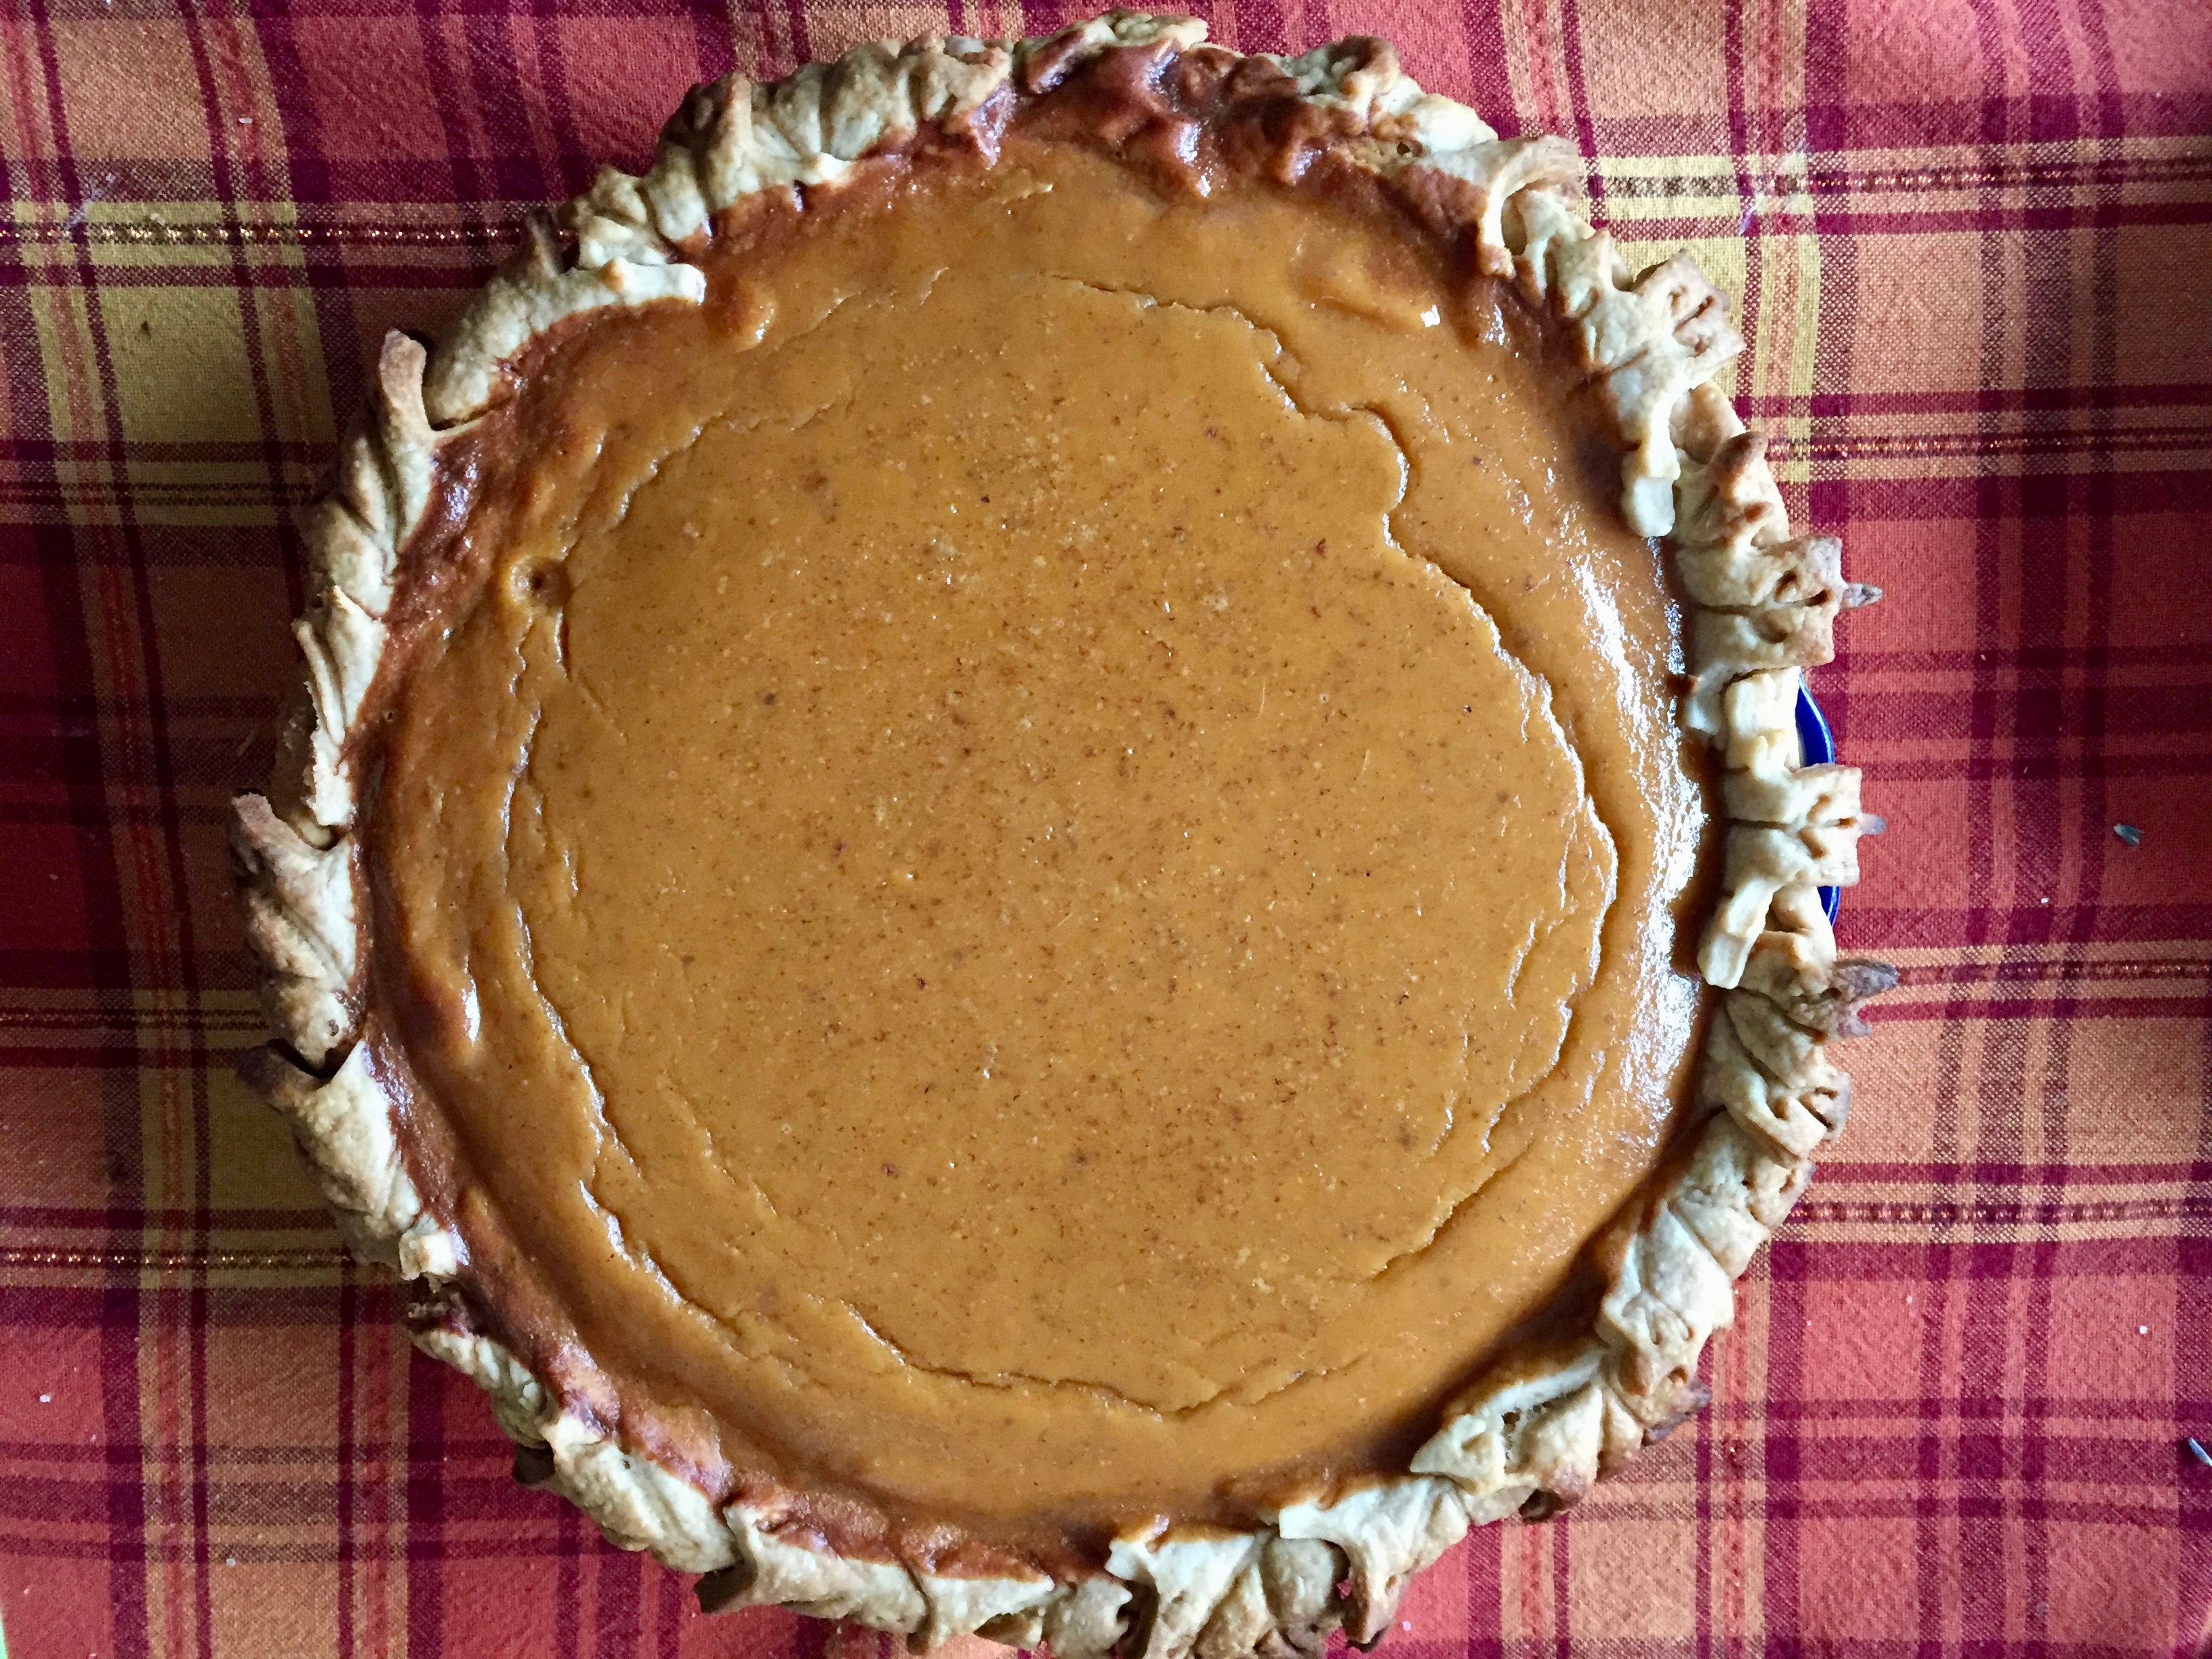
Now, for me- I don’t like there to be a lot of jiggle in the pumpkin pie. So, it becomes a dance of too much verses just enough. I pull the pie out when the jiggle is minimal- and even then, sometimes-like the picture here- you get a wrinkle or a crack. I’m ok with it. It is a custard and that makes it tricky only because it doesn’t contain nuts or anything to conceal the cracks if they happen- but I would much rather a pretty little wrinkle than an undercooked egg product. I also refrigerate my pumpkin pie-which is tricky when involving pie crust. It is usually the last pie I bake for this reason. If I can serve it without refrigerating it first, the crust will be better, but again, I don’t like the idea of a custard based pie sitting on the counter for long before serving to my guests.

Pumpkin Pie

I used my maple leaf pie crust cutter/stamps for this, and was so pleased with the result. It turned into a beautiful pie, and no one cared that the pumpkin came from a can. Even if I use a different brand of pumpkin (I made one with organic pureed pumpkin earlier), I still use the Libby’s recipe.

Now, is fresh homemade sugar pumpkin baked in your own oven better? Of course it is. you will swear you taste the difference because you WORKED SO HARD to make it so. However, in the circle of life that is prepping for family desserts, let’s be honest. You are still making the pie. You are still mixing the filling and pouring it into a shell and baking it in the oven and making a pumpkin miracle- no matter whether the pumpkin is freshly baked and scooped, organic from a can, from where you live or from several states away. It is still amazing.

This pie represents home for me. For the hands of my grandmother teaching me how to make pie crust, to my father standing at the kitchen counter carving a turkey, the deep dish pie plate I have used for twenty years, and my brother, who gets to go to the pumpkin festival so far from where I live. Pumpkin pie rules supreme from October to December, and then it goes away until the next maple leaf changes and floats on the crisp autumn air.

I hope you enjoy this recipe, and as always, thank you for coming to the table!

Chrissy

Click below for a printable recipe.

Print

Fresh from Iowa (Illinois) Pumpkin Pie

Pumpkin Pie
Print Recipe

Traditional pumpkin pie from the Libby’s company!

  • Author: chrissy@mythankfultable.com

Ingredients

Scale
  • 1 1/2 cups granulated sugar
  • 2 teaspoons ground cinnamon
  • 1 teaspoon salt
  • 1 teaspoon ground ginger
  • 1/2 teaspoon ground cloves
  • Freshly grated nutmeg
  • 4 Large eggs
  • 1 can LIBBY’S® 100% Pure Pumpkin (30 oz)
  • 2 cans NESTLÉ® CARNATION® Evaporated Milk (12 fl oz)
  • 2 unbaked 9-inch deep-dish pie shells ( I use one deep dish and one regular pie dish)

Instructions

  1. In a mixer, combine pumpkin puree, eggs, and sugar until combined.
  2. Gradually add evaporated milk.
  3. Blend in spices.
  4. Pour into pie shells.
  5. Preheat oven to 425*
  6. Bake for 15 minutes at 425* then reduce heat to 350* and bake for an additional 50 minutes until set.

Did you make this recipe?

Share a photo and tag us — we can't wait to see what you've made!

Posted in: Dessert, Recipes Tagged: pie, Pumpkin, pumpkin pie

Bourbon Pecan Pie

December 6, 2017 by chrissy@mythankfultable.com
Bourbon Pecan Pie
Bourbon Pecan Pie

Bourbon Pecan Pie

Having grown up in a non-pecan pie eating house, the mystery that is pecan pie is a love affair that began when I was older, and was able to embrace the beauty of that sweet nutty flavor with a splash of bourbon. Fall fast and hard, I did.

I was always afraid of pecan pie because, as I mention A LOT, I am a north east lady and this pie is distinctively southern. I imagine pecan groves and roadside stands, very Gone with the Wind, very warm climate beautiful plantation sort of pie.

Turns out, pecan pie is preeeettty simple. And northeastern, if the gal who makes it is from the northeast. In a time where we can access southern pecans and southern made bourbon and whisk it into a pie crust, it doesn’t matter where you live or what your accent is, this pie is for you.

Bourbon Pecan Pie

Bourbon Pecan Pie

The trickiest part of pecan pie is that special moment when the corn syrup mixture (and I use dark corn syrup, just a personal preference) meets the egg and bourbon mixture. Even though you do cool the corn syrup mixture, you have to be careful not to turn your eggs into a scrambled mess. It’s not as scary as it sounds, you just go slow and whisk fast.

In all of my pecan pie making, I have yet to make scrambled bourbon pecan eggs and yet every time I make this pie, this is my one worry. Again, it has yet to happen. Let the mixture cool enough, drizzle slowly, and whisk the whole time as you go.

Now, for the pecans. Halves? Pieces? up to you. I like to do a blend for visual appeal, and it is important, but, I have also made it with just halves, and just pieces, and no one has complained. Literally, no one complains that the nuts in a pecan pie are already smaller and therefore, easier to chew.  SO, you do it the way it works for you.

Bourbon Pecan Pie

Bourbon Pecan Pie

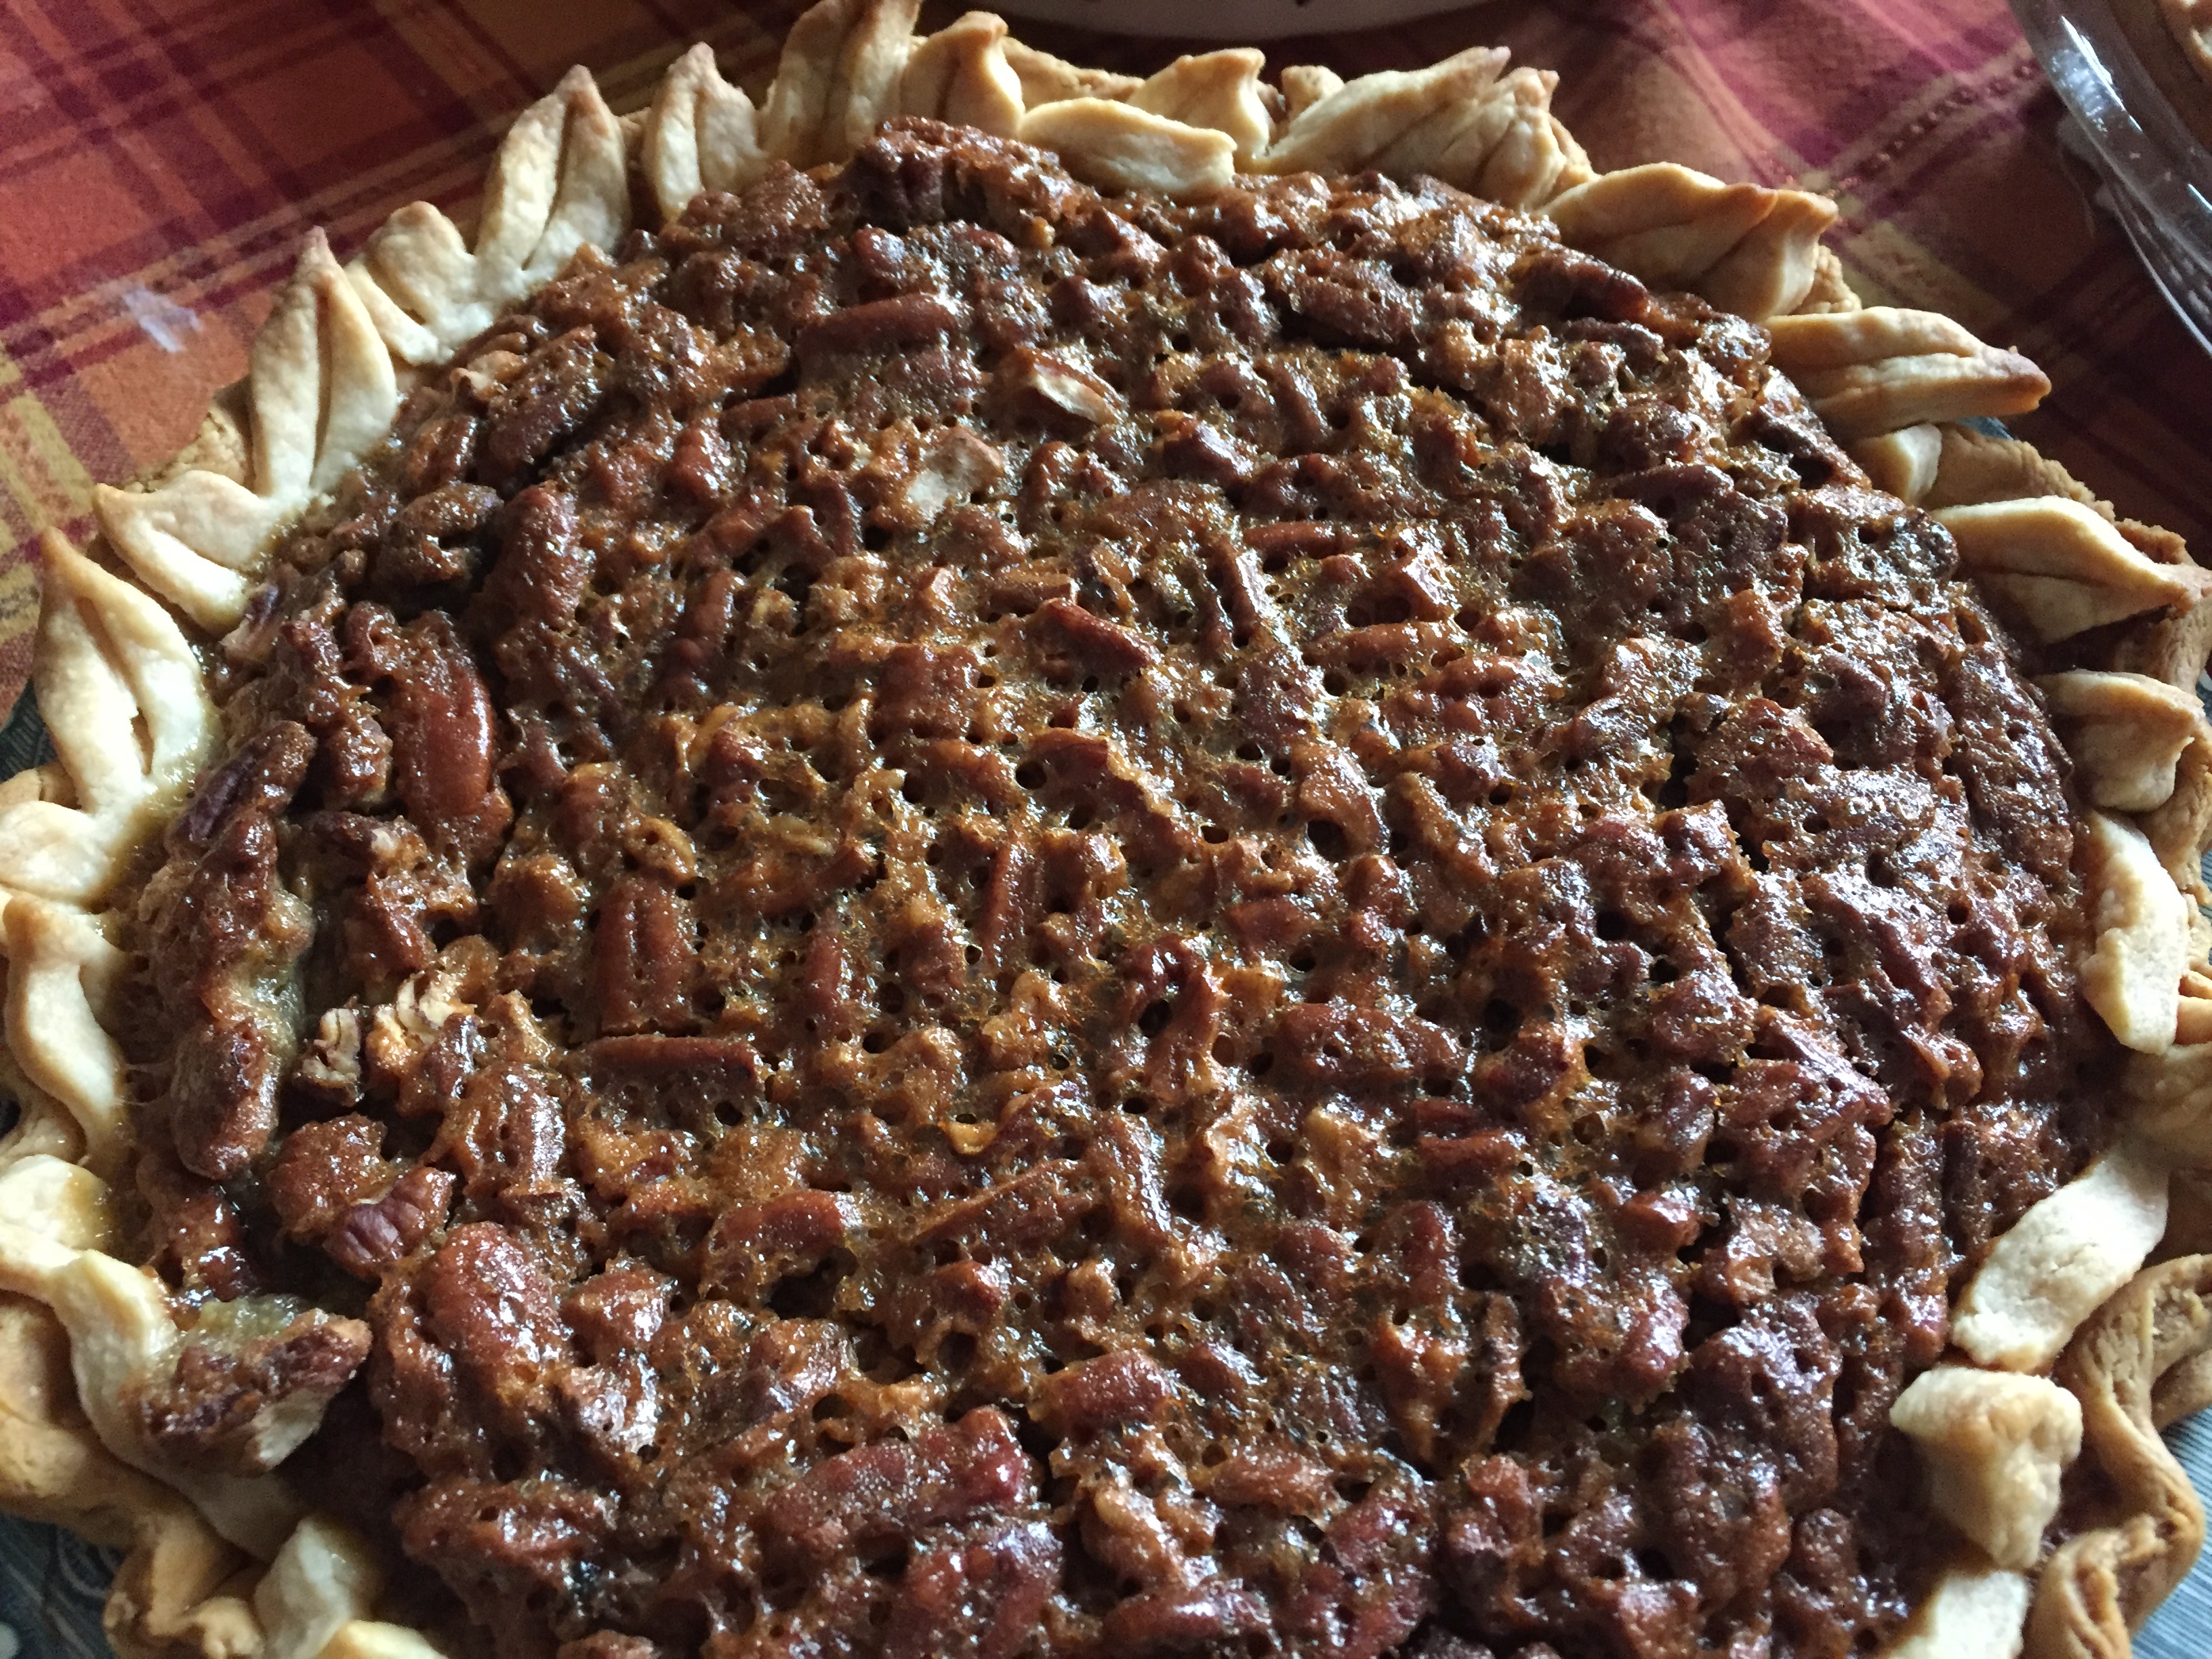
This pie cooks up and browns beautifully. I bake this pie until there is no jiggle in the middle (wish I could say that about my own middle) and the pecans have a roasted nutty flavor. I watch the edges of the crust so that they don’t brown too much and find that perfect balance of pecan pie doneness. It’s like the force, and you, young Skywalker, must harness it. Or, stick close to your oven and watch, give it a shake every five minutes or so near the end of cooking time.

I’m sad I didn’t get a slice shot of this beauty, but the caramel colored center serves as a perfect base for the pecan top layer.

The best part about growing up and learning about new flavors is finding something you really love. Like this pie. Don’t rule it out if you haven’t ever had a slice. Pecan pie could be your new great love. Then, you can mix it up, add chocolate chunks, and step up to Chocolate Bourbon Pecan Pie. Just saying.

I hope you enjoy this recipe, and as always, thank you for coming to the table!

Chrissy,

Click below for a printable recipe.

Print

Bourbon Pecan Pie

Bourbon Pecan Pie
Print Recipe

Delicious Pecan Pie with a Bourbon kick!

  • Author: chrissy@mythankfultable.com

Ingredients

Scale
  • 1 unbaked pie shell
  • 1 Cup Dark Corn Syrup
  • 1 Cup White Granulated Sugar
  • 1/2 Cup Butter
  • 4 Eggs, beaten
  • 1/4 Cup Bourbon
  • 1 1/2 Teaspoon Vanilla Extract
  • 1/4 Teaspoon Salt
  • 1 – 1 1/2 Cups Pecans

Instructions

  1. Preheat oven to 325*
  2. In a saucepan, combine corn syrup, butter, sugar, and cook over medium heat while stirring constantly until butter melts and sugar is dissolved.
  3. Cool mixture slightly.
  4. In an additional bowl, whisk eggs, bourbon, vanilla, salt and mix well.
  5. Slowly pour egg mixture into corn syrup mixture, whisking continuously until thoroughly combined.
  6. Add pecans and mix to coat.
  7. Pour mixture into prepared pie shell.
  8. Bake for 50 – 60 minutes, until pie is set in the middle.

Did you make this recipe?

Share a photo and tag us — we can't wait to see what you've made!

Posted in: Dessert, Recipes Tagged: Bourbon, Bourbon Pecan Pie, pecan, Pecan Pie, pie

Cheeseburger Chowder

December 5, 2017 by chrissy@mythankfultable.com

Cheeseburger Chowder

There is one meal I make in which I have takers for leftovers. This is that meal. This is that soup. Typically my children are one meal wonders. They don’t like leftovers. At. All. Where I am always trying to make “just enough” for this reason, usually I am bringing lunches that clean out the fridge to work, which isn’t a bad thing. Thursday is usually leftover night, which has no fans at all. Except, maybe the puppy, who loves a leftover turkey slice or a hamburger warmed up in the microwave for a few seconds.

However, this Cheeseburger Chowder is the no soup left behind miracle in my house. Very easy, a recipe I have only recently started to make as a result of my friend Erika (of the Eggplant Rollatini), and Beth (of the mandatory fun), I make this chowder in the cooler months at least once every three weeks. In my world, that is a regular rotation. It still gets eaten, every time.

The one part of this recipe that I love is the chunks of Sweet Potato. So pretty, and healthy too.

Sweet Potatoes and Onions on Cutting Board

Cheeseburger Chowder with Sweet Potatoes

The one part of this recipe that I don’t love but it literally makes the chowder and it is not the same without it, good old Velveeta Cheese. (Is Velveeta Cheese)?

Yes, this soup holds ground beef, onions, crumbled bacon, sweet potato, and processed cheese product. I have made this chowder with real cheddar and the consistency was different, the taste was just as good, but a chowder thats soupy isn’t really chowder in my son’s eyes, so off to two grocery stores to find the block of orange wonder that makes this chowder.

Essentially this whole chowder is made in the crock pot. I pre cook the ground beef and onions and bacon because I like the consistency and the sweet potatoes

Bowl of Bacon Cheeseburger Chowder

Cheeseburger Chowder

cook in the crock pot with the melty cheese.

It can be prepped the night before, it is so yummy, and like I said, its a hearty well received soup in our house.

For serving, I either serve this with tortilla chips, or crumbled bacon, hot sauce, or extra shredded cheese. It’s also good with a fresh salad, so you feel good about basically eating a bacon cheeseburger with sweet potato fries in chowder form!

I hope you enjoy this recipe, and as always, thank you for coming to the table!

Chrissy


Click below for a printable recipe!

Print

Bacon Cheeseburger Chowder with Sweet Potatoes

Print Recipe

Hearty Bacon Cheese Burger with chunks of sweet potato!

  • Author: chrissy@mythankfultable.com

Ingredients

Scale
  • 3 Pounds 80/20 Ground Beef
  • 32 Ounces of Velveeta Cheese (The BIG BLOCK)
  • 1/2 Package Thick Sliced Bacon chopped into 1/2 inch dice.
  • 24 Ounces Beef Stock
  • 24 Ounces Beef Broth
  • 3 Sweet Potatoes, Peeled and Cubed
  • 1/2 Sweet Onion
  • 1 Tablespoon Worcestershire Sauce
  • Salt and Pepper to taste

Instructions

  1. Chop and saute 1/2 Sweet White Onion – set aside.
  2. In a fry pan, cook diced bacon until crispy. Drain off fat and add chopped onion
  3. Saute onion until translucent. Add bacon and onion to crock pot set on low.
  4. Fry your ground beef until brown and cooked. Drain off the fat and add meat to the crock pot.
  5. Add chopped sweet potatoes  to the crock pot and season with salt, pepper, and Worcestershire.
  6. Add beef stock, and beef broth to crock pot.
  7. Cook on low heat 4 hours or until sweet potatoes are soft.
  8. Cube Velveeta cheese and put in crock pot. Turn heat up to High.
  9. Stir melted cheese throughout the soup until combined.
  10. Serve with tortilla chips, or soft rolls, and a smile.

Did you make this recipe?

Share a photo and tag us — we can't wait to see what you've made!

Posted in: crockpot, Recipes, soup Tagged: bacon, Bacon Cheeseburger Chowder, Broth, cheese, Cheeseburger Chowder, crock pot, soup

Cranberry Pecan Streusel Crunch Pie

December 4, 2017 by chrissy@mythankfultable.com

Cranberry Pecan Streusel Crunch Pie

I am a New England girl. I am more specifically a Massachusetts girl. Give me my glorious western mass mountains, rotaries, the turnpike, the cape, the fact that I can be in Vermont in an hour, and all the glory that goes with the Patriots, the Celtics, the Bruins, and the Red Sox. Ok, so I am not a big sports fans, but I can name key players and read a twitter feed to follow games, so who is any wiser? (Oh wait, just shared that on my blog…)

Cranberries

Cranberries!

Something that every New Englander can hopefully know is the harvesting of a cranberry bog. These little power houses of antioxidants are amazing in their chambered, floating figures of bright red goodness. It is a fall tradition, to flood the bogs, set those babies free, and corral them into their futures as cranberry juice, cranberry sauce, Craisins, and of course, to be sold as is in the stores.

Cranberries, Orange Zest and Sugar

Cranberries, Orange Zest and Sugar

If you are not from New England, in the world of YouTube and other internet wonders, you too can witness a cranberry harvest, but there is nothing like actually being there. It’s cooler weather, the leaves are starting to turn, cider and cider donuts are happening, typically there is a festival one weekend, and you think to yourself, “Hey, we are known for this! This is a very cool New England thing.”

Does everybody love the cranberry? No. Some people like it with their booze (Hello Cape Codder), some people like it for health reasons. I’m just a fan. Thus, this pie for the holidays.

Look at how pretty they are. All nestled in sugar and with orange peel.

Cranberry Pie Filling

Cranberries Pie Filling

This pie is so beautiful color wise, and it is paired with a pecan oat streusel that is just sweet enough and just crunchy enough to balance the tart of the cranberries. The original recipe is found on the www.smittenkitchen.com website.

The filling is partially cooked on the stovetop, and the combination of the pectin in the cranberries with the cornstarch make for a tight filling that packs a punch flavor wise. It is not cranberry sauce in a pie crust at all.

The streusel crust combines oats, brown sugar, cinnamon, pecans, and is pulverized to make a crumbly but consistent texture. I processed mine quickly so the little bits of pecan and oats were identifiable without being dominant. This may, in fact, be my new favorite streusel topping. I may just try this on top of muffins or crisps in the near future.

Cranberry Pie

Cranberry Pie

After the cranberry filling is partially cooked and the streusel is prepped, it is as easy as assembling the layers and popping it in the oven.

You know when you have to wait for something special and you wait and wait and wait? I got these pie crust punch cutters in my Christmas stocking last year and have waited all this time to use them.

I made an extra pie crust just for the decorative edges on this year’s pies and was I ever happy. I rolled the pie crust into the pie plate, and instead of pinching the edges, I cut and attached the pretty leaves on the outside rim.


Cranberry Pecan Streusel Pie

Cranberry Pecan Streusel Crunch Pie

Of all the pies this past holiday held, this was the one I chose for dessert. Just enough tart and sweet, crunch and chew, and balance between the flaky pie crust, crumble of the streusel, and consistency of the cranberries. Topped with a dollop of fresh homemade whipped cream, I was a happy girl.

There seems to be a common thread in my life these days of balance, between the sweet and the not so sweet, the blessings and the sorrow, and the fine line to keep solid between the two.

In this daily journey, I am thankful for the sweeter side of things, for the smell of cinnamon and the beautiful colors around me. I am thankful to live in a part of the world where every fall the mountains burst with colors, and the cranberry bogs fill with tiny chambered floating fruit, bobbing along their flooded homes to make their way into this special dessert for my family.

Every day is a gift.

I hope you enjoy this recipe, and as always, thank you for coming to the table!

Chrissy

Click below for a printable recipe.

Print

Cranberry Pecan Streusel Crunch Pie

Print Recipe

This pie combines the jewel like color and tart flavor of cranberries, orange zest with a pecan oat streusel topping. It is a perfect balance of tart and sweet, crunchy and chewy and flaky!

  • Author: chrissy@mythankfultable.com

Ingredients

Scale
  • 1 Unbaked Pie Crust

Cranberry Filling:

  • 4 1/2 Cups of Fresh Cranberries (original recipe said you can use frozen- I did not).
  • 1 Cup White Granulated Sugar
  • Orange Zest from one Orange OR 2 Clementines (I like the taste of orange and cranberry so I add more)
  • 1/8 Teaspoon Salt
  • 1 Tablespoon of Cornstarch

Streusel Topping:

  • 2/3 Cup Rolled Oats
  • 1/2 Cup Flour
  • 1/3 Cup White Granulated Sugar
  • 1/3 Cup Dark Brown Sugar
  • 1/2 Teaspoon Ground Cinnamon
  • 1/4 Teaspoon salt
  • 3/4 Cup Pecan Pieces
  • 6 Tablespoons Butter, melted and cooled


Instructions

For Cranberry Filling

  1. Combine cranberries, orange zest, sugar, cornstarch, salt in a saucepan over medium heat and begin to cook. Some of the cranberries will pop or leak juices, which is perfect. Continue to stir and cook for approximately 5-7 minutes. Allow filling to cool slightly. (I waited about 10-12 minutes).
  2. Pour cooled filling into pie shell.

For Streusel Topping:

  1. Using a food processor, grind oats and pecans for a coarse grind, add additional ingredients except butter. Pulse processor to combine all streusel ingredients.
  2. Combine Streusel ingredients with melted and cooled butter until crumbled in texture.
  3. Sprinkle topping over cranberry filling.

Bake pie for 50 minutes or more or until the cranberry filling is bubbling up through the streusel topping. If pie crust begins to brown too much while filling is cooking, cover edges of pie with foil to protect from burning.


Notes

While cooking this pie, I erred on the side of longer, waiting for the cranberry filling to really bubble up through the streusel topping. It did mean my cooking time was longer, but the result was worth the wait. The cranberries cooked down but retained their consistency, the crumble topping browned nicely, and it was all over a beautiful pie to cut into!

Did you make this recipe?

Share a photo and tag us — we can't wait to see what you've made!


Posted in: Dessert, My Story, Recipes Tagged: Cranberry, Cranberry Pecan Streusel Pie, Oats, pecan, pie, Streusel Topping
« Previous 1 2 3 4 5 6 7 8 9 10 11 12 Next »

Recipe Search

Recent Posts

  • Fluffernutter Cookies…You Heard Me April 12, 2024
  • On Nests July 30, 2023
  • Lemon Rosemary Shortbread Cookies April 24, 2022
  • Praline Sweet Potato Pie March 22, 2022
  • Italian Ricotta Cake March 13, 2022

Recent Comments

  • Cathy Carroll on To My Daughter On Her 18th Birthday
  • Maureen / Mimi on To My Daughter On Her 18th Birthday
  • Kathy G on To My Daughter On Her 18th Birthday
  • chrissy@mythankfultable.com on Cherry Crescent Moon Cookies and Finding the Joy
  • chrissy@mythankfultable.com on Cherry Crescent Moon Cookies and Finding the Joy

Archives

Categories

  • appetizer
  • bread
  • breakfast
  • Cookies
  • crockpot
  • crockpot
  • Dessert
  • Fruit
  • My Story
  • One Pan
  • Recipes
  • side dish
  • Side Dishes
  • soup
  • Vegan

Copyright © 2025 mythankfultable.com.

Lifestyle WordPress Theme by themehit.com