mythankfultable.com

Feeding the Heart, Body, and Family

  • My Pics
  • My Story
  • The Puppies
  • Contact Us
Feeding the Heart, Body, and Family

Cookie

Fudgey Avocado Chocolate Chip Cookies

February 7, 2022 by chrissy@mythankfultable.com

I don’t think there is anything prettier and more rewarding than cutting into the perfectly ripe avocado. That creamy flesh, with a buttery texture and full of good things for our bodies. The avocado is complete in and of itself. I will eat an avocado sliced up, on toast, mashed into guacamole, in salad, on tacos, the possibilities are endless.

Finding the avocado at it’s perfect ripeness is that daily dance of checking to see- too firm, just soft enough? Then there is the occasional over ripe one I’ll try to make work, but an avocado is not like a banana. There’s no magical bread to make with the over ripe avocados. In my home, avocados rarely last long enough to be over ripe. So for me, it is a worth while weekly produce purchase.

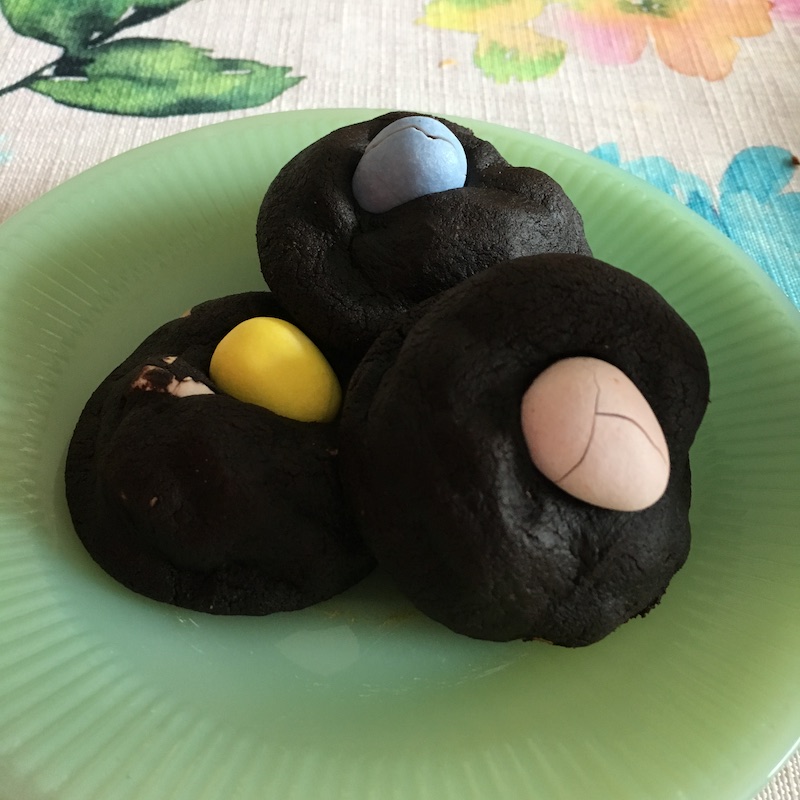
Now, add some coconut sugar, some dark cocoa powder, and turn these beauties into cookie dough? Why not! If you are looking for an indulgent cookie that isn’t guilt laden. (Though truthfully, I am not looking at cookies like that ever at this point in my life…I am almost 50. Eat the darn cookie). Here we have an example of a healthier version, with no refined sugar, gluten free, oil free, and vegan. (I know there are vegan chocolate chips available at a lot of grocery stores at this point, which is great).

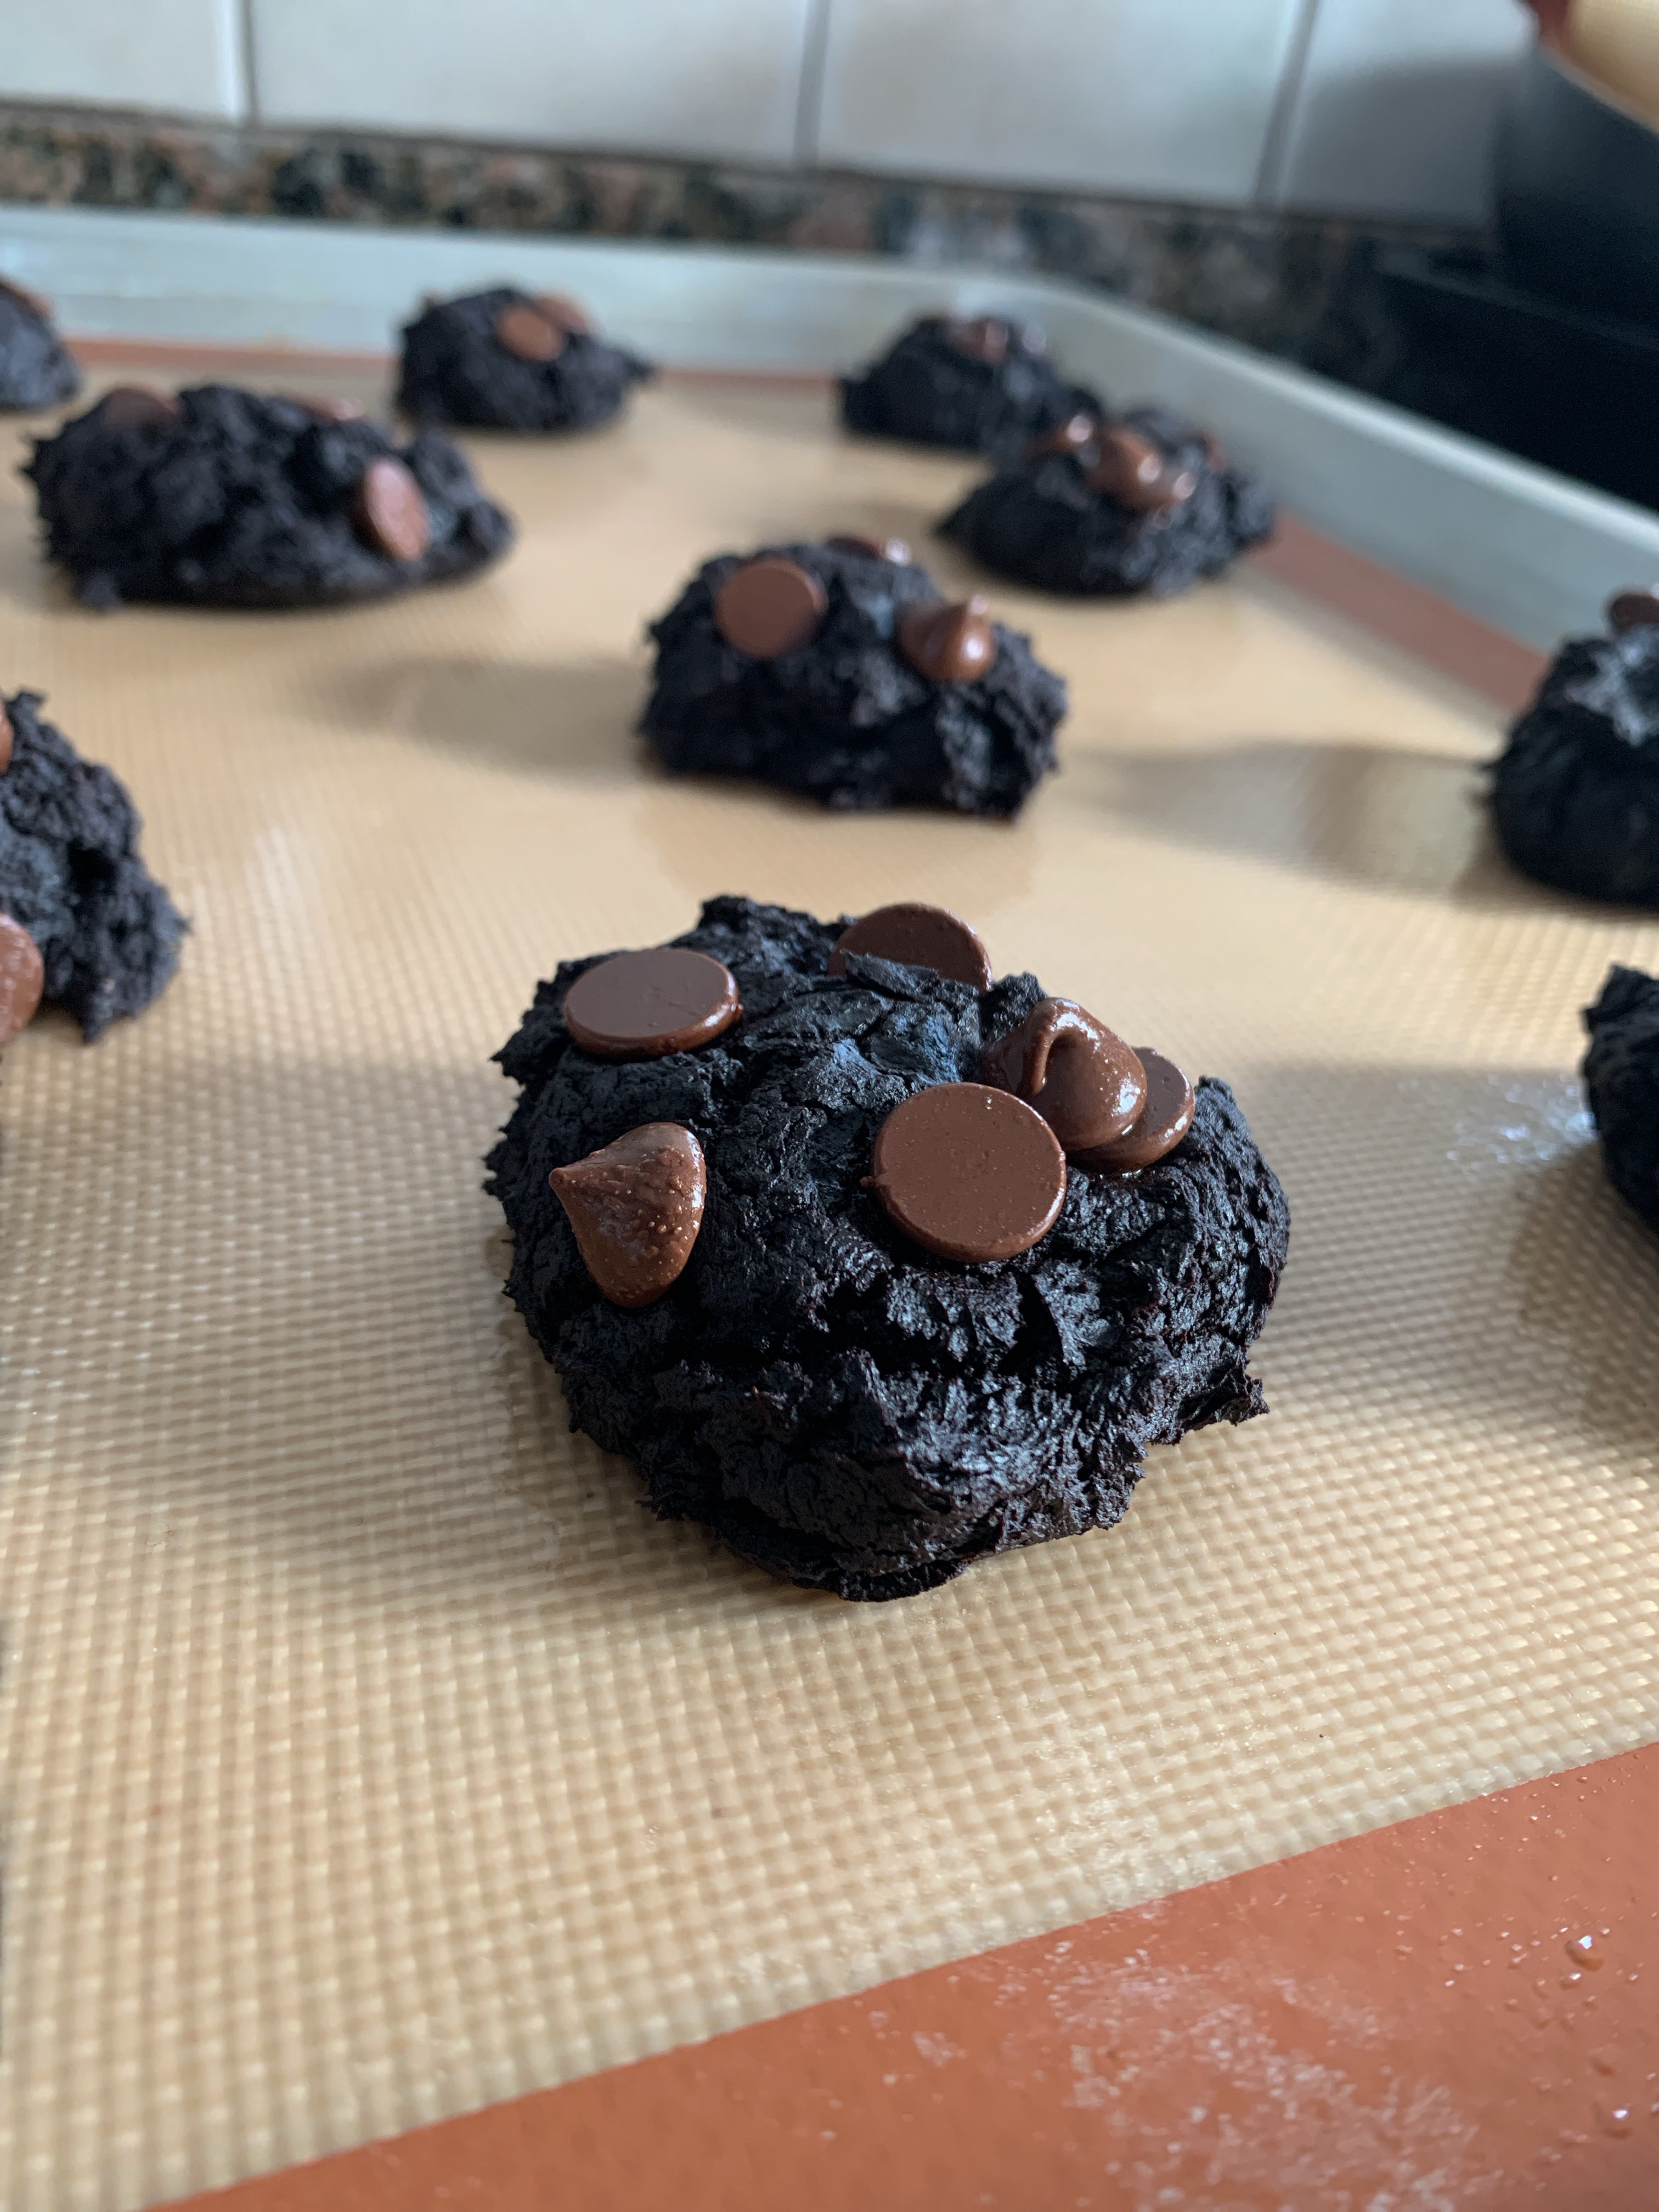
This cookie dough comes together quickly in the food processor, and it is dense, and fudge like. If you choose to make the cookies without the chips, they turn out as little brownie scoops. YUM

Because these cookies don’t spread much, slightly dampen your hand and give each of them a little pat to flatten. Ten to twelve minutes later, you have a delicious and mostly healthy treat!

I’ll be the first to admit that not many of my recipes fall into this category, so I am pleased to start incorporating healthier options for people in my life, and for me as well!

I hope you enjoy this recipe, and as always, I thank you for coming to the table!

Love,

Chrissy

Print

Fudgey Avocado Chocolate Chip Cookies

Print Recipe

These tasty, vegan, flourless, gluten free, oil-free, refined sugar free cookies are NOT flavor free! Tender little bites of chocolatey goodness let you have a treat without feeling guilty.  Original recipe from www.veggiekins.com


  • Author: chrissy@mythankfultable.com

Ingredients

Scale

1 Cup Avocado (ripe but not over ripe)

3/4 Cup Coconut Sugar

3/4 Cup Dark Cocoa Powder

2 Tsp Baking Powder

1/2 Cup Chocolate Chips

1 Tsp Salt

Instructions

  1. Preheat oven to 350*
  2. Line a baking sheet with parchment paper. 
  3. Scoop avocado from skin and give a rough chop.
  4. Using a food processor, pulse coconut sugar to remove any chunks.
  5. Add avocado to coconut sugar and process until combined.
  6. In a separate bowl, whisk together coconut, baking powder, and salt until combined.
  7. Transfer avocado mixture to the bowl with dry ingredients fold to combine.
  8. Add in chocolate chips if you are using them.
  9. Your dough will look a little wetter than usual cookie dough. Use a cookie scoop to place dough in scoops on parchment lined baking sheet.
  10. Using damp hands, pat down each cookie mound slightly- cookies will not flatten on their own.
  11. Bake cookies at 350* for 10-12 minutes. Tops of cookies and edges will look slightly cooked. 
  12. Allow cookies to cool on baking sheet.

Cookies will be soft and store in an air tight container for a few days- they won’t last that long!

Did you make this recipe?

Share a photo and tag us — we can’t wait to see what you’ve made!

Posted in: Cookies, My Story, Vegan Tagged: avocado, chocolate, Chocolate Chip, Cookie, flourless, food processor, Gluten Free, oil free, Vegan

A Love Letter to My Daughter and Her Friends, and Peanut Butter Heart Cookies

February 14, 2021 by chrissy@mythankfultable.com

Dear Every Girl My Daughter’s Age, including her Friends and Herself:

I feel like there are some things you need to hear and I mean HEAR. Like, in your soul and REMEMBER. Because, this world is crazy, and sometimes ugly. It shoves images and expectations at you, and even though it is a new age and there are so many more opportunities and glass ceilings are shattering…there is still some rampant crappola the world is sending your way.

  1. You are perfection. You aren’t perfect and that is OK. No one is. But you, and all you are, is exactly who and what you were supposed to be. Glorious and resplendent in all of your ways. Every smile, every laugh, every brilliant thing that comes out of your mouth (and even the not so brilliant things) make you you. And wow, is the world lucky to have you.
  2. You may not love your body. But start now. She’s been with you so far, and if you realize it early enough, she is your champion. She will get you to places and do things you haven’t thought of yet. Your body, whatever size, whatever shape, is perfection. Don’t let it define where you belong in this world. You belong. Period. Please don’t waste one more second listening to a culture that wants you hating on yourself. It’s a tragedy.
  3. Your mind is amazing. You are SMART. Your opinions matter. Your thoughts matter. Your creative ideas matter. Your decisions matter. For those of you who think bigger than the space your body takes up, keep being bigger. If they are worthy of you, they will get you and love it about you.
  4. Your heart is bigger and stronger than you imagine. You may have navigated the hard things already. You may not have had any bumps in the road. Life will teach you lessons and one of them, amazingly enough, is that YOUR HEART IS STRONGER than you know. It will survive. You will survive. You will be better for it.
  5. And lastly, no Mom on this earth, whether it be your biological one or adopted one or grafted in one or decided one along the way would ever, ever want you to settle. In any capacity. Do not sell yourself short. Do not accept a “less than” when you are worthy of so much more. You deserve to be successful, loved, and cherished in every capacity. Especially by yourself.

This is my abbreviated and not all inclusive Valentine’s wish for you, but for today, it will have to do.

All the love my heart can hold,

Chrissy (Mom)

(OK, and then there are these cookies. Which are little peanut butter puffs which then have a chocolate candy smooshed in when done baking. 🙂 Listen, every blog can’t be emotional, and every blog can’t be about the recipe. I recommend this cookie if you have a peanut butter lover in your life. Because they are amazing.)

Print

Peanut Butter Heart Cookies

Print Recipe

This recipe is originally from www.sallysbakingaddiction.com This recipe makes a light, pillowy soft dough that gets refrigerated for up to a day, and then topped with a chocolate heart of your choice. I used two different types of candies for this, a solid chocolate heart, and a peanut butter filled heart. It is hard to tell which were enjoyed more, because they both disappeared rather quickly! This recipe yields 2 dozen cookies.

  • Author: chrissy@mythankfultable.com

Ingredients

·       1 stick (½ cup) Butter (room temperature)

·       1 Large Egg

·       ¾ Cup Peanut Butter

·       1 Teaspoon Vanilla Extract

·       ½ Cup White Sugar

·       ½ Cup Packed Dark Brown Sugar

·       ½ Teaspoon Baking Soda

·       ¼ Teaspoon Salt

·       1 ¼ Cups Flour

·       Chocolate Heart Candies (Dove, Lindt, Reese’s all work)

Instructions

1.     In a bowl, combine flour, salt, and baking soda together.

2.     Using a mixer with a paddle attachment beat butter until fluffy. Add sugars and cream together until smooth.

3.     Add in peanut butter, egg, and vanilla extract. Combine until smooth, scraping down the sides of the bowl as needed.

4.     Add the combined dry ingredients to the wet ingredients slowly on a lower speed. 

5.     Roll out dough into balls using a cookie scoop or tablespoon measure and chill. OR Chill dough as a whole for at least half an hour up to a day. The longer you chill, you may need to let the dough sit for a little bit before rolling out into balls. *this is why I roll them before I chill them

6.     Preheat oven to 325 degrees. Prepare baking sheets with parchment paper or silicone mats.

7.     Place dough balls evenly spaced on cookie sheet and bake for 10-12 minutes.

8.     Allow cookies to cook for a few minutes, then press chocolate candy into each cookie.

9.     Allow cookies to cool completely, unless the idea of a melty chocolate heart is your thing (it’s my thing).


10.  Cookies stay fresh in an air-tight container for up to a week. They won’t last that long. 😉

Did you make this recipe?

Share a photo and tag us — we can’t wait to see what you’ve made!

Posted in: Cookies, My Story Tagged: chocolate candy, chocolate heart, Cookie, dessert, Dough, Peanut Butter, peanut butter cookie, Valentine's, Valentine's Day Cookies

Siblings and Skillet Cookies

February 9, 2021 by chrissy@mythankfultable.com
skillet cookie

True story, my brother is one of the funniest and tender hearted people I know. As kids, we used to fight a lot. We were your average born in the 70’s, four-square and kickball in the neighborhood, come home when the street lights turned on kids. We rode our bikes and got lost in the woods. We fought over who would sit in the front seat, who’s feet got to rest on the bar under the table, and lord only knows what else. But mostly, even when we were arguing, we were laughing.

He was organized, I was not. He was the math brain, I wrote stories. He loved video games, I didn’t. We were different, for sure. But family is like that. I see it in my own two children- their similarities and differences, and the way they laugh and look out for each other amongst those things.

I will say this, when I had my wisdom teeth removed, he held half of the ice pack for me in the car ride home. (Thankful we didn’t have cell phones or for sure he would have recorded me).

When my children lost their father, he jumped on a plane to meet us. For the rest of my life I will remember the sense of relief when he walked into that funeral home. One spot of lightness amidst chaos.

He’s that kind of man.

The gift of being older is instead of seeing your differences, you see the similarities and honor the wonderful things you find in your siblings the longer you share this life’s journey.

Now we exchange parenting stories. We both enjoy leadership roles, and have puppies, and even give each other a heads-up and great podcasts or books we’ve listened to and read. I trust him implicitly with the stuff I share. And we both have a Momma we love and joke with. There are moments when I am down and I will call or FaceTime my brother just because I know I will feel better when I hang up. There is a fellowship in sibling hood that is singular in nature.

So, when on one of the many social media platforms on which we follow each other my brother sends a picture of a larger than life skillet cookie, I ask for the recipe. When he sends it to me from Tiktok, I slowly rewatch so I can catch all of the ingredients because, hey we are in the middle of the longest, loneliest winter in the middle of the pandemic, and sometimes, the concept of a skillet cookie is magical.

Who am I kidding, when is a skillet cookie NOT magical?

This is a one-bowl cookie dough you press into a skillet and bake. It is beautifully crispy on the edges and soft and tender in the middle. I, of course changed stuff up and added extra things because I am me. I did not add walnuts (even though that addition would have been amazing) because my children do not like walnuts in dessert. I did add butterscotch chips because they add a little extra something that was delicious, but not necessary. You can mix up the add ins because there are no rules to this cookie except you eat it warm (it is just as good fully cooled but I recommend heating it up a bit first). I also suggest a good quality ice cream. listen, if we are going there, let’s go big.

I think, if the last year has taught us anything, it is the importance of loved ones and spending time with them. We are fortunate to live in a time where technology makes seeing someone half way across the country in a heartbeat possible. Where we can see the funny faces that go with the sarcasm. Where we can check in to see how someone is and laugh as well. If we can share a recipe along the way, aren’t we blessed?

As always, I hope you enjoy this recipe, and thank you for coming to the table.

Chrissy

(Click on link below for full recipe)

Print

Chocolate Chip Butterscotch Skillet Cookie

Print Recipe

This one bowl mix cookie dough is easy to make and so delicious. You need to get a bowl and scoop of ice cream ready! you are going to want to eat this when it has sightly cooled, but still warm.

  • Author: chrissy@mythankfultable.com

Ingredients

Scale
  • 16 Tablespoons of butter (2 sticks)
  • 1 1/2 Cup packed Brown Sugar
  • 1/4 Cup White Sugar
  • 1 Egg
  • 1 Egg Yolk
  • 1 Tablespoon Vanilla Extract
  • 1 Teaspoon Salt
  • 1 Teaspoon Baking Soda
  • 2 1/4 Cups Flour
  • 2 Cups Chocolate Chips or Chunks
  • Additional add ins:
    • Chopped Walnuts or Pecans
    • White Chocolate Chips
    • Butterscotch Chips (Which I used in my recipe – 1-2 Cups)

Instructions

  1. In the skillet you plan to cook the cookie in, melt two sticks of butter. You can continue to cook until the butter is browned to add another layer of flavor. Set aside to cool.
  2. While butter is cooling add sugars to a bowl, then add melted cool butter to sugars and mix.
  3. Combine with vanilla extract, egg and egg yolk, and dry ingredients.
  4. Stir in chocolate chips, additional add ins (I added 1 -1 1/2 cups of Butterscotch chips)
  5. Preheat oven to 350*
  6. Press combined cookie dough into pan.
  7. Bake in 350* oven for 15 Minutes (If you think it is too doughy you can cook additionally but it should be slightly doughy in the center.

Did you make this recipe?

Share a photo and tag us — we can’t wait to see what you’ve made!

Posted in: Dessert, My Story, Recipes Tagged: Butterscotch chips, Chocolate Chip, Cookie, cookie dough, dessert, Easy, One Bowl, skillet cookie

Cadbury Mini Egg Cookies

March 26, 2020 by chrissy@mythankfultable.com

I have a lifelong friend. She is brilliant, and beautiful, and I often say “runs the world.” I say this, because she does. Not only is she good at her job which is pretty important, she also pretty much takes care of everyone that crosses her path. She’s the one who helps families in need, is on every committee that betters our area, trains and volunteers in the community, funds people going on trips, or special camps, or even gives her not-so-old car. She’s the one who rarely takes time for herself, ever. To say I’ve known and loved her longer than I haven’t in this life is easy. She’s my person. That’s that.

And…this friend has a not-so-secret addiction. You all know mine is Cheez-its. (Straight up regular thank you. No need for fancy cheese or extra toasty). Well, this friend loves her some Cadbury Mini Eggs. They stalk her as soon as the snowmen and Christmas trees are cleared off the shelves. I am pretty sure they appear before Valentine’s Day. That purple bag calls out to her, as it should. Those little crunchy milk chocolate eggs with the coating are magical. It may even be possible that the first sighting of the Mini Eggs are photographed with some sort of Dooms Day comment and texted to said friend. Because, good friends send alerts when the caloric nemesis is present.

Needless to say when I saw a recipe for a dark chocolate mini egg cookie on Instagram…making these was inevitable. The original recipe is from @KelseytheFarmer’sDaughter, which is from her sister @JordynBakes, and adapted by me. I use dark cocoa powder and refrigerate the dough so my cookies are a little puffier. I also bake my cookies at a slightly lower temperature, as it is what I do. The cookies pictured on the original recipe are a slightly flatter and more bits and pieces from the egg category. I personally liked the idea of little cookie nests for little chockey eggs.

I love this cookie because is has layers of chocolate. There is the chewy dark chocolate cookie base. There is the milk chocolate of the mini egg, and the crunchy coating of whatever that’s made of…It gives the soft and sweet and crunch you’ve been waiting for.

If you are lucky enough to have someone you have loved since high school, through the really great moments and the really sucky moments of your life, you are really blessed. It is amazing that even though we are pretty much home at this point, between texting and FaceTime and Teams meetings, we are able to communicate with our loved ones. Even the fact that we can send sarcastic Instagram posts to one another adds another layer. How fortunate are we, that we are not without connection in a time of fear and the unknown.

Oh, just an aside…sometimes the Mini Egg cracks as it cools. This doesn’t impact the taste, in fact, it saves my lazy mouth from having to bite down through the egg to get to the cookie. And if that isn’t the epitome of lazy, I don’t know what is.

I only wish my sweet friend were here in my dining room or I were in her kitchen to share these beauties. True story, I will not be making these until we are able to spend time together and they will be dropped off at her house immediately.

To my friend who was the Nurse to my Juliet, who carted my non-licensed butt for far too long, and who literally has been my inspiration as one of the strongest women on the planet. You are my hero. XOXO.

I really hope you enjoy this recipe, and as always…thank you for coming to the table.

Love,

Chrissy

Click below for a printable recipe.

Print

Cadbury Mini Egg Cookies

Print Recipe

This dark chocolate cookie holds bits of mini eggs and packs the sweet chewy chocolatey crunch all in each bite. A perfect springtime cookie. Adapted from Kelsey the Farmer’s Daughter and Jordyn Bakes.

  • Author: chrissy@mythankfultable.com

Ingredients

Scale
  • 1 cup salted butter, softened
  • 1 cup granulated white sugar
  • 3/4 cup packed brown sugar
  • 2 large eggs
  • 1 teaspoon vanilla extract
  • 2 teaspoons baking soda
  • 1/2 teaspoon kosher salt
  • 1 1/4 cup unsweetened dark cocoa powder
  • 1 3/4 cup all-purpose flour
  • 2 cups mini eggs, chopped (save additional mini eggs as whole to decorate the top of cookies)

Instructions

  1. In a large mixing bowl, or in the bowl of a standmixer with a paddle attachment, cream together the butter and sugars on high until light and fluffy. 
  2. Add in the eggs one at a time on medium speed.

  3. Add in vanilla.
  4. In a separate bowl, whisk together salt, baking soda, cocoa powder, and flour. 

  5. Add the dry ingredients to the wet, about half at a time, mixing on low to try and reduce the puff of cocoa powder that always makes a mess!

  6. Mix on low until just incorporated.

  7. Use a spatula to scrape down the sides and bottom of the bowl.

  8. Stir in the chopped mini eggs on low speed.

  9. Scoop out dough with a tablespoon and roll into balls. 
  10. Refrigerate for a few hours or overnight.
  11. Place cookies onto the cookie sheets. Press an extra mini egg piece or two on top of each cookie dough ball if you’d like an extra pop of colour on top.

  12. Preheat oven to 325*
  13. Bake for 9-12 minutes. Remove from oven, and let cool on the cookie sheet for about 10 minutes before moving to a cooling rack.

Did you make this recipe?

Share a photo and tag us — we can’t wait to see what you’ve made!

Posted in: Cookies Tagged: chocolate, Cookie, Dark Chocolate, Easter, mini eggs, spring

Cherry Crescent Moon Cookies and Finding the Joy

February 11, 2020 by chrissy@mythankfultable.com

Welcome 2020 a little bit late…I have been busy being a mom. Like, full on seeing the light at the end of the tunnel momming. Not that I haven’t always been a mom, or that things have ever been really quiet in our world.

With one child in college and the other a junior in high school, we are ending the days of carpooling and chauffeuring, of planning calendars for who needs to be where and when, and what does the future hold? Looking for colleges, choosing majors, making decisions for an uncharted path. But I find myself with the knowledge that unfortunately age has granted along with my laugh lines. It’s all about the journey, it’s all about finding the joy.

I have told my children in their endeavors to choose what is next, that you have to love what you do. Not every day, but most days. I have also told them that no one at nineteen maps out what the future holds. Almost no one in my life is living Plan A. It just isn’t a thing. We choose something and then life hands us something else, and we grow, and change, and become something better. So choose the path that gives you joy.

I am not sure that this is the advice of the wealthy. I am not sure that this is the advice you would give your children, but it is the advice I am giving mine. Now, that being said, there is a no-stagnating rule in my home. You are not allowed to just sit and do nothing. You will either go to school or work, or both. You will move forward in one capacity or another, but you will move. Choose wisely, but be flexible, life has a plan of handing you options. My father used to say, “Keep moving forward. As long as you keep moving forward, you’ll be ok.”

So, to this cookie; Which is a little bit about the journey, and a little bit about joy.

This is a cookie my Pennsylvania family makes. Now, that family could be an ex-family, but they aren’t. They could be a removed family as a result of divorce and sad circumstances. They aren’t…and that is by choice. By them as well as me. I am thankful for it. I say this because sometimes, in choosing joy, you choose to do the thing that other people don’t get or understand. Sometimes though, grace and love choose the better thing. The different path. It shapes you, if you let it…and then you find joy when you didn’t expect it. Oh, and a cookie.

This cookie is a soft, pillowy cream cheese dough filled with either cherry preserves or the good old pie filling, then drizzled with an almond glaze and sprinkled with sliced almonds.

They are delicious.

They are little pockets of joy.

They take a little extra time in that you have to make the dough and chill it. Then you have to roll it out, cut into circles, spoon a little cherry filling, then press together. You can use a fork to seal the edges or pinch with your fingers…then there is the post baking decorating that is extra…but oh so worth it. Cherry and almonds and soft dough, oh my.

And, this momma is trying to find her way back to the thing that brings her joy, which is writing. The cooking and baking has continued, but the writing has been stuffed back in the corner of my brain with the cobwebs, and it’s taken me a month to do what a writing professor once said, “Put your Butt in the Chair” and write (Thank you Jane Yolen). I still plan on momming full time/over time, but somewhere, I am hoping to catch up on the blogging and post more. That is the 2020 creative intention, anyway.

With Valentine’s Day on the horizon and cool weather still in the forecast…I highly recommend these tasty little cookies for your loved one. You will not be disappointed. I’d be remiss if I didn’t give you all the Norma Jane warning…”Watch out, the cherries may have pits!”

Find the joy my darlings.

I hope you enjoy this recipe and as always, thank you for coming to the table.

Chrissy

Print

Cherry Crescent Moon Cookies

Print Recipe

Cherry filled and drizzled with almond glaze, these light cream cheese pastry cookies are the perfect combination of sweet and tart.

  • Author: chrissy@mythankfultable.com

Ingredients

Scale


  • 1 cup butter, softened
  • 1 8 ounce cream cheese, softened
  • 1 teaspoon almond extract
  • 2 cups all-purpose flour
  • ½ cup cherry preserves
  • 2 egg whites
  • ¾ cup powdered sugar
  • ¼ teaspoon almond extract
  • 1 – 2 tablespoon water
  • ¼ cup sliced almonds

Instructions


1. In a large mixing bowl beat the butter and cream cheese with an electric mixer on medium to high speed for 30 seconds. Beat in the 1 teaspoon almond extract until combined. Beat in the flour until dough comes together. Divide dough in half. Cover and chill dough about 1 1/2 hours or until easy to handle. 

2. Preheat oven to 375°F. Line cookie sheets with parchment paper; set aside. On a lightly floured surface roll half the dough at a time to 1/8 inch thick. Using a scalloped-edge 3-inch round cookie cutter, cut out dough. Place rounds 1 inch apart on prepared cookie sheets. 

3.  Spoon 1/2 teaspoon cherry preserves onto one side of each round; spread to 1/4 inch from the edge. Fold dough rounds in half, enclosing preserves; press edges with the tines of a fork to seal. Whisk egg whites until frothy; brush cookies lightly with egg whites. Bake for 12 to 15 minutes or until cookies are light brown. Transfer cookies to a wire rack and let cool. 

4. In a small bowl stir together powdered sugar, the 1/4 teaspoon almond extract, and enough of the water to make an icing of drizzling consistency. Drizzle cookies with icing. Sprinkle with almonds. Let stand until icing is set. 

Did you make this recipe?

Share a photo and tag us — we can’t wait to see what you’ve made!

Posted in: My Story Tagged: Almond, cherry, Cookie, cream cheese, dessert, Holiday

Chewy Oatmeal Cookies with Golden Raisins, Dried Cranberries, Chocolate Chunks, and Walnuts

July 17, 2018 by chrissy@mythankfultable.com

It begins with the table. Whether it is the family you are born into, or the family you make on your own, I am convinced the table is where a family evolves.

For some of us, the joy is in prepping and serving. For others, there is no joy in the cooking, but the gift resides sitting next to people you love and talking about whatever topic arises.

For me, the best times around a table are potluck. Where everyone brings something. We share. It isn’t as stressful or scary or overwhelming, and it somehow all comes together

Potluck suppers have been my last week. We spent a whole week in the glorious Outer Banks: four families, varying supper plans. Only for me, the one with no grill or stove, I was the one who made due. I was welcomed at the table regardless.

(I brought the cookies).

This week held meals around pop up tables, picnic tables, poolside tables, bay side beach chair on your lap tables, and at each, we were family. Some topics dinner appropriate. Some topics…not. But, we laughed, and shared, and sat in silence. It was perfect.

All week-long I thought, “it all starts at the table.” We teach our children, we feed our elderly, we welcome the hurting. We provide, and we ever so humbly receive. We learn to sit. To listen. To share. We learn to respect and to be kind. We learn to laugh at ourselves. We all clean up together, and there is joy in that as well.

If you are lucky, the table is sacred. You take the time to stop the world, put down your electronics, and not just look at but see the people around you. And your heart becomes even more thankful.

For every time I complained about my father’s staunch five o’ clock supper time, I would give anything to sit at his table. When we eat as a family, it is almost always a joint decision as to where. Inside? Outside? But mostly…together.

For every crumpled napkin, shared plate, “try this,” forkful or sip of a drink, every “would you please pass…” or “Anybody want anything else before we clean up?” Our lives are connected. We are family…and it happens at the table.

For this cookie you can think it’s healthy and it is… but it really isn’t. Oatmeal, dried cranberries, dark chocolate chunks, orange zest, walnuts, and golden raisins all dance around with brown sugar and molasses. Chewy, filled with jam like dried fruit, and that little kick of orange balances it all out.

Yes, these went to the table. To the beach, to the bay, to the pool. Because life is just sweeter on vacation with dessert. Cookies need no plate. These were the healthiest of the cookies I brought, and they got eaten just like the others…and I am thankful. Ever so thankful, for the family I got to share for the week.

I hope you enjoy this recipe, and as always, thank you for coming to the table!

Chrissy

For a printable recipe, click below!

Print

Chewy Oatmeal Cookies with Golden Raisins, Dried Cranberries, Chocolate Chunks, and Walnuts

Print Recipe
  • 1 Cup Butter
  • 1 Cup Brown Sugar (I like to use dark)
  • ½ Cup White Sugar
  • 2 Eggs
  • 2 Tablespoons (generous) Molasses
  • 3 Cups Rolled Oats (Can be Gluten Free)
  • 1 ½ Cup Flour
  • 2 Teaspoons Cinnamon
  • 1 Teaspoon Baking Soda
  • 1 Teaspoon Salt
  • 4 Teaspoons Corn Starch
  • 1 ½ Cups Dried Cherries
  • 1 ½ Cups Golden Raisins
  • 2 Tablespoons Orange Zest
  • 1 Cup Dark Chocolate Chunks/Chips
  • Author: chrissy@mythankfultable.com

Ingredients

  1. Dough can be made ahead of time and refrigerated for up to a few days but can be mixed and baked.
  2. Preheat oven to 325*
  3. Line cookie sheets with parchment paper or Silicone mats.
  4. In a mixer with a paddle attachment, combine butter and sugars until light and fluffy.
  5. Add in eggs and molasses and combine until smooth.
  6. In a separate bowl combine flour, oats, baking soda, salt, cornstarch, and cinnamon.
  7. Add dry ingredients to butter mixer until combined.
  8. Stir in dried cherries, zest, raisins, chocolate chunks.
  9. Scoop dough onto prepared cookie sheets.
  10. Bake for approx. 12 minutes. Allow to cool.

Did you make this recipe?

Share a photo and tag us — we can't wait to see what you've made!

Posted in: Cookies, My Story, Recipes Tagged: Cookie, Dark Chocolate Chunks, Dried Cranberries, Golden Raisins, Oatmeal, Oatmeal Cookie, Walnuts

Chocolate Chunk Walnut Biscotti (When Chocolate Chip Cookie Love Meets My Latest Obsession)

February 11, 2018 by chrissy@mythankfultable.com
Dark Chocolate Chunk Walnut Biscotti

Dark Chocolate Chunk Walnut Biscotti

Dark Chocolate Chunk Walnut Biscotti

If I could liken my biscotti baking to something it would be binge watching. As in, if loving biscotti is wrong, I don’t wanna be right. And, of course, where would we be with Valentine’s Day around the corner without chocolate? Enter this cookie.

So I have basically come to a decision that biscotti requires one stick of butter, one cup of sugar, a little salt, extract, two eggs and approximately two cups of flour. I always wonder how on the food network shows the competing chefs just remember recipes…but I honestly have this one down.

This recipe, in its simplicity, messes with the sugar. Instead of one cup of white granulated sugar, you are combining white and brown sugar. The result is a darker cookie, with a more chocolate chip flavor than biscotti. Who’s complaining? Not me.

Dark Chocolate Chunk Walnut Biscotti

Dark Chocolate Chunk Walnut Biscotti

I also threw in chopped walnuts, which was a winner idea. It gives the biscotti this mellow nutty flavor which is just fantastic.

Typically, I add a drizzle or a chocolate dip, because I like the idea of taking the biscotti to the next level. However, with these, no next level is needed. I am a soft and chewy chocolate chip cookie girl, but these are all that is wonderful in a crisper-crunchier, note not drier cookie. I also like that these biscotti have a more rustic and less smooth look to them. They are like the comfy sweats of biscotti. Perfect for binge watching television, too.

I can go on and on about the beauty of this cookie but if one thing reigns supreme it would be this: Biscotti last longer. Other reasons would be: You get way more cookie for the calories and; Hello perfect friend for coffee or tea.  You really can’t go wrong. Even your coffee needs a valentine. And that valentine is this cookie.

I hope you enjoy this recipe, and as always, thank you for coming to the table!

Chrissy

Clock below for a printable recipe.

Print

Chocolate Chunk Walnut Biscotti (When Chocolate Chip Cookie Love Meets My Latest Obsession)

Dark Chocolate Chunk Walnut Biscotti
Print Recipe

Dark chocolate chunks and chopped walnuts combined with a mixture of brown and white sugars make for the perfect chocolate chip biscotti.

  • Author: chrissy@mythankfultable.com

Ingredients

Scale
  • 1/2 Cup (1 Stick) of Butter
  • 1/2 Cup White Granulated Sugar
  • 1/2 Cup Dark Brown Sugar
  • 2 Eggs
  • 1 1/2 Teaspoons Baking Powder
  • 1 Teaspoon Vanilla Extract
  • 1 Teaspoon Almond Extract
  • 1 3/4–2 Cups AP Flour
  • 1 Cup Dark Chocolate Chunks (I used Trader Joe’s)
  • 1 Cup Chopped Walnuts

Instructions

  1. Preheat Oven to 350*
  2. In a mixer, combine butter and sugars until light and fluffy.
  3. Add eggs, extracts, salt, and baking powder.
  4. Add flour until dough is slightly sticky but holds together.
  5. Add chocolate chunks and walnuts.
  6. Form into two logs on a parchment or Silpat lined baking sheet
  7. Bake for 30 minutes.
  8. Reduce oven temperature to 300*.
  9. Allow bars to cool for ten minutes.
  10. Slice bars on the diagonal, approximately one inch thick.
  11. Place cookies slice side up on baking sheet and bake for an additional 15-20 minutes at 300*

Did you make this recipe?

Share a photo and tag us — we can't wait to see what you've made!


Posted in: Cookies, Dessert, My Story, Recipes Tagged: Biscotti, Cookie, Dark Chocolate Chunk, Walnut

Caramel Filled Snickerdoodles

January 11, 2018 by chrissy@mythankfultable.com
Caramel Filled Snickerdoodles

Caramel Filled Snickerdoodles

Caramel Filled Snickerdoodles

The month of December was jam packed with all things holidays and programs of one thing or another. As I am writing this, this recipe was made almost three weeks ago but I haven’t had the time or the stamina to write.

I will say this, if you aren’t a snickerdoodle fan (which I wasn’t before this cookie), you may change your mind. I found this recipe on www.sallysbakingaddiction.com and was interested. Anything caramel gets my attention, what can I say? Surround it in a buttery soft cookie and roll it in sugar and cinnamon…you have my attention.

Caramel Filled Snickerdoodles

Caramel Filled Snickerdoodles

This recipe was intended for a girls night filled with baking and movies and pajamas. Due to a wrestling tournament, it became one type of cookie on my end, and one movie (and I fell asleep with the dog on the couch fifteen minutes in) but the pajamas and the friendship are the kind where I can do that. My friend and her daughter love me and my daughter even if we are late and can only watch one movie. Life is good.

Caramel Filled Snickerdoodles

Caramel Filled Snickerdoodles

For this recipe, you measure out balls of dough into tablespoon sized servings, roll them and refrigerate. Then, taking a half a caramel, you smoosh it between two balls of dough and roll to cover.  The ball of dough is

then rolled in a sugar and cinnamon mixture, and baked.

Caramel Filled Snickerdoodles

Caramel Filled Snickerdoodles

I think it is important to comment here that if you are using older caramels, the cookie will look sort of, well, breast like. As in, the carmels stay more firm and look rather like nipples. I know. I said breast and nipple in one blog post. So, that said, make sure your caramels are fresh.

Fortunately, the nipples dispersed as the cookies continued to bake and all was well. The soft melty caramel and the sugary sweetness of the cookie made for a nice treat.

Another point to make is be sure to store these in an airtight container- as the buttery chewy texture will turn to a firmer cookie if left out without being covered.

As far as friendships and girls nights and baking go, this was a success. For the snickerdoodle lover it definitely hits the spot. For the newbie covered, I am sold.

I hope you enjoy this recipe, and as always, thank you for coming to the table!

Chrissy

Caramel Filled Snickerdoodles

Caramel Filled Snickerdoodles

Print

Caramel Filled Snickerdoodles

Caramel Filled Snickerdoodles
Print Recipe

Original recipe from www.sallysbakingedition.com. These soft chewy snickerdoodle cookies are filled with a sweet, melty caramel center.

  • Author: chrissy@mythankfultable.com

Ingredients

Scale
  • 1 Cup Butter, softened
  • 1 Cup White Granulated Sugar
  • 2/3 Cup packed Brown Sugar
  • 2 Eggs
  • 2 Teaspoons Vanilla Extract
  • 1 Teaspoon Cream of Tartar
  • 1 Teaspoon Baking Soda
  • 1 Teaspoon Baking Powder
  • 1/2 Teaspoon Salt
  • 3 Cups Flour
  • 12 Soft Caramels, cut in half

Topping:

  • 1/4 Cup Granulated Sugar
  • 1 1/2 Teaspoon Cinnamon

Instructions

  1. Combine flour, baking powder, baking soda, cream of tartar, and salt together.
  2. In a mixer, combine butter and sugar until light and fluffy.
  3. Beat in eggs and vanilla extract. Scrape down the sides of bowl as needed.
  4. Slowly incorporate dry ingredients until combined.
  5. Scoop and roll 1 teaspoon sized balls of dough.
  6. Refrigerate for a few hours up to three days.
  7. Preheat oven to 325*
  8. Take one ball of dough, place a 1/2 Caramel and cover with another ball of dough, rolling together until caramel is covered.
  9. Roll completed ball in topping mixture.
  10. Bake for 11 – 12 minutes on a silpat or parchment lined baking sheet.
  11. Allow cookies to cool additional time on the cookie sheet, then transfer to cooling rack and cool completely.

Did you make this recipe?

Share a photo and tag us — we can't wait to see what you've made!

Posted in: Cookies, Dessert Tagged: Caramel, caramel filled, Cinnamon, Cookie, snickerdoodle

Mimi’s Gingersnaps

January 8, 2018 by chrissy@mythankfultable.com
Soft Chewy Ginger Cookies

Soft Chewy Ginger Cookies

Soft Chewy Ginger Cookies

Anything Mimi makes is delicious. This recipe was originally a cookie swap cookie from my best friend, and the recipe I have is written in my notes is from Mimi. I think we all make them slightly different, but this is the recipe as I got it.

The only thing I do differently (which, I believe so does said person who gave me the recipe) is I am heavy handed when it comes to the spices. As in, use the recipe as a suggestion, and go overboard with all things ginger, cinnamon, and clove. (ok, maybe not so much the clove). I have been known to either heaping spoonful the measurement or even double the spice as written in this recipe, so buyer beware. You can do this recipe as is and it will be wonderful. You can amp up the spices and it will be a cross between a ginger cookie and death by ginger (my preferred cookie).

For me, ginger is a spectacular flavor. I am currently (and have been) in love with David’s Organic Super Ginger Tea. My daughter says it’s like drinking fire. I say, bring it. There is nothing better than ginger with chicken, ginger in my tea, or ginger in my cookie.

Soft Chewy Ginger Cookies

Soft Chewy Ginger Cookies

I’ve said it before and I will say it again, if you are going to consume something that is considered indulgent, it should be worth it. So for me, a gingersnap that is meh, I don’t want to bother with. If it is coming out of my kitchen, I want it to be a ginger snap.

Soft Chewy Ginger Cookies

Soft Chewy Ginger Cookies

So, soft or snappy? That’s up to you. I like them both. These tend to be chewy, which I love. They can get harder the longer you bake them, and do get a little harder as they cool, but overall, this is a chewy ginger cookie. This batch that I photographed tended to be more spread out than usual- but the taste was exactly the same. The chewy factor was also the same even though I have made these where they do look puffier.

The combination of shortening, molasses, spices, oh my. So good. I roll mine out and refrigerate before baking but you don’t have to. They bake at 300* which is low heat, even by my standards, but this is magic in the works. If Mimi says bake at 300*, I bake at 300*.

When you bake these, your kitchen will make you remember everything about Hansel and Gretel and the Gingerbread Baby (which you must read if you haven’t yet) and for me, home. I loves me a good cookie, but these specifically make me think of my friend and her family and so they are like the soft blankie equivalent in the realm of cookies. You just need them on your tray.

I treat these cookies like I do mint cookies. I keep them separate until the last minute. I don’t want anything messing with the burst of spice.

They are also an easy cookie to bake. One mix, roll in sugar, and bake. Which is partially why they are my go to cookie for cookie swaps. Unlike the multi-step cookies I have shared lately, these are a must make, true as can be cookie. Or as my son’s friend says, “Momma, we gotchu.” cookie.

Some things are snappy and spicy, some people are snappy and spicy. We need them all on the cookie tray. It adds to the mix. I find myself more of a gingersnap person in life, which works for me.

I hope you enjoy this recipe, and as always, thank you for coming to the table.

Chrissy

Click below for a printable recipe!

Print

Meme’s Gingersnaps

Print Recipe

★★★★

4 from 1 reviews

  • Author: chrissy@mythankfultable.com

Ingredients

Scale
  • ¾ Cup Crisco
  • ½ Teaspoon Salt
  • 1 Cup Sugar
  • 1 Egg
  • ½ Cup Molasses
  • 2 Cups Flour
  • 3 Teaspoon Baking Soda
  • 1 Teaspoon Cinnamon
  • 1 Teaspoon Ginger
  • ½ Teaspoon Cloves

Instructions

  1. Mix shortening and sugar until light and fluffy.
  2. Add eggs and molasses and beat again.
  3. Add dry ingredients and mix well.
  4. Roll into balls and then roll in additional sugar.
  5. Bake at 300* for 12-15 minutes. Remove to wire rack to cool.
  6. Cookies will be a little soft and turn hard after cooling.

Did you make this recipe?

Share a photo and tag us — we can't wait to see what you've made!


Posted in: Cookies, Dessert, Recipes Tagged: chewy cookie, Cinnamon, Cloves, Cookie, dessert, Ginger, Gingersnaps

Eggnog Biscotti with Rum Glaze (Even if You Don’t Like Eggnog or Hallmark Movies)

December 15, 2017 by chrissy@mythankfultable.com

Eggnog Biscotti with Rum Glaze

Eggnog is one of those things I associate with the holidays even though I may only take a taste. If I had to choose flavors and food items to have in my arsenal of holiday goodies, I have to admit, eggnog would get a nod, a, “Oh eggnog is out, it’s the holidays” (in a sing-song voice) but then my shopping cart and I would keep-on-a-walking.

I don’t want to come out and say I don’t like eggnog. It’s a texture thing. It’s a I’m-not-a-milk-drinker thing. But, I’m kinda not a fan. However, at my latest cookie swap with my amazing baker friends I came across a new to me cookie – an Eggnog Log.

Eggnog Biscotti

Eggnog Biscotti

I will be baking these for the blog soon (especially since I bought eggnog for this biscotti recipe), but the knock out flavor those cookies delivered may have changed my mind.

What a cool tasting cookie. Nutmeg, festive, sweet, and my wheels got spinning. Of course you also know I am slightly obsessed with biscotti and my new love of baking them now that they don’t terrify me. So, in my recipe search I came across this recipe for a glazed Eggnog Biscotti, which required the addition of a new Rum Extract to the baking pantry. Sign me up.

Eggnog Biscotti

Eggnog Biscotti

Again, biscotti is a simple process comparatively. Where you would chill the dough with any other cookie, you bake biscotti the first time right away. Where you would scoop or roll, you are slicing with a knife. Where you would be exchanging one tray of baked cookies for the next, you are cooking the whole batch at one time. It’s pretty cool. Oh, and the smell these cookies give off when baking is perfection. It tastes like what you would imagine the Hallmark movie houses smelling like…

Ok, I don’t actually watch Hallmark movies but everyone around me does. I’ve seen enough to know. Give me my on-demand of Playing House Seasons 1-3 and I am happy. I’ve also been sucked into the Stranger Things series by my son, who told me we need to watch it. Which, I agree we do. (I am only up to episode four in season one).

But back to the biscotti.

Eggnog Biscotti

Eggnog Biscotti

This biscotti is mixed up, formed into logs, baked, sliced on an angle, and baked a second time at a lower temperature until dry and lightly golden.

Then, the glaze is a simple mixture of confectioners sugar, eggnog, and rum extract.

I will say, give yourself time for the glaze to dry before packing these beauties up. I personally don’t like sugary sugary glazes, as in, all you taste is the sugar. So- I made my glaze/drizzle a little thinner. It was worth waiting for the glaze to dry to eat it. Although, who are we kidding, I tasted it as soon as it was on the completed batch. Listen, you will smell these and you will want to eat them.

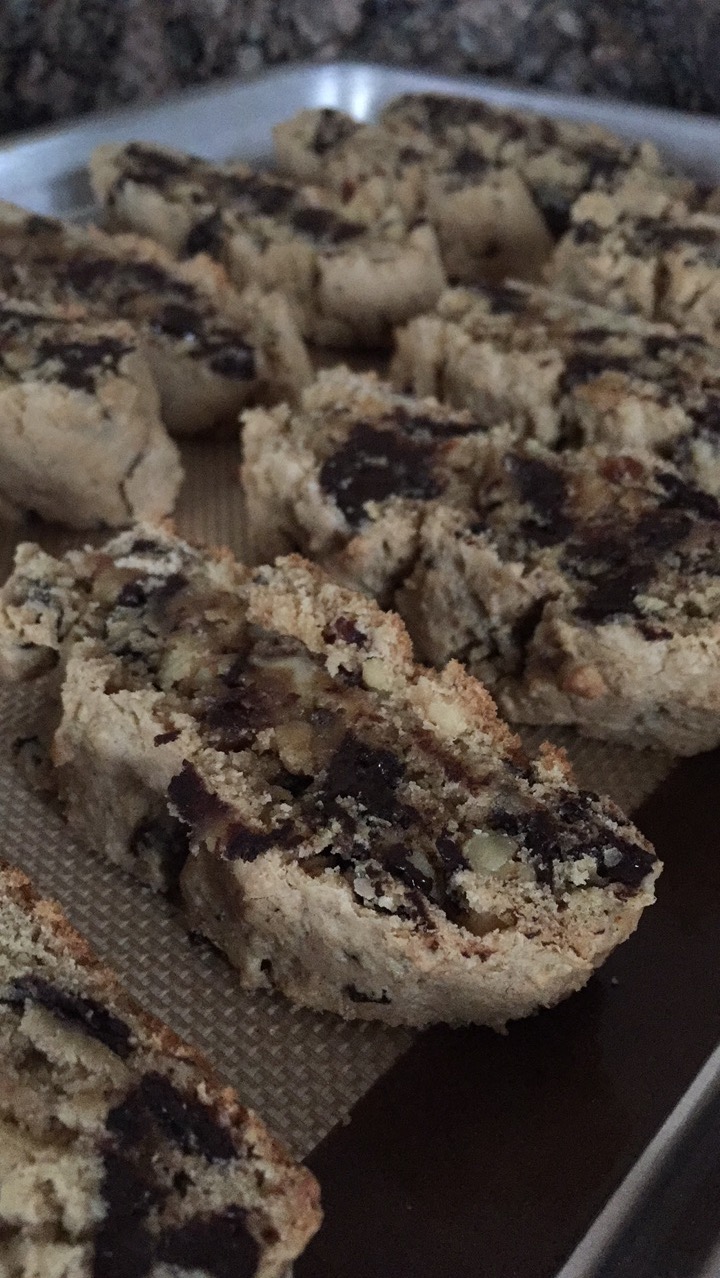
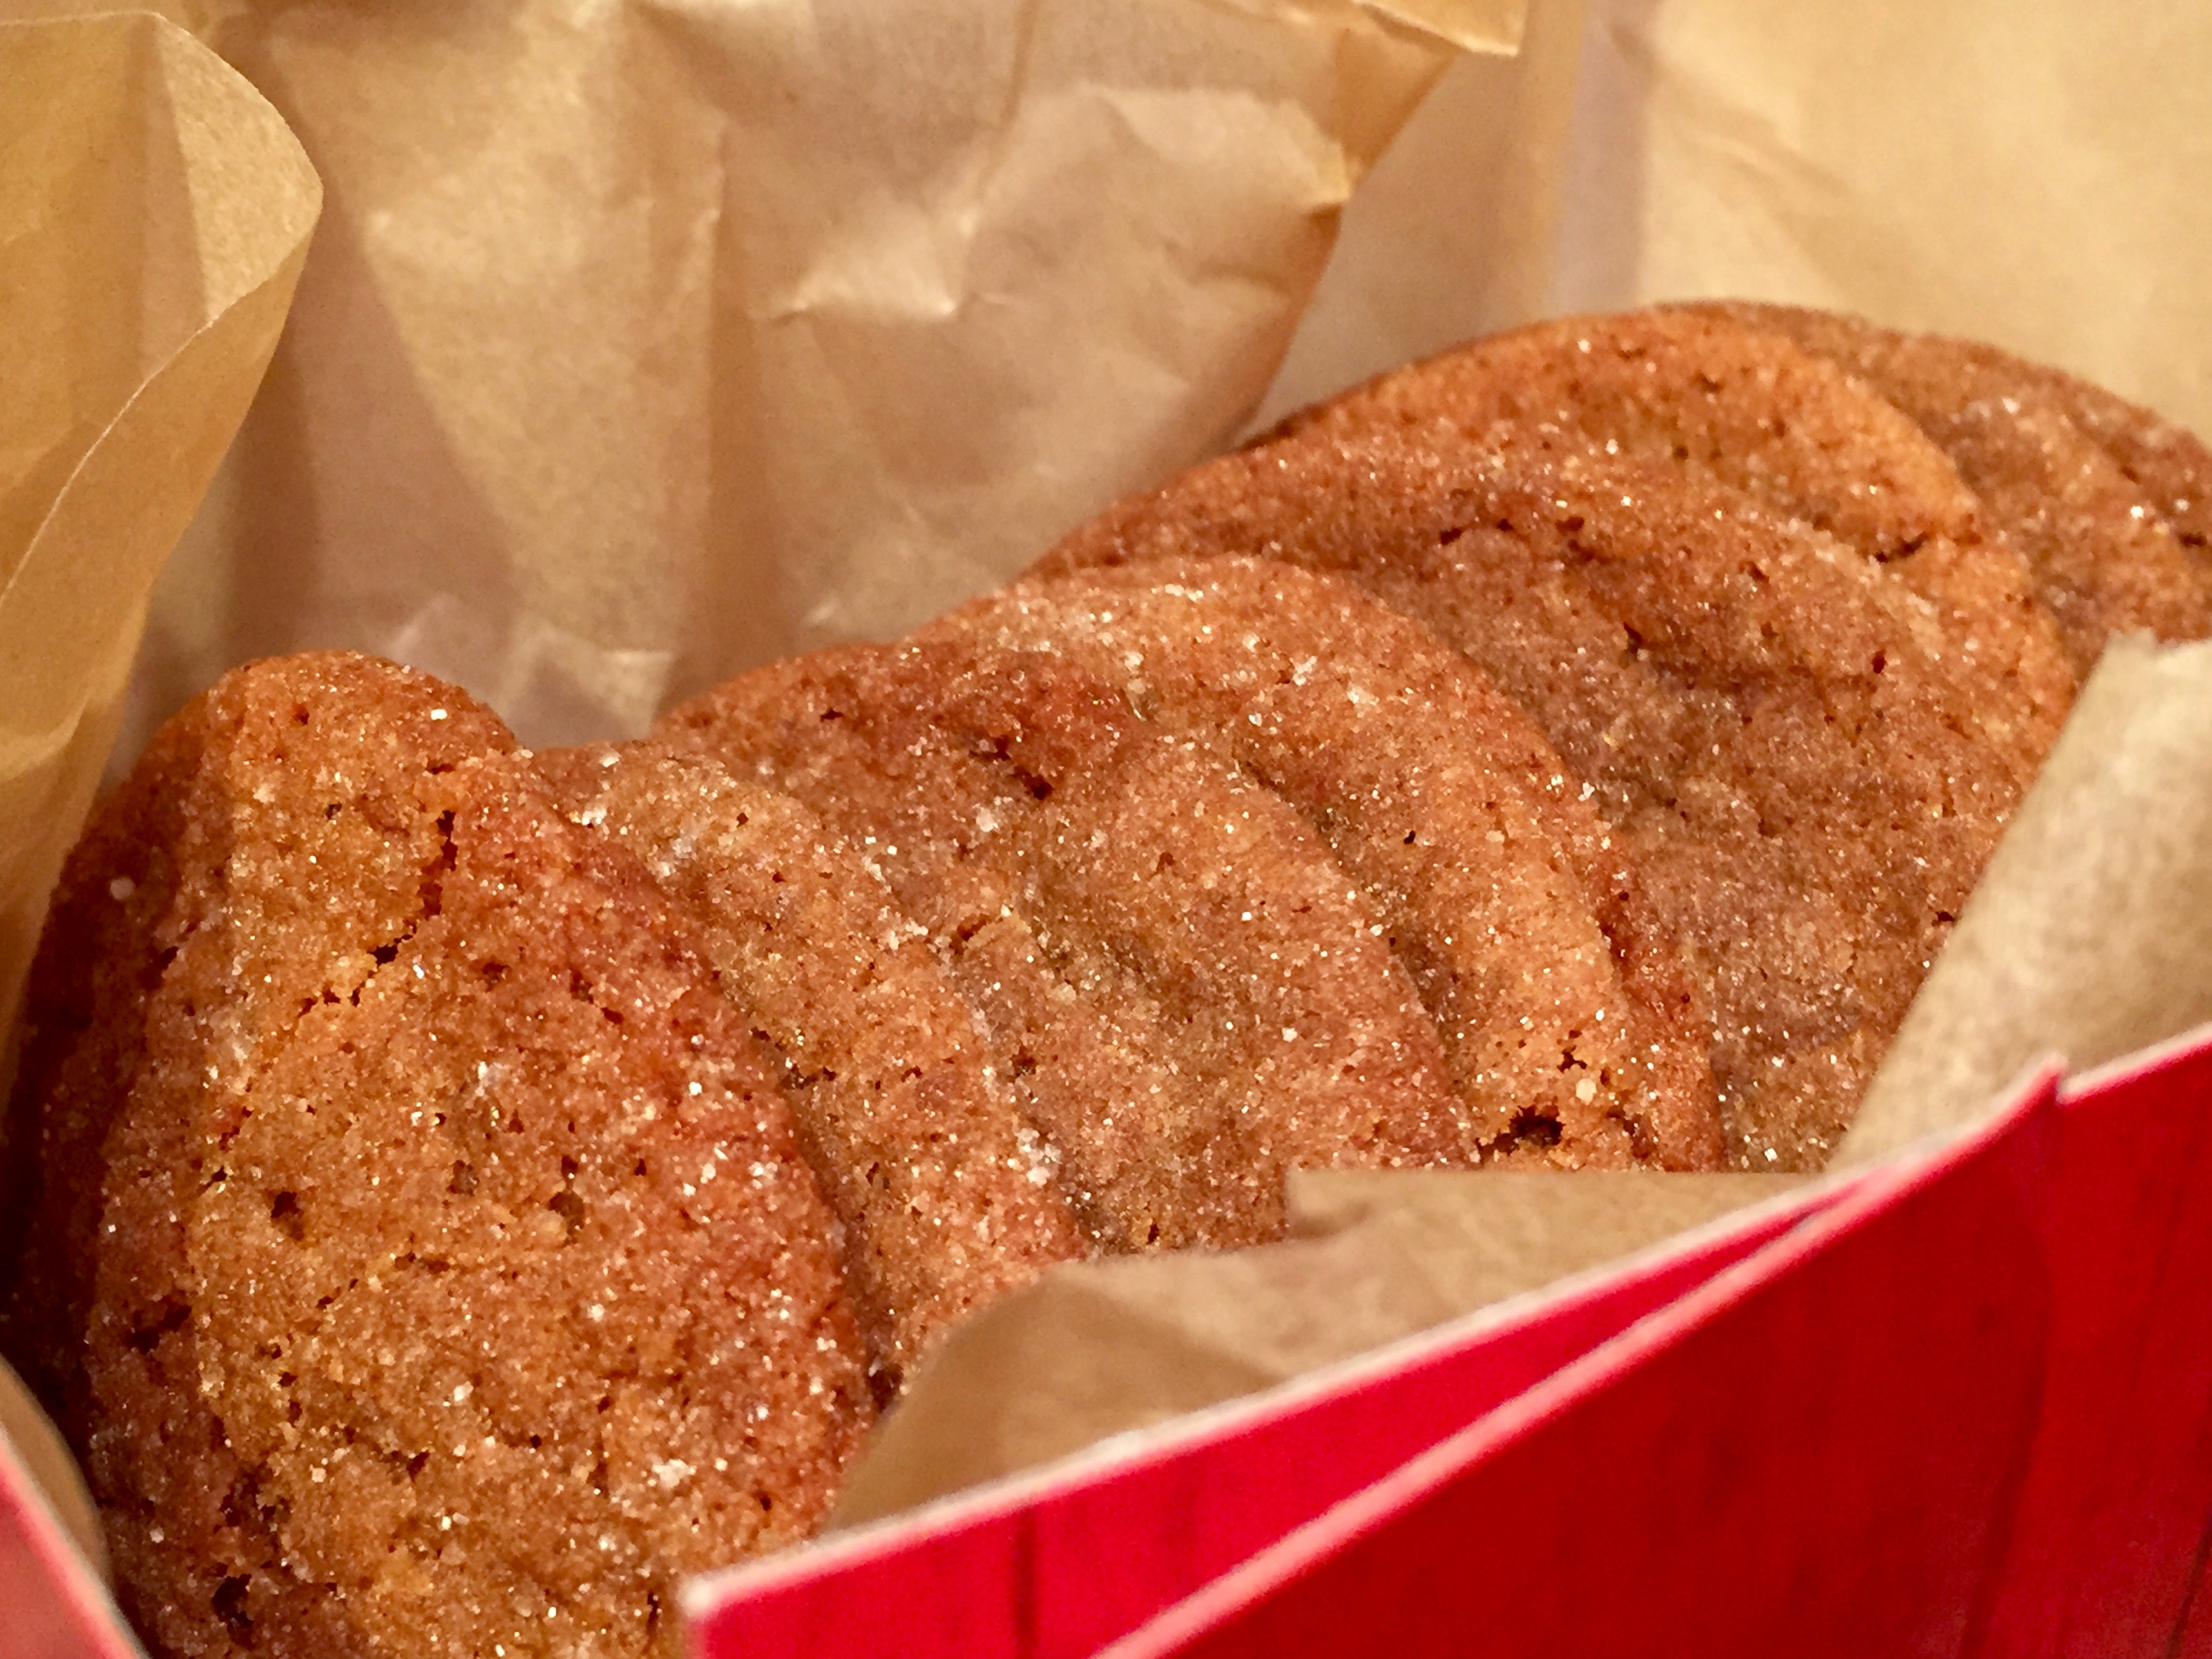
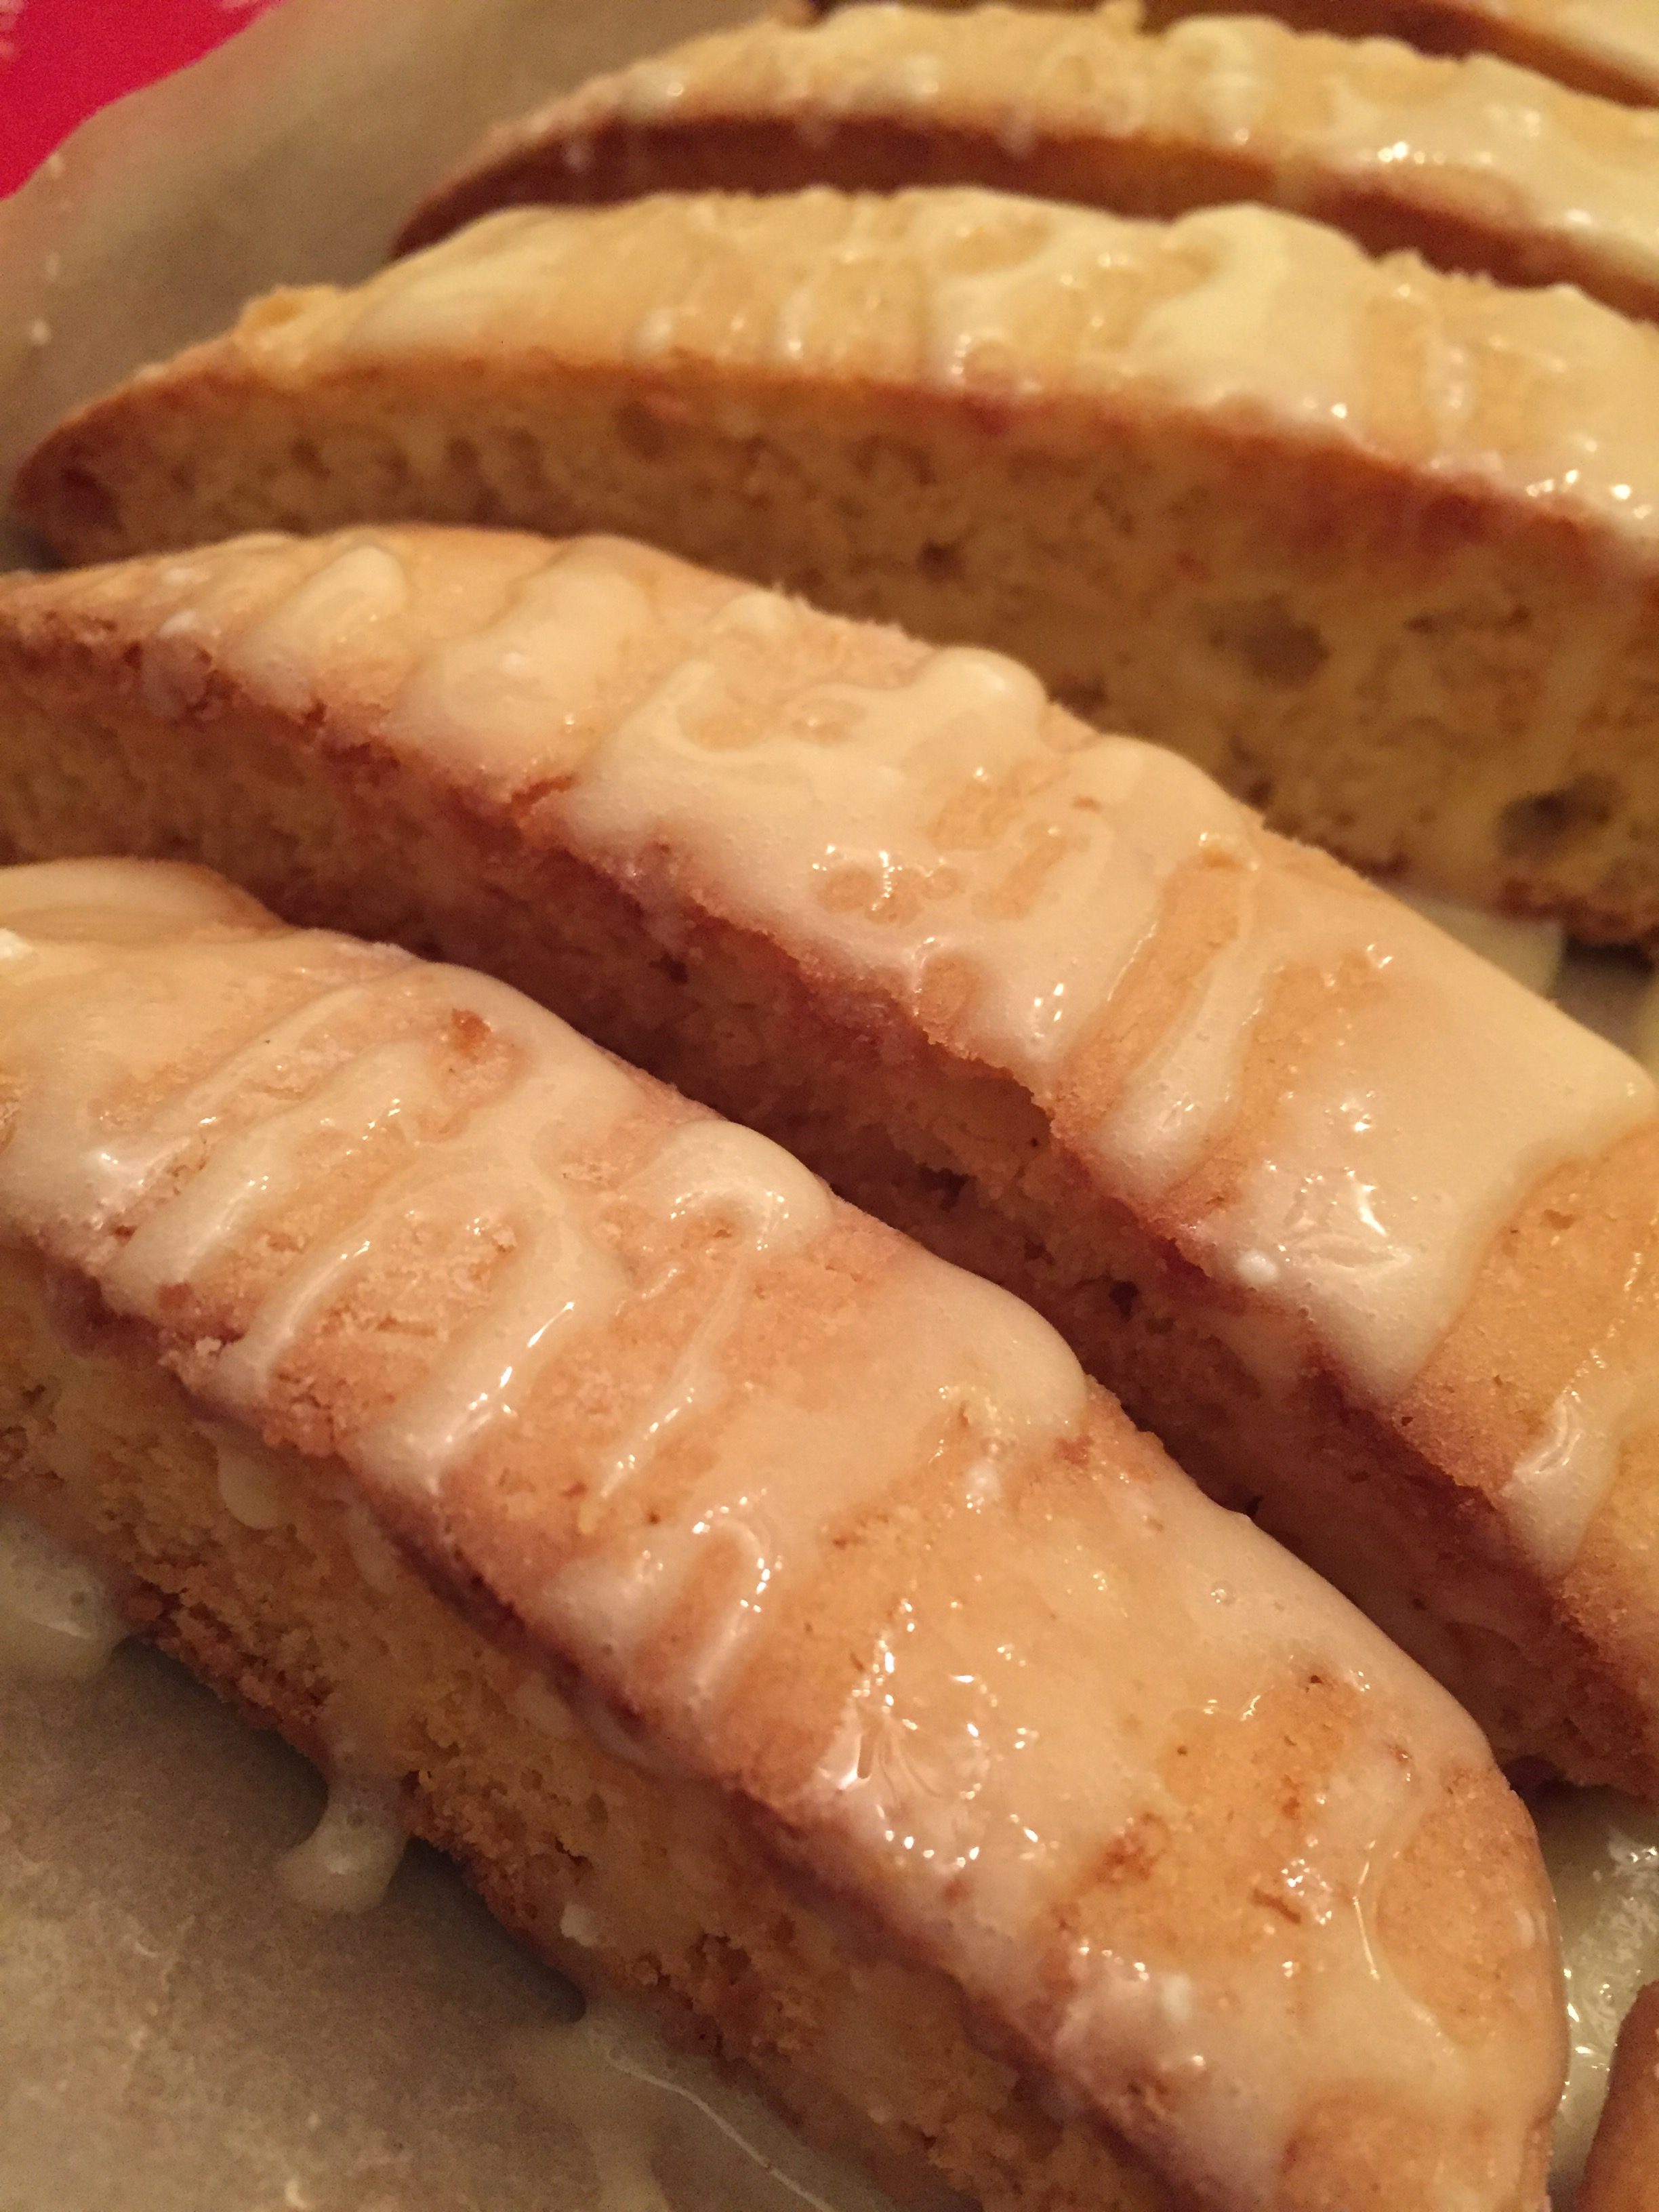
What I really liked about this biscotti is I connected with fellow eggnog haters, I mean, other people who don’t swig eggnog like water. People who said, just like me, “You know, I don’t really like eggnog, but these, these I like.” Which is a great thing. Just like the day someone says, “I really don’t like vegetables but I like your Brussels sprouts.” Major win.

Even if you don’t LOVE eggnog, you will LOVE this recipe. If a recipe could give you a kiss in the snow or save a town of Christmas toy makers, or find the perfect new nanny, like on Hallmark…this is that cookie. Or, at least, make your house smell like Hallmark movies and make your cookie platter diverse.

I hope you enjoy this recipe, and as always, thank you for coming to the table!

Chrissy

Click below for a printable recipe!

Print

Eggnog Biscotti with Rum Glaze

Print Recipe

Delicious biscotti with eggnog, delicious nutmeg and rum notes. Eggnog and rum drizzle. Original recipe by Brandie Valenzuela, with slight modifications.

  • Author: chrissy@mythankfultable.com

Ingredients

Scale

For Biscotti:

  • 1 Stick or 1/2 Cup Butter
  • 1 Cup Granulated Sugar
  • 2 Eggs
  • 2 Teaspoons Rum Extract
  • 1/2 Cup Eggnog
  • 2 Teaspoons Baking Powder
  • 1 Tablespoon Nutmeg (I used fresh nutmeg with a microplane)
  • 1/2 Teaspoon Salt
  • 3 1/4 Cup Flour

Glaze:

  • 1 Cup Powdered Sugar
  • 1 Teaspoon Rum Extract
  • 2–3 Tablespoons of Eggnog

Instructions

  1. Preheat Oven to 350*
  2. Line a large baking sheet with parchment paper or silicone baking sheet.
  3. In a mixer, cream together butter and sugar until light and fluffy.
  4. Add eggs, and mix until combined.
  5. Add eggnog and rum extract.
  6. Add salt, baking powder, and nutmeg to the mix.
  7. Slowly incorporate flour and mix until well combined.
  8. On a floured surface, divide the dough to into two portions.
  9. Shape dough into two long rolls/rectangles, approximately 12-14 ” long.
  10. Place dough on the cookie sheet, with a few inches apart (dough rises as it bakes).
  11. Press down on each roll until it is 1/2″ high.
  12. Bake for 25 minutes at 350* and the biscotti is golden brown.
  13. Allow biscotti to cool, then transfer to a cutting surface and cut on the diagonal.
  14. Reduce oven to 325*
  15. Return biscotti to the oven, cut side up for a second baking time of 10 minutes on each side. Finished cookies should be slightly crunchy and golden brown.
  16. Cool cookies completely.
  17. To make drizzle, combine ingredients to the right consistency.
  18. To drizzle the biscotti, use either a small spoon or fork and drizzle over biscotti.
  19. Allow glaze to dry before packaging up.

Did you make this recipe?

Share a photo and tag us — we can't wait to see what you've made!


Posted in: Cookies, Dessert, Recipes Tagged: Biscotti, Cookie, Eggnog, Eggnog Biscotti, Rum
1 2 Next »

Recipe Search

Recent Posts

  • Fluffernutter Cookies…You Heard Me April 12, 2024
  • On Nests July 30, 2023
  • Lemon Rosemary Shortbread Cookies April 24, 2022
  • Praline Sweet Potato Pie March 22, 2022
  • Italian Ricotta Cake March 13, 2022

Recent Comments

  • Cathy Carroll on To My Daughter On Her 18th Birthday
  • Maureen / Mimi on To My Daughter On Her 18th Birthday
  • Kathy G on To My Daughter On Her 18th Birthday
  • chrissy@mythankfultable.com on Cherry Crescent Moon Cookies and Finding the Joy
  • chrissy@mythankfultable.com on Cherry Crescent Moon Cookies and Finding the Joy

Archives

Categories

  • appetizer
  • bread
  • breakfast
  • Cookies
  • crockpot
  • crockpot
  • Dessert
  • Fruit
  • My Story
  • One Pan
  • Recipes
  • side dish
  • Side Dishes
  • soup
  • Vegan

Copyright © 2025 mythankfultable.com.

Lifestyle WordPress Theme by themehit.com