mythankfultable.com

Feeding the Heart, Body, and Family

  • My Pics
  • My Story
  • The Puppies
  • Contact Us
Feeding the Heart, Body, and Family

Cookies

Fluffernutter Cookies…You Heard Me
April 12, 2024 by chrissy@mythankfultable.com

In New England, we are known for all sorts of things, like leaf peeping and stone walls, die hard sports fans and quick weather changes. We talk fast, we are critical of everything, but we will also lend a helping hand. Its a meaner vibe than the people of say, Missouri, where I lived for a school year. But I will live here as long as my hand and back can handle a snow shovel, watch the river for flooding, and wake up with the birds around four am. Too many of Noah Kahan songs resonate. But wow am I a thankful New England woman.

Cut to, what I ate for supper last night, which is what brought me here. To the essence of NE, the fluffernutter. Peanut butter, Fluff, bread. I used to like it on the cheapest white bread I could find. Now we do artisinal bread. Lightly toasted. Standing at the counter with two pups waiting for any toasty peanutbuttery goodness.

So, when I saw a recipe with these two ingredients baked up into a cookie? Yes. Yes. Yes.

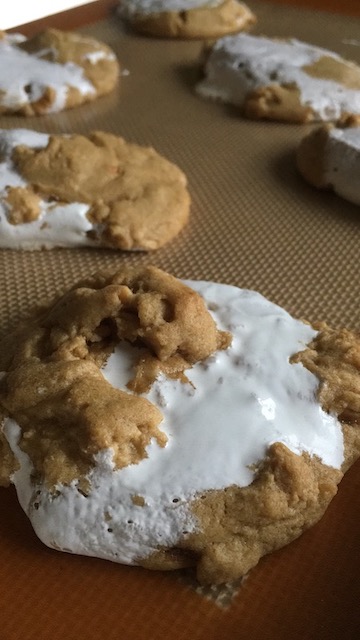
It is messier than your average cookie- not sure it would be my first pick for a cookie tray, but so worth the time if you are looking for a little sweet treat that brings back the nostalgia of school lunches packed in a metal lunchbox, complete with thermos.

I wish for you on this rainy spring day all the good, and warm gooey cookies. As always, thank you for coming to the table.

Print

Fluffernutter Cookies…You Heard Me

Print Recipe

Peanut Butter and Fluff come together to make an amazing cookie.

Original Recipe found on stress baking by Leslie Haasch 

https://stressbaking.com/fluffernutter-cookies/

Yield 12 Cookies

  • Author: chrissy@mythankfultable.com

Ingredients

·       ⅔ cup all purpose flour

·       1 teaspoon baking soda

·       Pinch of salt

·       8 tablespoons butter, room temperature

·       1 cup creamy peanut butter, well-stirred if using natural

·       1 ⅓ cups light brown sugar

·       1 egg, room temperature and lightly beaten

·       1 teaspoon pure vanilla bean paste or extract

·       2 tablespoons to ¼ cup marshmallow fluff, depending on how much you add to each cookie

Instructions

·       In a medium bowl, whisk together flour, baking soda, and salt.

·       In a stand mixer fitted with a paddle attachment, combine butter, peanut butter and brown sugar and beat on medium speed until light an fluffy.

·       Add egg and vanilla and beat to combine.

·       Add dry mixture and beat again to combine until you have a thick dough.

·       Cover the bowl with plastic wrap and place in the fridge for at least 30 minutes, preferably up to 1 hour.

·       Preheat oven to 325 °F. Prepare two baking sheets with nonstick silicon mats or parchment paper and set aside.

·       Grab a medium cookie scoop and fill it halfway with dough, pressing it into the bottom and up the sides. Spoon a teaspoon of marshmallow fluff into the center, and then top with more dough to fill the scoop. Place each ball of dough on prepared baking sheets, with no more than 6 on each, evenly spaced out with plenty of room for the cookies to spread.


·       Bake for 9-11 minutes until the cookies have spread and started to crinkle on top. Remove from the oven and let cookies cool for at least 15 minutes on the baking sheet itself – they will continue to spread and set a bit more as they cool. Carefully move to wire racks to cool completely. Enjoy!

Did you make this recipe?

Share a photo and tag us — we can’t wait to see what you’ve made!

Posted in: Cookies Tagged: Cookies, dessert, Fluff, Peanut Butter

Lemon Rosemary Shortbread Cookies

April 24, 2022 by chrissy@mythankfultable.com

Every now and then I come across a recipe and think, “Hmmm, yes. I need to make these.” At that point the recipe goes into a “Future Recipe” folder. (Sometimes I carry this around with me in my school bag like a total food nerd. I am ok with this).

Typically I bake for a specific reason, like a holiday, or a special event; then there is the recipe I make because it’s right there in the file, calling out to me. I find solace in the mundane parts of chopping or mincing, mixing and folding (now for my Schitt’s Creek fans, say it with me, “David, you simply fold in the cheese.”)

Maybe it’s a new Banana Bread recipe (which I have recently found and have made several times and will add to the blog), or it’s citrus season and the beautiful array of oranges and clementines and everything in between says, “Make that recipe now.” Cranberries are fresh in the early fall, and that is when you utilize every cranberry recipe in the file. I am currently watching my rhubarb unfurl with the first few warm days of spring, and you know the cobbler and crumble recipes await.

So, when I came across a cookie that combined savory, tart, and sweet…I figured it was worthy of the file.

This cookie, with its simplicity and yet complex flavors, was the cookie I made this winter just because. I made very few Christmas cookie plates up this year- I made a few of our favorites and I made only single batches of each.

When the kids and I discussed what was going to be baked, we streamlined to the top few. Our holidays were pretty quiet here. Also, I kind of needed to eliminate many things this year just because…the last two years have been a little crazy.

When I tell you that this savory but sweet little buttery cookie fills the wild card cookie spot, I kid you not. I have fond memories of the big blue tin of butter cookies and my grandmother’s house and tea time. These are not those cookies.

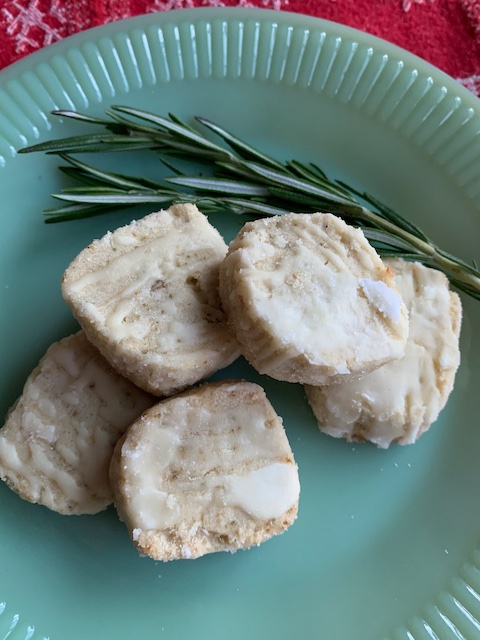
This is a buttery shortbread that incorporates rosemary, lemon rind, butter, egg, salt, confectioner’s sugar. It is so simple to put together.

The tricky part, if any, is keeping the dough chilled throughout the baking process. You only take out what you are baking and the rest goes back into the refrigerator. If you are like me and like to multitask (ie, put a bunch of cookies on the sheets and pop them in the oven as you do other things), this part is “meh.” But worth it!

I chose to drizzle a little extra lemon glaze on it to make it decorative, but really, it wasn’t needed.

The recipe yields approximately two dozen cookies, depending on the size of your dough roll and how thickly you cut them. I wanted mine to have an almost square look, so I flattened the rolls slightly to accommodate. I would also recommend erring on the smaller side for these, as they pack a punch flavor wise.

If you are looking for a cookie where the samplers stop for a second and have a look of, “What is this exactly?” but in the best way- this may be for you. Again, it’s not a peanut blossom or a double chocolate peppermint. It’s different for sure.

No matter the reason or season for your baking, I encourage you to expand the horizon and try something different. You will be surprised!

I hope you enjoy this recipe, and as always, I thank you for coming to the table!

Love,

Chrissy

Print

Lemon Rosemary Shortbread Cookies

Print Recipe
  • Author: chrissy@mythankfultable.com

Ingredients

Scale

1 Cup (2 Sticks) cold unsalted butter (I used salted and it didn’t impact the recipe) cut into small (1/2”) pieces

½ Cup granulated Sugar (plus 6–8 Tablespoon for coating)

2 Tablespoons chopped Fresh Rosemary

2–3 Tablespoons freshly grated Lemon Zest (I use a microplane for this)

1 Egg Yolk

¾ Teaspoon Salt

¼ Cup Confectioner’s Sugar

2 Cups AP Flour

Instructions

1.     Combine granulated sugar, lemon zest, rosemary, and salt in the bowl of a food processor. Pulse 5-6 times. 

2.     Add the egg yolk; pulse again several times. 

3.     Add the flour and confectioner’s sugar; pulse again to mix.

4.     Remove the lid and scatter the cold butter pieces over the dry ingredients. Pule until the dough forms large clumps that start gathering together. Stop pulsing before the dough form a ball around the blade.

5.     Turn the dough onto a lightly floured work surface. Divide it in half.

6.     Gently squeeze and knead the dough several times to even out the consistency. 

7.     Dust a long piece of waxed paper with 3-4 tablespoons of granulated sugar. 

8.     (Using your palms) Roll one half of the dough onto the granulated sugar until it forms a 1 ¾”-2” log.

9.     Repeat for the other half of the dough.

10.  Slip dough logs into gallon food storage bags or wrap tightly and store in the refrigerator over night.

11.  Preheat oven to 350* Line a baking sheet with parchment paper.

12.  Unwrap dough, and using a serated knife, cut the dough into rounds and place on baking sheet.

(a good tip is to keep unused dough refrigerated until ready to be baked- also don’t put cold dough on warm baking sheet or they will start to melt before they bake).


13.  Bake the cookies for 15-17 minutes or until the edges are golden and the surface is barely starting to brown. Leave on baking sheet for two more minutes then transfer to a rack to cool. 

These do not need anything, but I added a quick lemon glaze, whisking lemon juice and extract into powdered sugar until I got the desired consistency. It just added the extra lemon kick I was looking for!

Did you make this recipe?

Share a photo and tag us — we can’t wait to see what you’ve made!

Posted in: Cookies, My Story Tagged: Butter, Cookies, herb, lemon, Rosemary, Shortbread, Sweet

Fudgey Avocado Chocolate Chip Cookies

February 7, 2022 by chrissy@mythankfultable.com

I don’t think there is anything prettier and more rewarding than cutting into the perfectly ripe avocado. That creamy flesh, with a buttery texture and full of good things for our bodies. The avocado is complete in and of itself. I will eat an avocado sliced up, on toast, mashed into guacamole, in salad, on tacos, the possibilities are endless.

Finding the avocado at it’s perfect ripeness is that daily dance of checking to see- too firm, just soft enough? Then there is the occasional over ripe one I’ll try to make work, but an avocado is not like a banana. There’s no magical bread to make with the over ripe avocados. In my home, avocados rarely last long enough to be over ripe. So for me, it is a worth while weekly produce purchase.

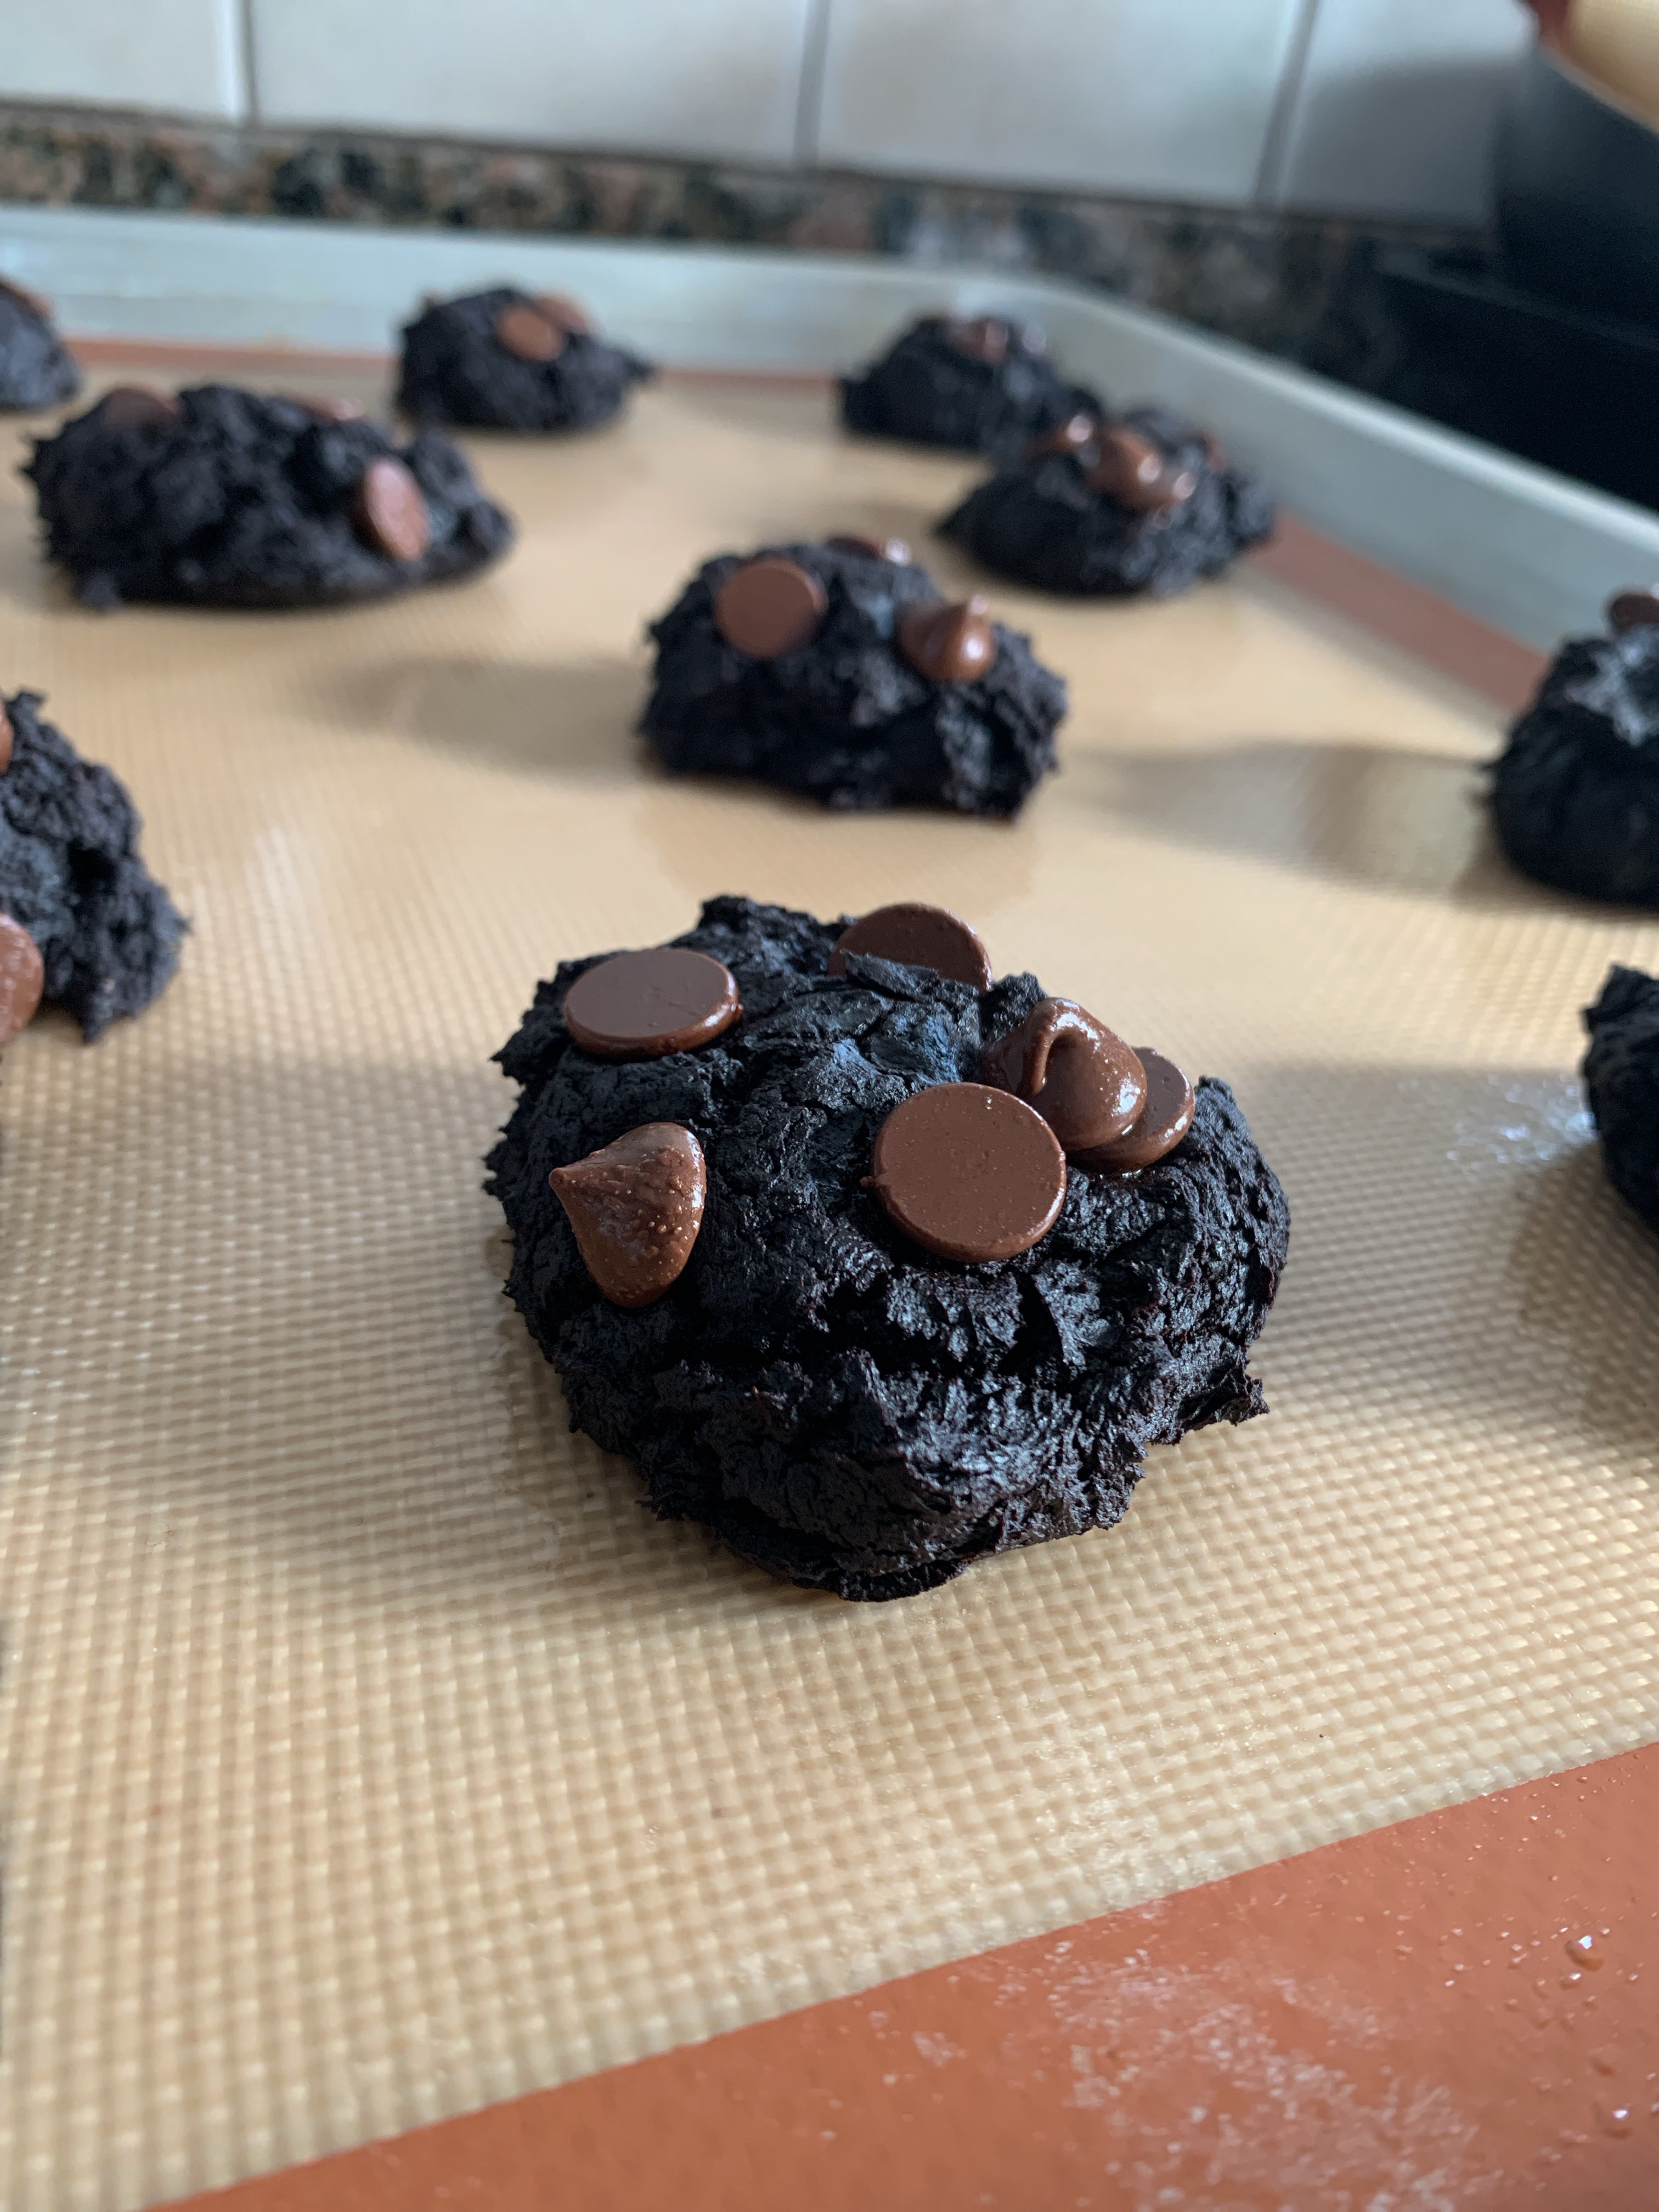
Now, add some coconut sugar, some dark cocoa powder, and turn these beauties into cookie dough? Why not! If you are looking for an indulgent cookie that isn’t guilt laden. (Though truthfully, I am not looking at cookies like that ever at this point in my life…I am almost 50. Eat the darn cookie). Here we have an example of a healthier version, with no refined sugar, gluten free, oil free, and vegan. (I know there are vegan chocolate chips available at a lot of grocery stores at this point, which is great).

This cookie dough comes together quickly in the food processor, and it is dense, and fudge like. If you choose to make the cookies without the chips, they turn out as little brownie scoops. YUM

Because these cookies don’t spread much, slightly dampen your hand and give each of them a little pat to flatten. Ten to twelve minutes later, you have a delicious and mostly healthy treat!

I’ll be the first to admit that not many of my recipes fall into this category, so I am pleased to start incorporating healthier options for people in my life, and for me as well!

I hope you enjoy this recipe, and as always, I thank you for coming to the table!

Love,

Chrissy

Print

Fudgey Avocado Chocolate Chip Cookies

Print Recipe

These tasty, vegan, flourless, gluten free, oil-free, refined sugar free cookies are NOT flavor free! Tender little bites of chocolatey goodness let you have a treat without feeling guilty.  Original recipe from www.veggiekins.com


  • Author: chrissy@mythankfultable.com

Ingredients

Scale

1 Cup Avocado (ripe but not over ripe)

3/4 Cup Coconut Sugar

3/4 Cup Dark Cocoa Powder

2 Tsp Baking Powder

1/2 Cup Chocolate Chips

1 Tsp Salt

Instructions

  1. Preheat oven to 350*
  2. Line a baking sheet with parchment paper. 
  3. Scoop avocado from skin and give a rough chop.
  4. Using a food processor, pulse coconut sugar to remove any chunks.
  5. Add avocado to coconut sugar and process until combined.
  6. In a separate bowl, whisk together coconut, baking powder, and salt until combined.
  7. Transfer avocado mixture to the bowl with dry ingredients fold to combine.
  8. Add in chocolate chips if you are using them.
  9. Your dough will look a little wetter than usual cookie dough. Use a cookie scoop to place dough in scoops on parchment lined baking sheet.
  10. Using damp hands, pat down each cookie mound slightly- cookies will not flatten on their own.
  11. Bake cookies at 350* for 10-12 minutes. Tops of cookies and edges will look slightly cooked. 
  12. Allow cookies to cool on baking sheet.

Cookies will be soft and store in an air tight container for a few days- they won’t last that long!

Did you make this recipe?

Share a photo and tag us — we can’t wait to see what you’ve made!

Posted in: Cookies, My Story, Vegan Tagged: avocado, chocolate, Chocolate Chip, Cookie, flourless, food processor, Gluten Free, oil free, Vegan

A Love Letter to My Daughter and Her Friends, and Peanut Butter Heart Cookies

February 14, 2021 by chrissy@mythankfultable.com

Dear Every Girl My Daughter’s Age, including her Friends and Herself:

I feel like there are some things you need to hear and I mean HEAR. Like, in your soul and REMEMBER. Because, this world is crazy, and sometimes ugly. It shoves images and expectations at you, and even though it is a new age and there are so many more opportunities and glass ceilings are shattering…there is still some rampant crappola the world is sending your way.

  1. You are perfection. You aren’t perfect and that is OK. No one is. But you, and all you are, is exactly who and what you were supposed to be. Glorious and resplendent in all of your ways. Every smile, every laugh, every brilliant thing that comes out of your mouth (and even the not so brilliant things) make you you. And wow, is the world lucky to have you.
  2. You may not love your body. But start now. She’s been with you so far, and if you realize it early enough, she is your champion. She will get you to places and do things you haven’t thought of yet. Your body, whatever size, whatever shape, is perfection. Don’t let it define where you belong in this world. You belong. Period. Please don’t waste one more second listening to a culture that wants you hating on yourself. It’s a tragedy.
  3. Your mind is amazing. You are SMART. Your opinions matter. Your thoughts matter. Your creative ideas matter. Your decisions matter. For those of you who think bigger than the space your body takes up, keep being bigger. If they are worthy of you, they will get you and love it about you.
  4. Your heart is bigger and stronger than you imagine. You may have navigated the hard things already. You may not have had any bumps in the road. Life will teach you lessons and one of them, amazingly enough, is that YOUR HEART IS STRONGER than you know. It will survive. You will survive. You will be better for it.
  5. And lastly, no Mom on this earth, whether it be your biological one or adopted one or grafted in one or decided one along the way would ever, ever want you to settle. In any capacity. Do not sell yourself short. Do not accept a “less than” when you are worthy of so much more. You deserve to be successful, loved, and cherished in every capacity. Especially by yourself.

This is my abbreviated and not all inclusive Valentine’s wish for you, but for today, it will have to do.

All the love my heart can hold,

Chrissy (Mom)

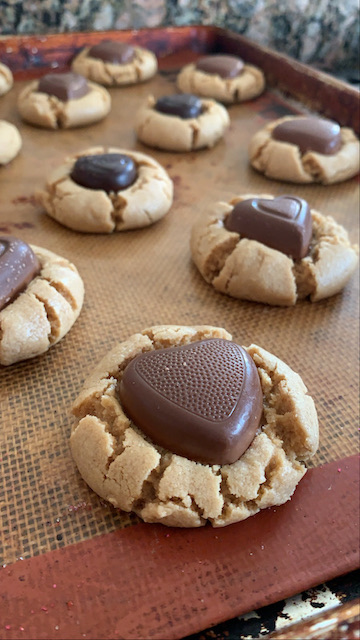
(OK, and then there are these cookies. Which are little peanut butter puffs which then have a chocolate candy smooshed in when done baking. 🙂 Listen, every blog can’t be emotional, and every blog can’t be about the recipe. I recommend this cookie if you have a peanut butter lover in your life. Because they are amazing.)

Print

Peanut Butter Heart Cookies

Print Recipe

This recipe is originally from www.sallysbakingaddiction.com This recipe makes a light, pillowy soft dough that gets refrigerated for up to a day, and then topped with a chocolate heart of your choice. I used two different types of candies for this, a solid chocolate heart, and a peanut butter filled heart. It is hard to tell which were enjoyed more, because they both disappeared rather quickly! This recipe yields 2 dozen cookies.
  • Author: chrissy@mythankfultable.com

Ingredients

·       1 stick (½ cup) Butter (room temperature)

·       1 Large Egg

·       ¾ Cup Peanut Butter

·       1 Teaspoon Vanilla Extract

·       ½ Cup White Sugar

·       ½ Cup Packed Dark Brown Sugar

·       ½ Teaspoon Baking Soda

·       ¼ Teaspoon Salt

·       1 ¼ Cups Flour

·       Chocolate Heart Candies (Dove, Lindt, Reese’s all work)

Instructions

1.     In a bowl, combine flour, salt, and baking soda together.

2.     Using a mixer with a paddle attachment beat butter until fluffy. Add sugars and cream together until smooth.

3.     Add in peanut butter, egg, and vanilla extract. Combine until smooth, scraping down the sides of the bowl as needed.

4.     Add the combined dry ingredients to the wet ingredients slowly on a lower speed. 

5.     Roll out dough into balls using a cookie scoop or tablespoon measure and chill. OR Chill dough as a whole for at least half an hour up to a day. The longer you chill, you may need to let the dough sit for a little bit before rolling out into balls. *this is why I roll them before I chill them

6.     Preheat oven to 325 degrees. Prepare baking sheets with parchment paper or silicone mats.

7.     Place dough balls evenly spaced on cookie sheet and bake for 10-12 minutes.

8.     Allow cookies to cook for a few minutes, then press chocolate candy into each cookie.

9.     Allow cookies to cool completely, unless the idea of a melty chocolate heart is your thing (it’s my thing).


10.  Cookies stay fresh in an air-tight container for up to a week. They won’t last that long. 😉

Did you make this recipe?

Share a photo and tag us — we can’t wait to see what you’ve made!

Posted in: Cookies, My Story Tagged: chocolate candy, chocolate heart, Cookie, dessert, Dough, Peanut Butter, peanut butter cookie, Valentine's, Valentine's Day Cookies

Cream Cheese Sprinkle Valentine Cookies

February 13, 2021 by chrissy@mythankfultable.com

As I sit here writing with a very tired puppy at my feet, in the stillness that is a Friday evening, Valentine’s Day is around the corner. In many of the podcasts I listen to, the idea of being single during the “Pandemmy” (because seriously if we can’t give this thing a cute nickname…what is our mental health status…wait, what?) is perfectly acceptable.

I know there are those couples out there who rocked out quarantine and are stronger than ever. And, go you. That’s amazing.

And there are those of us who had some good old fashioned time to look inward as well as outward and say, yeah, let’s face some hard facts.

Let’s use this quiet time to look at some of the stuff. The stuff we stay busy to avoid.

Which leads to uncomfortable questions, quiet reflections, and harder decisions. Which results in being solo for celebration of all couples everywhere.

But, that being said, I think even those of us who are celebrating sans-valentine deserve something beautiful and sweet on the sweetest day. What says cute like a cookie covered in sprinkles? Am I right? I read somewhere, “Hey these feelings aren’t going to eat themselves.” I jest.

The original posting for these cookies is from Sally’s Baking Addiction. These cookies are light and fluffy, they almost melt in your mouth, with the sweet and tang of a cream cheese base, vanilla and almond extracts, and the crystal crunch of the sanding sugar coating. Now, you don’t need to roll them in sugar. They are sweet without it. But it’s Valentine’s Day. Let’s paint with all the colors of the wind here.

Mix the dough, roll and chill. Then while the oven is preheating, roll them in decorative sugar (I found the three pack of two pinks and purple at my local craft store in the baking aisle) and press slightly with a glass to flatten.

When the cookies are freshly baked and cooling, press a heart shaped chocolate in the middle and voila! Perfection. I used Dove dark chocolate hearts, but with the ingenuity of the candy makers of the world, you could really mix it up. These cookies would actually be perfect for any occasion, provided you find the right sprinkle colors for the event. (Red and Green, Blue and Silver, Yellow and Pink, like I said, colors of the wind).

I think that the gift of quiet/alone time is the ability to check out your life and determine if it is the one you want to be living. We build it, daily. We create it, and design it, and chose to live where and how we live, if we are lucky. I am so thankful that even though things aren’t perfect…and my life looks differently than it did a year ago, I still wake up me.

Maybe the best part of Valentine’s Day is the part where we realize that we are surrounded by people who love us. The family we are born into, the family we create, the family we choose, the people who hold us up along the way. People who see our light and honor it. Encourage it, and help it grow.

Those are the love lights we cling to.

Those are the people who get the cookies. 🙂

I hope you enjoy this recipe, and as always, thank you for coming to the table.

Love,

Chrissy

Click Below for Full Recipe

Print

Cream Cheese Sprinkle Valentine Cookies

Print Recipe

The original recipe for these cookies is from Sally’s Baking Addiction. I bake at a lower temperature, but otherwise I followed her directions and recipe. This recipe yields approximately 3 dozen cookies.

  • Author: chrissy@mythankfultable.com

Ingredients

Scale
  • 1 Cup Butter (2 Sticks)
  • 2 Ounces Cream Cheese (block)
  • 1 Cup White Sugar
  • 1 Large room temperature Egg
  • 2 Teaspoons Vanilla Extract
  • 1 Teaspoon Almond Extract
  • 1/2 Teaspoon Salt
  • 1 1/2 Teaspoons Baking Powder
  • 3 Cups Flour
  • Various sanding sugars/sprinkles
  • Approx 36 chocolate heart candies

Instructions

  1. Combine flour, baking powder, salt together in a separate bowl and set aside.
  2. In a mixer with a paddle attachment, combine butter and cream cheese on high speed until combined and smooth.
  3. Add sugar and beat until combined.
  4. Add in egg, extracts, and beat on higher speed until all incorporated.
  5. Scrape down sides of bowl, and slowly add dry ingredients at a lower speed.
  6. Chill dough (at this point I scoop and roll dough between my hands and chill- making the next step easier but you can chill the entire dough and scoop dough out afterwards) for at least one hour.
  7. Preheat oven to 325 degrees and prepare cookie sheets with either parchment or silicone baking sheets.
  8. Roll cookie dough balls in sanding sugar or sprinkles of your choice.
  9. Place cookies approximately 2″ apart on cookie sheets.
  10. Using a glass or measuring cup, press down slightly on dough balls to flatten.
  11. Bake cookies for approximately 12-15 minutes depending on your oven. 
  12. Allow cookies to cool for 5 minutes.
  13. Press unwrapped chocolate heart candy into the middle of each cookie.

Did you make this recipe?

Share a photo and tag us — we can’t wait to see what you’ve made!

Posted in: Cookies, My Story Tagged: chocolate heart, Cookies, cream cheese, pink, sprinkles, Valentine's, valentines day

Dark Chocolate Bourbon Sugar Cookies

May 29, 2020 by chrissy@mythankfultable.com

I had a friend say to me a few weeks ago, “I am just so happy to see you are writing again.” Which, really warmed my heart. I carried that sunshine around for days, weeks actually. All during which, I did not write one more word.

Here’s what I have learned in the last two months of being home, only traveling for essentials, and basically being a rule follower. People sure do have a lot to say. Social media, bloggers, podcasters, news reporters, friends on the Facebook. Every person seems to have something to share. Right, wrong, insane, liberal, conservative. It’s a lot. I think in the last two months I have let go of some things I probably should have a long time ago. I have stopped following certain people on social media. I have evolved my opinions of some people in both the positive and negative as a result of words and actions or lack thereof. The learning curve has been steep.

That being said, I think to stop and write means to stop and make sense of the words in my head, and to put something out there that people who are already reading a lot want to and can read.

So reader, here we go. I will not offer you numbers or graphs or charts or rules. I will say that having lost one parent I will darned well do whatever I need to do to keep my living parent here as long as I can. I will say I had the gift of being with my Dad when he left this earth. A gift that I know too many people, people I know personally, did not get.

So, where does the writer find the words to fix this? I don’t. I just know that to not write means I am one less voice of hope out there. And we need hope. Well, some of us need toilet paper, and hope.

Friends, it’s time to bust out the boozy cookies. I will say it, I am not a big drinker. (Total transparency, I did join a wine club a month ago). But make a dark chocolate bourbon cookie and roll it in bourbon sugar? Sign. Me. Up. Sorry kids, these cookies are for the grown ups. They don’t taste heavily with alcohol, but they definitely have a rich and fantastic flavor. The original recipe for these cookies is from LoveandOliveOil.com. The original recipe calls for shaved chocolate in the cookie and dutch processed cocoa. I use dark cocoa and left out the chocolate shavings. I didn’t feel like I was missing out AT ALL. I also tried it with throwing in some semisweet morsels. Equally as amazing. A really neat tip in the original recipe is to store the cookies on top of any remaining bourbon sugar, which kept the cookies moist and fresh for a little longer.

What is bourbon sugar you ask? It is turbinado sugar and bourbon shaken together. Yes please. I am a fan of the big crunchy sugar crystals on top of muffins. Big crunchy sugar on a cookie? I’m in. You combine the sugar and the bourbon and it makes you wish the sandy beaches tasted this good. Another fun thing is post rolling the dough in the sugar, you can use a glass to flatten out the cookies to just the right thickness.

Friends, I wish I had answers. Answers to how this will all look or when this will all end. What the new normal will be. As an educator I wonder, what new changes in addition to the ones already made will take place? What about the students without access for a million reasons to an online format education? So many things. I guess, the thing I am learning in all of this, is gentleness. Being gentle with others, and all the more difficult, with myself. Trying to use this time to fix the things. So many things.

Gentleness, and grace. Time for kindness.

All of this, and chockey cookies with crunchy bourbon sugar.

Sending you so much love and light in this uncertain time. Thank you for sitting with me for a bit and for sharing your reading of the words with me. I hope you enjoy this recipe, and as always, thank you for coming to the table.

Love, Chrissy

Print

Dark Chocolate Bourbon Sugar Cookies

Print Recipe

This soft cookie rolled in turbinado sugar from the www.loveandoliveoil.com website is slightly modified (I use a dark cocoa powder but essentially it is the orginal masterpiece recipe).I can’t even begin to describe the combination of soft bourbon infused cookie dough and the crunch of the bourbon sugar on the outside except to say yes please. 

  • Author: chrissy@mythankfultable.com

Ingredients

·      ½ Cup Butter

·      ½ Cup Vegetable Shortening

·      1 Cup White Sugar

·      ¾ Cup Brown Sugar

·      1 Large Egg plus 1 Large Egg Yolk

·      3 Tablespoons Bourbon

·      ¾ Cup Dark Cocoa Powder

·      1 ¾ Cup Flour

·      ½ Teaspoon Baking Soda

·      ¼ Teaspoon Baking Powder

·      ½ Teaspoon Salt


For Rolling:


·      2 Tablespoons Bourbon

·      1 Cup Raw Turbinado Sugar

Instructions

1.     In a bowl, sift together flour, cocoa, baking soda, baking powder, and salt. Set aside.

2.     In a mixer, cream together butter, shortening, and sugar until creamy.

3.     Add brown and white sugar until light and fluffy.

4.     Add egg and egg yolk and mix until incorporated; scrape down the sides of the bowl and beater as necessary. 

5.     Slowly mix in bourbon.

6.     Add dry ingredients in two parts until incorporated. Mix in finely chopped chocolate.

7.     Combine and scoop/roll into balls. Refrigerate for a few hours or overnight.

8.     In a mason jar or other container, combine turbinado sugar and bourbon. Top with lid and shake until it resembles wet sand. Pour into shallow dish.

9.     Roll balls of dough into bourbon sugar until evenly coated. 

10.  Arrange dough on parchment lined pan approximately two inches apart.

11.  Bake at 325* for 13 – 15 minutes or until slightly puffy. 

12.  Let cool on cookie pan for ten minutes then transfer and cool completely.


13.  If there is extra bourbon sugar in the bottom of an airtight storage container; arrange cookies and cover.

Did you make this recipe?

Share a photo and tag us — we can’t wait to see what you’ve made!

Posted in: Cookies Tagged: Bourbon, bourbon sugar, Cookies, Dark Chocolate, dessert

Cadbury Mini Egg Cookies

March 26, 2020 by chrissy@mythankfultable.com

I have a lifelong friend. She is brilliant, and beautiful, and I often say “runs the world.” I say this, because she does. Not only is she good at her job which is pretty important, she also pretty much takes care of everyone that crosses her path. She’s the one who helps families in need, is on every committee that betters our area, trains and volunteers in the community, funds people going on trips, or special camps, or even gives her not-so-old car. She’s the one who rarely takes time for herself, ever. To say I’ve known and loved her longer than I haven’t in this life is easy. She’s my person. That’s that.

And…this friend has a not-so-secret addiction. You all know mine is Cheez-its. (Straight up regular thank you. No need for fancy cheese or extra toasty). Well, this friend loves her some Cadbury Mini Eggs. They stalk her as soon as the snowmen and Christmas trees are cleared off the shelves. I am pretty sure they appear before Valentine’s Day. That purple bag calls out to her, as it should. Those little crunchy milk chocolate eggs with the coating are magical. It may even be possible that the first sighting of the Mini Eggs are photographed with some sort of Dooms Day comment and texted to said friend. Because, good friends send alerts when the caloric nemesis is present.

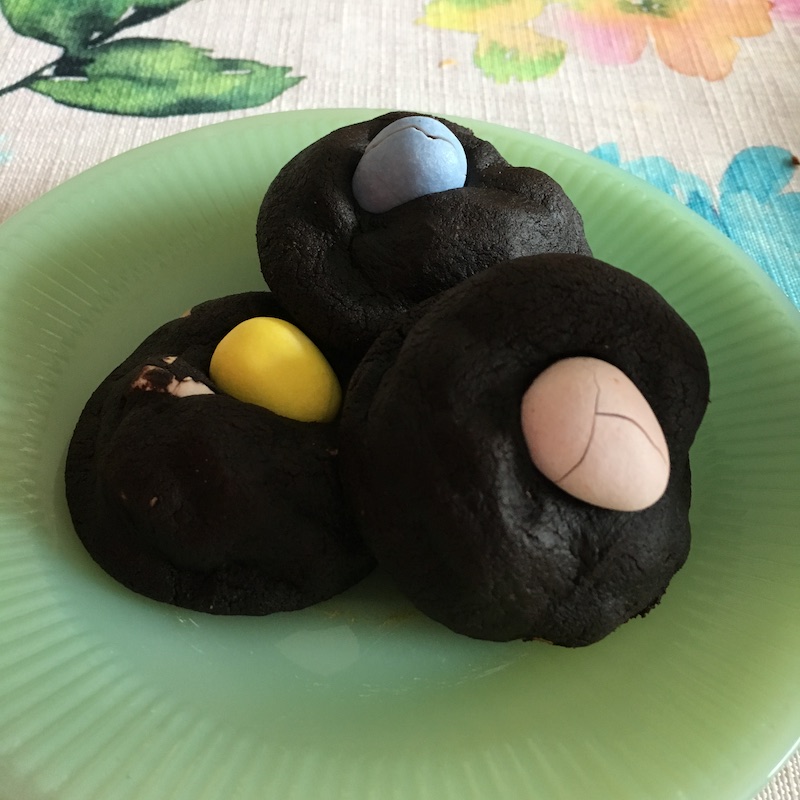
Needless to say when I saw a recipe for a dark chocolate mini egg cookie on Instagram…making these was inevitable. The original recipe is from @KelseytheFarmer’sDaughter, which is from her sister @JordynBakes, and adapted by me. I use dark cocoa powder and refrigerate the dough so my cookies are a little puffier. I also bake my cookies at a slightly lower temperature, as it is what I do. The cookies pictured on the original recipe are a slightly flatter and more bits and pieces from the egg category. I personally liked the idea of little cookie nests for little chockey eggs.

I love this cookie because is has layers of chocolate. There is the chewy dark chocolate cookie base. There is the milk chocolate of the mini egg, and the crunchy coating of whatever that’s made of…It gives the soft and sweet and crunch you’ve been waiting for.

If you are lucky enough to have someone you have loved since high school, through the really great moments and the really sucky moments of your life, you are really blessed. It is amazing that even though we are pretty much home at this point, between texting and FaceTime and Teams meetings, we are able to communicate with our loved ones. Even the fact that we can send sarcastic Instagram posts to one another adds another layer. How fortunate are we, that we are not without connection in a time of fear and the unknown.

Oh, just an aside…sometimes the Mini Egg cracks as it cools. This doesn’t impact the taste, in fact, it saves my lazy mouth from having to bite down through the egg to get to the cookie. And if that isn’t the epitome of lazy, I don’t know what is.

I only wish my sweet friend were here in my dining room or I were in her kitchen to share these beauties. True story, I will not be making these until we are able to spend time together and they will be dropped off at her house immediately.

To my friend who was the Nurse to my Juliet, who carted my non-licensed butt for far too long, and who literally has been my inspiration as one of the strongest women on the planet. You are my hero. XOXO.

I really hope you enjoy this recipe, and as always…thank you for coming to the table.

Love,

Chrissy

Click below for a printable recipe.

Print

Cadbury Mini Egg Cookies

Print Recipe

This dark chocolate cookie holds bits of mini eggs and packs the sweet chewy chocolatey crunch all in each bite. A perfect springtime cookie. Adapted from Kelsey the Farmer’s Daughter and Jordyn Bakes.

  • Author: chrissy@mythankfultable.com

Ingredients

Scale
  • 1 cup salted butter, softened
  • 1 cup granulated white sugar
  • 3/4 cup packed brown sugar
  • 2 large eggs
  • 1 teaspoon vanilla extract
  • 2 teaspoons baking soda
  • 1/2 teaspoon kosher salt
  • 1 1/4 cup unsweetened dark cocoa powder
  • 1 3/4 cup all-purpose flour
  • 2 cups mini eggs, chopped (save additional mini eggs as whole to decorate the top of cookies)

Instructions

  1. In a large mixing bowl, or in the bowl of a standmixer with a paddle attachment, cream together the butter and sugars on high until light and fluffy. 
  2. Add in the eggs one at a time on medium speed.

  3. Add in vanilla.
  4. In a separate bowl, whisk together salt, baking soda, cocoa powder, and flour. 

  5. Add the dry ingredients to the wet, about half at a time, mixing on low to try and reduce the puff of cocoa powder that always makes a mess!

  6. Mix on low until just incorporated.

  7. Use a spatula to scrape down the sides and bottom of the bowl.

  8. Stir in the chopped mini eggs on low speed.

  9. Scoop out dough with a tablespoon and roll into balls. 
  10. Refrigerate for a few hours or overnight.
  11. Place cookies onto the cookie sheets. Press an extra mini egg piece or two on top of each cookie dough ball if you’d like an extra pop of colour on top.

  12. Preheat oven to 325*
  13. Bake for 9-12 minutes. Remove from oven, and let cool on the cookie sheet for about 10 minutes before moving to a cooling rack.

Did you make this recipe?

Share a photo and tag us — we can’t wait to see what you’ve made!

Posted in: Cookies Tagged: chocolate, Cookie, Dark Chocolate, Easter, mini eggs, spring

Double Chocolate Peppermint Cookies

February 12, 2020 by chrissy@mythankfultable.com

The season for peppermint crunchy topped chocolate cookies may have passed…no wait, it hasn’t.

While traditionally a this is considered a Christmas peppermint cookie, I dare to say these little darlings can still find a place in February. The smart marketing people of the world determined that pre crushed peppermint candies make this possible. Starlight mints (I think that’s what they used to be called) are available year round as well, so if the combination of chocolate and peppermint makes your heart flutter, this cookie is for you.

There is something to be said about the way mint complements the dark chocolate, red and white are for sure in with Valentine’s theme, and no one will say no to cookies. Unless your sweetheart is one of those not into sweets people. I know they are out there.

My return to writing the blog has been slow, and I am going to ease myself back in, but this recipe was too nice to wait for my thoughts to get lofty to blog about. I switched up Broma Bakery’s recipe to include dark chocolate chips instead of white, mine are drizzled instead of dipped, but the essence of the recipe is the same and they get all of the credit. I also bake my cookies at 325* because that is what I do. I like a cookie with no brown on the bottom, a soft chewy cookie that is just ever so slightly under-baked and left to continue cooking on the cookie sheet tends to make perfection for my taste. If you are a 350* baker, watch the cookies so they don’t overcook while baking!

Hopefully this new year has brought all good things, and this cookie recipe will find you with happy hearts.

I hope you enjoy it, and as always, thank you for coming to the table!

Chrissy

Print

Double Chocolate Peppermint Cookies

Print Recipe

This dark chocolate peppermint cookie is drizzled with white chocolate and crushed peppermints…perfect for the holidays and for your favorite minty valentine. Original recipe found on Broma Bakery’s website. Their cookies use white chocolate chips and are dipped in additional white chocolate. I used dark chocolate chips and drizzle…but the options are limitless. 

  • Author: chrissy@mythankfultable.com

Ingredients

Scale
  • 1/2 Cup Butter at room temperature
  • 1 Cup packed Dark Brown Sugar
  • 1 Large Egg at room temperature
  • 3/4 Cup Flour
  • 1/3 Cup Dark Cocoa Powder
  • 1/2 Teaspoon Salt
  • 1/2 Teaspoon Baking Soda
  • 1 Teaspoon Peppermint Extract
  • 1 Bag Dark Chocolate Chips
  • 7 ounces White Chocolate
  • 1 Teaspoon Coconut oil or Crisco
  • 1/2 Cup Crushed Peppermint Candies

Instructions

  1. In a mixer with a paddle attachment, cream together butter and sugar until light and fluffy.
  2. Add in Egg and Peppermint Extract.
  3. Sift together dry ingredients in a separate bowl.
  4. Add dry ingredients carefully into butter mixture, until combined. 
  5. Fold in Chocolate Chips.
  6. Scoop dough into balls and chill dough (I do this with almost every cookie dough I make- it isn’t necessary but I like the way the cookies turn out after the dough has been chilled).
  7. Preheat oven to 325*, prepare cookie sheet with parchment or silicone mats.
  8. Place chilled dough balls on the cookie sheet and bake for approximately 10-12 minutes.
  9. Allow cookies to come to room temperature.
  10. Combine white chocolate and crisco or coconut oil over a double boiler or microwave and stir gently until melted.
  11. Drizzle white chocolate over cookies and sprinkle with crushed peppermint candies while chocolate is still soft.

Did you make this recipe?

Share a photo and tag us — we can’t wait to see what you’ve made!

Posted in: Cookies, My Story, Recipes Tagged: chocolate, Cookies, Dark Chocolate, Peppermint, peppermint cookies, White Chocolate

And Then There Were Fluffernutter Bars…

May 27, 2019 by chrissy@mythankfultable.com

I’m going to make this post quick. It’s Memorial Day, most of you are heading somewhere to eat at someone’s cookout if you didn’t already, and time’s a wasting. Get to baking.

The Fluffernutter is the quintessential New England sandwich, made with peanut butter, and Fluff (not marshmallow creme, and yes, there is a difference). I am not saying it is the most nutritious food item to put in a lunchbox for your kid, but I do know anyone raised in Massachusetts knows what it is…and likes it. If you were lucky you got it on soft white bread, and maybe even got the crusts cut off.

Tuck those Peanut
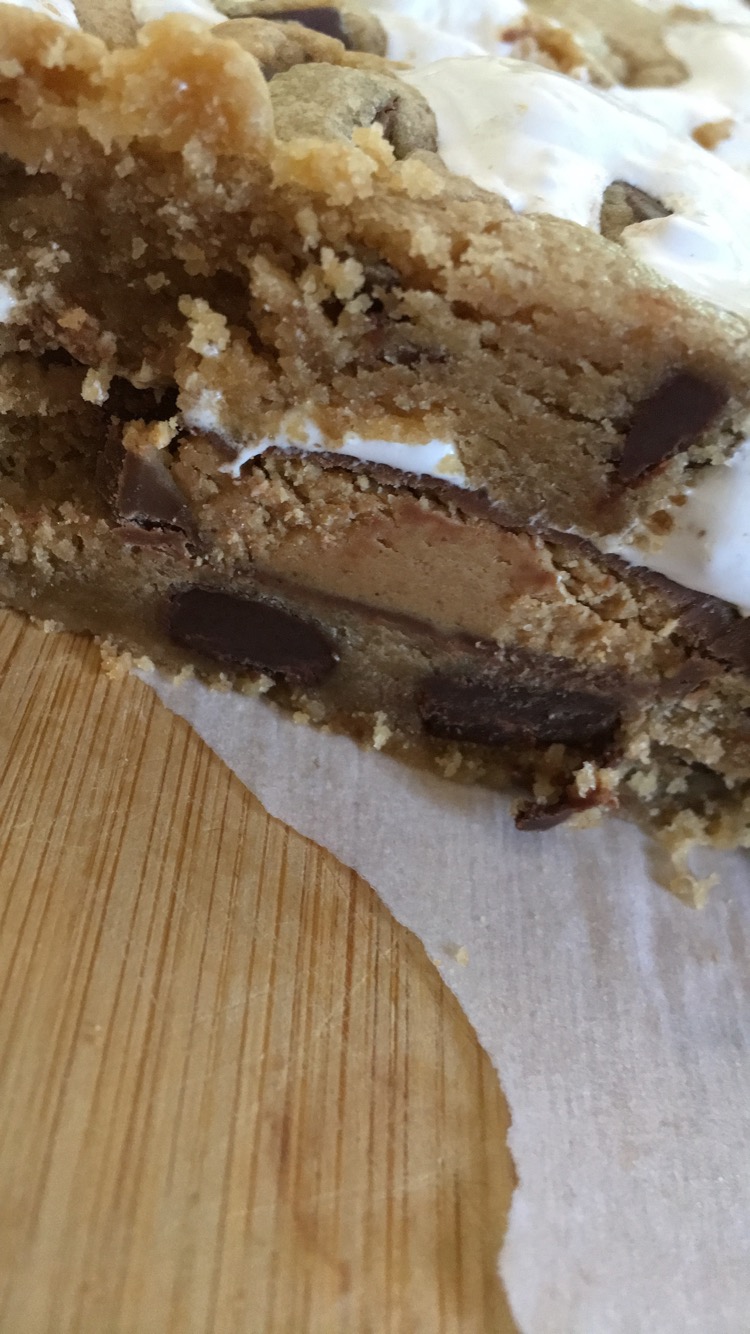
Tuck those Peanut Butter Cups into their bed of Cookie Dough

Fast forward to now: My bread is typically sprouted grain. My peanut butter is natural. Oh, but there is a brand new container of Fluff in the cabinet at all times. For you know, life emergencies. Some days a woman needs to stand in her kitchen with a spoonful of fluff and giver her dog the stink eye because she is not sharing.

To the recipe: the original recipe is from soccer mom.com. When a friend sends you a Pinterest posted recipe and you have a cookout to be the next day, you try it. I am glad I did. I am also glad I fiddled with the proportions and made MORE. I am also glad I left them at the campsite where our cookout was because they are like a siren song to me. All good.

This recipe is a basic peanut butter dough with chocolate chunks, divided into two parts. Press one part on the bottom of a pan and add FULL SIZED Peanut butter cups. Add Fluff! Add more dough! Bake and leave to cool. Sound simple? It is. Do people need to know this deliciousness wasn’t an all day process? No. You can keep that little secret to yourself.

If you were one of us who embraced sugary marshmallow and peanut butter, loves peanut butter cups, or just needs to feel like a gooey dessert is essential for a cookout, you have met your match. I hope you make these. Today.

I hope you enjoy this recipe, and as always, thank you for coming to the table!

Chrissy

Click below for a printable recipe

Print

Fluffer Nutter Bars

Fluffernutter Bars
Print Recipe

This delicious creation of peanut butter, peanut butter cups, and fluff originally was posted on thesoccermomblog.com. I changed the proportions to make a larger batch. You will not be disapointed!

  • Author: chrissy@mythankfultable.com

Ingredients

Scale
  • 1 Cup Butter
  • 2/3 Cup Plain Peanut Butter (I used Creamy Jif)
  • 12 Unwrapped FULL SIZED Peanut Butter Cups
  • 2 Cups packed Dark Brown Sugar
  • 2 large Eggs
  • 2 generous teaspoons Vanilla Extract
  • 2 1/2 Cups All Purpose Flour
  • 1 bag Nestle Chocolate Chunks
  • 1/2 Container Marshmallow Fluff

Instructions

  1. Preheat oven to 350* and prepare a 9×13″ baking pan by lining it with parchment paper.
  2. in a mixer with a paddle attachment, cream butter and sugar until light and fluffy.
  3. Add peanut butter and combine. Add eggs and vanilla and continue to combine until uniform.
  4. Add flour until mixed in, fold in chocolate chunks (I just add mine while the mixer is running on low)
  5. Divide dough into 2/3 and 1/3.
  6. Press 2/3 of dough into prepared pan. Distribute Peanut butter cups evenly into dough.
  7. Cover peanut butter cups with Marshmallow Fluff, smooth to create an even layer.
  8. Break apart remaining dough and cover the mixture. Press down.
  9. Bake in 350* oven for 25-30 minutes until golden brown, do not overcook.
  10. Leave bars in pan until cool (they will continue to cook in the pan and you want this!)
  11. Pull bars out of pan with edges of parchment paper and slice!
  12. These will keep in an airtight container for a few days…but they won’t last that long!

Did you make this recipe?

Share a photo and tag us — we can’t wait to see what you’ve made!

Posted in: Cookies, Dessert, My Story Tagged: bar cookies, Chocolate Chunks, Fluff, fluffernutter bars, marshmallow, Peanut Butter

Reese’s Pieces Peanut Butter Cookies

February 20, 2019 by chrissy@mythankfultable.com

These cookies combine the peanut butter base of a soft cookie with the melty crunch of baked chocolate coated peanut butter candies. Win-Win.

I don’t know about you, but there are certain foods I can not bring into my house. Purely because I know they are there, they whisper to me, and then I seek them out to eat them. Among this list I wish were celery and yogurt…you know, the stuff I buy because I am supposed to and they make me healthy. The real list is more like Kraft Caramels, Cheez-its, Caramel M&M’s and Reese’s Pieces. I save these purchases for when the will power is strong…or I need them for a recipe.

Maybe it is the fact that I was little when E.T. was in the movie theaters and this candy became insanely popular. Maybe it’s the idea of mixing up peanut butter cookies to include an extra kick. These cookies are amazing.

When I make cookies, I typically make the dough at least a day in advance, pre-scoop/roll into shapes ready for baking, and refrigerate overnight. These cookies are adorable pre-baked. I had to hide them in the back of the fridge, I was worried they would be consumed before I got the chance to bake them!

These cookies are simple to make, and deliver a real peanut butter punch. If you have a peanut butter lover in your life, these cookies belong in your cookie toolbox!

I hope you enjoy this recipe, and as always, thank you for coming to the table!

Chrissy

Click below for a printable recipe.

Print

Reese’s Pieces Peanut Butter Cookies

Print Recipe

Peanut butter cookie loaded with Reese’s Pieces candies. Original recipe from Simple Green Moms

  • Author: chrissy@mythankfultable.com

Ingredients

Scale
  • 1/2 Cup Creamy Peanut Butter
  • 1 Stick melted Butter (1/2 Cup)
  • 3/4 Dark Brown Sugar
  • 1/2 Cup White Sugar
  • 1 Large Egg (room temperature)
  • 1 3/4 Cup Flour
  • 1 Teaspoon Vanilla Extract
  • 1/2 Teaspoon Salt
  • 1 Teaspoon Baking Soda
  • 1 Cup Reese’s Pieces Candies

Instructions

  1. Combine peanut butter and melted butter in a mixer and combined. 
  2. Add in sugars and mix until light and fluffy.
  3. Add in egg and vanilla extract and mix.
  4. Combine flour, baking soda, salt and add to mixture.
  5. Add and incorporate Reese’s Pieces by hand until evenly distributed throughout the dough.
  6. Refrigerating dough is not necessary, but I pre-scoop my dough and refrigerate overnight.
  7. Preheat oven to 325*
  8. On a parchment lined baking sheet, place scoops of dough a few inches apart.
  9. Bake at 325* for 8-11 minutes, until puffy and light brown.

Did you make this recipe?

Share a photo and tag us — we can’t wait to see what you’ve made!

Posted in: Cookies Tagged: Cookies, Peanut Butter, peanut butter cookies, Reese's pieces
1 2 3 4 5 Next »

Recipe Search

Recent Posts

  • Fluffernutter Cookies…You Heard Me April 12, 2024
  • On Nests July 30, 2023
  • Lemon Rosemary Shortbread Cookies April 24, 2022
  • Praline Sweet Potato Pie March 22, 2022
  • Italian Ricotta Cake March 13, 2022

Recent Comments

  • Cathy Carroll on To My Daughter On Her 18th Birthday
  • Maureen / Mimi on To My Daughter On Her 18th Birthday
  • Kathy G on To My Daughter On Her 18th Birthday
  • chrissy@mythankfultable.com on Cherry Crescent Moon Cookies and Finding the Joy
  • chrissy@mythankfultable.com on Cherry Crescent Moon Cookies and Finding the Joy

Archives

Categories

  • appetizer
  • bread
  • breakfast
  • Cookies
  • crockpot
  • crockpot
  • Dessert
  • Fruit
  • My Story
  • One Pan
  • Recipes
  • side dish
  • Side Dishes
  • soup
  • Vegan

Copyright © 2025 mythankfultable.com.

Lifestyle WordPress Theme by themehit.com