mythankfultable.com

Feeding the Heart, Body, and Family

  • My Pics
  • My Story
  • The Puppies
  • Contact Us
Feeding the Heart, Body, and Family

Recipes

Here is the recipe!

Chicken Supreme

January 24, 2018 by chrissy@mythankfultable.com
Chicken Supreme

Chicken Supreme

Somewhere between the new year resolution to streamline and clean up recipes and the several snow days that have occurred, I have fallen into making the comfort food that goes nicely with shoveling, roof raking, alternating with binge tv watching, reading, and fire enjoying. I’m not going to lie, the gift of a snow day in January is well worth the extra time spent in June when the kids can have recess outside and hopefully, less germs are prevalent. Can you say Strep? Flu? Pink Eye? Common Cold? I work in a Petri dish some days. Good thing my students are super cute. Working with littles has the disadvantage of massive exposure during the cold season.

Chicken Supreme

Chicken Supreme

This recipe is one I called my mother in law for, as it is an oldie but goodie from Pennsylvania. When I asked about it, she told me it was actually the recipe of someone else. I never knew it was actually Jean’s recipe.

This is a church supper, potluck, stick to your ribs meal. It is from an old friend that not only taught me how to quilt better, she added to my perennial garden and my heart garden (the one inside of me). Even though Jean passed many years ago, her life lessons still stay true to my heart.

The Christmas prior to her passing, Jean made everyone in her family a Christmas stocking. They were all quilted and made especially for each person, and they were all BIG.

When I moved home and started over, one of the first things I made for our first Christmas was brand new stockings. I used Jean’s pattern. My stockings are big and full, and my favorite part of holiday shopping.

True to all church pot luck dishes served in a 9×13 pan, this recipe includes cream of chicken soup, cream of mushroom soup, sour cream, and stove top stuffing. It is baked in one pan, it is creamy and delicious, and it can be served with a side vegetable or not. I did make a salad to go with, but honestly after a few rounds of shoveling, I wanted chicken and stuffing.

Cut the boneless skinless chicken into good sized chunks and bake in the baking dish. Combine your sauce ingredients, and mix with the baked chicken. Follow the stove top recipe and cover the top of the chicken mixture. Bake until bubbly.

Chicken Supreme

While this is not an every day meal, I can say I will be making this again before the snow days are gone. Sometimes, a little comfort food that is simple and quick to prepare is just the thing.

I always judge the success of a recipe in the amount that gets eaten, I don’t know if I’ve mentioned it, but my children don’t like leftovers. At all. If I have enough left over, I share, because otherwise I will be eating it until I either give up and toss or it is finished.

I am happy to report this recipe fed my family, and not much was left…so I say it’s a good thing.

I hope you enjoy this recipe, and as always, thank you for coming to the table!

Chrissy

Click below for a printable recipe!

Print

Chicken Supreme

Chicken Supreme
Print Recipe
  • Author: chrissy@mythankfultable.com

Ingredients

Scale
  • 1 Tablespoon Oil
  • 4 Boneless Skinless Chicken Breasts
  • 1 Can of Cream of Mushroom Soup
  • 1 Can of Cream of Chicken Soup
  • 1 Teaspoon Salt
  • 1 Teaspoon Pepper
  • 1 Tablespoon Dried Minced Onions or one fresh shallot
  • 16 Ounces of Sour Cream
  • 2 Boxes of Stove Top Stuffing (I used Chicken)

Instructions

  1. Preheat oven to 350*
  2. Slice chicken breasts into 1 ½ Inch chunks and place in a 9X13 baking dish.
  3. Coat with Oil, Onion or Shallot, Salt and Pepper.
  4. Bake for 45 minutes, or until cooked through.
  5. Mix Sour Cream with Cream of Chicken and Cream of Mushroom Soup until combined. (You can use just Cream of Chicken Soup if you prefer).
  6. Add Sour cream mixture to Chicken in baking dish.
  7. Follow stuffing directions, and place prepared stuffing on top of the chicken mixture in baking dish.
  8. Place mixture back into oven and cook for an additional 30-45 minutes or until bubbly.

Did you make this recipe?

Share a photo and tag us — we can't wait to see what you've made!

Posted in: My Story, Recipes Tagged: Baked Chicken, Chicken, Chicken Supreme, One Pan, Stuffing, Supper

Maraschino Cherry and Almond Biscotti

January 23, 2018 by chrissy@mythankfultable.com
Maraschino Cherry and Almond Biscotti

Maraschino Cherry and Almond Biscotti

Every year I make this sweet little cream cheese cookie with a cherry half on top. It is an old Pennsylvania recipe that I make during the holidays without fail, except for this year.

I did, however, buy the ingredients to make these cookies, which included maraschino cherries. You know, the glass jar filled with ruby red cherries that glisten in their sugary sweetness. Long stems and future sundae toppers/Shirley Temple makers. You can’t really find them in the same place at grocery stores…some are with the ice cream toppings and some are in the baked good aisle and some you just have to stop and ask the clerks to find.

I know that artificially red colored anything is bad. I know it is not for the every day experience. I also know, when making these cookies I had at least one cherry while I was chopping them up.

I am a 1972 born and raised human. I never wore a seat belt as a child. I sat in the front seat, breathed in an abundance of second hand smoke, and never wore a helmet while bicycle riding until I was nineteen. I lived in a time where my parents had no idea where I was during the summer from lunch until street lights came on. So, a red maraschino cherry was definitely a part of my childhood. Along with slush puppies, striped knee socks, games of four squares, and feathered hair. Throw Fonzie in there, Love Boat, and Saturday morning cartoons, you now see a glimpse into my childhood.

Fast forward; I have used a seatbelt every time I enter a car since the late 80’s. My children wear bicycle helmets, and we do not find ourselves around much second hand smoke. We are pretty boring. I’m thrilled with this. The internet, laptops, cell phones, have invaded our lives, and with them, different dangers.

I do still buy maraschino cherries. They are just a little sentimental part of my life that I keep in the pantry. I haven’t made a Shirley Temple, I don’t think, in the last ten years. We don’t even have ice cream sundaes often, but I did make these cookies, and they are delicious.

Almond and cherry are like the peas and carrots of the baking world. This original recipe from www.culinaryhills.com not only incorporated sliced almonds (roughly chopped) it also includes almond extract. The sweet pink color and the slight chew from the small pieces of cherry make this another visually appealing as well as tasty biscotti. I, of course, added more cherries than the original recipe. I also added a white chocolate drizzle because it looked pretty and added a little more sweet to the finished product.

I intentionally leave my biscotti with a little chew to them, as I don’t want a brick-like finished product. I do know most biscotti have the hard crunch to them and I like mine just shy of that. The final baking time determines how dry the cookies end up, so you determine that when you bake your own.

These would make a very sweet valentine cookie, and if you are going to crack open one of those jars of red wonder, why not in the name of love? You could sing Tainted Love to go with your ethical stand on red food dye? No?

If I were to mix up my cookie tray, these would be a keeper. Throw in an almond or orange with dark chocolate biscotti, or a double chocolate biscotti and you have a range of colors and flavors.

I like that biscotti keep nicely in an air tight container for more than a week, if you can keep them around that long (last time I did breakfast at school they were gone before the first lunch wave). They can nestle in an air tight container or even be frozen and keep their integrity. And I am all about integrity, especially in a cookie. Ok, more of in my humans, but if a cookie can not crumble that works too.


Sometimes we take a detour, and we find ourselves in a place we don’t expect but find pleasantly surprising. That’s where the journey with my maraschino cherries ended up. Instead of becoming a cream cheese classic, they became a biscotti that will make another appearance in my kitchen. Wherever you go, wear your seatbelt, or a helmet…we aren’t in the eighties anymore.

I hope you enjoy this recipe, and as always, thank you for coming to the table!

Chrissy

Click below for a printable recipe!

Print

Maraschino Cherry and Almond Biscotti

Maraschino Cherry and Almond Biscotti
Print Recipe

Original biscotti base recipe from www.culinaryhills.com (I made some minor adjustments)that incorporates sweet maraschino cherries and slivered almonds. White Chocolate drizzle gives the added layer of sweetness.

  • Author: chrissy@mythankfultable.com

Ingredients

Scale
  • ½ Cup Butter
  • 1 Cup Sugar
  • 2 Teaspoons Almond Extract
  • 2 Eggs
  • 1 Teaspoon Baking Powder
  • 1 Teaspoon Baking Soda
  • ½ Teaspoon Salt
  • 3–3 1/2 Cups of Flour
  • 1 Cup Maraschino Cherries, chopped
  • 1 Cup Slivered Almonds, roughly chopped

Drizzle (optional)

  • 1 Cup White Chocolate Chips
  • 2 Tablespoons Shortening

Instructions

  1. Preheat oven to 350*
  2. In a mixer, beat butter and sugar together until light and fluffy.
  3. Add eggs, almond extract, and combine.
  4. Add baking powder, baking soda, salt to mix, then slowly add flour.
  5. Mix well and fold in maraschino cherries and chopped almonds.
  6. Transfer dough onto a lightly floured surface and shape into two logs approximately 8-10 inches long.
  7. Bake for 20-25 minutes or until lightly browned.
  8. Remove tray from the oven and allow to cool for ten minutes.
  9. Slice at an angle approximately one inch thick.
  10. Replace biscotti on the cookie tray slice side down.
  11. Continue to bake for an additional 20 minutes, flipping over after approximately ten minutes to cook on both sides.
  12. Remove biscotti from the oven and allow to cool on a wire rack completely.

Drizzle

  1. In a microwave safe bowl, melt white chocolate chips with 1-2 Tablespoons of shortening and drizzle on one sliced side of biscotti

Did you make this recipe?

Share a photo and tag us — we can't wait to see what you've made!

Posted in: Cookies, My Story, Recipes Tagged: Almond, Biscotti, Cookies, Maraschino Cherries, White Chocolate Drizzle

Momma’s Apple Nut Sour Cream Coffee Cake

January 22, 2018 by chrissy@mythankfultable.com
Momma's Apple Nut Sour Cream Coffee Cake

Momma’s Apple Nut Sour Cream Coffee Cake

Growing up, the holidays for me meant two types of cookies, and these breads. Every Christmas, my parents would bake chocolate chip and oatmeal raisin cookies, and this Apple Nut Sour Cream Coffee Cake.

If you were loved by my parents, you got one or two of these to eat Christmas Eve and Christmas morning and a tray of cookies. Our dining room table would be covered, as well as every other possible surface, with wrapped breads and cookies to be delivered. It was a confectionary wonder when I was little. My Mom and Dad worked together and it was a fun time. My parents were not everyday bakers, so for me, this was such a great tradition. Cookie dough batches were literally mixed in a lobster pot to accommodate the measurements of ingredients. Giant foil bows awaited to be placed on top of the breads and cookies. It was our pre-christmas tradition.

Momma's Sour Cream Apple Nut Bread

Momma’s Sour Cream Apple Nut Bread

I have only ever seen this coffee cake made in double, triple, or quadruple batches. The idea of only making only one of these breads has never happened- so this recipe actually makes two breads. Which is perfect, because it will be gone so fast you will be happy you have a back up. Or, you could be like my mom and dad and give one away.

This is a one bowl mix recipe, with a topping you combine either on the stovetop or after microwaving the butter to melt.

When I made this bread for the first time, I doubled the apples and the topping and essentially got hot, warm, apple cinnamon goo. It was awesome. But, it was not bread. So, if you add more of either, go a little at a time and see how it goes. For me, the topping is what makes this bread and it is amazeballs. It sinks into the bread and makes the apples sing.

Think apple dumpling or apple fritter into coffee cake but not cake cakey. As in, it doesn’t have the same crumb when you cut into it like a buckle.

These breads keep for a few days, if they last that long, but not much longer. Kept cold you may extend the shelf life, but I recommend eating it within the first day or two. We have never frozen these breads to my knowledge, but I can’t see why it wouldn’t freeze well, if warmed gently in an oven before serving.

I know every family has traditions, especially around the holidays. It’s funny that even as I am writing this, I am wondering why I never make this bread during apple picking season- but I don’t. It’s for the Christmas table. You, however, can make it whenever you want.

Momma

I have to admit, when I was helping my mom with these breads, and watching my daughter put the topping on, my heart was full. Three generations of family creating something wonderful and delicious for our loved ones.  In my world, it doesn’t get any better than that. The only thing that would have made it better would be if my Dad was there with us, but in a way, he was.


My Dad Mixing Christmas Cookies

I intentionally choose to live a life where I search for the blessings and view every day a gift. On days like these, with loved ones far and near and crossed over, I am thankful for the simple things like cinnamon and walnuts sinking into a sour cream apple bread. They will head out to other kitchens and rest on other people’s tables. My bread will have the most topping because I choose the one with the most (baker’s privilege). It’s that simple. Though the list of people who receive them has shortened, because some have already passed on, the people who do get them know that this is part of Christmas for us. They too, remember, and it will be something I carry on when Mom decides she is tired of making these breads (this will never happen).

For the two mornings after it is baked I will eat a breakfast of Momma’s bread and coffee and be thankful. Thankful for who I am lucky enough to call Mom and Dad, thankful for my children, thankful for this life we live.

I hope you enjoy this recipe, and as always, thank you for coming to the table!


Print

Momma’s Apple Nut Sour Cream Coffee Cake

Momma's Apple Nut Sour Cream Coffee Cake
Print Recipe

This sour cream apple nut coffee cake has been a part of my family’s Christmas for decades. Delicious apple coffee cake topped with a brown sugar cinnamon walnut mixture.

  • Author: chrissy@mythankfultable.com

Ingredients

Scale
  • 1/2 Cup Shortening
  • 1 Cup Sugar
  • 2 Eggs
  • 1 Teaspoon Vanilla
  • 1 Teaspoon Baking Powder
  • 1 Teaspoon Baking Soda
  • 2 Cups Flour
  • 1/4 Teaspoon Salt
  • 2 Cups Chopped Apples
  • 1 Cup Sour Cream

Topping:

  • 1/2 Cup Chopped Walnuts
  • 1 Cup Brown Sugar
  • 1 Teaspoon Cinnamon
  • 2 Teaspoons Butter, melted

Instructions

  1. Preheat oven to 350*
  2. Chop apples into small pieces.
  3. Cream together shortening and sugar.
  4. Add eggs, vanilla, and combine well.
  5. Add flour, salt, baking soda, and baking powder alternately with sour cream.
  6. Fold in chopped apples.
  7. Spread batter in a prepared pan (grease and flour in advance).
  8. Combine topping ingredients and spread over the top of the batter.
  9. Bake for 35-40  minutes.

Did you make this recipe?

Share a photo and tag us — we can't wait to see what you've made!

Posted in: bread, Dessert, My Story, Recipes Tagged: Apple, Apples, breakfast, Butter, Christmas Bread, Cinnamon, Nut Bread, Sour Cream, Walnuts

Late Night Focaccia with Jacob and Being a Mama Bear

January 21, 2018 by chrissy@mythankfultable.com
Focaccia Bread

About four years ago I wrote a paper for my MFA about my son, Jacob. He is a mixture of poetry and chaos. He is the kid that will run into the ice-cold ocean without hesitation. He is my grumpy-hoodie-wearing, grab-all-the-groceries-from-my-car-in-one-trip-kid. He is the kid who may not want to talk before school, but never leaves the house without saying, “love you.” We may approach life differently, but every day I see myself as well as his father in that kid. I am fiercely in love with that boy. He was the first to hear my heart beat from the inside. 
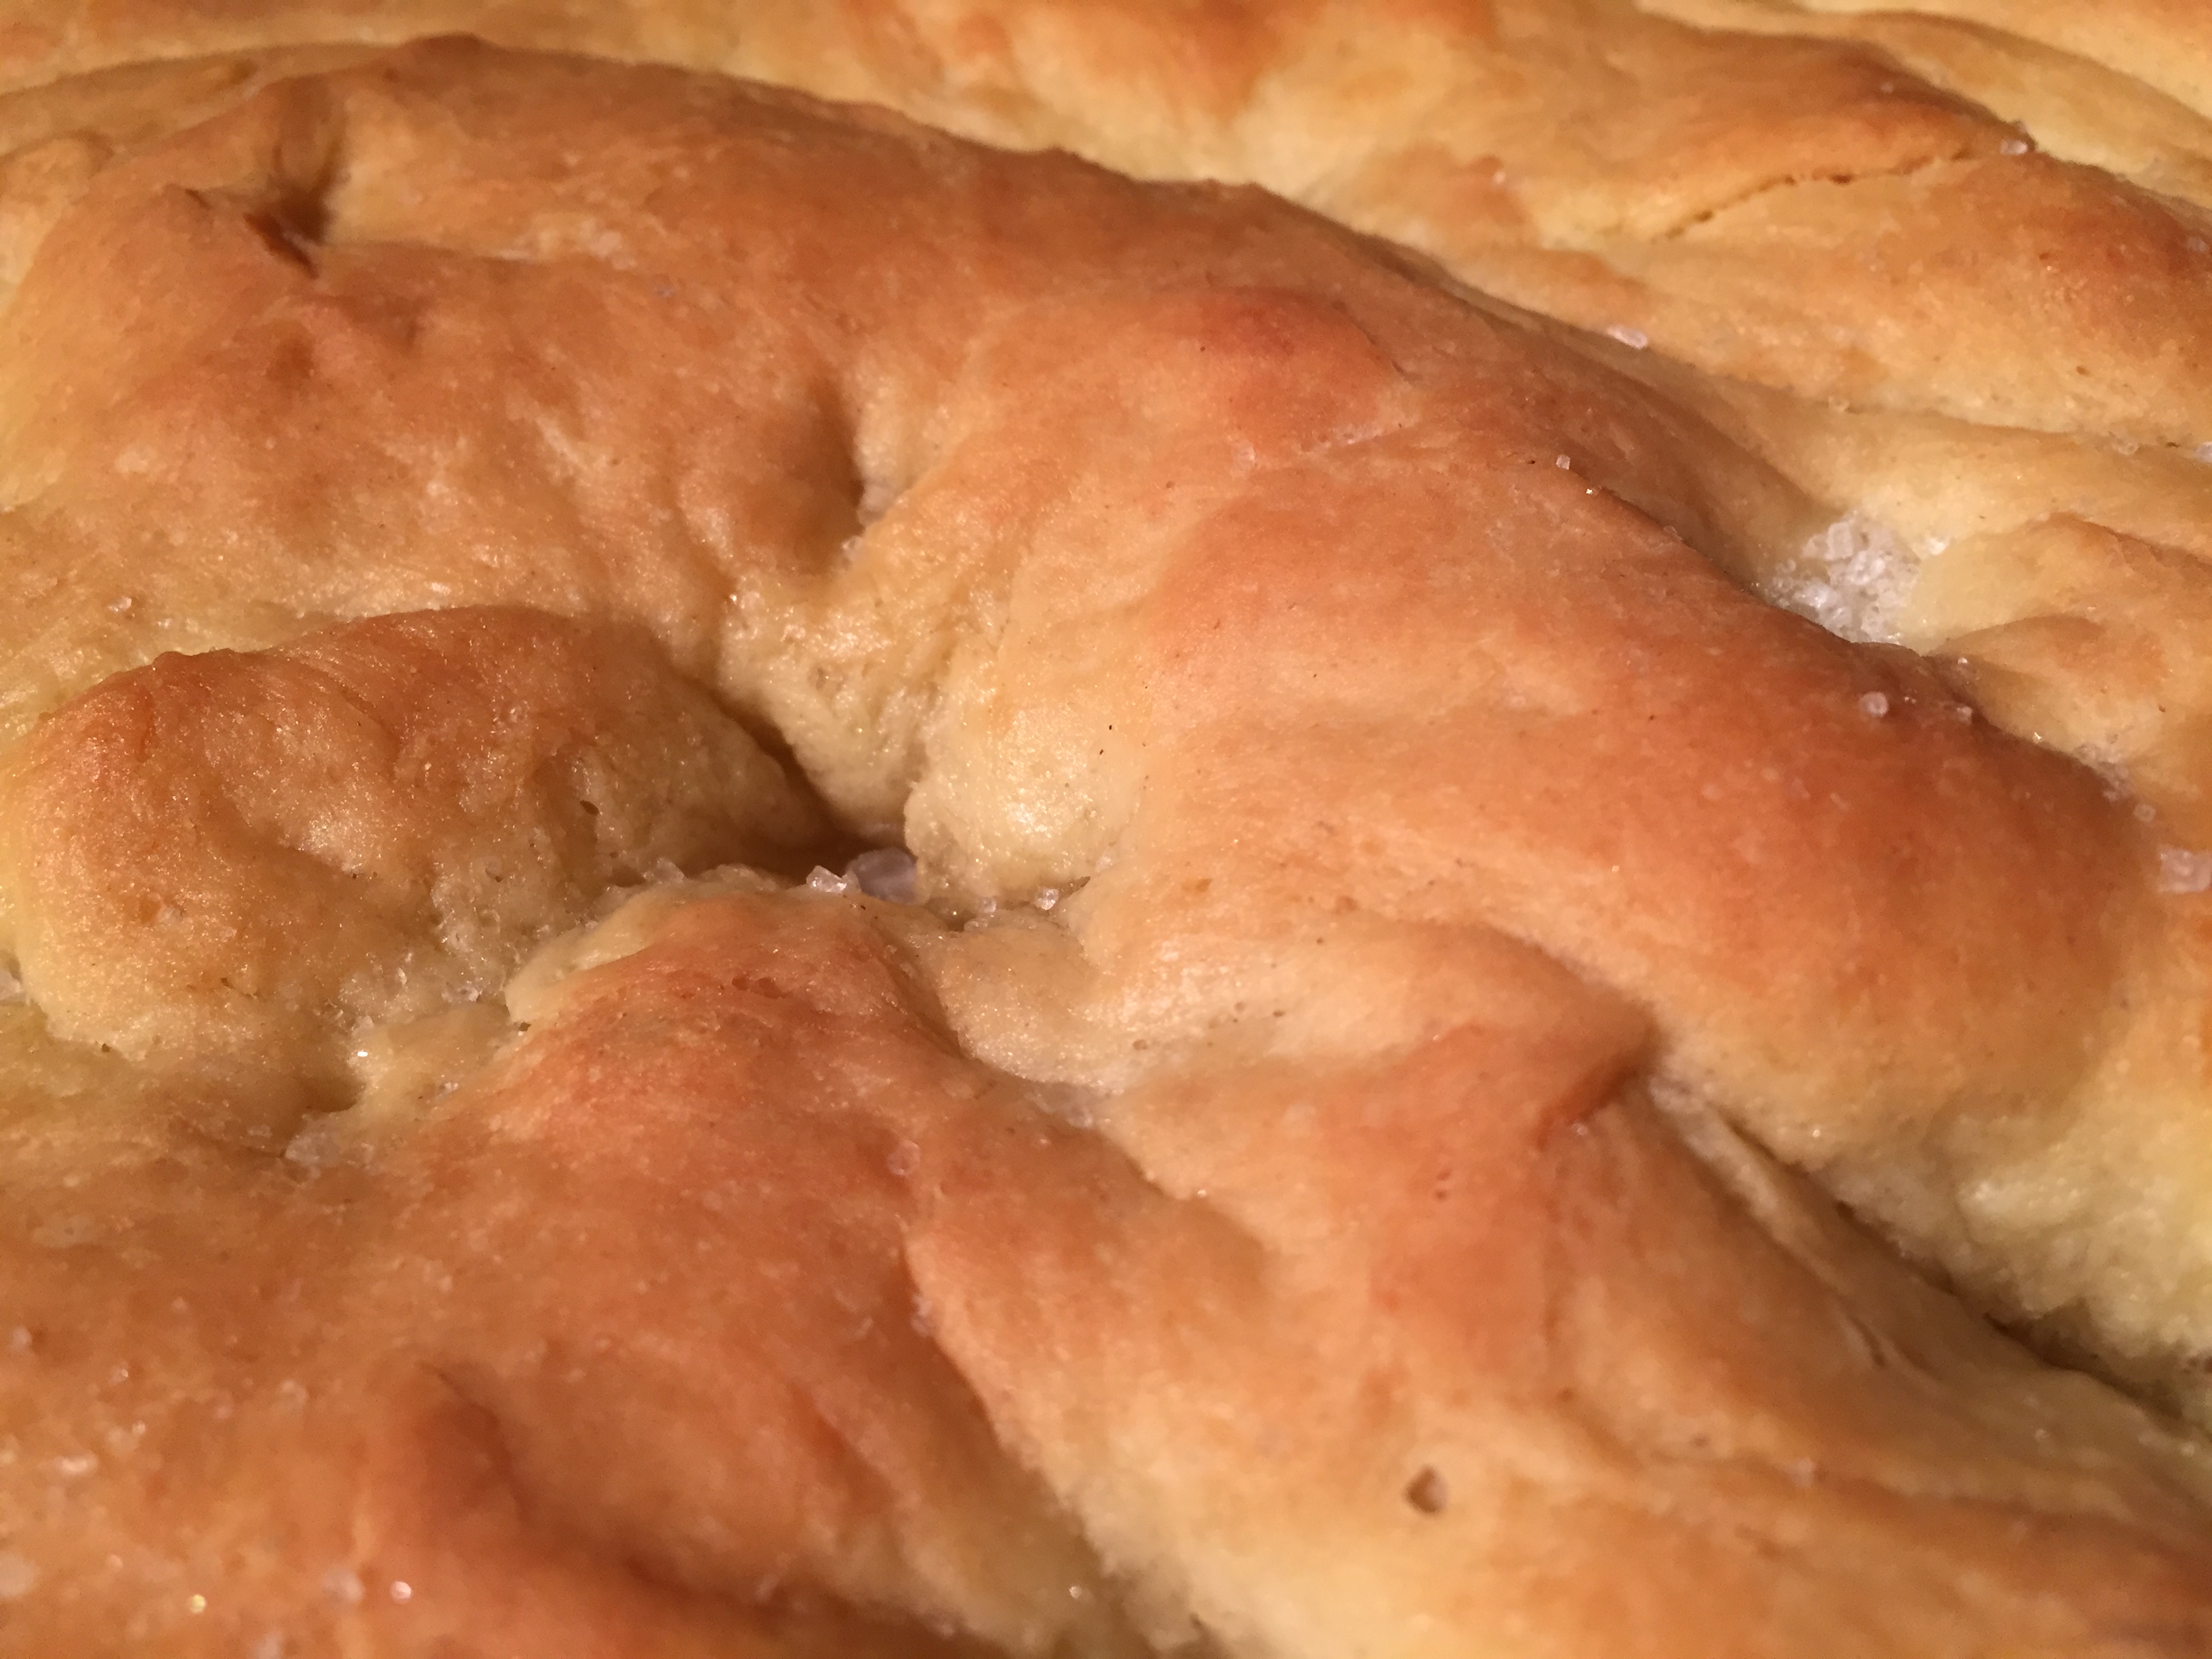
Jake’s Focaccia

The life lesson I have learned about my son is: the difference between poetry and chaos is cadence. It’s how you time things, how you shape things, how you let things rest for a bit. Which is also, a lot like making bread.

There are some mean people in this world. People who feel better when they judge or make other people feel inferior. People who feel they are entitled to say or do what they want when they want to unleash their misplaced anger on others.

I have had enough life experience to nod my head or acknowledge position, to do the right thing and to show kindness, and then there is that time when you are just done. And, that is when it involves my children.

I am all about “it takes a village.” I expect people who love my children to admonish them, if necessary. My friends know they are my fill in- that is a relationship based on trust and time. They have invested in my children’s lives, know who they are and who their Mom wants them to be. It is part of family, grafted or blood. We take care of each other.

I understand that I am far from the perfect parent and that I have made mistakes. Those are the things I replay in my mind, the “Should I have…” or the “Maybe if I didn’t…” But the bottom line is, I knew what it meant to have children before I had them, and I am a key player, not a sideliner. From single parenting as a result of divorce to now single parenting as my ex has passed, I am in this game. This long, exhausting, but ever so rewarding game of parenthood.

I tell my kids that you don’t stop loving or expecting or protecting because they get older and more responsible. It just doesn’t turn off. I never turns off.

So, when my child gets verbally lambasted whether he/she deserved correction from another adult or not, I am ever impressed when he/she does the right thing. When they show respect, follow instruction, chose the right path, I think, “Well all right, I have done a good job after all.”

However;

I have to say this, because as a mom, I may not have done the right thing if I had been there to see it happen.

I might have said all the things I think in my head but filter on a good day.

Maybe, I would have verbally leveled that person like they did my kid, and they could deal with the aftermath.

I might have even enjoyed it.

I don’t think Mama Bears look back at the people who put their cubs in danger and feel remorse.

Every day as an educator, I  ask myself, “How would I want a teacher to treat my kids in this situation?” If you are lucky enough to have had amazing teachers for your children, my bet is, they ask themselves the same question. That isn’t a skill taught in college, but some people who spend time with developing hearts and minds know enough to know be a guide, or a mentor, or even a role model. They step out of themselves to see the perspective of another before acting.

And then, as a parent, you know your children will encounter the garden variety ass, who feels entitled to “parent” your child. They like the way it feels when they reduce someone else’s kid to where they think he or she should be.

Especially, when they look and see that you aren’t around to see you aren’t there to see this behavior? You know the type. Sadly, me too.

Transition to bread for a moment: I know bread is evil. I got the memo. It has carbs and gluten and essentially destroys the universe. Blah, blah. So do mean people.

Here’s the beauty of bread. You take yeast and water and create life. You add flour, oil, salt. You stir and knead and move and flip it over and pound and then carefully place it into an oiled bowl. You lovingly run a clean cloth under hot water, wring it out, and fold it over the bread. You place it somewhere warm. You let it rise.  You knead it again and allow it to rise a second time. And then, you bake perfection.

So, when my son asked me to make focaccia after supper one night, and even found the recipe on-line to do make it happen, I stayed up late to coach the baker I didn’t know existed in my kid.

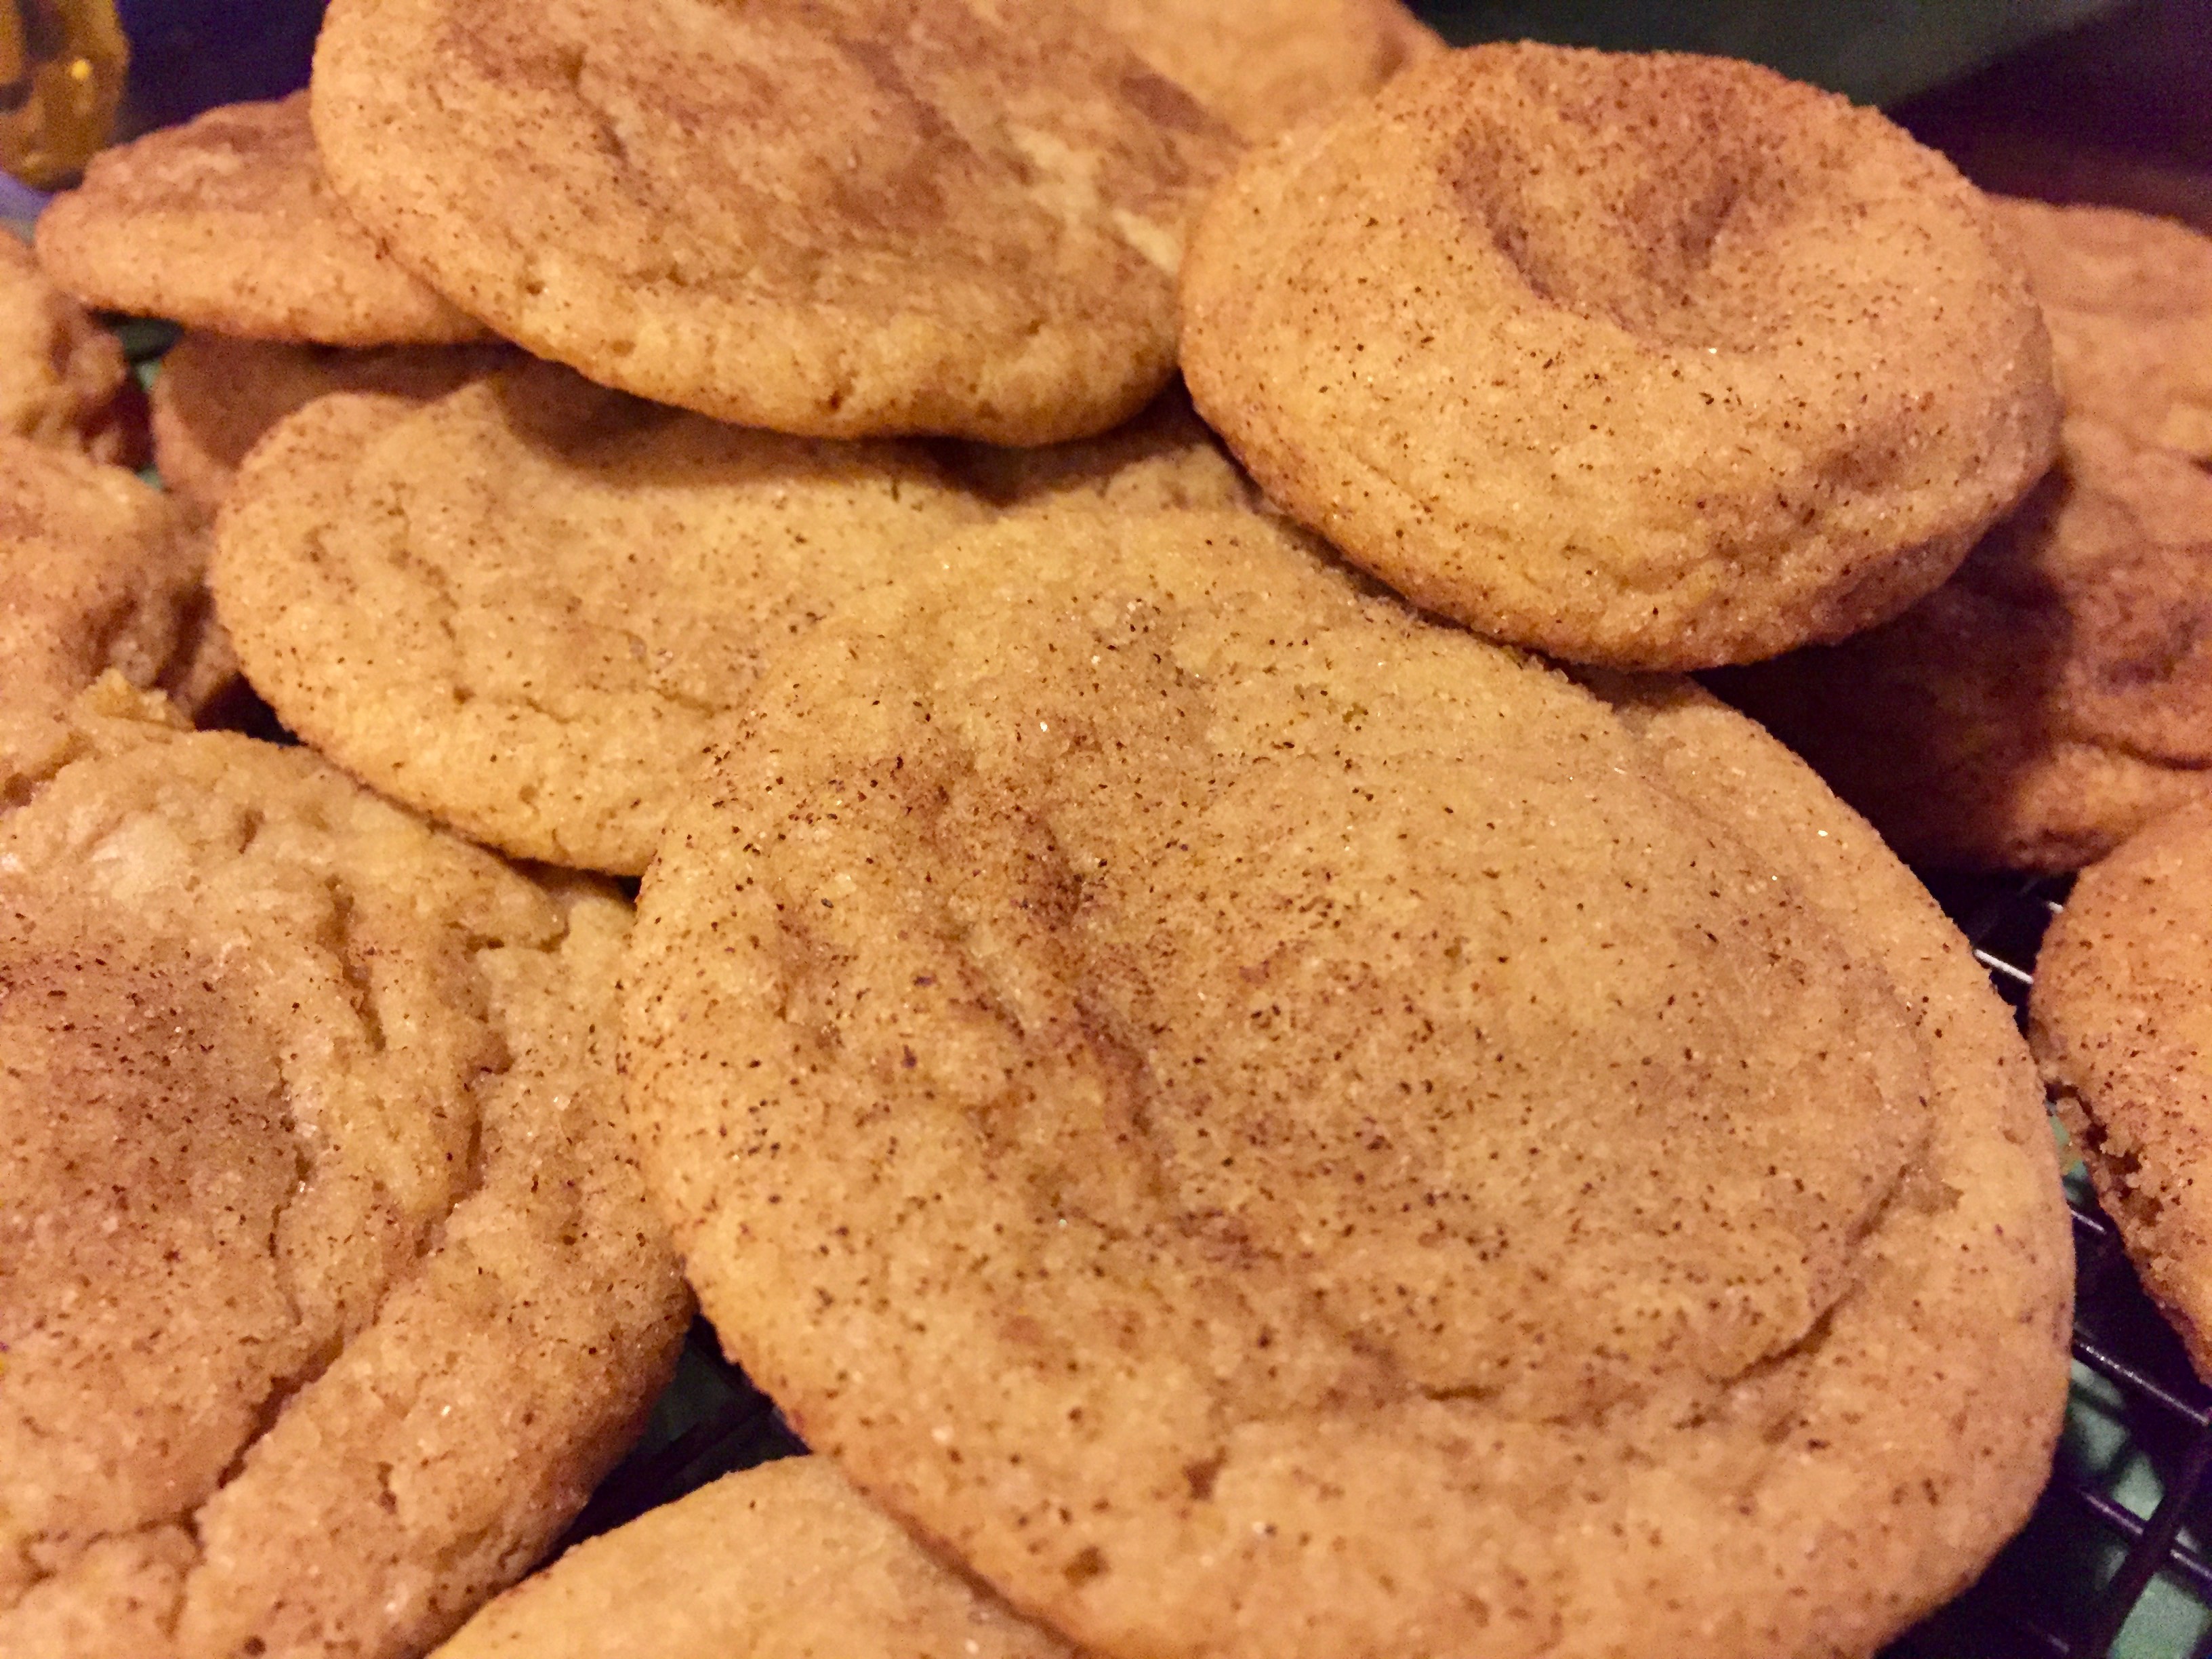
We used Anne Burnell’s recipe from the food network. Simple-salted dough that is doused in olive oil and set to rise in two sessions, dimpled with finger holes, and baked to a golden brown.

As a mom, I can’t tell you the joy of watching my son follow the directions, and to see him knead the bread and actually like the cadence of kneading the flour and the dough on the board. As a baker, who does use the kitchen for therapy, I am more than happy to know he too will have this outlet, should he choose.

We didn’t need to make bread. I have bread. What we did need, was time together. Time to create poetry out of chaos.

It was well past my bedtime when the focaccia came out of the oven and I admit we did not wait for it to cool before I cut into it.

I know dipping focaccia in olive oil and sea salt and cracked pepper around ten thirty at night is a bad dietary choice. I know it is not calorie friendly. I know all of the things and why it was a bad idea.

But sometimes, you stand in the kitchen with your son who has been through some stuff, and you eat the bread he baked because it is a celebration of what he can do. To create something amazing in the midst of brokenness. You embrace the poetry of your kid and rip off a piece of golden salty amazingness. You leave the dishes on the counter and you talk. And you thank God for the moment you have been able to capture in your heart.

I ride my kids hard. I am always the tough parent, just by reality dictating that I must be the consequence giver and the line toe-er. I have rules and expectations because I am the mom. That is my job. MINE.

I feel like in a world where people feel compelled and entitled to spout their verbal garbage, (can I get an amen?) our kids should at least have a way to combat the wounds inflicted. Bullies come in all sizes. Some even smile at you when they say hello.

All that to say, I am glad my kids know that even when the outside world can be unkind, they can create and make beautiful things. If I have taught them to respect people, to follow rules, to be kind to others, and even bake bread, they too can make poetry out of chaos.

I don’t think people intentionally hurt, or at least I would like to believe it, but I am wrong. Some people are really that ugly on the inside. And while as a grown up I know it’s really their issues, I can’t help but wonder. I can’t protect my kids from everything, but God help you if it warrants my stepping in. I am raising children in an imperfect world, as an imperfect parent, but my love is strong. My love is big, and hopefully, my kids know I have their back.

With Momma love, and perfect bread, the world can be a better place.

I hope you enjoy this recipe, and as always, thank you for coming to the table!

Chrissy

Click below for a printable recipe

Print

Late Night Focaccia with Jacob

Focaccia Bread
Print Recipe

Chef Anne Burrell’s recipe for Focaccia Bread is easy and delicious. It also makes for an excellent late night snack with your favorite teenager.

  • Author: chrissy@mythankfultable.com

Ingredients

Scale
  • 1 3/4 cups warm water
  • 1 package active dry yeast
  • 1 tablespoon sugar
  • 5 cups all-purpose flour, plus additional for kneading
  • 1 tablespoon kosher salt, plus coarse sea salt, for sprinkling
  • 1 cup extra-virgin olive oil, divided

Instructions

  1. Combine warm water, yeast and sugar in a small bowl. Put the bowl in a warm, not hot or cool, place until the yeast blooms, at least 15 minutes.
  2. In the bowl of a mixer, using a dough hook, combine the flour, 1 tablespoon of kosher salt, 1/2 cup olive oil together.
  3. Slowly add the yeast mixture and combine on low speed.
  4. Once the dough has come together, continue to knead for 5 to 6 minutes on a medium speed until it becomes smooth and soft.
  5. Transfer the dough to a clean, lightly floured surface, then knead it by hand for five minutes.
  6. Lightly oil the inside of a bowl with olive oil and place dough inside, turning to coat. Cover it with a damp cloth and put it in a warm place until the dough has doubled in size, at least 1 hour.
  7. Coat a jelly roll pan with the remaining 1/2 cup olive oil.
  8. Put the dough onto the jelly roll pan and begin pressing it out to fit the size of the pan. Turn the dough over to coat the other side with the olive oil. Continue to stretch the dough to fit the pan.
  9. Make finger hole impressions all the way through the dough.
  10. Put the dough in the warm place until it has doubled in size, about 1 hour. While the dough is rising a second time, preheat the oven to 425 degrees F.
  11. Give a generous sprinkle of seas salt over the top of the focaccia.
  12. Lightly drizzle a little oil on top.Bake the dough until the top of the loaf is golden brown, about 25 to 30 minutes. Remove the focaccia from the oven and let it cool before cutting and serving.

Did you make this recipe?

Share a photo and tag us — we can't wait to see what you've made!


Posted in: bread, My Story, Recipes Tagged: Bread, Focaccia, Food Network Recipe, Olive Oil, Salt, yeast

Amaretto Biscotti with Almond Drizzle

January 19, 2018 by chrissy@mythankfultable.com
Amaretto Biscotti
Amaretto Biscotti

Amaretto Biscotti

I love anything that uses almond extract. It doesn’t need to have actual almonds, it just needs to taste like almonds as far as I am concerned. So, when I saw a recipe for an amaretto biscotti, it made perfect sense to marry my new obsession with biscotti with almond and more almond.

This recipe calls for both Amaretto liquor, as well as almond extract. The additional drizzle of almond on top makes for the perfect biscotti, with coffee, with tea, with traffic lights on the way to school, you name it.

Amaretto Biscotti

Amaretto Biscotti

Light, easy to prepare, and the aroma is wonderful. I am amazed that I didn’t make a biscotti before last month. Just combine the ingredients in a mixer, form into logs of dough, bake, slice, bake again. The drizzle is really for looks but I am not kidding when I say it really does put it over the top.

You can throw chopped almonds or just about anything into this biscotti dough, like finely chopped chocolate, because it is versatile and handles the additional fillings nicely. This recipe is simple and for me, that was perfection.

Amaretto Biscotti

Amaretto Biscotti

The second baking time is when the biscotti gets its crunch-and for me it is a fine line of baking enough or too much. I like my biscotti to have a little tooth. Each baker has his or her own desired crunch level. I time it so the biscotti are dried out but still have just a little tenderness.


After cooling, combine the drizzle ingredients to the desired consistency and drizzle with a spoon. Allow time for drizzle to set. Store in an air-tight container.

As always, I hope you enjoy this recipe and thank you for coming to the table!

Chrissy

Click below for a printable recipe.

Print

Amaretto Biscotti with Almond Drizzle

Amaretto Biscotti
Print Recipe
  • Author: chrissy@mythankfultable.com

Ingredients

Scale
  • ½ Cup Butter
  • 1 Cup Sugar
  • 2 Large Eggs
  • 2 Tablespoons Amaretto Liquor
  • 2 Teaspoons Almond Extract
  • ½ Teaspoon Salt
  • 2 Teaspoons Baking Powder
  • 2 ¼ Cup All Purpose Flour


  • Drizzle:
  • 1 Cup Confectioner’s Sugar
  • 1 Tablespoon Almond Extract
  • 1–2 Tablespoons heavy cream

Instructions

  1. Preheat oven to 350*.
  2. In a mixer, beat butter and sugar until light and fluffy.
  3. Add eggs, extract, and liquor and combine.
  4. Add baking powder and salt to mixture.
  5. Slowly add flour and combine.
  6. Turn dough out onto a lightly floured surface.
  7. Divide dough into two long rolls, and place on a silicone mate or parchment lined baking sheet.
  8. Bake for 20-25 minutes, until slightly golden and puffed in appearance.
  9. Remove from cookie sheet and cool for 10-15 minutes.
  10. Slice on an angle approximately one inch thick.
  11. Reduce oven temperature to 325*
  12. Place cookies slice side down on cookie sheet and bake for an additional 20 – 25 minutes or until desired “baked-ness”. (I like my biscotti to have a little chew to it- not a lot).


  1. If Drizzle is desired, mix ingredients until desired consistency (I add the heavy cream slowly until it is where I want it in thickness). Drizzle on biscotti.

Did you make this recipe?

Share a photo and tag us — we can't wait to see what you've made!

Posted in: Cookies, Recipes Tagged: Almond, Amaretto, Amaretto Biscotti, Biscotti

Guinness Slow Cooker Roast Beef

January 18, 2018 by chrissy@mythankfultable.com
Guinness Slow Cooker Roast Bee

Guinness Slow Cooker Roast Beef

Once upon a time, I went to a St. Patrick’s Day Feast at a friend’s house, and was scouring the internet for the perfect not-corned-beef-dinner item to contribute. This was my find…and has been a staple throughout the cooler months in my home. My daughter calls this the “beer beef,” but it isn’t just any beer, and it isn’t just any crock pot meal.

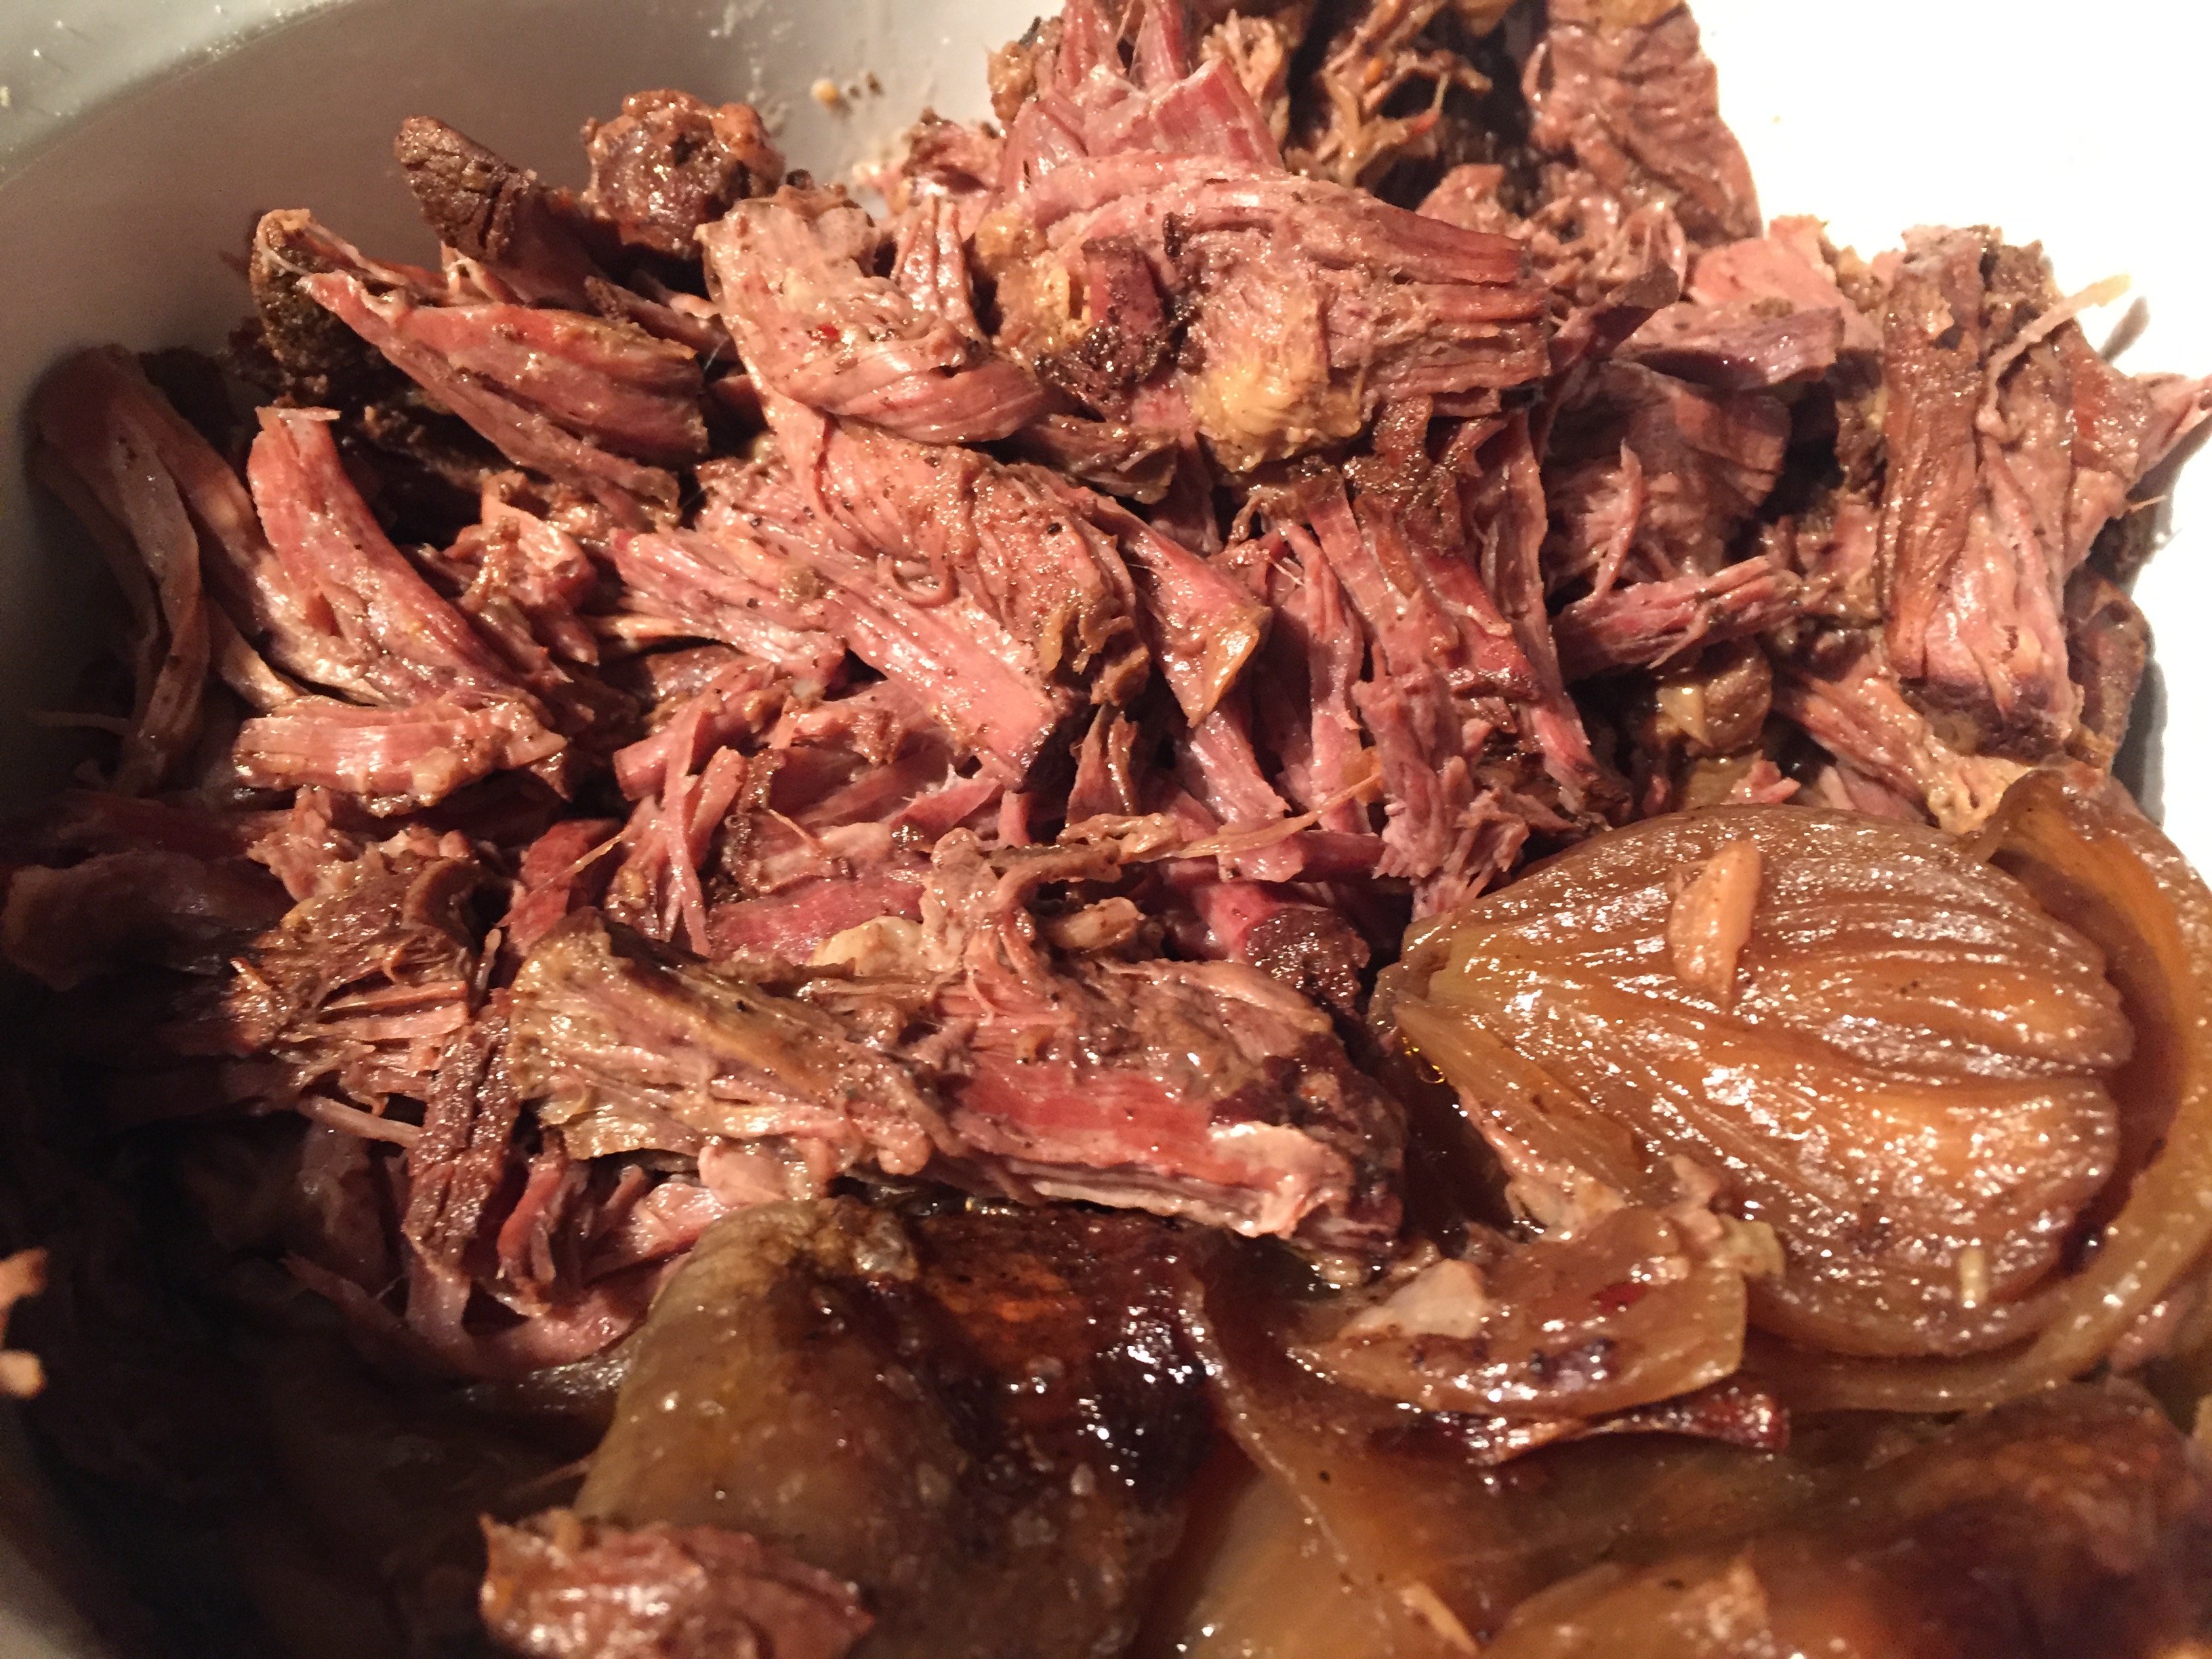
While I am not a Guinness drinker, simply because I am not a big drinker, I always have Guinness on hand specifically for this recipe (and another Guinness Dark Chocolate Chip Cookie recipe that is death by beer and chocolate).

So simple; brown your roast, place in a crock pot with onion, beef stock, spices, and pop open that can. I actually had to research the widget inside the can, which was awesome and I felt smarter and more worldly just by learning that this beer has a specific gadget to make the pour better and give the perfect amount of head to the glass.

I let this recipe cook low and slow, as in, “hey, we are snowed in all day and most likely tomorrow, I will make this recipe.” Because, nothing smells as amazing as a crock pot that you don’t have to mess with. Put the lid on and leave it alone for several hours (I go 6-8 on low depending on the size of the roast).

When you remove the top of your crock pot, the smell of beef and onion and the kick of alcohol makes you really thankful you aren’t a vegetarian anymore, sorry not sorry.

The roast falls apart, and the extra au jus can be simmered down, or served as is.

I serve this with a lot of vegetables and mashed potatoes, or fresh homemade bread, and it is amazing.

Simple, delicious, and hearty. You need to make this recipe whether it is Saint Patrick’s Day or not, and you won’t be sorry you did.

May the road rise up to meet you and may your table always be full.

I hope you enjoy this recipe, and as always, thank you for coming to the table!

Chrissy

Click below for printable recipe.


Print

Guinness Slow Cooker Roast Beef

Guinness Slow Cooker Roast Bee
Print Recipe
  • Author: chrissy@mythankfultable.com

Ingredients

Scale
  • 1 Tablespoon Oil
  • 1 Tablespoon Butter
  • 3 Pound Boneless Chuck Roast
  • 1 Teaspoon Salt
  • 2 Teaspoons Black Pepper
  • ½ Teaspoon Red Pepper Flakes
  • 1 Teaspoon Chili Powder
  • 1 Bay Leaf
  • 1 Can Guinness
  • 1 24 Ounce Container of Beef Stock
  • 2 Onions, root end removed and sliced in half

Instructions

  1. In a pan, heat oil and butter together.
  2. Brown roast on all sides.
  3. Move Roast into crock pot.
  4. Place onions cut side down into pan with remainder of butter, oil, and beef drippings from browning.
  5. Sear onions quickly and add to the crockpot as well.
  6. Sprinkle spices and bay leaf on top of roast.
  7. Add Guinness and Beef stock on top of roast until ¾ full, reserve remaining beef stock.
  8. Set crock pot on low for 6-8 hours, or until fork tender.

Did you make this recipe?

Share a photo and tag us — we can't wait to see what you've made!

Posted in: crockpot, Recipes Tagged: Beef, crock pot, Guinness, Guinness Beef, one pot

Caramel Filled Snickerdoodles

January 11, 2018 by chrissy@mythankfultable.com
Caramel Filled Snickerdoodles

Caramel Filled Snickerdoodles

The month of December was jam packed with all things holidays and programs of one thing or another. As I am writing this, this recipe was made almost three weeks ago but I haven’t had the time or the stamina to write.

I will say this, if you aren’t a snickerdoodle fan (which I wasn’t before this cookie), you may change your mind. I found this recipe on www.sallysbakingaddiction.com and was interested. Anything caramel gets my attention, what can I say? Surround it in a buttery soft cookie and roll it in sugar and cinnamon…you have my attention.

Caramel Filled Snickerdoodles

Caramel Filled Snickerdoodles

This recipe was intended for a girls night filled with baking and movies and pajamas. Due to a wrestling tournament, it became one type of cookie on my end, and one movie (and I fell asleep with the dog on the couch fifteen minutes in) but the pajamas and the friendship are the kind where I can do that. My friend and her daughter love me and my daughter even if we are late and can only watch one movie. Life is good.

Caramel Filled Snickerdoodles

Caramel Filled Snickerdoodles

For this recipe, you measure out balls of dough into tablespoon sized servings, roll them and refrigerate. Then, taking a half a caramel, you smoosh it between two balls of dough and roll to cover.  The ball of dough is

then rolled in a sugar and cinnamon mixture, and baked.

Caramel Filled Snickerdoodles

Caramel Filled Snickerdoodles

I think it is important to comment here that if you are using older caramels, the cookie will look sort of, well, breast like. As in, the carmels stay more firm and look rather like nipples. I know. I said breast and nipple in one blog post. So, that said, make sure your caramels are fresh.

Fortunately, the nipples dispersed as the cookies continued to bake and all was well. The soft melty caramel and the sugary sweetness of the cookie made for a nice treat.

Another point to make is be sure to store these in an airtight container- as the buttery chewy texture will turn to a firmer cookie if left out without being covered.

As far as friendships and girls nights and baking go, this was a success. For the snickerdoodle lover it definitely hits the spot. For the newbie covered, I am sold.

I hope you enjoy this recipe, and as always, thank you for coming to the table!

Chrissy

Caramel Filled Snickerdoodles

Caramel Filled Snickerdoodles

Print

Caramel Filled Snickerdoodles

Caramel Filled Snickerdoodles
Print Recipe

Original recipe from www.sallysbakingedition.com. These soft chewy snickerdoodle cookies are filled with a sweet, melty caramel center.

  • Author: chrissy@mythankfultable.com

Ingredients

Scale
  • 1 Cup Butter, softened
  • 1 Cup White Granulated Sugar
  • 2/3 Cup packed Brown Sugar
  • 2 Eggs
  • 2 Teaspoons Vanilla Extract
  • 1 Teaspoon Cream of Tartar
  • 1 Teaspoon Baking Soda
  • 1 Teaspoon Baking Powder
  • 1/2 Teaspoon Salt
  • 3 Cups Flour
  • 12 Soft Caramels, cut in half

Topping:

  • 1/4 Cup Granulated Sugar
  • 1 1/2 Teaspoon Cinnamon

Instructions

  1. Combine flour, baking powder, baking soda, cream of tartar, and salt together.
  2. In a mixer, combine butter and sugar until light and fluffy.
  3. Beat in eggs and vanilla extract. Scrape down the sides of bowl as needed.
  4. Slowly incorporate dry ingredients until combined.
  5. Scoop and roll 1 teaspoon sized balls of dough.
  6. Refrigerate for a few hours up to three days.
  7. Preheat oven to 325*
  8. Take one ball of dough, place a 1/2 Caramel and cover with another ball of dough, rolling together until caramel is covered.
  9. Roll completed ball in topping mixture.
  10. Bake for 11 – 12 minutes on a silpat or parchment lined baking sheet.
  11. Allow cookies to cool additional time on the cookie sheet, then transfer to cooling rack and cool completely.

Did you make this recipe?

Share a photo and tag us — we can't wait to see what you've made!

Posted in: Cookies, Dessert Tagged: Caramel, caramel filled, Cinnamon, Cookie, snickerdoodle

Mimi’s Gingersnaps

January 8, 2018 by chrissy@mythankfultable.com
Soft Chewy Ginger Cookies

Soft Chewy Ginger Cookies

Anything Mimi makes is delicious. This recipe was originally a cookie swap cookie from my best friend, and the recipe I have is written in my notes is from Mimi. I think we all make them slightly different, but this is the recipe as I got it.

The only thing I do differently (which, I believe so does said person who gave me the recipe) is I am heavy handed when it comes to the spices. As in, use the recipe as a suggestion, and go overboard with all things ginger, cinnamon, and clove. (ok, maybe not so much the clove). I have been known to either heaping spoonful the measurement or even double the spice as written in this recipe, so buyer beware. You can do this recipe as is and it will be wonderful. You can amp up the spices and it will be a cross between a ginger cookie and death by ginger (my preferred cookie).

For me, ginger is a spectacular flavor. I am currently (and have been) in love with David’s Organic Super Ginger Tea. My daughter says it’s like drinking fire. I say, bring it. There is nothing better than ginger with chicken, ginger in my tea, or ginger in my cookie.

Soft Chewy Ginger Cookies

Soft Chewy Ginger Cookies

I’ve said it before and I will say it again, if you are going to consume something that is considered indulgent, it should be worth it. So for me, a gingersnap that is meh, I don’t want to bother with. If it is coming out of my kitchen, I want it to be a ginger snap.

Soft Chewy Ginger Cookies

Soft Chewy Ginger Cookies

So, soft or snappy? That’s up to you. I like them both. These tend to be chewy, which I love. They can get harder the longer you bake them, and do get a little harder as they cool, but overall, this is a chewy ginger cookie. This batch that I photographed tended to be more spread out than usual- but the taste was exactly the same. The chewy factor was also the same even though I have made these where they do look puffier.

The combination of shortening, molasses, spices, oh my. So good. I roll mine out and refrigerate before baking but you don’t have to. They bake at 300* which is low heat, even by my standards, but this is magic in the works. If Mimi says bake at 300*, I bake at 300*.

When you bake these, your kitchen will make you remember everything about Hansel and Gretel and the Gingerbread Baby (which you must read if you haven’t yet) and for me, home. I loves me a good cookie, but these specifically make me think of my friend and her family and so they are like the soft blankie equivalent in the realm of cookies. You just need them on your tray.

I treat these cookies like I do mint cookies. I keep them separate until the last minute. I don’t want anything messing with the burst of spice.

They are also an easy cookie to bake. One mix, roll in sugar, and bake. Which is partially why they are my go to cookie for cookie swaps. Unlike the multi-step cookies I have shared lately, these are a must make, true as can be cookie. Or as my son’s friend says, “Momma, we gotchu.” cookie.

Some things are snappy and spicy, some people are snappy and spicy. We need them all on the cookie tray. It adds to the mix. I find myself more of a gingersnap person in life, which works for me.

I hope you enjoy this recipe, and as always, thank you for coming to the table.

Chrissy

Click below for a printable recipe!

Print

Meme’s Gingersnaps

Print Recipe

★★★★

4 from 1 reviews

  • Author: chrissy@mythankfultable.com

Ingredients

Scale
  • ¾ Cup Crisco
  • ½ Teaspoon Salt
  • 1 Cup Sugar
  • 1 Egg
  • ½ Cup Molasses
  • 2 Cups Flour
  • 3 Teaspoon Baking Soda
  • 1 Teaspoon Cinnamon
  • 1 Teaspoon Ginger
  • ½ Teaspoon Cloves

Instructions

  1. Mix shortening and sugar until light and fluffy.
  2. Add eggs and molasses and beat again.
  3. Add dry ingredients and mix well.
  4. Roll into balls and then roll in additional sugar.
  5. Bake at 300* for 12-15 minutes. Remove to wire rack to cool.
  6. Cookies will be a little soft and turn hard after cooling.

Did you make this recipe?

Share a photo and tag us — we can't wait to see what you've made!


Posted in: Cookies, Dessert, Recipes Tagged: chewy cookie, Cinnamon, Cloves, Cookie, dessert, Ginger, Gingersnaps

Mexican Hot Chocolate Cookies

December 28, 2017 by chrissy@mythankfultable.com
Mexican Hot Chocolate Cookies

Mexican Hot Chocolate Cookies

This time of year tends to lean to the crazy side of things. Food, family, friends, programs, ending semesters, grading, finals, shopping, busy busy busy.

This is in addition to regular life stuff, like sports and work and feeding your family, so imagine my sadness when I realized that the blog hasn’t really gotten attention in a week. Then more sadness when I realized that this cookie has a grand total of two pictures for the whole blog. I guess, in the midst of photographing and recipe typing, this cookie got the short end of the stick. Kind of makes me sad, because of the cookies with the most surprise, this one is delish.

Imagine a dark chocolate cookie, rolled in a mixture of sugar, cinnamon, and two kinds of chili powder. Then baked to a soft dark sweet and spicy treat. You have this cookie.

Originally by Martha Stewart in her glory (yes I own almost every one of her cookbooks), the cookie calls for unsweetened cocoa powder. I have baked it with Dutch process and Dark Cocoa and hands down, my family prefers the darker chocolate flavor. I have also upped the spice factor by adding both Ancho and Chipotle, and increased the amounts, but trust me, with the sugar and the cinnamon, the subtle heat that happens with this cookie is more of a “Oh Wow” than “What the heck?”

As an aside, these spices are from the Atlantic Spice Company, an awesome little shop in North Truro, Massachusetts. This is in the Outer Cape Cod, at the junction of 6 and 6A. A must stop if you love to cook and are on the Cape. They have an amazing selection of spices and teas as well as the very cool gift selection for the culinary artist in your family (many items in my stocking came from the Atlantic Spice Company and I was very pleased).

In all fairness, I do typically warn the consumers of what is what on a cookie tray. My mom is not a fan. Spicy is not her thing. So, in respect for those who want to stay to the safe side of the cookie tray, let your guests know.

If you are the type who loves a little kick, and likes to be inspired, then this is the cookie for you. You can’t go wrong with a spicy dark chocolate chewy cookie that has just the subtlest hints of red flecks amongst the sugar. The cinnamon also rounds this out, so it is just a flavor boom of a cookie.

I also continue to bake my cookies at the lower temperature (I know, who do I think I am to mess with Martha Stewart on a recipe?) to keep them soft and I find that these are the kind of cookies you bake, and serve. As in, tender and break easily after the first day. So if you are planning to bake and freeze or bake and leave out…maybe do another kind of cookie. The good thing is, this dough doesn’t require chilling after mixing and before baking, so you can do this in one setting.

The soft chocolate crinkly top with the mix of sweet and heat makes this the perfect bring along to something like a Super Bowl party, where the folks who are clinging to the wings platter might enjoy spice with their cookie, or an event were foodies who like to try something new are up for a new dessert. I say, it takes all kinds of cookies to make up a tray.

I hope you enjoy this recipe, and as always, thank you for coming to the table!

Chrissy

Click below for a printable recipe!


Print

Mexican Hot Chocolate Cookies

Print Recipe
  • Author: chrissy@mythankfultable.com

Ingredients

Scale
  • 2 ¼ Cup Flour
  • ½ Cup Dark Cocoa Powder
  • 2 Teaspoons Cream of Tartar
  • 1 Teaspoon Baking Soda
  • ½ Teaspoon Coarse Salt
  • 1 Cup Butter
  • 1 ¾ Cup White Granulated Sugar
  • 2 Large Eggs
  • 2 Teaspoons Cinnamon
  • ½ Teaspoon Ancho Chili Powder
  • 1/2 Teaspoon Cayenne/or Chipotle Chili Powder (If you are going to go easy, this is the place to do it).

Instructions

  1. In a medium bowl, sift together flour, cocoa, cream of tartar, baking soda, and salt. Set aside.
  2. In an electric mixer, combine butter and 1 ½ Cups of sugar until light and fluffy.
  3. Scrape down sides of the bowl, beat in eggs until combined.
  4. With mixture on low, slowly combine dry mixture until combined.
  5. Refrigerate dough for a few hours up to two days.
  6. In a bowl, combine ¼ Cup Sugar, Cinnamon, and Chili Powder
  7. Scoop dough into balls and roll into cinnamon sugar mixture.
  8. Place dough balls on parchment lined cookie sheets.
  9. Bake at 325* for approx. 10 minutes. Bake until cookies are set in the center and are beginning to crack.
  10. Let cookies slightly cool on cookie sheets then transfer to wire rack to cool completely.

Notes

Yield 32 Cookies

Did you make this recipe?

Share a photo and tag us — we can't wait to see what you've made!

Posted in: Cookies, Dessert, Recipes Tagged: chili, chocolate, Cinnamon, Cookies, Mexican Hot Chocolate Cookies, Spicy Cookies

White Chocolate Raspberry Cookies and Is it Fixable?

December 27, 2017 by chrissy@mythankfultable.com
White Chocolate Raspberry Cookies with White Chocolate Drizzle

White Chocolate Raspberry Cookies with White Chocolate Drizzle

Do you have a recipe you have made for years and everyone likes it and even expects it to appear annually? For me, that would be this cookie. This White Chocolate Raspberry Cookie that has been baked by myself since 1995.

It is not only beautiful, it is also  delicious.

A combination of white chocolate that finds itself not only in the form of chunks in the cookie as well as drizzled on top, it is actually melted into the batter, providing the smooth, sweet texture of a regular cookie the extra flavor boost to take it next level.

Then there is the addition of a perfect ruby of seedless raspberry preserves in the middle. It is a decadent cookie. It is a break it in to steps cookie, but it is worth it.

White Chocolate Raspberry Cookies

White Chocolate Raspberry Cookies

I think the part of this cookie that is interesting is that it can be broken down into steps. Make the dough and either form into logs to slice (later) or roll into balls to refrigerate. They can stay in the refrigerator for a few days, well wrapped.

White Chocolate Raspberry Cookies

White Chocolate Raspberry Cookies

Then bake. Again, put them in an air tight container and you can walk away. Then, right before you are ready to assemble cookie tray or deliver, top with the raspberry and white chocolate drizzle. They are the queen of the cookie tray.

And now the heart of the matter: They are not my favorite cookie. I almost didn’t make them this year. 


What? What kind of sales pitch is this? It isn’t.

White Chocolate Raspberry Cookies

White Chocolate Raspberry Cookies

I love these cookies. They are just the perfect combination of flavor and tenderness, I make them smaller on purpose because of the sweetness, and they are so so pretty.


I think, like a great dog or a long time friend, they hold the comfort of the familiar. I make them every year. It is a constant. It is respected and I treat it with the same level of love my other cookies get. The pride is still there when they turn out the way they should.

They are not the sea salt caramel I have been bubbly over, they are not the new and shiny. They are the old and shiny. The cookie I am expected to make because they are my cookie.

With a blog I want everything to be new and exciting. However, these are my been doing it forever and not exciting. But that’s me. We’ve been in this baking game together for two decades now, this me and this cookie.

Now you, if you have never had one, or even if you have, you will have butterflies. Trust me, you’ll love them.

Funny thing is, I am not a recipe hoarder. I had no idea people wanted to know how to make these. I don’t remember anyone asking for the recipe…But I am HAPPY to share it. Actually, the recipe comes from my Better Homes and Garden Cookbook. One of the oldest cookbooks in my pantry. It opens to this recipe because it’s one of those recipes. The kind where the book has the splatter and water wear…you know what I mean.

The secret to these cookies is cooking at a low temperature. It is white chocolate and butter friends, both brown easily. Nobody wants a hard brown bottom cookie. Nobody. So you have to watch. One batch will be ready in eleven minutes, the next time you make these they can be ready in ten or twelve. Bake on parchment or silpat lined cookie sheet. Bake at 325*.

A double batch of this recipe can yield  four dozen smaller cookies. You want to keep them on the smaller side because they have a cookie/confection like quality. It’s the white chocolate that makes it so.

Also, the dough can seem like it isn’t what it should be, but it will be, trust and have faith. The combination of butter and white melted chocolate give the dough an almost drier consistency when you are rolling the balls or into logs to slice (when I slice them, I make them 1/4″ thick…I don’t use a ruler for this). They will get into the oven and suddenly transform to white, soft, buttery velvet cookies.

Maybe the stress on my relationship with this cookie is because I want them to be the perfect cookie every time. People expect it. I expect it. Which is why they almost didn’t get made this year. What if the batter decides to look dry again? What if the bottoms are brown? What if the drizzle looks like ploopy white globs of goo? (It’s happened). What if I melt the chocolate wrong and it burns and that smell…oh that smell… See? A million things could go wrong.

A million things don’t go wrong. And if they did, it’s cookies. It isn’t life altering.

I have a phrase I use A LOT. “Is it fixable?” Is it? If it is, then fix it. If it isn’t, then solve it or start over.

I use this phrase with my own children: Spills? Scratched the car’s paint (but didn’t get hurt)? Said the wrong thing (and need to apologize)?

I use this at school: Wrote something incorrectly? Read something that didn’t make sense? Need to pick things up that tipped over accidentally?

I use this for myself: Long day? Stressed? Too many things to do on the list? Can’t be the perfect (fill in the blank here my titles range all over the place)?

If we can’t fix it, it’s a problem. If we can fix it, then there is a path to take. Some things can’t be fixed. Like when cookies don’t turn out like the picture, or you can’t go back and redo a situation the right way. So you do your best to make it better, or toss the crappy cookies out and start over. It’s butter and sugar people. Let’s not be worried about the small stuff.

Which is why, in the end, these beautiful cookies are on my cookie tray for Christmas. Or, in this case were, and you can make them before the new year or for Valentines Day, because they have hearts and love all over them.

This blog, and it’s author will and are going to be streamlining and lightening up. Literally. But for the next nine recipes or so, we are packing in the sugar and the sweetness because there is a time in life for sweetness.

There is a time for softness, and kindness, and beautiful. So we make the cookie that people want. Because when you hand over these cookies to someone who loves them, it makes you feel like a better human being. We need more of that in our world. People who feel like they can fix and be better human beings. Including myself.

I hope you enjoy this recipe, and as always, thank you for coming to the table!

Chrissy

Click below for a printable recipe.


Print

White Chocolate Raspberry Cookies

Print Recipe
  • Author: chrissy@mythankfultable.com

Ingredients

Scale
  • 8 Ounces White Baking Bar or White Chocolate Chips (chopped)
  • ½ Cup Butter
  • 1 Cup Granulated Sugar
  • 1 Teaspoon Baking Soda
  • ¼ Teaspoon Salt
  • 2 Eggs
  • 2 ¾ Cup Flour


  • ½ Cup Seedless Raspberry Jam
  • 3 Ounces White Chocolate Baking Bar
  • ½ Teaspoon Shortening

Instructions

  1. Divide 8 ounces of white chocolate baking bar or white chocolate chips into 2- four ounce segments- melting four ounces and reserving the other four ounces to add to the dough as chips or chunks. Set the melted white chocolate aside to cool.
  2. In a mixer with a paddle attachment, beat butter until light and fluffy. Add sugar and cream together.
  3. Add baking soda and salt. Beat until combined.
  4. Add eggs and melted white chocolate.
  5. Beat in as much flour as you can with mixer. Then add remaining flour by hand stirring with a wooden spoon.
  6. Stir in remaining 4 ounces of chopped white chocolate or white chocolate chips.
  7. Roll dough into logs and wrap in parchment or wax paper and chill.
  8. Slice logs into slices and bake at 325* for 8-10 minutes.
  9. When fresh from the oven, make small indentation with a spoon in the middle of the cookie.
  10. Allow to cool. Cookies will store in an airtight container for up to three days or freeze up to a month. If freezing, freeze cookies as is, and decorate with jam and white chocolate before serving.
  11. Right before serving, melt raspberry jam in a sauce pan. Spoon ½ teaspoon of jam onto each cookie.
  12. In a saucepan, combine remaining white chocolate and shortening until melted.
  13. Drizzle white chocolate mixture over jam on each cookie, forming a drizzle. When I do this, I try to cover the jam so that the cookies are able to stack slightly without getting “jammy.”

Did you make this recipe?

Share a photo and tag us — we can't wait to see what you've made!

Posted in: Cookies, Dessert, Recipes Tagged: Cookies, dessert, Raspberry, White Chocolate, White Chocolate Chips, White Chocolate Raspberry Cookies
« Previous 1 2 3 4 5 6 7 8 9 10 11 12 Next »

Recipe Search

Recent Posts

  • Fluffernutter Cookies…You Heard Me April 12, 2024
  • On Nests July 30, 2023
  • Lemon Rosemary Shortbread Cookies April 24, 2022
  • Praline Sweet Potato Pie March 22, 2022
  • Italian Ricotta Cake March 13, 2022

Recent Comments

  • Cathy Carroll on To My Daughter On Her 18th Birthday
  • Maureen / Mimi on To My Daughter On Her 18th Birthday
  • Kathy G on To My Daughter On Her 18th Birthday
  • chrissy@mythankfultable.com on Cherry Crescent Moon Cookies and Finding the Joy
  • chrissy@mythankfultable.com on Cherry Crescent Moon Cookies and Finding the Joy

Archives

Categories

  • appetizer
  • bread
  • breakfast
  • Cookies
  • crockpot
  • crockpot
  • Dessert
  • Fruit
  • My Story
  • One Pan
  • Recipes
  • side dish
  • Side Dishes
  • soup
  • Vegan

Copyright © 2025 mythankfultable.com.

Lifestyle WordPress Theme by themehit.com