mythankfultable.com

Feeding the Heart, Body, and Family

  • My Pics
  • My Story
  • The Puppies
  • Contact Us
Feeding the Heart, Body, and Family

Recipes

Here is the recipe!

Chocolate Bourbon Pecan Pie

December 2, 2017 by chrissy@mythankfultable.com

Chocolate Bourbon Pecan Pie

Prepare to wow and amaze your guests, be the star of the dessert table, and enter into a sugar coma that compares to no other. May I present to you, the Chocolate Bourbon Pecan Pie.

This is a staple in my dessert arsenal, it is also the pie that never seems to have a remaining slice left in the pie plate. It’s the top pick of my daughter and I think, mine as well.

This pie comes out twice a year: Thanksgiving and Christmas. So maybe that is why it is so special. Or, it could be that pecan pie meets chocolate chunks and it melts into a flaky pie crust to make the gooey, sticky, wonder that is pecan pie meets chocolate.

I can’t expound on it’s perfection.

Chocolate Bourbon Pecan Pie

Now, if you aren’t a pecan pie lover, and I know you are out there. I understand. It isn’t for everyone.

But for a girl who didn’t try pecan pie until I was an adult, the wonder is still there for me.

This recipe is all over the internet, my original copy was from 2012 and printed from all recipes.com. I have since seen it on several blogs, and the variations are minimal.

Essentially, you combine sugars and corn syrup, butter until melty and beautiful. Combine eggs and bourbon and vanilla in another bowl, and you marry the two. Then add your pecans and chocolate and pour into the pie shell.

Chocolate Bourbon Pecan Pie

What I love about this pie is how beautifully it sets up. I let my pecan pie bake until there is almost no jiggle in the middle. It actually almost puffs up and then settles down as it cools. I have also experimented with chocolate chips and chocolate chunks, and both seem to have the same consistency when it comes to melting into the under-the-pecan layer.

The smell in your kitchen as this bakes is somewhere between pie crust and toasted pecans and brown sugar. Which, in my opinion, is quite lovely.

I am thankful this pie only appears a few times a year, even though my daughter continues to ask when the next pie is being made (she had to share this one with the family), I am reticent to make it only because it is a serious temptation. As in, let the dog out in the middle of the night and grab your fork temptation.

I hope you enjoy this recipe, and as always, thank you for coming to the table!

Chrissy

Click below for a printable recipe.

Print

Chocolate Bourbon Pecan Pie

Print Recipe

A delicious combination of melted chocolate and pecan pie come together in this dessert! Perfect with a dollop of fresh whipped cream.

  • Author: chrissy@mythankfultable.com

Ingredients

Scale
  • 1 Unbaked Pie Shell
  • 1 Cup Chopped Pecans
  • 1 Cup White Granulated Sugar
  • 1 Cup Dark Corn Syrup
  • 1/2 Cup Butter
  • 4 Eggs, beaten
  • 1/4 Cup Bourbon
  • 1 1/2 Teaspoon Vanilla Extract
  • 1/4 Teaspoon Salt
  • 6–8 Ounces Chocolate Chips

Instructions

  1. Preheat oven to 325*
  2. In a saucepan, combine corn syrup, sugar, butter, and cook over medium heat, stirring constantly until butter is melted, sugar is dissolved, and ingredients are combined.
  3. Cool mixture slightly.
  4. In a large bowl, whisk eggs, vanilla extract, bourbon, and salt.
  5. Slowly pour melted sugar and corn syrup mixture into egg mixture, whisking constantly.
  6. When combined, add pecans and chocolate chips.
  7. Pour into pie shell and bake for 45-60 minutes, depending on your oven. You want to check- give the pie a little jiggle and see if the inner part of the pie has set.

Did you make this recipe?

Share a photo and tag us — we can't wait to see what you've made!

Posted in: Dessert, Recipes Tagged: Bourbon, chocolate, chocolate bourbon pecan pie, dessert, pecan, Pecan Pie, pie

Homemade Sea Salt Caramel

November 28, 2017 by chrissy@mythankfultable.com

Homemade Sea Salt Caramel

The idea that you can take plain old white sugar and transform it into something as magical as caramel is somewhat daunting and yet it called out to me.

Come to find, it wasn’t really that difficult. I did require that I was organized, had my ingredients ready to go, and stayed present in the process.

Granulated Sugar About to Become Caramel

It’s actually pretty simple. Sugar in a pan, stir as it transforms into an amber liquid (which is really kind of mad science chemistry and a lot of fun without the idea of noxious gasses or flames). Add butter, Add Cream. Add Sea Salt.

Yup, there you have it. The result is this amazing slightly salty caramel goodness that has found it’s way into my coffee, apple pie, my daughter’s breakfast, and there is enough left over to store in the fridge for something yummy in the near future.

Melted Sugar

This recipe is originally from www.sallysbakingaddiction.com and accompanies the Salted Caramel Pie recipe. I doubled the ingredients so I would have extra and I am glad I did. It filled a one pint jar with enough left over to use in the pie, etc.

I used a non-stick pan that is similar to wok shaped with a flat bottom. I also used a spatula and a whisk for the process. I had all of my butter cut into pieces next to me on the stove.

I didn’t remeasure my heavy cream and it was almost impossible to photograph the process- but I had helpers (Thanks Em and George) so we got it done.

Adding Butter to Melted Sugar

The sugar dissolves, and you add your butter.

Expect bubbly madness and to whisk away. So much fun. Once the sugar and butter are incorporated (this takes a few minutes of whisking but you get there.

Incorporating Butter into Melted Sugar

Ready to add Heavy Cream

At this point, you are going to slowly incorporate the heavy cream, whisking, and smiling, because you are almost done.

The last thing you add is your salt. I used Himalayan Pink Sea Salt. You can use any sea salt you prefer.

Now, I put my caramel in a mason jar because it looked pretty and was convenient. It will keep in the refrigerator for up to two weeks. It does get pretty solid and needs to be warmed up before using once it has been refrigerated but that isn’t super difficult to do.

Friends, not only was this recipe delicious and relatively easy to do (ok- moderately easy to do), I can honestly say I will be doing this again. What an awesome holiday gift to give, use on sundaes, the options are endless. If you are gift giving this tasty treat, you can keep it at room temperature for a day and it will be ok, but keep it in the refrigerator otherwise.

I hope you enjoy this recipe, and as always, thank you for coming to the table!
Chrissy

Click below for a printable recipe!

Print

Homemade Sea Salt Caramel

Print Recipe

Original recipe from www.sallysbakingaddiction.com. I doubled the ingredients to have extra on hand!

  • Author: chrissy@mythankfultable.com

Ingredients

Scale
  • 2 Cups Granulated White Sugar
  • 12 Tablespoons Salted Butter, cut into Tablespoon-sized pieces.
  • 1 Cup Heavy Cream
  • 2 Teaspoons Sea Salt

Instructions

  1. Slowly dissolve sugar in a sauce pan over medium heat. Stir constantly with either heat resistant spatula, wooden spoon, or whisk.
  2. Sugar will transform into clumps, then melt down. An amber colored, thick liquid is the stage where you want to proceed.
  3. Add pats of butter to melted sugar, careful to watch-the butter will cause the sugar to bubble rapidly. Continue to stir/whisk until butter and sugar are incorporated.
  4. Very slowly incorporate the heavy cream, stirring the whole time. Again, watch for bubbling when this stage happens.
  5. Allow the mixture to boil for one minute.
  6. Remove from the heat and stir in the salt.
  7. Allow to cool before putting in a jar or using.

Did you make this recipe?

Share a photo and tag us — we can't wait to see what you've made!

Posted in: Dessert, Recipes Tagged: Caramel, Homemade Caramel, Sea Salt Caramel

Salted Caramel Apple Pie

November 28, 2017 by chrissy@mythankfultable.com

Salted Caramel Apple Pie

I wish I could tell you that I do everything right the first time. That, without flaw, I tackle projects, and recipes, and parenting, and life in general with the best possible attitude and right mindset. I don’t.

I know the right thing to do, and I even do the right thing a lot of the time, but sometimes…there is that nagging, grumpy feeling that just plain honestly feels good to indulge in.

I recently asked my good friend how it is even physically possible for me to live in this “totally blessed” mindset (Which I do). And simultaneously live in a “grumpy” mindset. (Which sometimes, I do).

Please don’t miss the excessive lemon zest. My bad.

I have a very thin filter, and at this point in my life I am kind of transparent about how I feel on things. I just don’t have the time to fake it. Life is too short. I am not talking about slaying someone over something minuscule. Big picture stuff.

If I disagree, you know.

The best advice I ever got about the holidays and divorce was from my bestie (the ricotta maker), who said, “We all navigate the holidays Chrissy, even the married people.”  That is true. We all decide to go to where and what are we bringing and when. Or, we choose to order in and stay on the couch in quiet. We navigate. Sometimes it is easy, sometimes, not so easy. Gratitude and Grumpy.

Salted Caramel Apple Pie with Lattice Crust

Which brings me to this pie. Salted Caramel Apple. Granny Smith and Macoun Apples. Lemon Zest. Salted Caramel. Flaky Crust. This pie is beautiful and I am not even an apple pie lover.

I did make the Salted Caramel and yes, it is spectacular. The apples did not mush and get runny.

The lattice was sprinkled with cookie sugar and my son, who says very little says, “I don’t know how you do this. That is really pretty.” Cue the mom tears.

So imagine my surprise when my daughter bites into it and says, “It’s kinda tangy.” “Good tangy? Sour? Bad? I mean, does the caramel balance it out?” (this is Thanksgiving and my pie is bad)?

“No mom, it’s really good, just tangy.” Lemon zest. you sneaky devil. You are the grumpy to my blessed life. So true confession? I added more lemon zest than the recipe called for. I like lemon zest. Oh well. But, it did get me thinking. It was the zing of the zest that made the pie tangy.

Salted Caramel Apple Pie

Life lesson, once in a while it’s ok to have a little grumpy with your gratitude. To say, “I am tired and may not want to do this thing.” or,

“You know what, I baked pies all day and I am not cooking supper because I am getting up tomorrow at the crack to drive.” or,

“Is this holiday going to be ok, now that some major parts of our lives are different?”

Which is the heart of this holiday for my kids.

It’s ok to feel a little sad or a little tangy. It’s not good to wallow in it. But to feel it? Yeah, that’s ok.

This Thanksgiving was wonderful, and cherished; and, it was sad. Which is fitting. A lot of people who grieve during the holidays have the additional emotions that they too have to navigate.

Salted Caramel Apple Pie

It doesn’t mean that it’s easy. It’s got a little zing. You can love the people you are with and miss the people you aren’t. You can cry when you wash the holiday dishes and think, “he/she should be here.”  It’s all a part of it.

I personally loved the tang of the extra lemon zest, and when you top the pie with salted caramel, it balances out really well. Like life. You get a little zing to balance the sweet. I used a combination of Granny Smith and Macoun apples- and the amount of flour in the mix with the apples prevented the apples from getting runny and soft. (Not a fan of apple soup in my pie crust).

I will do my best to get the salted caramel recipe up asap, as it is used in the pie as well as for topping. (The finished picture was actually my daughter’s Thanksgiving dessert). This pie, originally from www.sallysbakingaddiction.com is simply beautiful and delicious. I use my own pie crust recipe (yes, I actually make pie crust on the holidays…) but the lattice I brushed with egg wash and sprinkled with decorating sugar, like the original recipe calls for.

Although our Thanksgiving was a “first” in many ways, the mix of bitter-sweet made the holiday. We loved on family, sat with friends, and said goodbye to some parts of who we used to be. Life is a gift. Thankful hearts, both blessed and grumpy, are still thankful. And hey, nobody wants a super sweet apple pie, anyway. That’s all about balance. Big hug friends!

I hope you enjoyed this recipe, and as always, thank you for coming to the table!

Chrissy

Click below for a printable recipe.

Print

Salted Caramel Apple Pie

Print Recipe

Delicious chunks of apple with lemon zest and salted caramel. Original recipe from www.sallysbakingaddiction.com

  • Author: chrissy@mythankfultable.com

Ingredients

Scale
  • Two pie crusts (lattice is optional but you will want two)
  • homemade salted caramel sauce (I made mine but you can use purchased caramel- I won’t tell)
  • 10–12 Cups Peeled and Sliced Apples -I used four Granny Smith and three Macoun. I kept my apple slices relatively 1/2 in slice- not super thin and not super chunky. Every apple pie lover likes their apples a certain way- you do you!
  • 1/2 Cup Granulated Sugar
  • 2 Teaspoons Fresh Lemon Zest. (I used at least 2 tablespoons. I zested the whole lemon)
  • 1/4 Cup fresh Lemon Juice (I used the juice from the lemon I zested)
  • 1/4 Cup flour
  • 1/4 Teaspoon Ground Cloves
  • 1/4 Teaspoon Nutmeg (I used my microplane and ran the nutmeg over it a few times)
  • 1 and 1/2 Teaspoon Ground Cinnamon

Egg Wash:

  • 1 Egg beaten with 1 Tablespoon Water or Milk
  • Decorating Sugar for sprinkling on top pie crust after egg wash

Instructions

  1. Place apple slices in a bowl with lemon zest, lemon juice, sugar, and spices. Toss to combine.
  2. Roll out pie crust and place dough in pie dish.
  3. Fill pie dish with apple mixture. This will be a fairly large mountain of apples, but that’s what we are going for. Drizzle 1/2 Cup of Salted Caramel mixture over apples. (So pretty).
  4. Cover apples with remaining pie crust.
  5. For Lattice- measure and cut out strips of pie crust dough with a pastry cutter or knife (I use an old tortellini cutter – it has a rippled edge that I like and it is about a million years old).
  6. I start my lattice by securing one side of strips to the pie, then weaving the second side over and under the established strips. Then trip excess crust dough and pinch edges for a pretty finish.
  7. Brush with egg wash, then sprinkle decorative sugar.
  8. Bake in a 400* oven for 20 minutes, then reduce the heat to 350 and bake for an additional 40-50 minutes. When baking pie, don’t wander to far, you want to watch your crusts to make sure they don’t get too brown. You can tent your edges with foil if crust is getting browner than you would prefer.
  9. Allow Pie to cool. Drizzle additional Salted Caramel over each slice when serving.

Did you make this recipe?

Share a photo and tag us — we can't wait to see what you've made!

Posted in: Dessert, My Story, Recipes Tagged: Apple, Apple Pie, Caramel, pie, Salted Caramel, Salted Caramel Apple Pie

Chicken Sweet Potato Wild Rice Soup

November 23, 2017 by chrissy@mythankfultable.com

Chicken Sweet Potato Wild Rice Soup

My name is Chrissy, and I am a soup lover. There, I said it. There is nothing more comforting to me than a bowl of soup, with maybe a side salad, and warm, fresh bread. Throw a pat of butter into the mix and I am one spectacularly happy woman.

Now, I know soup is not everyone’s thing. Especially my son. Who wonders why his mother turns everything into soup.

Organic Wild Rice

But when you purchase a beautiful organic container of wild rice, and butternut squash is in full season at the farmer’s market, you marry the two with some chicken and fresh vegetable and call it a crock pot soup kinda day.

This recipe does require a little prep work, but then you are putting all of the ingredients into the crock pot and walking away, so over all the work is not overwhelming. I am also not a fan of touching raw meat, so the cutting up of the chicken is minimal.

Wild Rice Chicken Butternut Squash Soup

This recipe embodies all that is wonderful about fall. The chunks of squash retain their shape and yet are soft to the tooth. The chicken pieces fall apart and are so tender. Wild rice adds a unique flavor and color- and bonus, absorbs the moisture of the broth the longer you let it sit.

I warmed this soup up a few days later and it was almost risotto like in consistency, which was a pretty amazing happy little accident. You can always add additional broth to the soup if that happens and it is not up to your tastes. As for me, I added shaved parmesan cheese to the reheated soup and spooned my way to bliss.

Wild Rice Chicken Butternut Squash Soup.

I kept the spices for this soup basic, but you really could add sage or any other poultry seasoning to this soup. I used salt and pepper and left it at that.

Put all of the ingredients on low and cook for 6-8 hours, when the chicken, squash, and rice is cooked through. This soup is simple and lovely. I am even thinking it would work with left over turkey and shorten the cooking time.

In a season of gratitude, and typically abundance of food, simple is sometimes the best way.

Reheated soup has a thicker consistency!

I know on a Thursday (Friday Junior) or Friday night, a simple meal can mean we don’t do fast food or take out food. So healthy and easy can be a huge win. I wish for you healthy and simple and easy at least one night for supper this week!

I hope you enjoy this recipe, and as always, thank you for coming to the table!
Chrissy

Click below for a printable recipe!


Print

Chicken Sweet Potato Wild Rice Soup

Print Recipe

Delicious chicken and wild rice soup with chunks of delicious butternut squash.

  • Author: chrissy@mythankfultable.com

Ingredients

Scale
  • 1 Lb Chicken Breast, cubed into 1” cubes
  • 1/2 Onion (I used sweet white) chopped
  • 3 Cups Butternut Squash Cubed
  • 1 Stalk Celery Chopped
  • 1 Cup Chopped Carrots
  • 64 Ounces Chicken Stock
  • 1 1/2 Cup Wild Rice Blend
  • 1 Teaspoon salt
  • 1 Tablespoon Pepper

Instructions

  1. Chop all vegetables, and cube chicken.
  2. Place chicken, vegetables, and chicken stock into crock pot.
  3. Add wild rice.
  4. Cover and cook on low for 6-8 Hours.

Did you make this recipe?

Share a photo and tag us — we can't wait to see what you've made!

Posted in: crockpot, Recipes, soup Tagged: chicken soup, Chicken Sweet Potato Wild Rice Soup, crock pot, soup, sweet potato, wild rice

Brown Sugar Frosted Pumpkin Bars

November 22, 2017 by chrissy@mythankfultable.com

Brown Sugar Frosted Pumpkin Bars

I wanted to write about this recipe long before now- because it seems pumpkin has a life of between late august and late November. Once Pumpkin Pie has taken center stage at Thanksgiving, it get pushed back into the back of the pantry and recipe lists. I love a bar cookie, and this fits the bill. Its a dense pumpkin cake bar with a brown sugar frosting, read: LOVE. It isn’t too sweet, and the pumpkin flavor is accented with all of the great spices that go with it, cinnamon, nutmeg, and ginger. The bars are easy to assemble, mixing in one bowl, and the frosting is also relatively easy. You could actually make the bars without the frosting and they resemble a less spicy gingerbread with pumpkin shining through.

These were made for a fall party and they were a hit. I also liked that it was another excuse to cook with pumpkin and feature it NOT in a pie.

The original recipe is from www.handletheheat.com and I tinkered with the recipe to use all of the pumpkin I had in my container. I purchased organic pumpkin, and there was enough left over that I increased the amounts. If you wanted to try to make this gluten free, I don’t think it would impact the end result of the pumpkin bars. I used regular flour, but the density would remain the same.

On the side of frosting, I did follow the recipe exactly, and felt it could have used more confectioner’s sugar to be a thicker, lighter more frosting-er frosting. However, when you make a frosting with two types of sugar, the last thing you want to add is more sugar, especially when the bars themselves are healthy(er than usual recipes you see here).

These held their shape when packing into lunches, and stayed moist for almost a week in a sealed container, which is pretty amazing when it comes to dessert!

I hope you enjoy this recipe, and as always, thank you for coming to the table!

Chrissy

Click below for a printable recipe!

Print

Brown Sugar Frosted Pumpkin Bars

Print Recipe

Pumpkin bars frosted with a brown sugar frosting! Recipe adapted from Handle the Heat’s Pumpkin Bars with Brown Sugar Frosting.

  • Author: chrissy@mythankfultable.com

Ingredients

Scale

Pumpkin Bars:

  • 1 3/4 Cup Pumpkin Puree
  • 2 1/4 Cup Flour
  • 14 Tablespoons (I stick and 6 Tablespoons) Butter, melted
  • 2 Teaspoon Cinnamon
  • 3/4 Teaspoon Ground Ginger
  • 3/4 Teaspoon Ground Nutmeg
  • 1/2 Teaspoon Salt
  • 3/4 Teaspoon Baking Soda
  • 1 Cup Packed Dark Brown Sugar
  • 2 Large Eggs
  • 1 Tablespoon Vanilla Extract

Brown Sugar Frosting:

  • 1 Stick (8 Tablespoons) Butter
  • 1/4 Cup Dark Brown Sugar
  • 1/2 Teaspoon Cinnamon
  • 1/8 Teaspoon Salt
  • 1 1/2 Cups Confectioner’s Sugar
  • 1/2 Teaspoon Vanilla Extract
  • 1 + Tablespoon of Milk (more if needed)

Instructions

  1. Line a 9×13 Pan with parchment paper.
  2. Preheat oven to 350*
  3. Combine Flour, cinnamon, ginger, nutmeg, baking soda, and salt in a bowl. Whisk to combine.
  4. In a mixer, combined butter, brown sugar, egg, vanilla, and pumpkin puree.
  5. Gently add flour mixture to pumpkin mixture.
  6. Pour batter into prepared pan.
  7. Bake at 350* for 25-30 minutes or until tester comes out clean from center of pan.
  8. Cool

To make frosting:

  1. In a mixer, combine butter and sugar until light and creamy.
  2. Add cinnamon, salt and gradually add confectioner’s sugar.
  3. When all of the ingredients are combined, add milk and vanilla, until frosting is the right consistency.
  4. Frost pumpkin bars with frosting. Cut into squares or bars.

Did you make this recipe?

Share a photo and tag us — we can't wait to see what you've made!

Posted in: bread, Dessert, Recipes Tagged: Bar Cookie, Brown Sugar, Brown Sugar Frosting, frosted bar cookie, Pumpkin, Pumpkin Bars

Chocolate Peppermint Thumbprint Cookies

November 22, 2017 by chrissy@mythankfultable.com

Chocolate Peppermint Thumbprint Cookies

This is the quintessential Christmas cookie. Chocolate, peppermint, little hints of candy cane and red and white stripes. Come on, pop in that Christmas playlist and make a batch. Ya know you want to.

I love these cookies because they are easy to mix up, refrigerate, roll into balls, and bake for ten minutes.

Peppermint Kisses

There is a combination of peppermint in the dough as well as the candy cane Hershey kiss, (yes, I buy these as soon as they come out because last year I couldn’t find them). I make mine smaller because I think the peppermint is a big taste, and a big peppermint cookie may be too much of a good thing.

They freeze nicely, so if you are looking to get a batch of cookies underway for your cookie trays, this is a nice recipe. It is originally from www.smalltownwoman.com ‘s website. I changed the amount of peppermint extract and other than that, they are perfect as is.

Chocolate Peppermint Cookies awaiting a Kiss!

They also look SO PRETTY. I am a mint chocolate chip ice cream gal so this recipe is right up my alley. And hey, cookie trays need to be about variety. I will place these cookies along side a white chocolate raspberry cookie, a bar cookie, a Mexican hot chocolate cookie, and it meets all palettes.

These cookies are just enough sweet and chocolate and peppermint to satisfy the Christmas spirit in everyone. Turn the Hallmark channel on (I have to confess it is not my thing but seems to be the respite of EVERYONE around me), prop your feet up, and eat the cookie. 

One note, I use Dark Cocoa Powder. I like the consistency, and I like a chocolate cookie to be really chocolatey. It is usually found right next to the regular cocoa and for me, I like it better. I do also use Dutch Processed Cocoa from Penzey’s and Trader Joe’s has a really good cocoa as well.

I love how these bring together a dynamic duo of peppermint and cocoa, and how they have that extra special touch of the striped kiss. I will warn you the kiss melts quickly and you need to leave them alone for a while until they set. (Read: temptation central).

I hope you enjoy this recipe, and as always, thank you for coming to the table!

Chrissy

Click below for a printable recipe

Print

Chocolate Peppermint Thumbprint Cookies

Print Recipe
  • Pepperminty chocolate cookie with a peppermint kiss in the middle! Original recipe from www.smalltownwoman.com
  • Author: chrissy@mythankfultable.com

Ingredients

Scale
  • 8  Tablespoons/ 1/2 Cup of Butter
  • 1/2 Cup White Sugar
  • 1/2 Cup Brown Sugar
  • 2 Eggs
  • 2 Teaspoons Peppermint Extract
  • 1 1/2 Cup Flour
  • 2/3 Cups Dark Cocoa Powder
  • 1/4 Teaspoon Salt
  • 1/4 Teaspoon Baking Powder
  • 1/4 Teaspoon Baking Soda
  • One Bag unwrapped Peppermint Kisses

Instructions

  1. In a mixer, cream together butter and both sugars until fluffy.
  2. Add eggs one at a time until incorporated.
  3. Add in peppermint extract.
  4. Add Cocoa Powder.
  5. Add Salt, Baking Powder, Baking Soda, then flour, scraping down the sides of the bowl.
  6. Wrap dough in parchment paper or Saran Wrap and refrigerate for a few hours or overnight.
  7. Scoop chilled dough and roll into balls.
  8. Place on a parchment or silpat lined baking sheet.
  9. Bake cookies for 10 minutes at 325*
  10. Leaving cookies on the baking sheet, press one peppermint kiss into each cookie.
  11. After a few minutes, remove carefully to parchment paper lined surface or cooling racks.
  12. Allow peppermint kisses to re-harden before serving.

Did you make this recipe?

Share a photo and tag us — we can't wait to see what you've made!

Posted in: Cookies, Recipes Tagged: Candy Cane, chocolate, Chocolate Peppermint Thumbprint Cookies, Christmas Cookie, Cookies, Hershey kiss cookies, Minty, Peppermint

Apple Walnut Raisin Slaw

November 21, 2017 by chrissy@mythankfultable.com

Fresh Chopped Apples

For me, Thanksgiving is ALL ABOUT THE SIDES. I enjoy a turkey sandwich the next day, but really, my plate is filled with the sweet potato casserole, the Swiss vegetable medley, the cranberry sauce my mother makes, and the rest of the sides. My Thanksgiving table is 80% vegetables, 15% Turkey, and 5% bread/starch. Bring on the side dishes. I don’t care that I have four green vegetables and two orange vegetables, I just want the leftovers.

This side dish is easy, and not unlike another one I have posted- but it includes dried cranberries, golden raisins, walnuts, and shredded cabbage in addition to chopped apples. It has a great combination of chew to crunch, sweet to tart, and healthy too. I do purchase the pre-shredded cabbage, and I purchase the finest shred I can.

Apple Walnut Raisin Slaw

I know Santa is bringing me a shredder attachment for my KitchenAid for Christmas, and perhaps I will shred my own cabbage then (Ah the beauty of being a single mom and picking out your gift for the kids to give you). I made a basic Cole slaw dressing with almost no sugar, and actually, the sweetness of the craisins and raisins make it possible to eliminate all sugar.

This salad is really nice with poultry or meatloaf, or any time you need something different. Especially when apple season makes apples so abundant.

This also makes for a great salad topper. As in, the next day you can fill a container with the lettuce or greens of your choice, and scoop the leftovers of this salad on top. you have variety, additional crunch, and built in dressing.

I know not every recipe needs to be complicated- but on a scale of one to ten this is a one. Chopping the apples is the hardest part, and truth be told, measuring the nuts and raisins are optional. This is one of those “toss in a handful” recipes in real life and “measure” in blog life.

I hope you enjoy this recipe, and as always, thank you for coming to the table!
Chrissy

Click below for a printable recipe.


Print

Apple Walnut Raisin Slaw

Print Recipe
  • 2 large Apples, Chopped
  • 1 Cup Shredded Cabbage/Coleslaw Mix
  • 1/2 Cup Walnut Pieces
  • 1/8 Cup Golden Raisins
  • 1/8 Cup Craisins
  • 1/4 Cup Apple Cider Vinegar
  • 1/4 Cup Miracle Whip/Mayonaise
  • 2 Tbsp Sugar
  • Author: chrissy@mythankfultable.com

Ingredients

  1. Chop Apples into bite sized pieces.
  2. Mix Apples, Cabbage, Walnuts, Craisins, and Raisins together in a bowl.
  3. In a separate bowl, mix Miracle Whip, Apple Cider Vinegar, and Sugar together.
  4. Toss vegetable mixture with dressing mixture until combined.
  5. Refrigerate and serve.

Did you make this recipe?

Share a photo and tag us — we can't wait to see what you've made!

Posted in: Recipes, side dish Tagged: Apple, apple walnut raisin slaw, cabbage, Coleslaw, raisin, side dish, Walnut

Pioneer Woman’s Peanut Butter Pie

November 21, 2017 by chrissy@mythankfultable.com

Peanut Butter Pie

Peanut, peanut butter…I used to think peanut butter pie was really hard to make. Truth be told, it is the easiest pie I make. It is my go -to stand-by for school breakfasts. Every Friday we (the teachers) eat breakfast together at my school. It’s a critical part of our love language. On shorter weeks, we find a way to have breakfast anyway (this pie is actually for our Friendsgiving Breakfast today).

Peanut Butter Mixture

With Thanksgiving around the corner I will be making this again on Wednesday, and although it isn’t my favorite, it will disappear (That’s the power of peanut butter and chocolate). Is it complicated? Not really. Is it a given people will be excited about it? Unless they have a nut allergy, the answer is a resounding yes.

So the truth of peanut butter pie is this: You put a block of cream cheese and a cup of peanut butter in the mixer and whip until well blended. Then add 1 and 1/4 Cup of confectioner’s sugar.

The consistency of the middle of a peanut butter cup is the end result. Resist the urge to eat this filling at this point.

Peanut Butter Cloud

Then take a whole tub of cool whip or whipped topping, add it to the peanut butter mixture and whip that filling until a light, peanutbuttery cloud is what you’ve created.

It has the consistency of a thicker, gooey chocolate mousse except, it isn’t chocolate, and your entire kitchen smells like a peanut butter bomb went off. Scent saturation!

The hardest part of the recipe is in the making of the Oreo crust (pulverize oreos and combine with butter and press into a pie plate). Which is a little work – until I found out that you can BUY A PREMADE OREO CRUST. Hello game changer. I will not be making a crust this time. I will be buying it forever more. I removed the pie crust’s plastic cover, spooned the filling into the pie shell.

Easy Way Out

It could be over at this point. People would still love your peanut butter pie. HOWEVER. I chop up some peanut butter cups and sprinkle them around the edges. Because, yes please. It is pretty. It also makes for a yummier treat.

For all my peanut butter loving friends out there I recommend this recipe. It is the Pioneer Woman’s Peanut Butter Pie. The only thing I did was add peanut butter cups on top and cheated the dessert gods and bought my crust. And for those two things, my heart is thankful.

There is still time for you to grab these ingredients and whip up this pie treasure. No go and make some peanut butter clouds of your own!

I hope you enjoy this recipe, and as always, thank you for coming to the table!
Chrissy

Click below for a printable recipe!

Print

Pioneer Woman’s Peanut Butter Pie

Print Recipe

Delicious peanut butter pie from the Pioneer Woman’s recipe.

  • Author: chrissy@mythankfultable.com

Ingredients

Scale
  • 1 Cup Smooth Peanut Butter
  • 1 8 Ounce Block of Cream Cheese
  • 1  1/4 Cup Confectioner’s Sugar
  • 1 Container of Cool Whip or other whipped topping
  • 25 Oreo Cookies
  • 4 Tablespoons of Butter, melted
  • 10 Miniature Peanut butter cups, chopped

Instructions

  1. In a food processor, pulse 25 Oreos until; pulverized and the white cream centers of the cookie are incorporated into the chocolate part.
  2. Pour four tablespoons of melted butter over the crushed Oreos.
  3. Press Oreo mixture into a pie plate.
  4. Bake in a 350* for 5-7 minutes.
  5. In a mixer, combine cream cheese and peanut butter until combined and smooth.
  6. Add confectioner’s sugar and combine.
  7. Add entire container of Cool Whip and continue to mix on a high speed until light and fluffy.
  8. Spoon peanut butter mixture into pie crust.
  9. Sprinkle crushed peanut butter cups on edges.
  10. Refrigerate until chilled through and serve.

Did you make this recipe?

Share a photo and tag us — we can't wait to see what you've made!

Posted in: Dessert, Recipes Tagged: chocolate peanut butter pie, cool whip, Oreos Oreo crust, Peanut Butter, peanut butter cup pie, peanut butter pie

Peanut Blossom Cookies

November 20, 2017 by chrissy@mythankfultable.com


Peanut Blossom Cookies

I am a word collector. Quotes, inspirational sayings, prayers, poems, old samples of handwriting, and, you guessed it…recipes. 

This recipe comes from a student’s mom from long ago, and the actual recipe card is a type written paper circa 1998. That’s not an “old” recipe, but it’s old when I consider who I was when it was given to me, newly married, no kids, transplanted from Massachusetts to Pennsylvania. Some things do seem like relics, even if they are under twenty years old.

I am also not always the neatest cook, so occasionally my recipes look like they have seen better days. This recipe, which has served almost two decades of baking, is worse for wear. However, I still use it every time.

Peanut Butter Blossom, Cookies


Back to the quintessential combination of peanut butter and chocolate. I have to say, these are one of my favorite cookies – there is something about the crackle of the cookie and the soft melty Hershey kiss. These also happen to be favorites of two of my favorite men, so that makes it a regular rotation in the baking schedule.

I have seen the recipe two ways, one is where you roll the dough directly in sugar, and this way- where you dip the dough ball in egg white first, then sugar. I do it this way, because I love the crackle the egg white finish gives to the cookie when you smoosh the kiss in. (Smoosh is a word, right?)

No matter the condition of the recipe card, the cookies are delicious and the words remind me of the student who sat in my classroom so many years ago. She’s a momma now, no doubt making these cookies for her little boy too.

In this week of being thankful for so many, I am so happy that this mindset of gratitude is something I embraced so many years ago. We treat each day as a gift. Which is what it is. When I see a post from six years ago, I realize the a gratitude mindset has been the healthiest part of my life. It makes you realize all that you do have, and see the world through a much different lens. So, make these cookies, and be thankful.

I hope you enjoy this recipe, and as always, thank you for coming to the table!
Chrissy

Print

Peanut Blossom Cookies

Print Recipe

Peanut Butter Cookies with a Hershey Kiss Center

  • Author: chrissy@mythankfultable.com

Ingredients

Scale
  • 1/2 Cup Shortening
  • 1/2 Cup Peanut Butter
  • 1/2 Cup Sugar
  • 1/2 Cup Dark Brown Sugar
  • 1 Egg
  • 2 Tablespoons Milk
  • 1 Teaspoon Vanilla
  • 1 3/4 Cups Flour
  • 1 Teaspoon Baking Soda
  • 1/2 Teaspoon Salt
  • Egg White (for rolling before rolling in sugar)
  • 1 Bag of Hershey’s kisses, unwrapped

Instructions

  1. Cream together shortening and peanut butter.
  2. Add in sugars until light and fluffy
  3. Add Egg and vanilla and combine.
  4. Add two teaspoons of milk.
  5. Add dry ingredients and gradually mix.
  6. Dough can be refrigerated or used immediately. If you choose to chill, chill for two hours or overnight.
  7. Shape dough into balls.
  8. Dip dough balls into egg white, then roll in sugar. (You can skip egg white, but it gives the “crackle” finish.
  9. Bake at 325* for 10-12 minutes.
  10. Remove from oven and place Hershey kiss directly in the center, squishing down the middle and causing the cookie to “crackle.”

Did you make this recipe?

Share a photo and tag us — we can't wait to see what you've made!


Posted in: Cookies, Recipes Tagged: Cookie, dessert, Hershey kiss cookies, peanut blossom cookies, peanut butter cookies

The Thai Peanut Chicken Noodle Soup That Never Made it to Cookbook Club

November 15, 2017 by chrissy@mythankfultable.com

Thai Peanut Chicken Noodle Soup

In the last month, I have listened to Brene Brown’s Braving the Wilderness four times. Yes, four. I will also be checking it out of the local library or purchasing the actual book, because I love it that much. It all started with The Gift of Imperfection, another book I have listened to several times. I’m slightly obsessed. Did I mention that I just bought the Power of Vulnerability by her as well?

I am a reader, and like my music playlist I can’t really say I am a one genre gal. I mix it up, all the time. That said, I love a non-fiction book that combines down to earth advice, from an authentic person, and where I learn that no matter how imperfect I may be or perceive myself to be, I am still lovable. I am still grounded. I am still Chrissy. Make me laugh while I am reading it? Even better.

Because, I am extremely imperfect. This isn’t horrible life sentence, but it isn’t my ideal either.

I have this awesome quote, I am not sure who the author is, but for a while, it was on every surface I could post it:

“You will be too much for some people. Those aren’t your people.”

If you have ever felt like your personality and your ideas were bigger than your body, then you get me. I have so much that extends beyond who I am as a person. This could probably be a diagnosis in the works…but I have been living this way for a really long time. So, I understand who I am, and who I need to be. I’m also too old at this point to pretend to be somebody else.

So who I am? I am perfectly imperfect. Hey, I read once that in Japan the cracks in precious pottery are filled with gold. The imperfections are highlighted and make the piece more valuable. Sign me up for the gold fillings.

I consider myself incredibly blessed to be able to surround myself with an amazing group of people. This is monumental. I love my quiet, but I need human contact. The laugh-out-loud, share your stories, build each other up kind. Give me authentic. Give me people to laugh and cry with. Those are my people. In this circle there are my family people, my life time friend people, my sports mom people, my work people, my book club people, and my newly found library cookbook club people.

What is a library cook book club? Exactly what it sounds like. Last year my friend (who is the librarian who coordinates this club in addition to other countless great programs) invited me in October. I had already committed to another leadership committee that met monthly on the same night. So every month I would think about this club with a forlorn feeling. Finally, in June, on the last meeting of the academic year…I got to go.

Oh the joy of collaborating with a group of people you don’t know other than that they love to cook. All age groups, all different careers, coming around a table with food to share. We pick a theme or a book, select a recipe, and bring it to a potluck at the library. I get to bring food into the library. Now haters who don’t get this…realize I am a Language Arts Consultant. I teach reading. I will be heard telling students that books are treasures. So, bringing food into the library is like that childhood dream I had of getting locked into the mall overnight and being able to have free reign.

Back to book club: We discuss how we changed the recipe; we talk about the flavors. We are there until the other librarian comes back to kick us out. It is A-MA-ZING. and I get to go.

Thai Peanut Chicken Noodle Soup

This month the pick was from 365 Slow Cooker Suppers by Stephanie O’Dea. Now, if you are like me, when you present your food at any event, you want it to be stellar. Especially if it is at a cookbook club. Specifically if you have a food blog.

So, imagine my total dismay when even though I got up early to prep, and make this recipe, and leave it on low for the time it would take to cook in time for me to add the noodles and go to cookbook club…I get home and realize I NEVER PLUGGED THE CROCKPOT IN. Turned it on, but never. plugged. it. in.

Total shame. If imperfection had a sound track. Man, I would be lead singer.

I sent an emergency ALL CAPS TEXT to the coordinator.  CROCKPOT WASN’T PLUGGED IN!

Her response? “That happens, come anyway.”

Emergency run to the grocery store to buy baked goods that someone else made so I could at least show up with dessert. Even though I blog about desserts, all the time.

That being said, and all shame aside…the cookbook club was ever so gracious. They accepted that I was imperfect and welcomed me to their table and ate my store bought babka. I was humbled but I was blessed. Sometimes, we just fall short. We fall short and we make amends and life goes on.

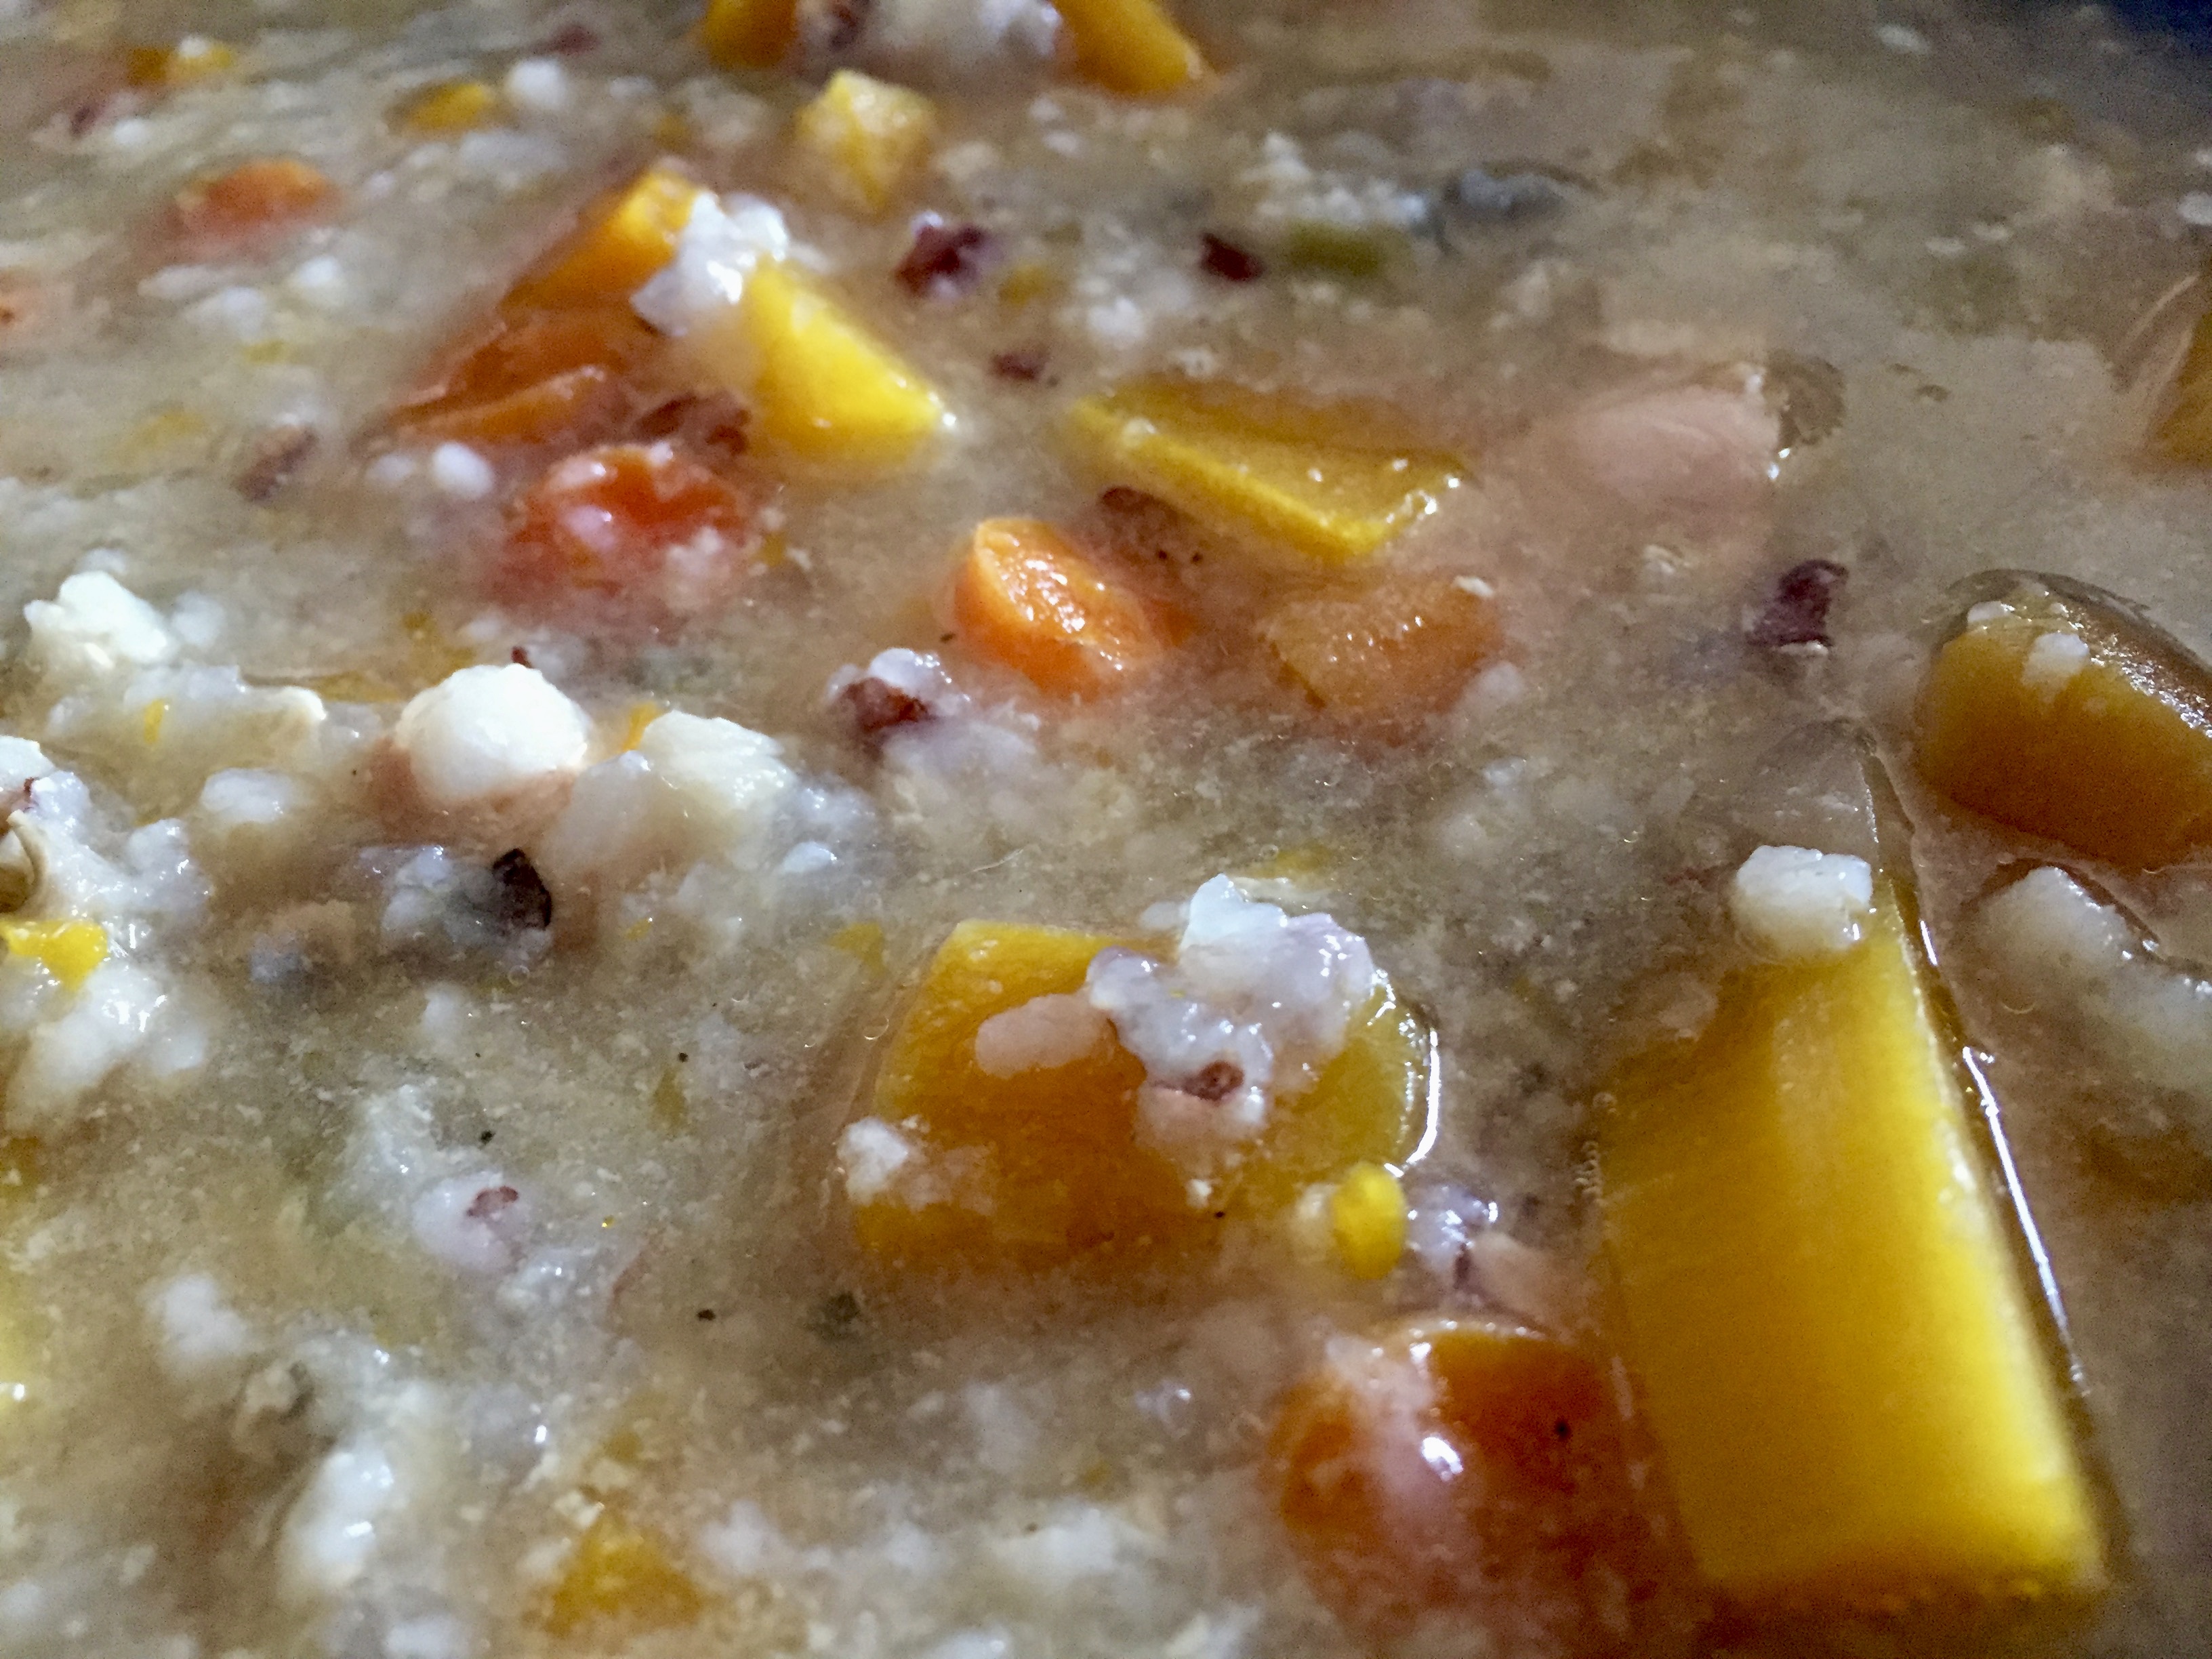
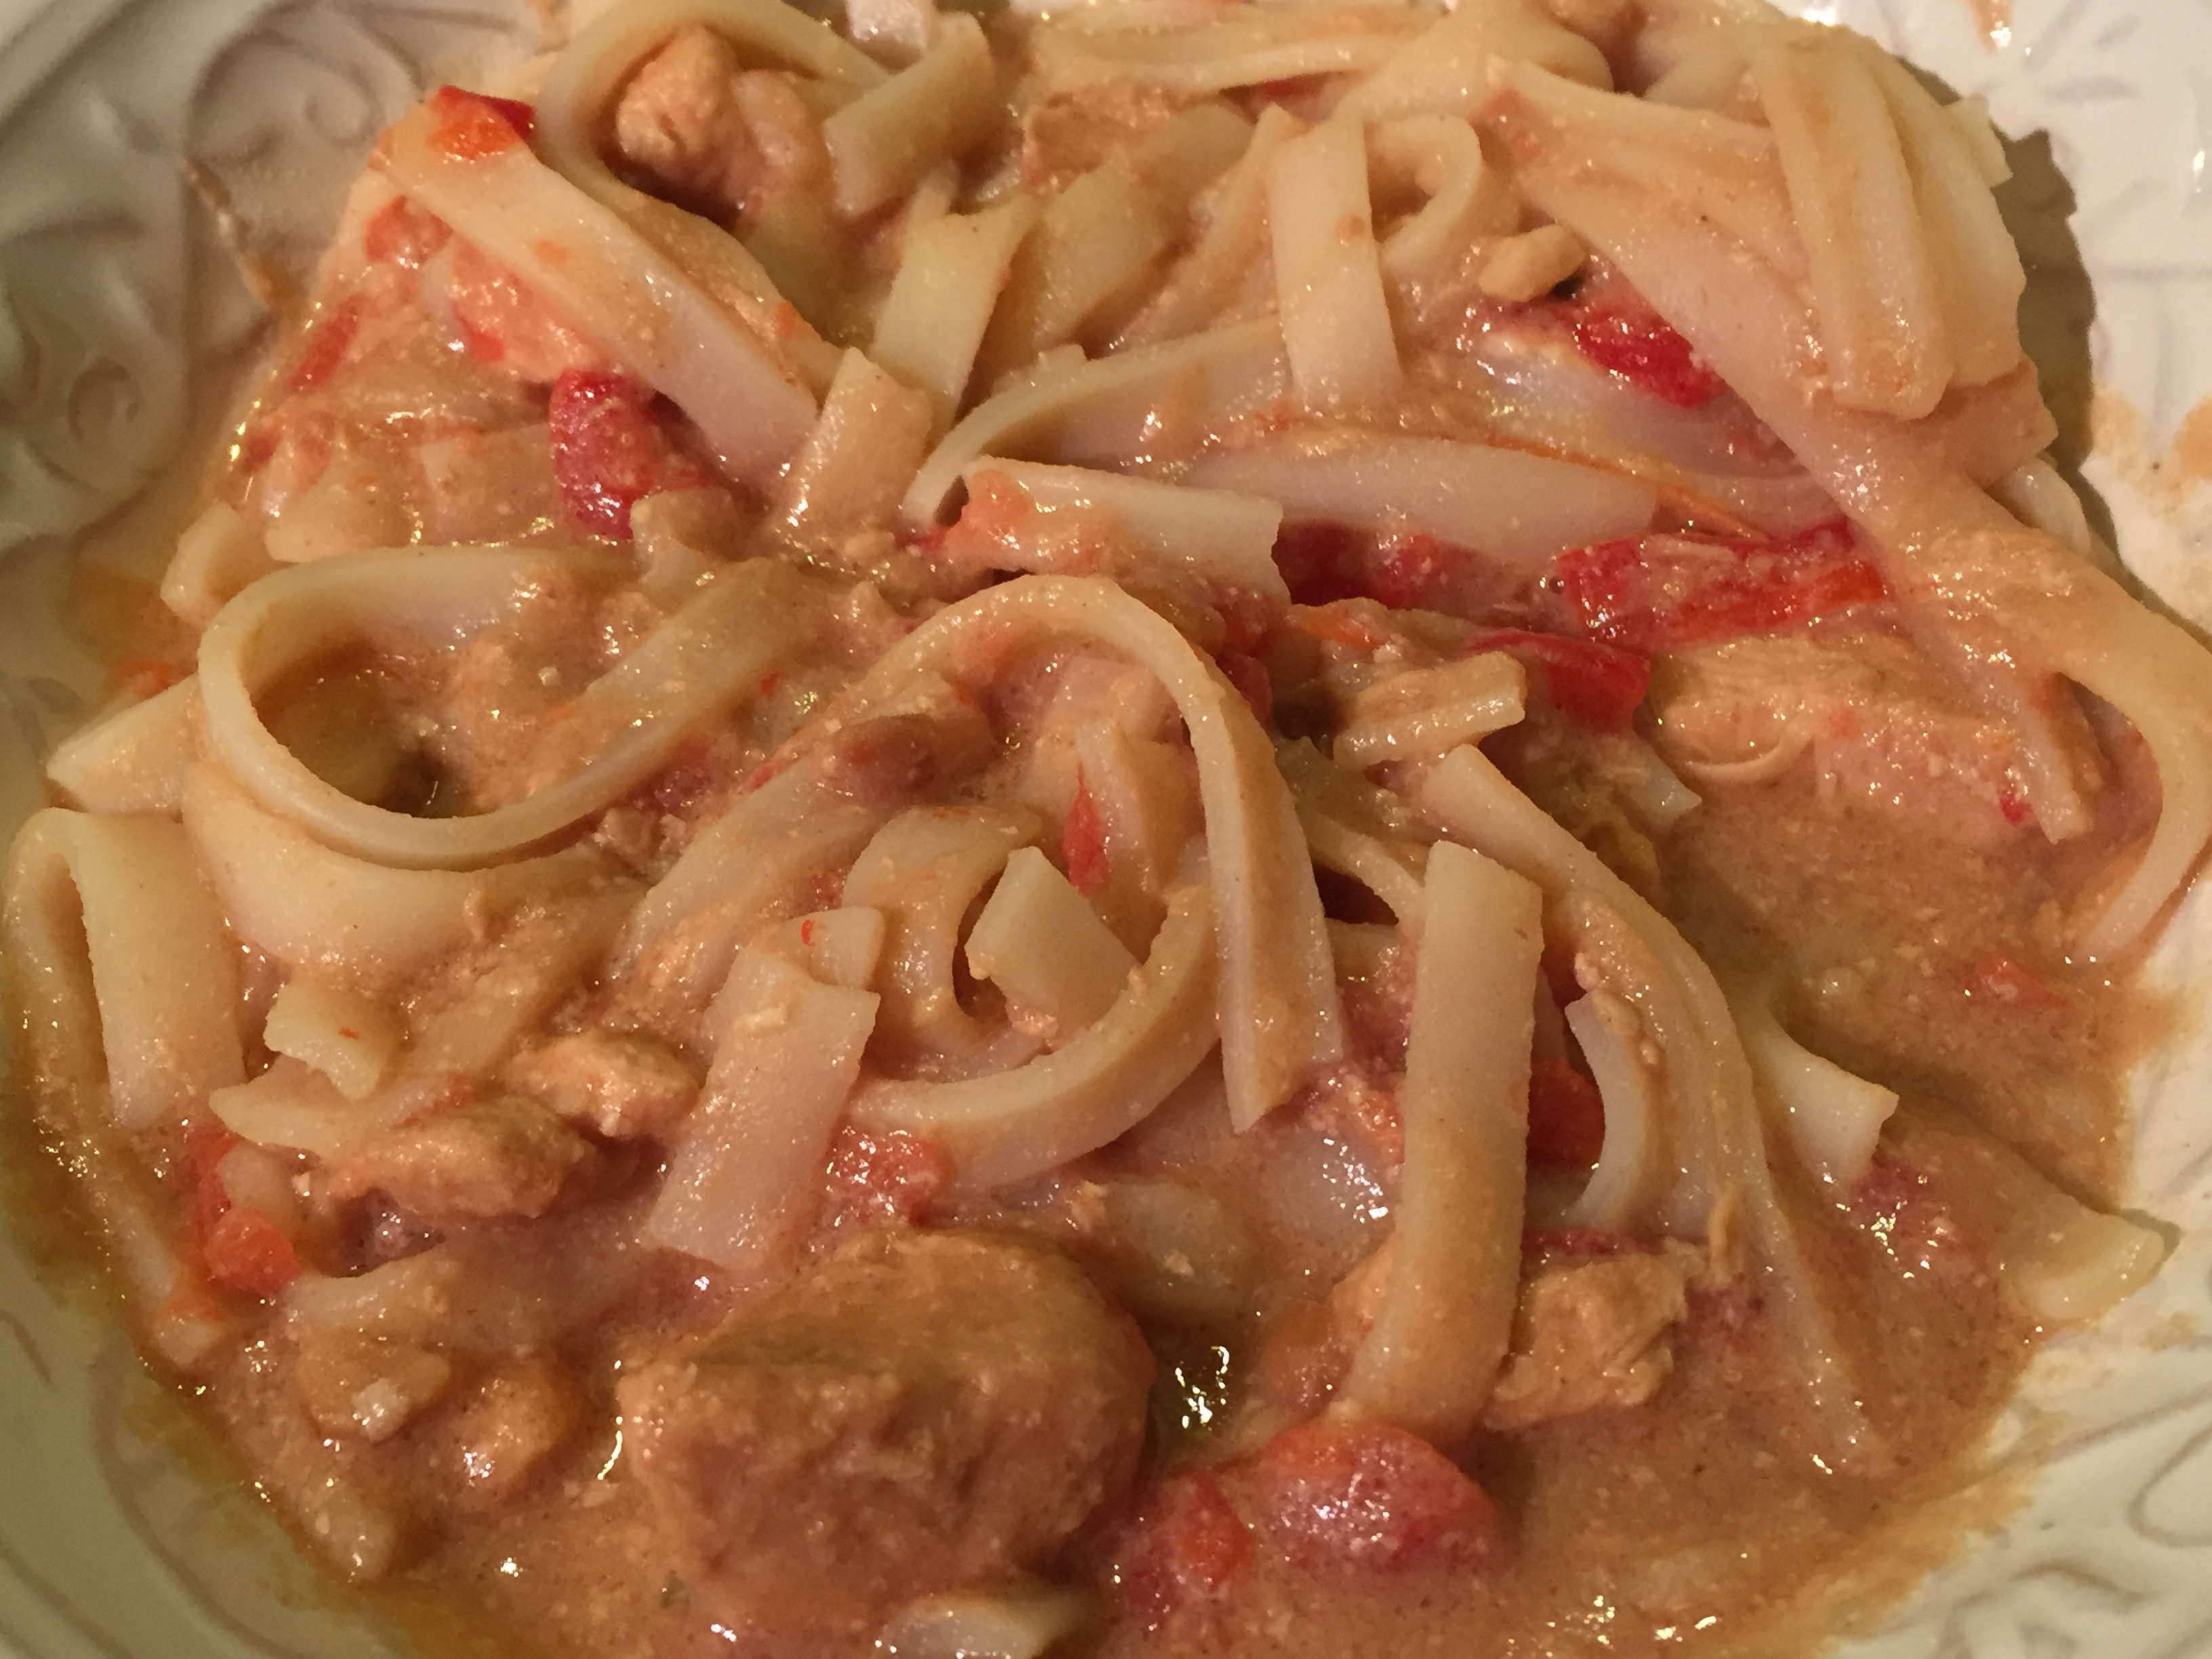
This soup, which ended up being more of a noodle dish because I added so many more noodles, was delicious. Peanut chicken, with red peppers, and a little spice, and rice noodles that absorb the broth the longer you cook it.

So easy, so quick to prepare. Most of the ingredients I already had in my pantry, I didn’t find bean sprouts, so I left them out of mine. The hardest part of the recipe is cubing the chicken and slicing the red peppers. Everything else is thrown into a crock pot and left to cook. At the final twenty minutes I put in my rice noodles, and dinner was done.

My children and I ate this dish the next day. The day after cookbook club. And, it was pretty perfect. If I can dare to say it. (I am laughing as I write this).

Next month we all will bring our favorite cookies to the cookbook club table, and boy is that a hard decision (I am a girl with a serious cookie love list). I can guarantee this, I won’t disappoint. Those cookies will be stellar, and I will blog about them as well. But for today, I will rest in the fact that this soup is good the day after you are supposed to share it, and cookbook club people are very kind. In fact, if you look for kindness, you will find it almost anywhere. I may not be perfect, but I can be kind.

I hope you enjoy this recipe, and as always, thank you for coming to the table!

Chrissy

Click below for a printable recipe!

Print

The Thai Peanut Chicken Noodle Soup That Never Made it to Cookbook Club

Print Recipe

This delicious take on peanut chicken makes an easy and hearty crock pot meal! From 365 Slow Cooker Suppers by Stephanie O’Dea (Page 52)

  • Author: chrissy@mythankfultable.com

Ingredients

Scale
  • 1 pound boneless, skinless chicken, cut into 1/2 inch pieces
  • 1 14.5 ounce can diced tomatoes, undrained
  • 1 red bell pepper, seeded and sliced thinly
  • 1 Cup bean sprouts
  • 3 green onions, thinly sliced
  • 1 (2 inch) piece fresh ginger, peeled and grated
  • 4 garlic cloves, minced
  • 4 Cups chicken broth
  • 1/2 Cup smooth, all natural peanut butter (I upped my amount of peanut butter to 1 Cup)
  • 1 Tablespoon fish sauce
  • 1 Tablespoon soy sauce
  • 1 Teaspoon sesame oil
  • 1 6 ounce package of rice noodles, rinsed. (I used a larger package of noodles)

Instructions

  1. Use a six quart slow cooker. Place chicken, tomatoes, bell pepper, bean sprouts, green onions, ginger and garlic into insert. Stir in broth, peanut butter, fish sauce, soy sauce, and oil. The peanut butter will still be clumpy-don’t worry about it. Cover and cook on low for 7-8 hours. Stir well and drop in the rice noodles. Cover and cook for an additional 20-30 minutes. Until noodles are bite tender. Serve in large bowls with chopped peanuts, cilantro, lime, if desired.

Did you make this recipe?

Share a photo and tag us — we can't wait to see what you've made!


Posted in: crockpot, crockpot, soup Tagged: Chicken Noodle Soup, crock pot, soup, Thai Peanut Chicken Noodle Soup, Thai Soup
« Previous 1 2 3 4 5 6 7 8 9 10 11 12 Next »

Recipe Search

Recent Posts

  • Fluffernutter Cookies…You Heard Me April 12, 2024
  • On Nests July 30, 2023
  • Lemon Rosemary Shortbread Cookies April 24, 2022
  • Praline Sweet Potato Pie March 22, 2022
  • Italian Ricotta Cake March 13, 2022

Recent Comments

  • Cathy Carroll on To My Daughter On Her 18th Birthday
  • Maureen / Mimi on To My Daughter On Her 18th Birthday
  • Kathy G on To My Daughter On Her 18th Birthday
  • chrissy@mythankfultable.com on Cherry Crescent Moon Cookies and Finding the Joy
  • chrissy@mythankfultable.com on Cherry Crescent Moon Cookies and Finding the Joy

Archives

Categories

  • appetizer
  • bread
  • breakfast
  • Cookies
  • crockpot
  • crockpot
  • Dessert
  • Fruit
  • My Story
  • One Pan
  • Recipes
  • side dish
  • Side Dishes
  • soup
  • Vegan

Copyright © 2025 mythankfultable.com.

Lifestyle WordPress Theme by themehit.com