mythankfultable.com

Feeding the Heart, Body, and Family

  • My Pics
  • My Story
  • The Puppies
  • Contact Us
Feeding the Heart, Body, and Family

Peanut Butter

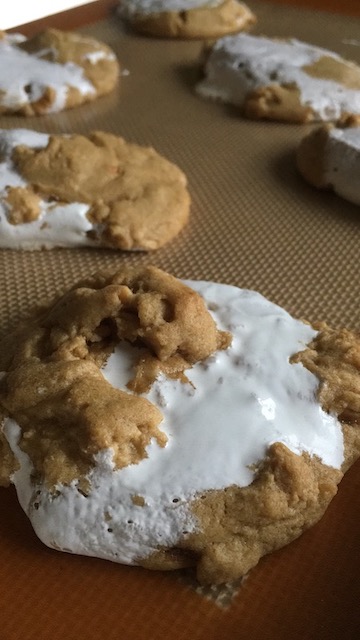
Fluffernutter Cookies…You Heard Me
April 12, 2024 by chrissy@mythankfultable.com

In New England, we are known for all sorts of things, like leaf peeping and stone walls, die hard sports fans and quick weather changes. We talk fast, we are critical of everything, but we will also lend a helping hand. Its a meaner vibe than the people of say, Missouri, where I lived for a school year. But I will live here as long as my hand and back can handle a snow shovel, watch the river for flooding, and wake up with the birds around four am. Too many of Noah Kahan songs resonate. But wow am I a thankful New England woman.

Cut to, what I ate for supper last night, which is what brought me here. To the essence of NE, the fluffernutter. Peanut butter, Fluff, bread. I used to like it on the cheapest white bread I could find. Now we do artisinal bread. Lightly toasted. Standing at the counter with two pups waiting for any toasty peanutbuttery goodness.

So, when I saw a recipe with these two ingredients baked up into a cookie? Yes. Yes. Yes.

It is messier than your average cookie- not sure it would be my first pick for a cookie tray, but so worth the time if you are looking for a little sweet treat that brings back the nostalgia of school lunches packed in a metal lunchbox, complete with thermos.

I wish for you on this rainy spring day all the good, and warm gooey cookies. As always, thank you for coming to the table.

Print

Fluffernutter Cookies…You Heard Me

Print Recipe

Peanut Butter and Fluff come together to make an amazing cookie.

Original Recipe found on stress baking by Leslie Haasch 

https://stressbaking.com/fluffernutter-cookies/

Yield 12 Cookies

  • Author: chrissy@mythankfultable.com

Ingredients

·       ⅔ cup all purpose flour

·       1 teaspoon baking soda

·       Pinch of salt

·       8 tablespoons butter, room temperature

·       1 cup creamy peanut butter, well-stirred if using natural

·       1 ⅓ cups light brown sugar

·       1 egg, room temperature and lightly beaten

·       1 teaspoon pure vanilla bean paste or extract

·       2 tablespoons to ¼ cup marshmallow fluff, depending on how much you add to each cookie

Instructions

·       In a medium bowl, whisk together flour, baking soda, and salt.

·       In a stand mixer fitted with a paddle attachment, combine butter, peanut butter and brown sugar and beat on medium speed until light an fluffy.

·       Add egg and vanilla and beat to combine.

·       Add dry mixture and beat again to combine until you have a thick dough.

·       Cover the bowl with plastic wrap and place in the fridge for at least 30 minutes, preferably up to 1 hour.

·       Preheat oven to 325 °F. Prepare two baking sheets with nonstick silicon mats or parchment paper and set aside.

·       Grab a medium cookie scoop and fill it halfway with dough, pressing it into the bottom and up the sides. Spoon a teaspoon of marshmallow fluff into the center, and then top with more dough to fill the scoop. Place each ball of dough on prepared baking sheets, with no more than 6 on each, evenly spaced out with plenty of room for the cookies to spread.


·       Bake for 9-11 minutes until the cookies have spread and started to crinkle on top. Remove from the oven and let cookies cool for at least 15 minutes on the baking sheet itself – they will continue to spread and set a bit more as they cool. Carefully move to wire racks to cool completely. Enjoy!

Did you make this recipe?

Share a photo and tag us — we can’t wait to see what you’ve made!

Posted in: Cookies Tagged: Cookies, dessert, Fluff, Peanut Butter

A Love Letter to My Daughter and Her Friends, and Peanut Butter Heart Cookies

February 14, 2021 by chrissy@mythankfultable.com

Dear Every Girl My Daughter’s Age, including her Friends and Herself:

I feel like there are some things you need to hear and I mean HEAR. Like, in your soul and REMEMBER. Because, this world is crazy, and sometimes ugly. It shoves images and expectations at you, and even though it is a new age and there are so many more opportunities and glass ceilings are shattering…there is still some rampant crappola the world is sending your way.

  1. You are perfection. You aren’t perfect and that is OK. No one is. But you, and all you are, is exactly who and what you were supposed to be. Glorious and resplendent in all of your ways. Every smile, every laugh, every brilliant thing that comes out of your mouth (and even the not so brilliant things) make you you. And wow, is the world lucky to have you.
  2. You may not love your body. But start now. She’s been with you so far, and if you realize it early enough, she is your champion. She will get you to places and do things you haven’t thought of yet. Your body, whatever size, whatever shape, is perfection. Don’t let it define where you belong in this world. You belong. Period. Please don’t waste one more second listening to a culture that wants you hating on yourself. It’s a tragedy.
  3. Your mind is amazing. You are SMART. Your opinions matter. Your thoughts matter. Your creative ideas matter. Your decisions matter. For those of you who think bigger than the space your body takes up, keep being bigger. If they are worthy of you, they will get you and love it about you.
  4. Your heart is bigger and stronger than you imagine. You may have navigated the hard things already. You may not have had any bumps in the road. Life will teach you lessons and one of them, amazingly enough, is that YOUR HEART IS STRONGER than you know. It will survive. You will survive. You will be better for it.
  5. And lastly, no Mom on this earth, whether it be your biological one or adopted one or grafted in one or decided one along the way would ever, ever want you to settle. In any capacity. Do not sell yourself short. Do not accept a “less than” when you are worthy of so much more. You deserve to be successful, loved, and cherished in every capacity. Especially by yourself.

This is my abbreviated and not all inclusive Valentine’s wish for you, but for today, it will have to do.

All the love my heart can hold,

Chrissy (Mom)

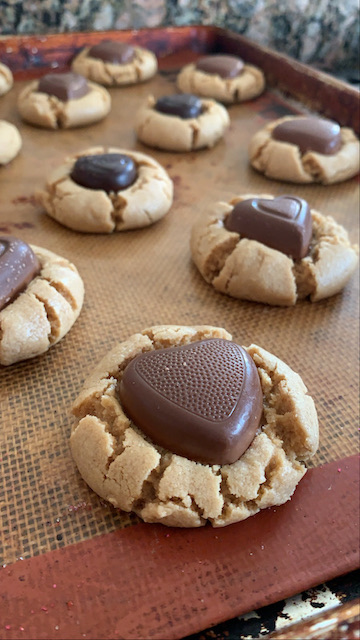
(OK, and then there are these cookies. Which are little peanut butter puffs which then have a chocolate candy smooshed in when done baking. 🙂 Listen, every blog can’t be emotional, and every blog can’t be about the recipe. I recommend this cookie if you have a peanut butter lover in your life. Because they are amazing.)

Print

Peanut Butter Heart Cookies

Print Recipe

This recipe is originally from www.sallysbakingaddiction.com This recipe makes a light, pillowy soft dough that gets refrigerated for up to a day, and then topped with a chocolate heart of your choice. I used two different types of candies for this, a solid chocolate heart, and a peanut butter filled heart. It is hard to tell which were enjoyed more, because they both disappeared rather quickly! This recipe yields 2 dozen cookies.

  • Author: chrissy@mythankfultable.com

Ingredients

·       1 stick (½ cup) Butter (room temperature)

·       1 Large Egg

·       ¾ Cup Peanut Butter

·       1 Teaspoon Vanilla Extract

·       ½ Cup White Sugar

·       ½ Cup Packed Dark Brown Sugar

·       ½ Teaspoon Baking Soda

·       ¼ Teaspoon Salt

·       1 ¼ Cups Flour

·       Chocolate Heart Candies (Dove, Lindt, Reese’s all work)

Instructions

1.     In a bowl, combine flour, salt, and baking soda together.

2.     Using a mixer with a paddle attachment beat butter until fluffy. Add sugars and cream together until smooth.

3.     Add in peanut butter, egg, and vanilla extract. Combine until smooth, scraping down the sides of the bowl as needed.

4.     Add the combined dry ingredients to the wet ingredients slowly on a lower speed. 

5.     Roll out dough into balls using a cookie scoop or tablespoon measure and chill. OR Chill dough as a whole for at least half an hour up to a day. The longer you chill, you may need to let the dough sit for a little bit before rolling out into balls. *this is why I roll them before I chill them

6.     Preheat oven to 325 degrees. Prepare baking sheets with parchment paper or silicone mats.

7.     Place dough balls evenly spaced on cookie sheet and bake for 10-12 minutes.

8.     Allow cookies to cook for a few minutes, then press chocolate candy into each cookie.

9.     Allow cookies to cool completely, unless the idea of a melty chocolate heart is your thing (it’s my thing).


10.  Cookies stay fresh in an air-tight container for up to a week. They won’t last that long. 😉

Did you make this recipe?

Share a photo and tag us — we can’t wait to see what you’ve made!

Posted in: Cookies, My Story Tagged: chocolate candy, chocolate heart, Cookie, dessert, Dough, Peanut Butter, peanut butter cookie, Valentine's, Valentine's Day Cookies

And Then There Were Fluffernutter Bars…

May 27, 2019 by chrissy@mythankfultable.com

I’m going to make this post quick. It’s Memorial Day, most of you are heading somewhere to eat at someone’s cookout if you didn’t already, and time’s a wasting. Get to baking.

The Fluffernutter is the quintessential New England sandwich, made with peanut butter, and Fluff (not marshmallow creme, and yes, there is a difference). I am not saying it is the most nutritious food item to put in a lunchbox for your kid, but I do know anyone raised in Massachusetts knows what it is…and likes it. If you were lucky you got it on soft white bread, and maybe even got the crusts cut off.

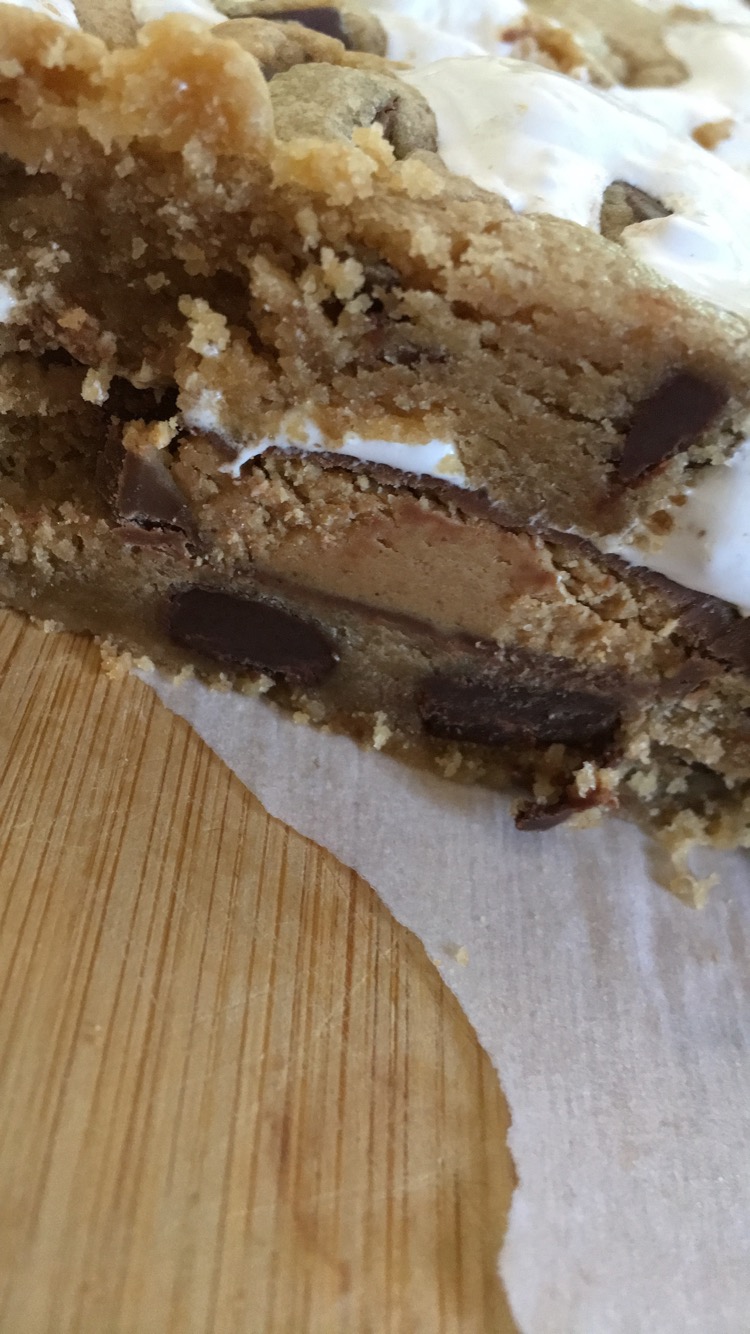
Tuck those Peanut
Tuck those Peanut Butter Cups into their bed of Cookie Dough

Fast forward to now: My bread is typically sprouted grain. My peanut butter is natural. Oh, but there is a brand new container of Fluff in the cabinet at all times. For you know, life emergencies. Some days a woman needs to stand in her kitchen with a spoonful of fluff and giver her dog the stink eye because she is not sharing.

To the recipe: the original recipe is from soccer mom.com. When a friend sends you a Pinterest posted recipe and you have a cookout to be the next day, you try it. I am glad I did. I am also glad I fiddled with the proportions and made MORE. I am also glad I left them at the campsite where our cookout was because they are like a siren song to me. All good.

This recipe is a basic peanut butter dough with chocolate chunks, divided into two parts. Press one part on the bottom of a pan and add FULL SIZED Peanut butter cups. Add Fluff! Add more dough! Bake and leave to cool. Sound simple? It is. Do people need to know this deliciousness wasn’t an all day process? No. You can keep that little secret to yourself.

If you were one of us who embraced sugary marshmallow and peanut butter, loves peanut butter cups, or just needs to feel like a gooey dessert is essential for a cookout, you have met your match. I hope you make these. Today.

I hope you enjoy this recipe, and as always, thank you for coming to the table!

Chrissy

Click below for a printable recipe

Print

Fluffer Nutter Bars

Fluffernutter Bars
Print Recipe

This delicious creation of peanut butter, peanut butter cups, and fluff originally was posted on thesoccermomblog.com. I changed the proportions to make a larger batch. You will not be disapointed!

  • Author: chrissy@mythankfultable.com

Ingredients

Scale
  • 1 Cup Butter
  • 2/3 Cup Plain Peanut Butter (I used Creamy Jif)
  • 12 Unwrapped FULL SIZED Peanut Butter Cups
  • 2 Cups packed Dark Brown Sugar
  • 2 large Eggs
  • 2 generous teaspoons Vanilla Extract
  • 2 1/2 Cups All Purpose Flour
  • 1 bag Nestle Chocolate Chunks
  • 1/2 Container Marshmallow Fluff

Instructions

  1. Preheat oven to 350* and prepare a 9×13″ baking pan by lining it with parchment paper.
  2. in a mixer with a paddle attachment, cream butter and sugar until light and fluffy.
  3. Add peanut butter and combine. Add eggs and vanilla and continue to combine until uniform.
  4. Add flour until mixed in, fold in chocolate chunks (I just add mine while the mixer is running on low)
  5. Divide dough into 2/3 and 1/3.
  6. Press 2/3 of dough into prepared pan. Distribute Peanut butter cups evenly into dough.
  7. Cover peanut butter cups with Marshmallow Fluff, smooth to create an even layer.
  8. Break apart remaining dough and cover the mixture. Press down.
  9. Bake in 350* oven for 25-30 minutes until golden brown, do not overcook.
  10. Leave bars in pan until cool (they will continue to cook in the pan and you want this!)
  11. Pull bars out of pan with edges of parchment paper and slice!
  12. These will keep in an airtight container for a few days…but they won’t last that long!

Did you make this recipe?

Share a photo and tag us — we can’t wait to see what you’ve made!

Posted in: Cookies, Dessert, My Story Tagged: bar cookies, Chocolate Chunks, Fluff, fluffernutter bars, marshmallow, Peanut Butter

Reese’s Pieces Peanut Butter Cookies

February 20, 2019 by chrissy@mythankfultable.com

These cookies combine the peanut butter base of a soft cookie with the melty crunch of baked chocolate coated peanut butter candies. Win-Win.

I don’t know about you, but there are certain foods I can not bring into my house. Purely because I know they are there, they whisper to me, and then I seek them out to eat them. Among this list I wish were celery and yogurt…you know, the stuff I buy because I am supposed to and they make me healthy. The real list is more like Kraft Caramels, Cheez-its, Caramel M&M’s and Reese’s Pieces. I save these purchases for when the will power is strong…or I need them for a recipe.

Maybe it is the fact that I was little when E.T. was in the movie theaters and this candy became insanely popular. Maybe it’s the idea of mixing up peanut butter cookies to include an extra kick. These cookies are amazing.

When I make cookies, I typically make the dough at least a day in advance, pre-scoop/roll into shapes ready for baking, and refrigerate overnight. These cookies are adorable pre-baked. I had to hide them in the back of the fridge, I was worried they would be consumed before I got the chance to bake them!

These cookies are simple to make, and deliver a real peanut butter punch. If you have a peanut butter lover in your life, these cookies belong in your cookie toolbox!

I hope you enjoy this recipe, and as always, thank you for coming to the table!

Chrissy

Click below for a printable recipe.

Print

Reese’s Pieces Peanut Butter Cookies

Print Recipe

Peanut butter cookie loaded with Reese’s Pieces candies. Original recipe from Simple Green Moms

  • Author: chrissy@mythankfultable.com

Ingredients

Scale
  • 1/2 Cup Creamy Peanut Butter
  • 1 Stick melted Butter (1/2 Cup)
  • 3/4 Dark Brown Sugar
  • 1/2 Cup White Sugar
  • 1 Large Egg (room temperature)
  • 1 3/4 Cup Flour
  • 1 Teaspoon Vanilla Extract
  • 1/2 Teaspoon Salt
  • 1 Teaspoon Baking Soda
  • 1 Cup Reese’s Pieces Candies

Instructions

  1. Combine peanut butter and melted butter in a mixer and combined. 
  2. Add in sugars and mix until light and fluffy.
  3. Add in egg and vanilla extract and mix.
  4. Combine flour, baking soda, salt and add to mixture.
  5. Add and incorporate Reese’s Pieces by hand until evenly distributed throughout the dough.
  6. Refrigerating dough is not necessary, but I pre-scoop my dough and refrigerate overnight.
  7. Preheat oven to 325*
  8. On a parchment lined baking sheet, place scoops of dough a few inches apart.
  9. Bake at 325* for 8-11 minutes, until puffy and light brown.

Did you make this recipe?

Share a photo and tag us — we can’t wait to see what you’ve made!

Posted in: Cookies Tagged: Cookies, Peanut Butter, peanut butter cookies, Reese's pieces

Chocolate Dipped Peanut Butter Biscotti and Happy Little Accidents

March 20, 2018 by chrissy@mythankfultable.com
Chocolate Dipped Peanut Butter Biscotti

Chocolate Dipped Peanut Butter Biscotti

Chocolate Dipped Peanut Butter Biscotti

My precious. Peanut Butter Biscotti dipped in melty semi-sweet morsels. You had me at hello. I don’t even love peanut butter and chocolate the way some people do, but this cookie holds a sweet spot (pun intended) in my heart.

This dough is a peanut butter based, and actually doesn’t even have regular butter in the dough. It uses and mix dark brown sugar and white sugar instead of all white, and calls for an extra egg than my regular batter calls for.

Chocolate Dipped Peanut Butter Biscotti

I have a small kitchen, but a very organized pantry. Baking ingredients live on two shelves, and my various pans and baking implements live together happily so this baker knows what she does and doesn’t have. So…when I added the chips to the mixer (which were supposed to be peanut butter chips) and realized as they were being incorporated that lo and behold they were butterscotch chips…well it was a happy little accident. The peanut butter chips live right next to the butterscotch chips. I grabbed the wrong bag. Chocolate Dipped Peanut Butter Biscotti

I am sure had the chips been the peanut butter and not butterscotch the peanut flavor would be boosted above and beyond. It was not intentional, but the change of plan made for an amazing cookie. The peanut taste is there and the chocolate as well and the scotchy seemed to make the peanut butter almost taste peanut buttery-er. However, if you make these, you do you. Use the peanut butter chips.

Chocolate Dipped Peanut Butter BiscottiIf I baked these cookies a little longer after being sliced, they would crisp up nicely, but I chose to leave them slightly softer and chewier, a decision I do not regret. While there is a place in the world for the crisper crunchier biscotti, these cookies called for a bit of chew. Call me sentimental, but I like my peanut butter cookies chewier.
Whether you embrace my happy accident or go full on Peanut Butter, the way this biscotti dough cooks up, you will be so happy. The outside forms a perfect shell, with a hint of a crackle when you slice into it. Then, the inner portion of the cookie stays tender and soft (which does firm up with the second bake). I could have left them as they were without doing the second bake- but then it would not have been biscotti.

I love the way people light up when they realize I have made something peanut butter based. It really does have a following. This cookie will not disappoint. Even with the butterscotch chips- it is pretty darn near the perfect cookie. If I do say so myself.

I hope you enjoy this recipe, and as always, thank you for coming to the table!

Chrissy

Click below for a printable recipe.

Print

Chocolate Dipped Peanut Butter Biscotti and Happy Little Accidents

Chocolate Dipped Peanut Butter Biscotti
Print Recipe

This delicious peanut butter based biscotti incorporates the sweet mellow flavor of butterscotch chips and wrap up in a chocolate dip. The perfect accompaniment to tea or coffee.

  • Author: chrissy@mythankfultable.com

Ingredients

Scale
  • 1 Cup Creamy Peanut Butter
  • 1/2 Cup Dark Brown Sugar
  • 1/2 Cup Sugar
  • 3 Eggs
  • 1/4 Cup Milk
  • 1 Tablespoon Baking Powder
  • 1 Tablespoon Vanilla Extract
  • 3 Cups AP Flour
  • 2 Cups Butterscotch Chips

Instructions

  1. Preheat oven to 350*
  2. In a mixer with a paddle attachment, combine peanut butter and sugars. Combine until light and fluffy.
  3. Add eggs, one at a time, and incorporate.
  4. Pour in milk, extract, and mix until combined.
  5. Add dry ingredients, slowly, until all incorporated. Stop to scrape the sides of the bowl as you go.
  6. Add chips into the mixture.
  7. Separate the dough into three sections and form each into a softly rounded rectangle/log.
  8. Place on a silicone or parchment lined cookie sheet and bake for 15-20 minutes or until firm and lightly golden.
  9. Allow to cool for ten minutes.
  10. Slice logs into one inch slices, and return to the baking sheet cut side up.
  11. Return to oven and bake for an addition 10 minutes or until dry (I keep mine chewier).
  12. Remove biscotti and allow to cool completely.
  13. In a microwave safe bowl, melt semi sweet or dark chocolate chips (approx 1 -2 Cups)
  14. Dip cookies into melted chocolate or drizzle on top of cookies.

Did you make this recipe?

Share a photo and tag us — we can't wait to see what you've made!


Posted in: Cookies, Recipes Tagged: Biscotti, Butterscotch chips, chocolate dipped, Cookies, Peanut Butter, Peanut Butter Biscotti, semi sweet chocolate

Sea Salt Peanut Butter Dark Chocolate Chunk Cookies

March 17, 2018 by chrissy@mythankfultable.com

Sea Salt Peanut Butter Dark Chocolate Chunk Cookies

Sea Salt Peanut Butter Dark Chocolate Chunk Cookies

Oh this life. It can hand you some things. Good, bad, hard, easy, thankful, grumpy…we ride the roller coaster and take each day as it comes.

And when you stumble upon a recipe titled “Jumbo Peanut Butter Chocolate Chip Cookies,” (www.oliveandartisan.com) and further realize the recipe calls for flaked sea salt to be sprinkle on top…you say, “Thanks, life, for letting me find this.”

We had another snow day, and therefore, I baked. I baked and then shared because I am trying to become a smaller version of myself (bigger on the inside but maybe smaller on the scale side). Which is never a bad thing, sharing cookies such as these.

Sea Salt Peanut Butter Dark Chocolate Chunk Cookies

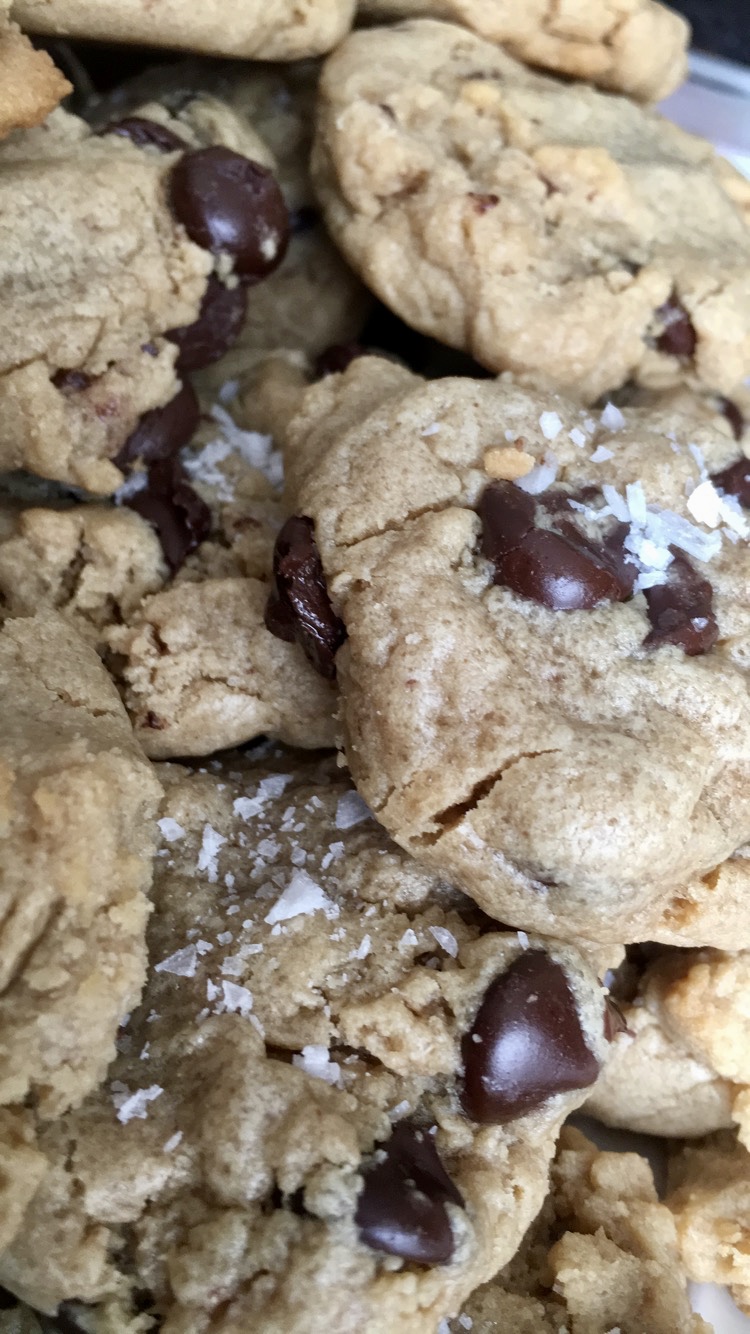
These cookies are soft and pillowy, with huge dark chocolate chips (why are the dark chocolate chips bigger in the Nestle bag? Not sure but I am all for it.), and then topped with sea salt. Just enough to make the dark chocolate resonate and the peanut butter stand out. It’s a pretty brilliant cookie.

I made my dough the night before and refrigerated it so my cookies are a little puffier than I anticipated. They also are baked at a lower temperature so they stay oh so soft and chewy.

Sea Salt Peanut Butter Dark Chocolate Chunk CookiesThey have a similarity to the stand by Peanut Blossom Cookie without being as heavy or as dense. They have all of the flavor and then some. I actually like the idea of smaller chocolate pieces as opposed to the big Hershey kiss of the Peanut Blossom.

I usually can pass by a peanut butter cookie (I know, I’m weird). Not these. These are actually a cookie dough I would eat raw (I try not to- old mom infused habits of old). It is that good.Sea Salt Peanut Butter Dark Chocolate Chunk Cookies

I actually doubled the recipe as well because I had every intention of sharing. After all, when your children beg you to stop making biscotti and make a soft cookie for once, you plan that they will eat the soft cookies. Add a snow day and being inside and well, there aren’t many left over. Which is always a good thing.

I hope you enjoy this recipe, and as always, thank you for coming to the table!

Chrissy

Click below for a printable recipe!

Print

Sea Salt Peanut Butter Dark Chocolate Chunk Cookies

Print Recipe

This delicious peanut butter dark chocolate chip cookie with sea salt sprinkled on top takes peanut butter love to the next level. Recipe adapted from www.oliveandartisan.com This recipe makes approx. 48 regular-sized cookies.

  • Author: chrissy@mythankfultable.com

Ingredients

Scale
  • 1 Cup Butter
  • 1 Cup Creamy Peanut Butter
  • 2 Teaspoons Vanilla Extract
  • 1 Cup Sugar
  • 1 Cup Brown Sugar
  • 2 Large Eggs
  • 3 Cups AP Flour
  • 1 Teaspoon Baking Soda
  • 1 Teaspoon Baking Powder
  • 1 Teaspoon Salt
  • 1 Bag Dark Chocolate Chips/Chunks (You can ALWAYS ADD MORE!)
  • Flaked Sea Salt for topping


Instructions

  1. In a mixer with a paddle attachment, cream together butter and peanut butter.
  2. Add Sugars and mix until light and fluffy.
  3. Add Vanilla Extract, and Eggs and mix until combined.
  4. Add in dry ingredients and mix until combined thoroughly.
  5. Pour in Dark Chocolate Chips/Chunks.
  6. Refrigerate dough for a few hours or over night (If you do not refrigerate you will have less puffy cookies-your choice).
  7. Preheat oven to 325*.
  8. Scoop with a small ice cream scoop or spoon and place on cookie sheet lined with either a silicone baking liner or parchment paper. I made generous sized scoops and placed them approximately 15 per baking sheet.
  9. Bake for 12-14 minutes or until just set.
  10. Sprinkle with sea salt (I pressed my cookies down just a bit before sprinkling).
  11. Leave on cookie sheet for 1-2 additional minutes.
  12. Cool completely on a wire rack or parchment paper lined surface.

Did you make this recipe?

Share a photo and tag us — we can't wait to see what you've made!

Posted in: Cookies, Recipes Tagged: chocolate chunk, Chocolate Chunk Cookies, Peanut Butter, Sea Salt

Peanut Butter Buckeyes

January 30, 2018 by chrissy@mythankfultable.com
Peanut Butter Buckeyes

Peanut Butter Buckeyes

Peanut Butter Buckeyes

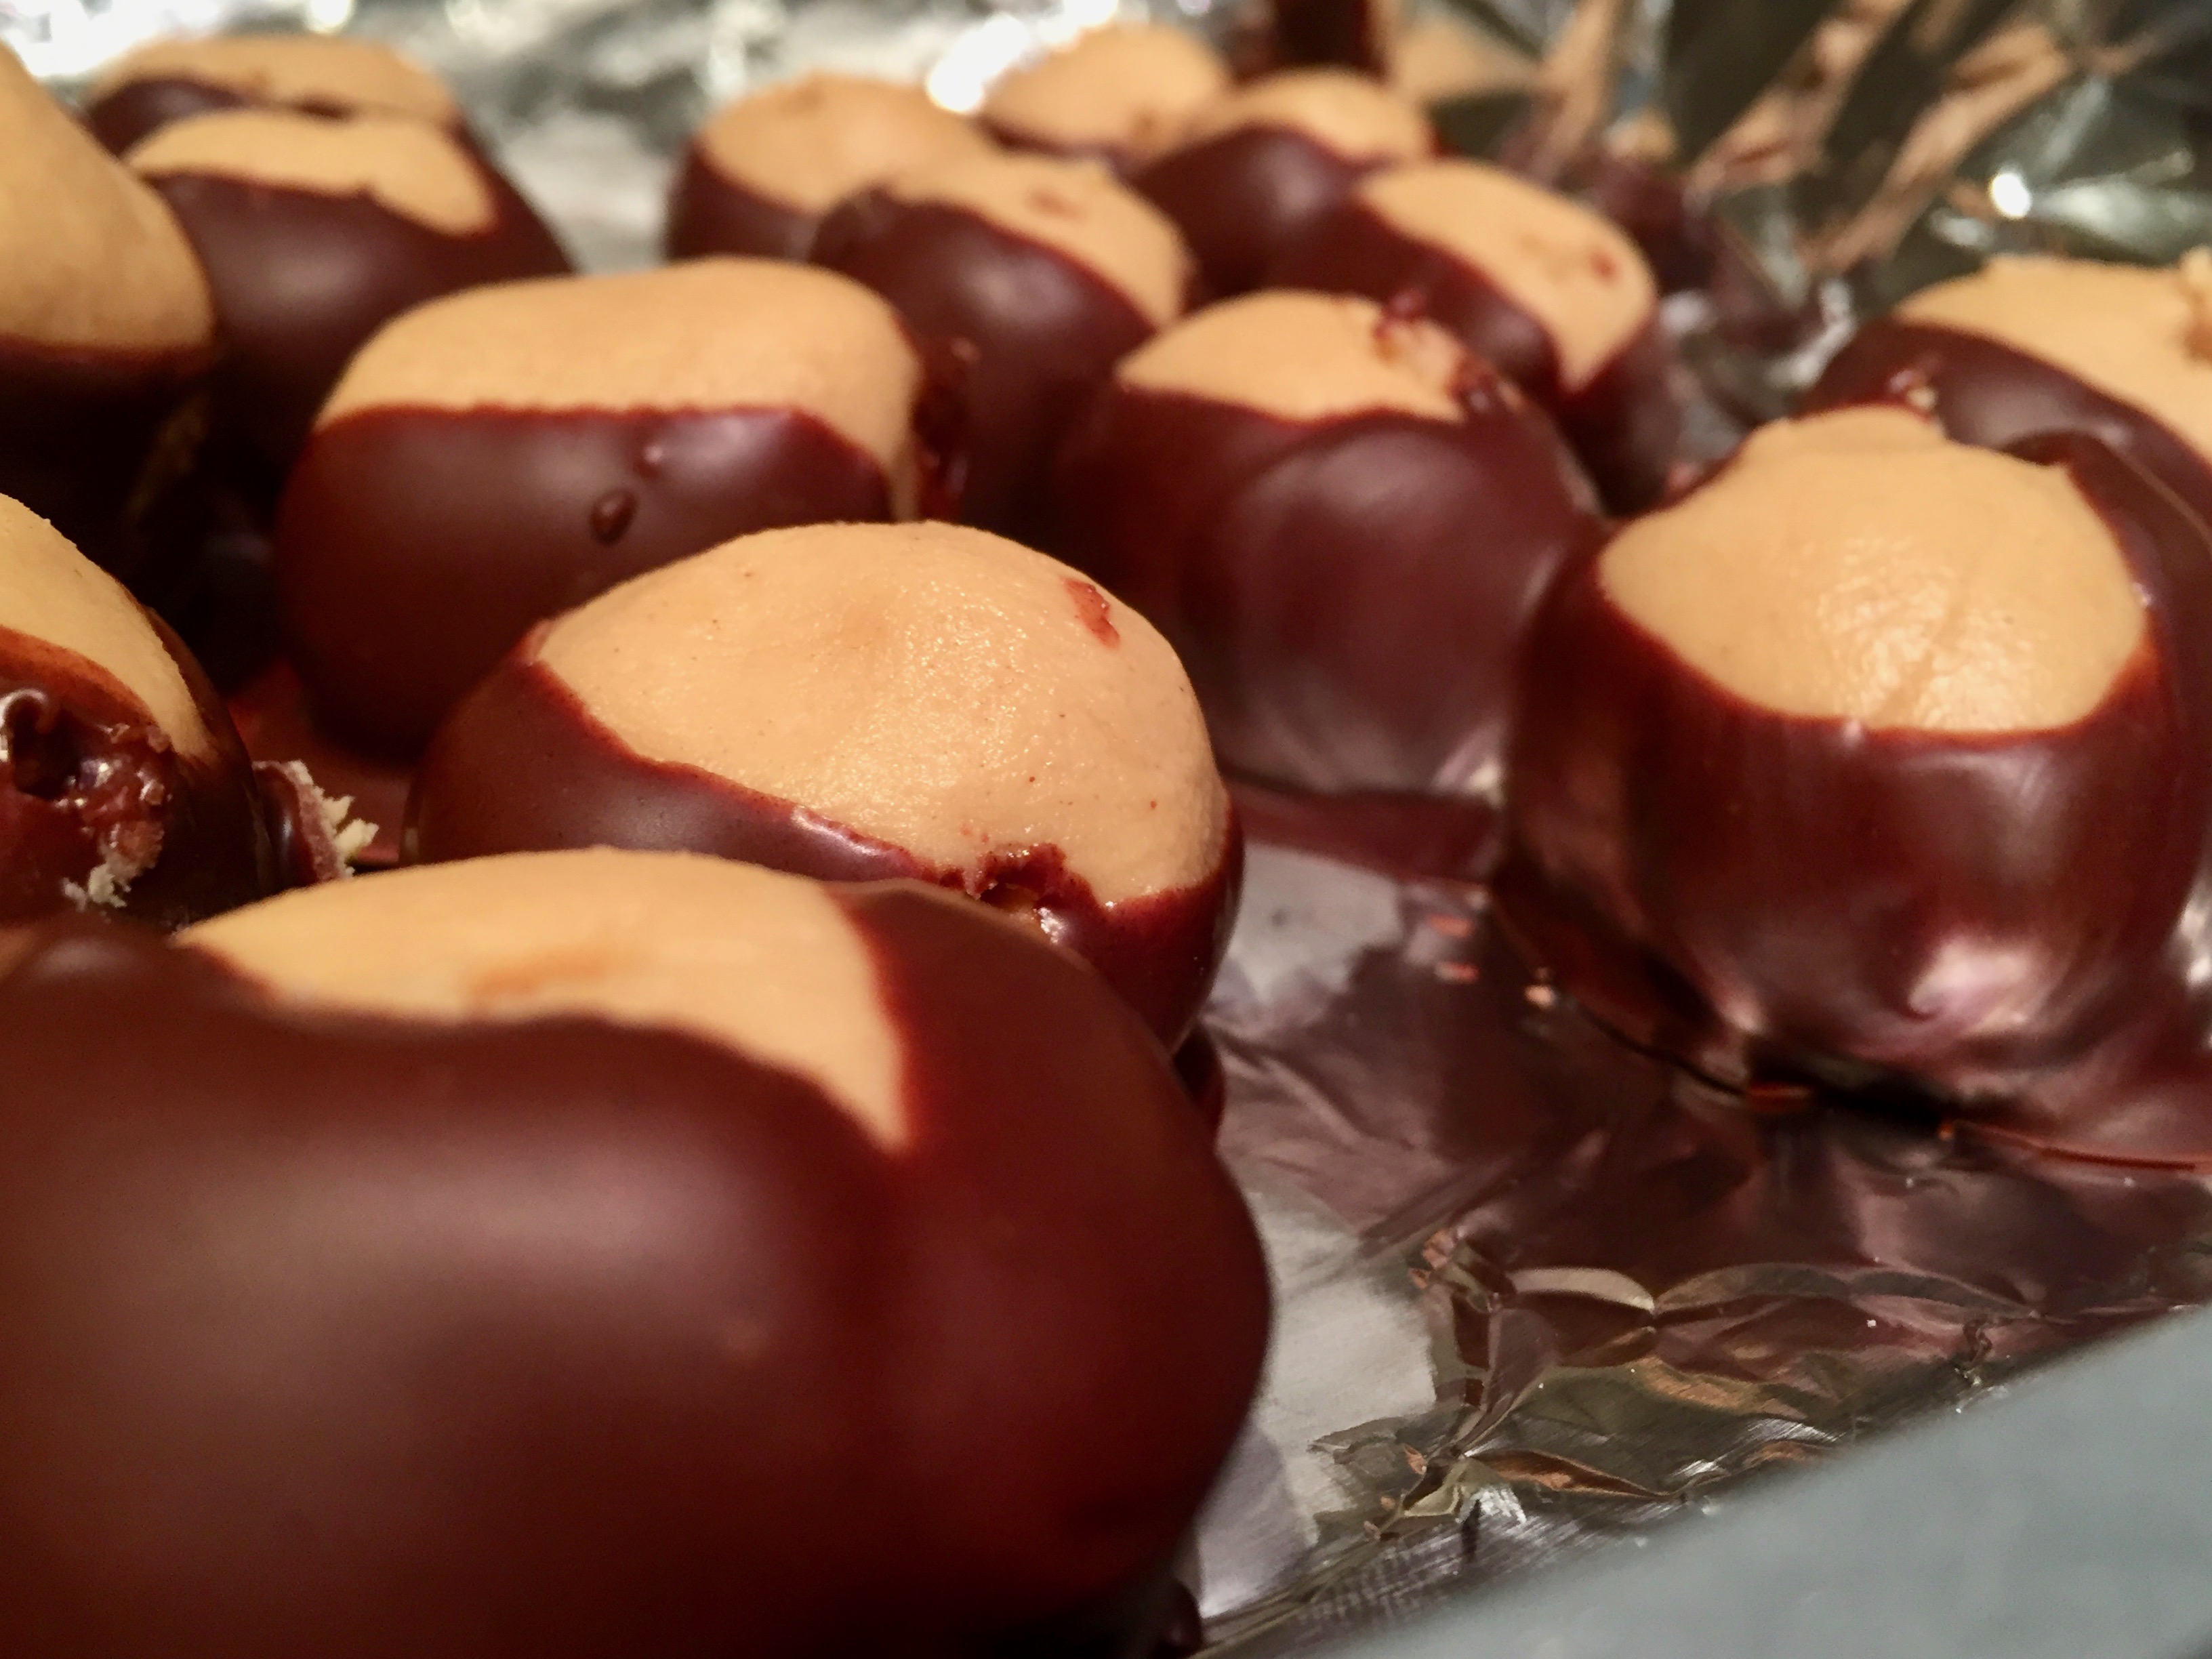
If you have ever had the opportunity to see a real Buckeye, (Google image search that term right now), the idea that someone, somewhere along the line thought, “Hey, let’s take peanut butter and dip it into chocolate and call it a buckeye.” is pretty genius.

While I don’t fall into the peanut butter & chocolate love I know people hold dear, I do like creating a dessert that disappears and makes people happy. These fit the bill. They are also super easy to make and even though you have to do it in stages, and it requires dipping in chocolate, you’ve got this.

Now, when it comes to cooking, my people are content to let me do my thing. Except, on this day, I had willing helpers. They wanted to sample, ahem, I mean, help me with this recipe.

Peanut Butter BuckeyesOh the magic of peanut butter balls. You bring out the chefs in us all.

This is the recipe from Jif peanut butter…but pretty much every recipe is the same ingredients- peanut butter, butter, confectioner’s sugar, etc.

I grew up with Jif. Every family has their own brand and respect to that. I have a friend who only uses Peter Pan. I have another who swears by Skippy.

If you are an I-only-buy-natural-peanut-butter kind of person, I have to ask, Why are you making peanut butter balls? Go make energy bites or protein balls. The real deal stuff is perfect for Ezekiel bread, but not this recipe. (I am a huge natural peanut butter fan, BTW, just not for this recipe).

You mix the dough, refrigerate, then melt some chocolate and dip. Refrigerate a second time and hide from the people who will eat them before it is time to serve.

Peanut Butter Buckeyes

Peanut Butter Buckeyes

The hardest part of this recipe is the actual dipping part. As in, if you use a toothpick, you have to hold onto that ball. If you use a spoon, you have to make sure it isn’t too covered or not enough covered. That’s pressure.

OK, so it isn’t world peace pressure, but I need to be honest, if I didn’t stress about them being pretty, it would have been easier. Come to find out, people don’t care if it’s pretty when it’s a buckeye. They want it to taste good.

The balls are basically the inside of a peanut butter cup consistency, with powdered sugar and butter mixing with the peanut butter to be light and fluffy. They are sweet and light and lovely.

They also potentially last a long time, should you need them to be and or hide them well. If kept refrigerated, they can last for a few weeks. I hid some in the fridge way in the back where it is super cold, and managed to make them last three weeks. Now, with chocolate being temperamental, I wouldn’t make them that far in advance to share, but for my own snacking purposes (and remember I am not drawn to these), I was pleased they still looked and tasted good.

I know the big Valentine’s Day is coming up, so if you have someone special who is a peanut butter lover, what could be more charming than a batch of confections that look like a nut? Come on, you crazies, get your Jif out and make some balls for the one you love.

I hope you enjoy this recipe, and as always, thank you for coming to the table!

Chrissy

Click below for a printable recipe!

Print

Peanut Butter Buckeyes

Peanut Butter Buckeyes
Print Recipe

This recipe is the original Jif Creamy Peanut Butter Buckeye recipe.

  • Author: chrissy@mythankfultable.com

Ingredients

Scale
  • 1 1/2 cups Jif creamy peanut butter
  • 1/2 cup bitter, softened
  • 1/2 teaspoon salt
  • 3–4 cups confectioner’s powdered sugar
  • 2 cups semisweet chocolate chips
  • 2 tablespoons crisco or shortening

Instructions

  1. Combine peanut butter, butter, vanilla, and salt in a mixing bowl.
  2. Beat with a mixer on low until blended. Add two cups of confectioner’s sugar until blended.
  3. Add additional sugar as needed until dough can be formed into balls that will maintain shape when dipped in chocolate.
  4. In a microwave safe bowl, melt chocolate chips and shortening together and mix.
  5. Insert toothpick in peanut butter ball. Dip 3/4 of the ball in chocolate mix, leaving top uncovered to resemble a buckeye.
  6. Place on wax-paper lined tray. Remove toothpick. Smooth over holes.
  7. Keep refrigerated until firm.

Did you make this recipe?

Share a photo and tag us — we can't wait to see what you've made!


Posted in: Dessert, Recipes Tagged: Buckeyes, chocolate, Confection, dessert, Peanut, Peanut Butter, Peanut Butter Balls

Pioneer Woman’s Peanut Butter Pie

November 21, 2017 by chrissy@mythankfultable.com

Peanut Butter Pie

Peanut, peanut butter…I used to think peanut butter pie was really hard to make. Truth be told, it is the easiest pie I make. It is my go -to stand-by for school breakfasts. Every Friday we (the teachers) eat breakfast together at my school. It’s a critical part of our love language. On shorter weeks, we find a way to have breakfast anyway (this pie is actually for our Friendsgiving Breakfast today).

Peanut Butter Mixture

With Thanksgiving around the corner I will be making this again on Wednesday, and although it isn’t my favorite, it will disappear (That’s the power of peanut butter and chocolate). Is it complicated? Not really. Is it a given people will be excited about it? Unless they have a nut allergy, the answer is a resounding yes.

So the truth of peanut butter pie is this: You put a block of cream cheese and a cup of peanut butter in the mixer and whip until well blended. Then add 1 and 1/4 Cup of confectioner’s sugar.

The consistency of the middle of a peanut butter cup is the end result. Resist the urge to eat this filling at this point.

Peanut Butter Cloud

Then take a whole tub of cool whip or whipped topping, add it to the peanut butter mixture and whip that filling until a light, peanutbuttery cloud is what you’ve created.

It has the consistency of a thicker, gooey chocolate mousse except, it isn’t chocolate, and your entire kitchen smells like a peanut butter bomb went off. Scent saturation!

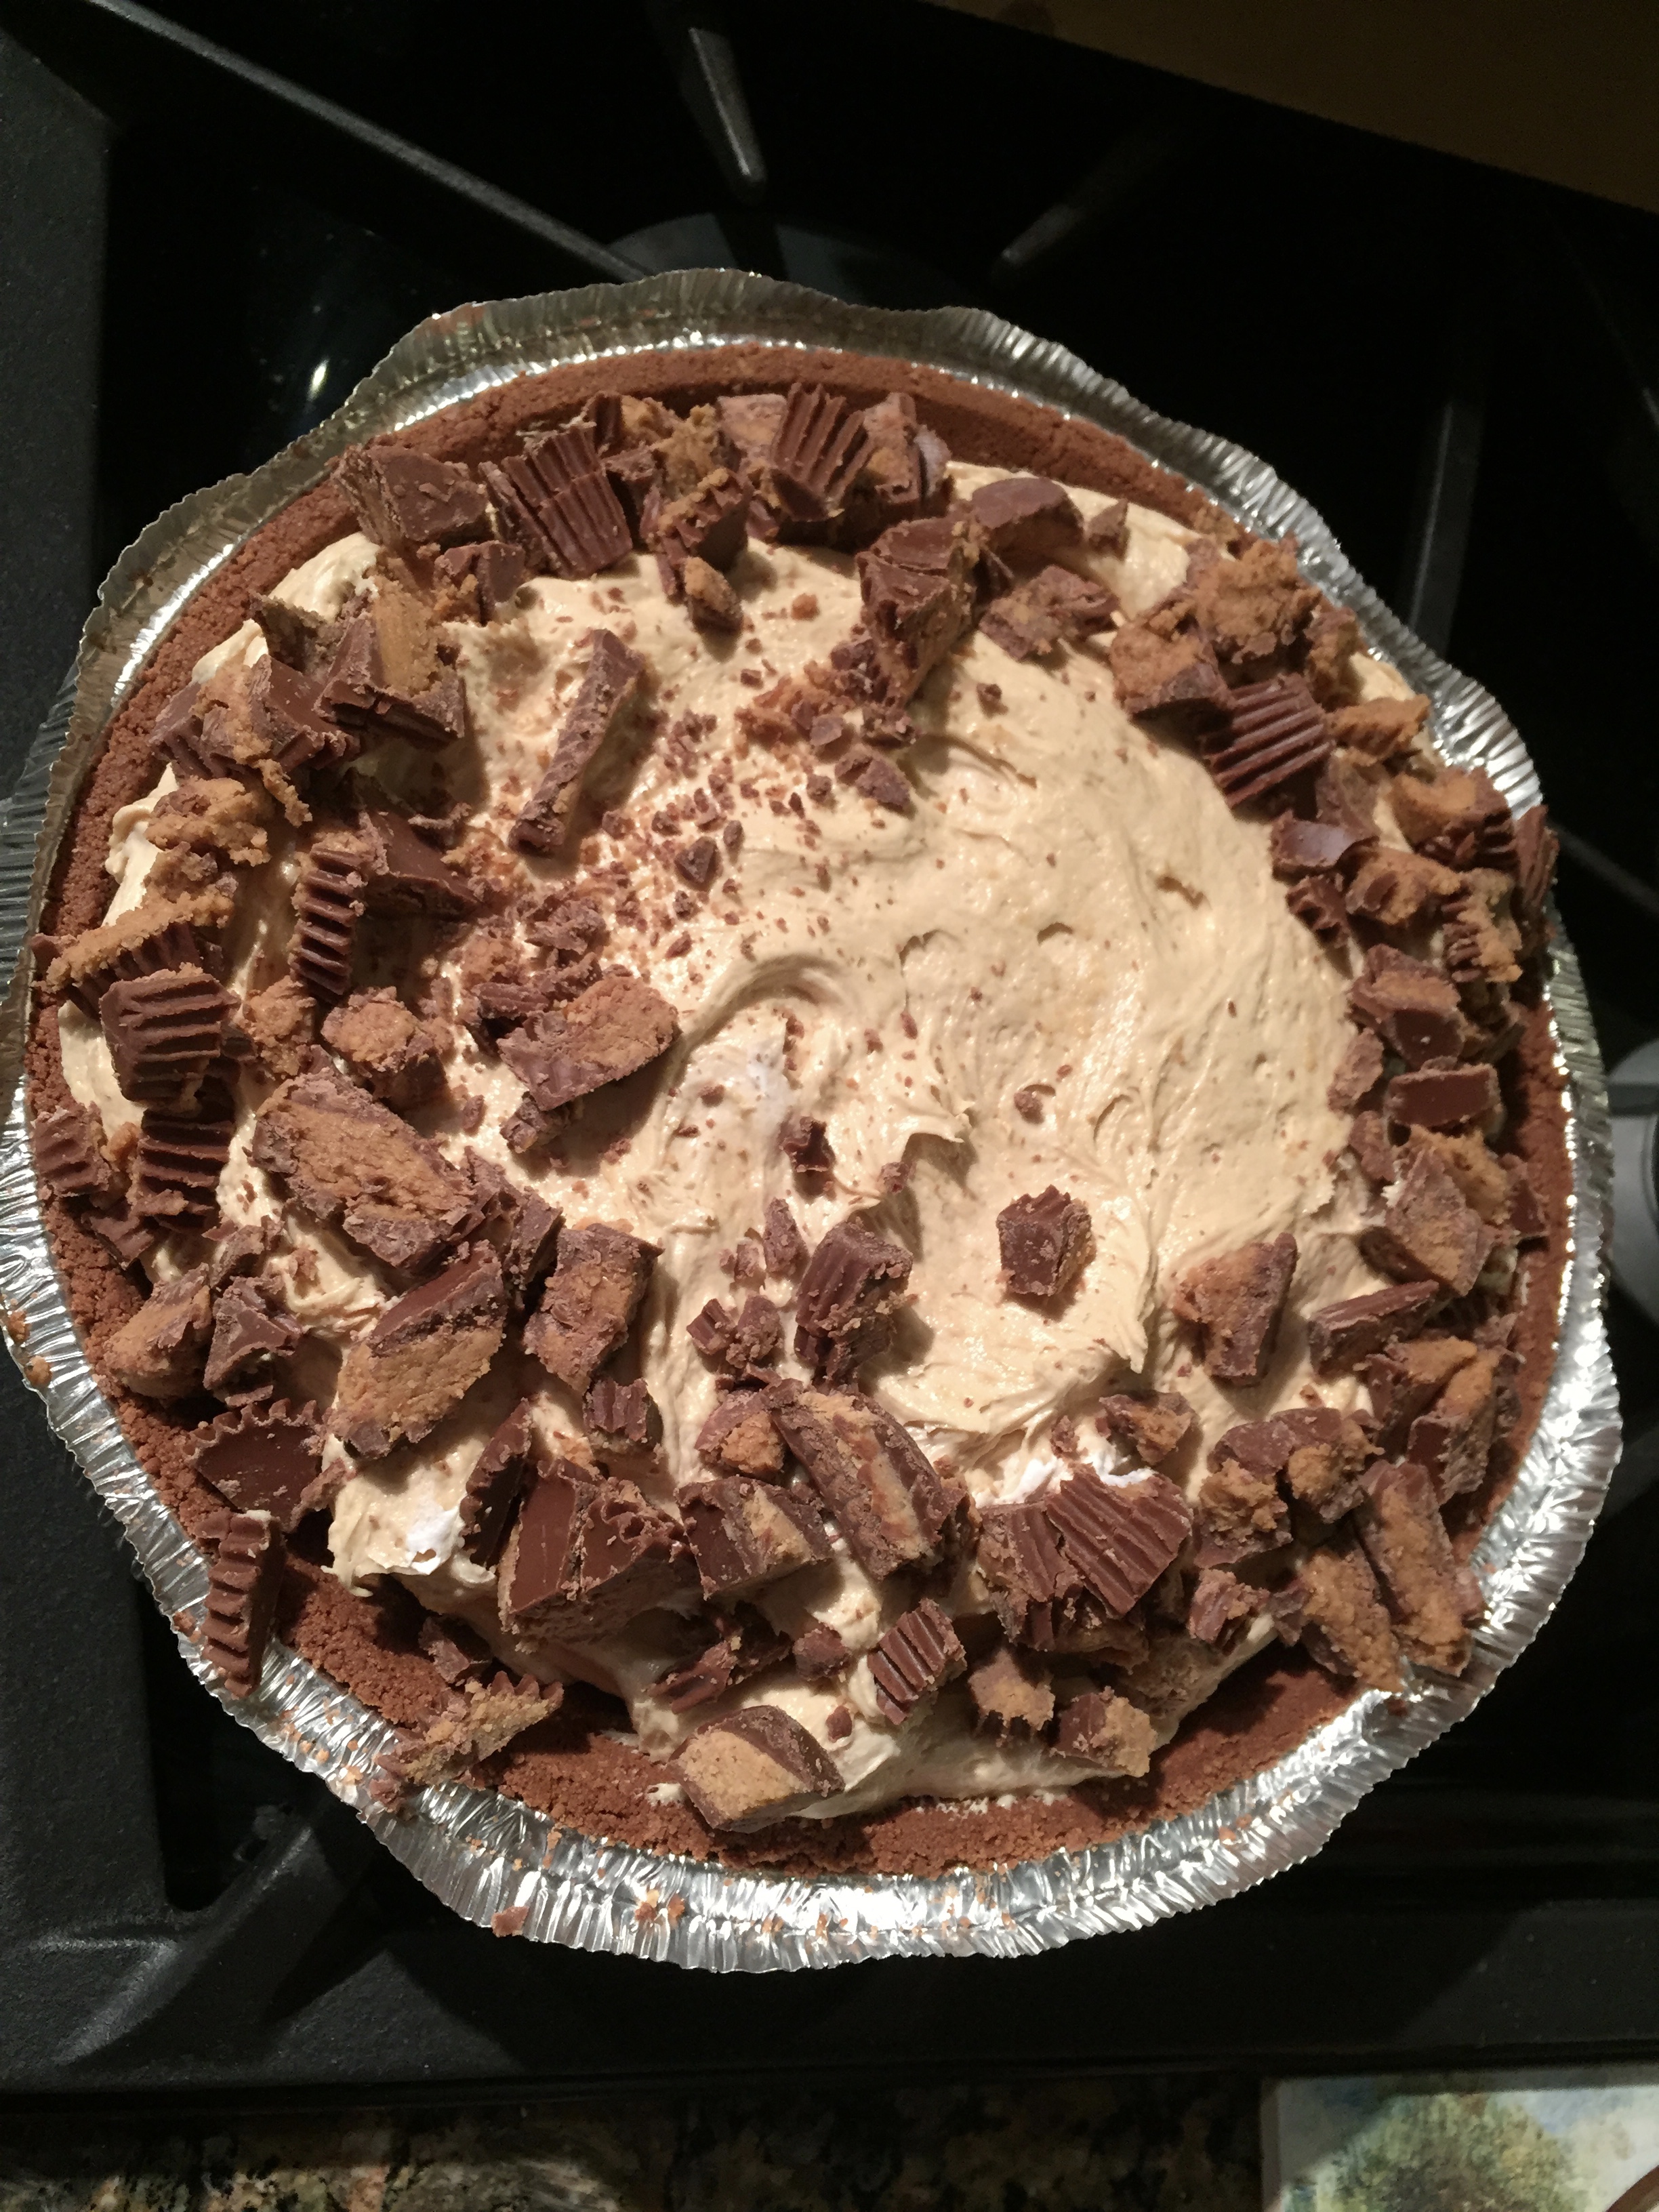
The hardest part of the recipe is in the making of the Oreo crust (pulverize oreos and combine with butter and press into a pie plate). Which is a little work – until I found out that you can BUY A PREMADE OREO CRUST. Hello game changer. I will not be making a crust this time. I will be buying it forever more. I removed the pie crust’s plastic cover, spooned the filling into the pie shell.

Easy Way Out

It could be over at this point. People would still love your peanut butter pie. HOWEVER. I chop up some peanut butter cups and sprinkle them around the edges. Because, yes please. It is pretty. It also makes for a yummier treat.

For all my peanut butter loving friends out there I recommend this recipe. It is the Pioneer Woman’s Peanut Butter Pie. The only thing I did was add peanut butter cups on top and cheated the dessert gods and bought my crust. And for those two things, my heart is thankful.

There is still time for you to grab these ingredients and whip up this pie treasure. No go and make some peanut butter clouds of your own!

I hope you enjoy this recipe, and as always, thank you for coming to the table!
Chrissy

Click below for a printable recipe!

Print

Pioneer Woman’s Peanut Butter Pie

Print Recipe

Delicious peanut butter pie from the Pioneer Woman’s recipe.

  • Author: chrissy@mythankfultable.com

Ingredients

Scale
  • 1 Cup Smooth Peanut Butter
  • 1 8 Ounce Block of Cream Cheese
  • 1  1/4 Cup Confectioner’s Sugar
  • 1 Container of Cool Whip or other whipped topping
  • 25 Oreo Cookies
  • 4 Tablespoons of Butter, melted
  • 10 Miniature Peanut butter cups, chopped

Instructions

  1. In a food processor, pulse 25 Oreos until; pulverized and the white cream centers of the cookie are incorporated into the chocolate part.
  2. Pour four tablespoons of melted butter over the crushed Oreos.
  3. Press Oreo mixture into a pie plate.
  4. Bake in a 350* for 5-7 minutes.
  5. In a mixer, combine cream cheese and peanut butter until combined and smooth.
  6. Add confectioner’s sugar and combine.
  7. Add entire container of Cool Whip and continue to mix on a high speed until light and fluffy.
  8. Spoon peanut butter mixture into pie crust.
  9. Sprinkle crushed peanut butter cups on edges.
  10. Refrigerate until chilled through and serve.

Did you make this recipe?

Share a photo and tag us — we can't wait to see what you've made!

Posted in: Dessert, Recipes Tagged: chocolate peanut butter pie, cool whip, Oreos Oreo crust, Peanut Butter, peanut butter cup pie, peanut butter pie

Peanut Butter Cup Cookies

November 11, 2017 by chrissy@mythankfultable.com

Chocolate Peanut Butter Cup Cookies

What is the amazing combination of Peanut Butter and Chocolate and the power it holds over people in my life? Almost everyone I know is in love with this dynamic duo.

While I am a sea salt caramel dark chocolate gal, I understand the love for this kind of cookie. It’s the kind of cookie I get loving looks over. And hey, who doesn’t want to be loved?

If you could make food porn, there is a smell of peanut butter and chocolate melting, as well as the fact that when these first get incorporated- the peanut butter cups get all melty and soft and delicious. It’s really, really good stuff.

Peanut Butter Dough Ready for the Oven

As in, be careful when you remove these from the pan or you will get melted chocolate on your hand and there is no using a paper towel for that mess.

Peanut Butter Cookies waiting for Peanut Butter Cups

In all honestly, I do not know where this recipe came from. I have a computer printed out recipe with no indicator of who the author is. It is from pre-pinterest board days, and I apologize to the author for not knowing who you are to give you credit. It is a superior recipe and you deserve it!

The batter itself is easy to prepare and SO WORTH DOUBLING. Make the extra dough. You should buy the extra bag of peanut butter cups. You will want more of these.

Now, for the baking: I used a very large mini muffin pan I purchased specifically for this recipe. You scoop or mold the dough into balls after refrigerating, and bake. I scooped. I did not take the time to hand roll each cookie ball. It was undetectable. Make this easy on you, scoop away.

Peanut Butter Cup Cookie

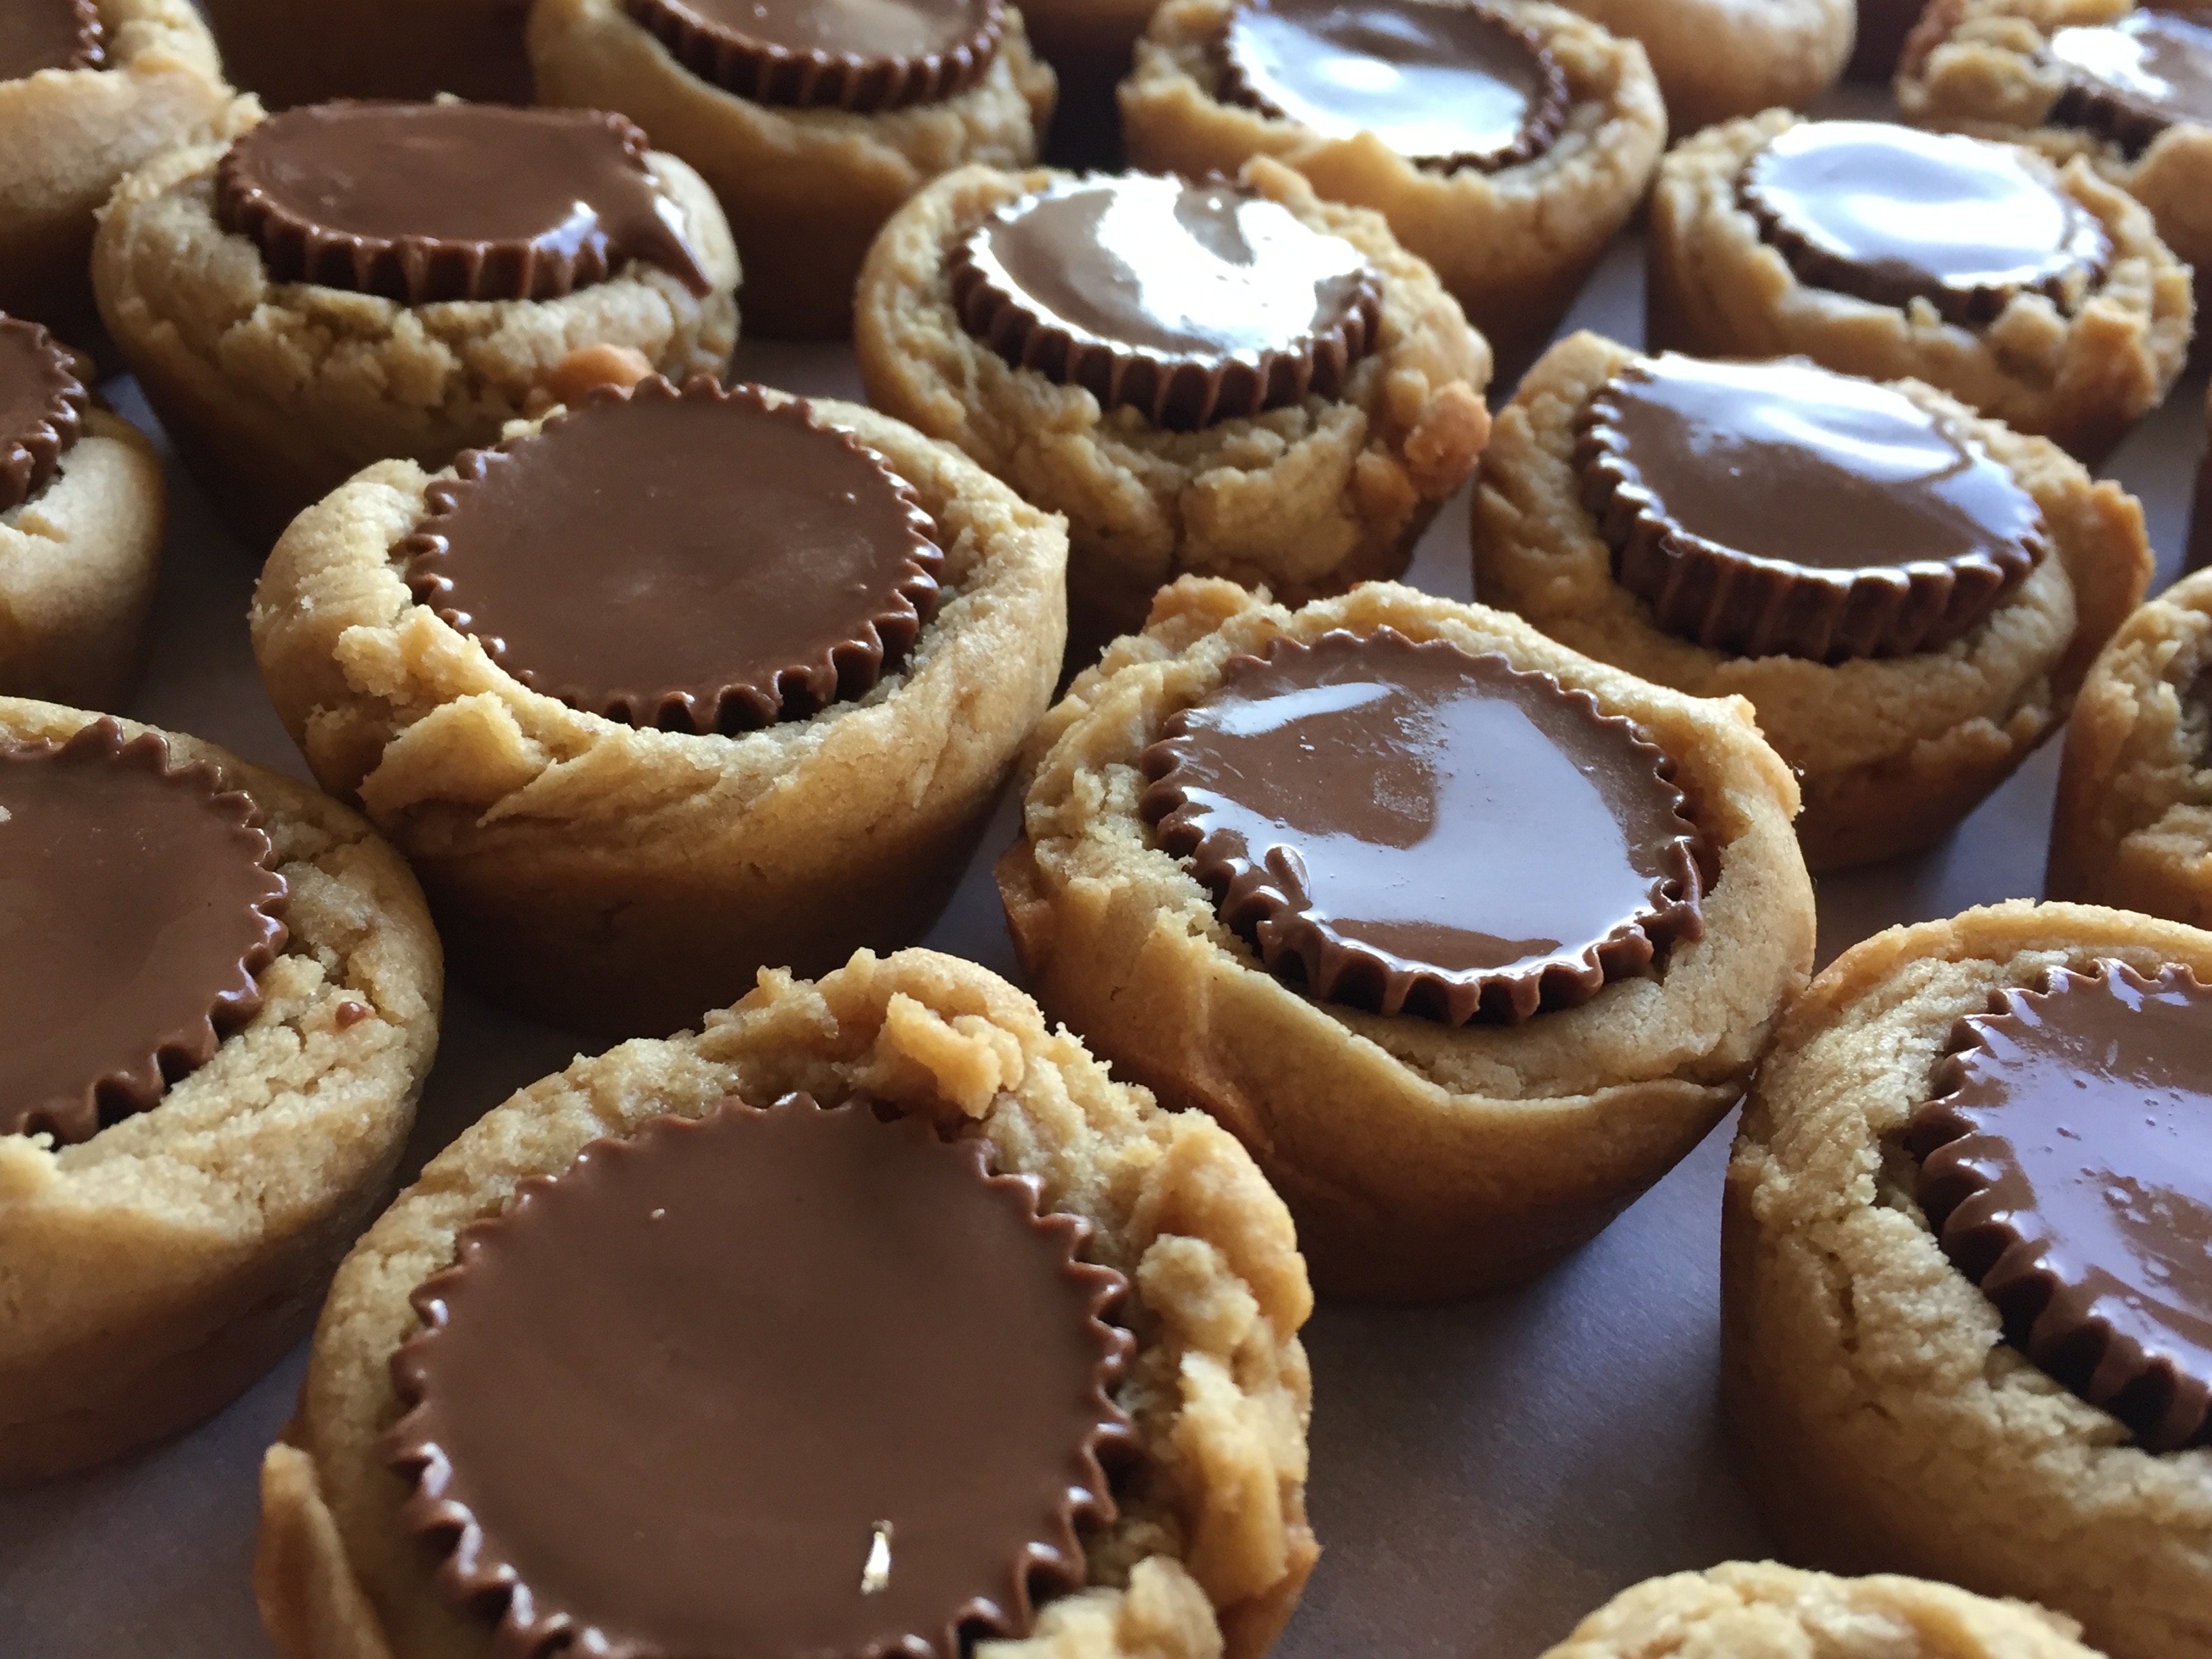
Then, the moment of sweet union! You press the peanut butter cup into the baked cookie dough and wait. Wait for the peanut butter cup to melt, wait for the dough to cool just enough to take the cookies out of the pan and start all over.

I doubled this recipe, and had exactly enough peanut butter cups (I bought two bags of the holiday wrapped ones) with the exception of one cookie, which got a rolo (extra from another cookie recipe I will be sharing soon). I do believe that someone in my life ate a peanut butter cup without permission from the bag (you know who you are, and it’s a good thing I like you).

The rolo cookie actually wasn’t awful either. But let’s keep to the real deal for this recipe.

With all of the nut allergy people in the world, this is a recipe I would only bring if I knew I could, but I do know it wouldn’t last long. These would be the first to go.

If you are a really lucky seventeen year old, your mom puts a baggie of these in your car so you have some for your road trip, and you say, “Thanks mom!” and hug her. Which is why she put them in your car in the first place (as well as threw out the gum wrappers and miscellaneous trash).

Essentially, its a love fest in a bite sized portion.

I am going to publish this recipe right now, I hope you enjoy it! And as always, thank you for coming to the table!

Chrissy

Click below for printable recipe!

Print

Peanut Butter Cup Cookies

Print Recipe

Peanut butter cookies with a peanut butter cup center!

  • Author: chrissy@mythankfultable.com

Ingredients

Scale
  • 1/2 Cup Butter
  • 1/2 Cup Peanut Butter
  • 1/2 Cup Granulated White Sugar
  • 1/2 Cup Dark Brown Sugar
  • 1 Egg
  • 1 Teaspoon Vanilla Extract
  • 1 1/4 Cup Flour
  • 3/4 Teaspoon Baking Soda
  • 1/2 Teaspoon Salt
  • 48 Unwrapped miniature Peanut Butter Cups

Instructions

  1. In a bowl, whisk together dry ingredients. Set aside.
  2. In a mixer, cream butter, sugars, until light and creamy.
  3. Add egg and vanilla. Mix to combine, scraping down sides of bowl.
  4. Slowly incorporate dry ingredients, mixing until combined.
  5. Refrigerate dough until chilled, 2 hours or overnight.
  6. Scoop/shape dough into 1 inch balls and place in mini muffin pan.
  7. Bake for 10-12 minutes or until puffy and light golden brown.
  8. Remove from oven and immediately press unwrapped miniature peanut butter cups into each cookie.
  9. Cool for ten minutes before removing from the pans.

Did you make this recipe?

Share a photo and tag us — we can't wait to see what you've made!

Posted in: Cookies, Recipes Tagged: Cookies, Peanut Butter, peanut butter cup, peanut butter cup cookies

Elvis Overnight Oats

September 13, 2017 by chrissy@mythankfultable.com
Elvis Overnight Oats

I know. I know. Some things go from being good to over the top, and they need a name worthy of their awesomeness. May I introduce my latest breakfast creation, The Elvis Overnight Oats.

Elvis Overnight Oats

Elvis Overnight Oats

It started out as an endeavor to create a high-protein, healthy, filling, nutritious breakfast. Which it is, don’t get me wrong. Starting out with steel-cut oats, right before the liquid is absorbed, I added peanut butter powder. Step one of yum. Then, taking plain Greek yogurt, I added Quest Banana Protein Powder, which is one of my favorites.  So you have the peanut butter and banana part.

My official peanut-butter-taste-tester-man commented it needed more peanut butter, so we added a tablespoon of chunky style peanut butter on top.

I felt it needed more banana, so in went the fresh banana.

It was perfect.

Or so I thought.

As an aside, I was lucky enough to host the JV Field Hockey team for breakfast on Sunday, and was impressed not only that this team of girls were kind, and polite, and gracious athletes…but that they put away almost as much food as the wrestling team can (after a match, before they don’t like to eat much). Go girls! Did I mention they ate almost six pounds of bacon? I know, impressive.

Peanut Butter and Banana Overnight Oats

Peanut Butter and Banana Overnight Oats

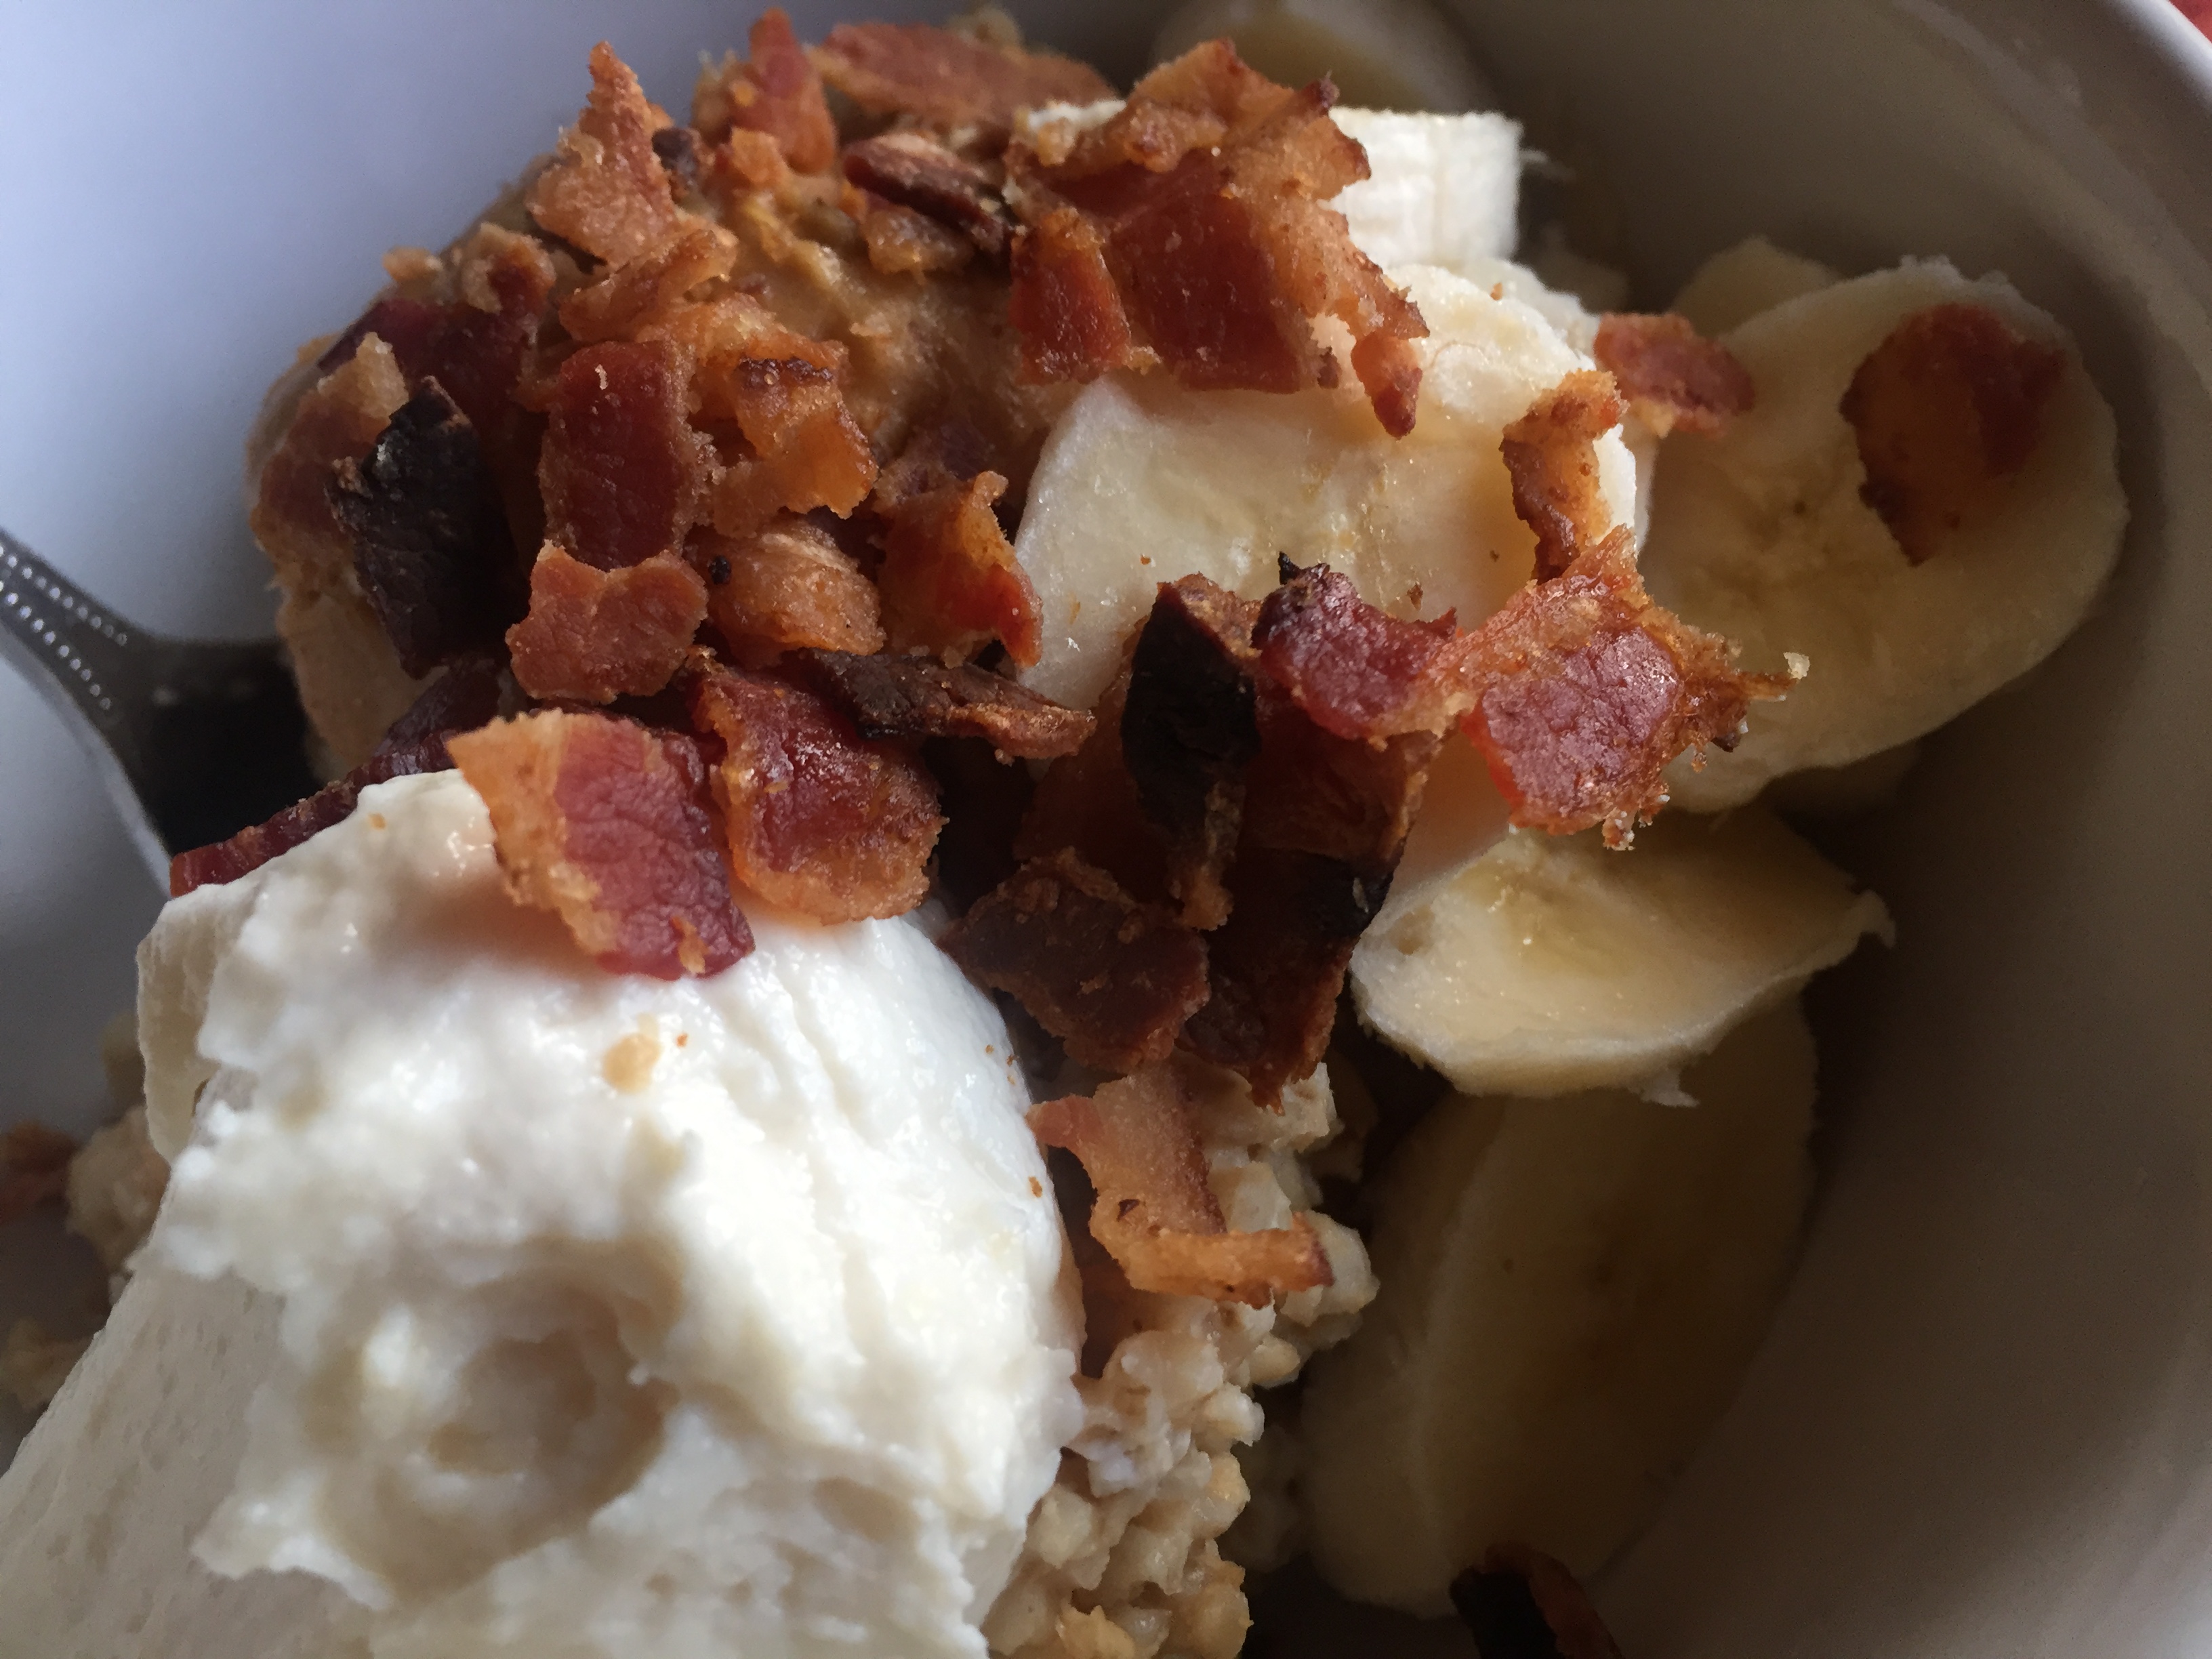
So, my perfect breakfast was put just over the top with the leftover bacon from the breakfast (I was able to salvage a few strips). This serving literally has half a strip, so in the big scheme of things it didn’t create caloric devastation, but it did tip the scales in the realm of breakfast flavor.

When I visit my brother in West Des Moines, a mandatory stop is Zombie Burger, for an Undead Elvis (check it out, it is amazing). If you are a carnivore, and believe in the burger to end all burgers, the apocalyptic (pun intended) experience is worth the flight. So, that said, a breakfast that includes, peanut butter, banana, and (sigh) bacon, deserves the king of names.

Elvis Overnight Oats

Elvis Overnight Oats

Elvis was before my time, but his voice graces my play list, and his favorite blend of banana, peanut butter and bacon is in my opinion, brilliant.

You can disagree. If you must know, this morning I had the peanut butter and banana oats as I originally intended, without the bacon. It was equally delicious. Sometimes, over the top is best saved for special occasions. That, and the JV team ate the rest of the bacon.

They have won their first two games, so who’s to complain?

I hope your breakfasts love you tender, and as always, thank you for coming to the table!

Chrissy

click below for printable recipe

Print

Elvis Overnight Oats

Elvis Overnight Oats
Print Recipe

This recipe makes four servings of “King” worthy breakfast!

  • Author: chrissy@mythankfultable.com

Ingredients

Scale
  • 1 Cup Steel Cut Oats
  • 4 Cups Boiling Water
  • 2 Tablespoons Peanut Butter Powder
  • 1 Cup Plain Greek Style Yogurt
  • 1 Scoop/packet Banana Quest Protein Powder
  • 2 Bananas
  • 4 Tablespoons Chunky (or Plain) Peanut Butter
  • 2 Strips of Crispy Bacon

Instructions

  1. Cook Oats according to directions, boiling water, adding the oats and stirring until liquid is absorbed.
  2. At the end of cooking time, stir in Peanut Butter Powder (this is found in peanut butter aisle at grocery store, and typically contains less fat and calories)
  3. Divide into four serving bowls
  4. In a separate bowl, mix plain Greek yogurt with Banana Protein Powder
  5. Scoop four separate portions of Banana powder onto oats
  6. 1/2 Banana into each serving portion
  7. Scoop 1 TBSP Peanut Butter into each portion
  8. Crumble 1/2 strip of bacon into each portion.
  9. Put on some classic Elvis and enjoy.

Did you make this recipe?

Share a photo and tag us — we can't wait to see what you've made!

Posted in: breakfast, Recipes Tagged: banana, breakfast, Greek yogurt, overnight oats, Peanut Butter, Protein Powder, steel cut oats

Recipe Search

Recent Posts

  • Fluffernutter Cookies…You Heard Me April 12, 2024
  • On Nests July 30, 2023
  • Lemon Rosemary Shortbread Cookies April 24, 2022
  • Praline Sweet Potato Pie March 22, 2022
  • Italian Ricotta Cake March 13, 2022

Recent Comments

  • Cathy Carroll on To My Daughter On Her 18th Birthday
  • Maureen / Mimi on To My Daughter On Her 18th Birthday
  • Kathy G on To My Daughter On Her 18th Birthday
  • chrissy@mythankfultable.com on Cherry Crescent Moon Cookies and Finding the Joy
  • chrissy@mythankfultable.com on Cherry Crescent Moon Cookies and Finding the Joy

Archives

Categories

  • appetizer
  • bread
  • breakfast
  • Cookies
  • crockpot
  • crockpot
  • Dessert
  • Fruit
  • My Story
  • One Pan
  • Recipes
  • side dish
  • Side Dishes
  • soup
  • Vegan

Copyright © 2025 mythankfultable.com.

Lifestyle WordPress Theme by themehit.com