mythankfultable.com

Feeding the Heart, Body, and Family

  • My Pics
  • My Story
  • The Puppies
  • Contact Us
Feeding the Heart, Body, and Family

Recipes

Here is the recipe!

On Tootie’s Pickled Beets and the Stuff We Do Right

March 29, 2018 by chrissy@mythankfultable.com

This is a story about pickled beets, but mostly, not. 

I am meal planning for Easter. I realize that my table will not be filled except for my essential peeps, there will be leftovers to share and people can drop in for dessert as the day allows, but still, the planning and the prepping are all part of the joy for me. It’s like vacation; the planning part is almost as much fun as the going part. I’m a fan of anticipation and delayed gratification. For the most part, anyways.

I have been brewing a post about one year anniversaries of loss and navigating a year of parenting children who have lost their Dad, and how to write about it…but the things in my head and my heart don’t always mean I have the words to say them, or that anyone would want to read them, so they stay put.

Then, I come across a recipe from a lifetime ago, and I can hear his voice,

“Hey, do you have that recipe from those people out in the country? The Beet Recipe? I just got my hands on a ton of beets and want to try to make it.”

And there it is, all the good and the bad and the life that was and is. A woman named Tootie gave us her beet recipe when our son was just a baby…and it has stayed with me ever since. And yes, I shared the recipe, and he made a batch of these beets all of those years later.

So, I thought, instead of remembering all of the things we didn’t do the best, I would write about the things we did right.

We cooked, and made meals, and fed people. We loved people. We loved each other.

Even when it was ugly ugly. Even when it all fell apart. Even when all the things you think are safe and protected aren’t. Even when the worst happens and the bottom falls out. We had grace and respect. Sometimes better-late-than-never grace and respect, but it showed up eventually.

We did disagreeing until it was appropriate right. We did long distance parenting as best as we could. We did making sure as much of their lives was accessible to you to celebrate and participate in could happen. Made it so you were there for the every day ear-piercing stuff as well as the end of the year concert stuff. They talk to your parents at least once a week.

We had two great kids.

They are such a blend. They have a drive for adventure. They love to eat and cook new foods. They find a reverence in the cool old things one finds along the journey. They like competition, they see the best in people.

They flow. They wear ball caps, like you. They sing along to country music. These are just some their Dad’s qualities.

They have chosen to remember both the good and the bad things.

They have chosen to hold their questions for you, until they see you again.

And, even when you disappeared, we were there when you came back. We did a lot of it right. Or, at least the best “right” we could.

I don’t even begin to know what it is to wrestle with addiction, other than to have lived it from the outside. I know it doesn’t respect race or religion or socio-economic status. Addiction touches more people than we realize. I know there can be so much shame associated with addiction, for all who are touched by it.

Even though the world is changing, even though there is help out there, many people stay silent. It’s destructive and devastating and exhausting. It’s smoke and mirrors, weeding through to get to the real story, and building gut-wrenching boundaries.

I’ve read that addiction is the only illness that convinces you that you can cure yourself.

For those on the outside, it’s a briar patch of wanting to help and protecting what you can. There is no one-size-fits-all hand book for it. There is no easy way for anyone involved.

I wish I knew how to do more. I wish I knew how to do things the right way. Or how to have gotten through.  I will always wish these things, I think.

We did as much “right,” for the space of time and life that we were given. The things we didn’t do right shape my point of view for the rest of my days as well as the stuff we did.

Some days, I just sort through it. Some days, the fact that you are gone is still an elusive, shimmering truth that I can’t wrap myself around just yet.

He got into college. He made it to States. He got the Most Improved Award for the second year in a row. She makes honor roll every quarter. She won the Italian competition. She played field hockey all fall and winter long. They are sarcastic and funny and kind. They are amazing. They work together and laugh and play their ukuleles and guitars. They protect each other.

Photo courtesy of Larry White Jr. Photography

And you are missing all of it.

The list of stuff you are missing is overwhelming if I allow myself the time to think it.

Then I think, no. You aren’t. And maybe, from where you are, a safer, quieter place, where you don’t battle anymore, you can see them better. You can really see all of the things that perhaps, you wouldn’t have if things ended differently.  I don’t have the answers.

We did not do all things right, but these two kids, we did.

Sometimes my blog is all about the recipe, and this has one too, but sometimes, it’s about the stuff the recipe holds that doesn’t involve ingredient lists or cooking time. It’s about the other parts of life. Which is all a part of being welcome to come to the table.

I hope you enjoy it, and as always, thank you for coming to the table.

Chrissy

Print

Tootie’s Pickled Beets

Print Recipe

This pickled beet recipe came from a woman in Pennsylvania from a lifetime ago. The cloves, cinnamon, and allspice bring a different flavor to the pickled beets you may not encounter regularly!

  • Author: chrissy@mythankfultable.com

Ingredients

Scale
  • 4 Pounds cooked, peeled, and sliced beets.
  • 3 Cups sliced onions
  • 2 1/2 Cups Apple Cider Vinegar
  • 1 1/2 Cups Water
  • 1 Teaspoon Salt (Kosher)
  • 2 Cups White Sugar
  • 1 Tablespoon Mustard Seed
  • 1 Teaspoon Whole Allspice
  • 1 Teaspoon Whole Cloves
  • 3 Sticks of Cinnamon, broken

Instructions

  1. Boil liquids and spices and then reduce to a simmer for 5 minutes.
  2. Add beets and Onions and cook in simmering liquid for approx. 10 more minutes.
  3. Remove cinnamon sticks from cooking liquid.
  4. Using sterilized mason jars, pack beets and onions, leaving 1/4 inch remaining space in canning jar.
  5. Ladle hot liquid over beets and onions.
  6. Finish canning process with a water bath or allow to cool and refrigerate.

Did you make this recipe?

Share a photo and tag us — we can't wait to see what you've made!


Posted in: My Story, Recipes Tagged: beets, My story, Pickled Beets, Pickles, Side Dishes

Cranberry Orange Biscotti

March 27, 2018 by chrissy@mythankfultable.com
Cranberry Orange Biscotti

Cranberry Orange Biscotti

So, I’m a New England Girl, through and through. Give me your white steepled churches and ancient graveyards, lighthouses, glorious autumns, and all of the goodness that comes with the history of our great nation.

With that, and I’ve blogged about this before, is the amazing tradition of taking a perfectly healthy berry and plunking it down in a dessert. Now, if peanut butter and chocolate are a culinary “Bachelor”, cranberry and orange are the “Bachelorette.” Disclaimer: I don’t watch either show. However, this match of cranberry and orange just work so well together. I am all about being a resident of Massachusetts. We be the cranberry kings. Bring on the cranberries. 

In my endeavor to make all of the biscotti, it was inevitable I would find this recipe and attempt it.

Now, in my defense and love of citrus…I did really amp up the orange zest. How does one end up with 1/4 a cup of zest? Easy. You buy a bag of clementines, your mom brings over more clementines, and then, you see Satsumas with their little green leaves at the grocery store and you just have to buy them. Citrus overload. I can’t say I am sorry. We eat a lot of citrus. I need my vitamin C. I work with small children. My teaching table is a Petri dish.

Cranberry Orange BiscottiWell, if a clementine gets past it’s freshness it gets hard and almost field hockey ball like. But guess what? That zest is perfect. I also just bought a masticating cold press juicer (who knew this was a thing? it is). Enter more use for citrus but not it’s peel. Aha! Zesting has become pretty regular and normal around my kitchen.

This recipe combines easily and bakes in two stages. It keeps forever in an airtight container. Even though I don’t love white chocolate I think it adds just a little sweet and pretty on the finished cookie. I might make these again with white chocolate chips on the inside of the cookie; give the batter a bonus, and not dip them. Mix it up a bit. I might also make an orange glaze with citrus zest and confectioner’s sugar next time around.Cranberry Orange Biscotti

I will be honest and say I do love these biscotti, they are one of the best cranberry orange cookies I have ever had.

If you are a New Englander, you need to make yourself these cookies because they embrace everything that our history holds, (cranberries were even at the first Thanksgiving, remember). If you aren’t a New Englander, you should grab yourself a bag of dried cranberries and try this recipe. I promise, you won’t be disappointed.

I hope you enjoy this recipe and as always, thank you for coming to the table!

Chrissy

Click below for a printable recipe.

Print

Cranberry Orange Biscotti

Cranberry Orange Biscotti
Print Recipe

This combination of cranberry and orange biscotti with a white chocolate dip makes for the perfect New England biscotti. Recipe adapted from www.yourhomebasedmom.com

  • Author: chrissy@mythankfultable.com

Ingredients

Scale
  • 1/2 Cup Butter
  • 6 ounce package of Dried Cranberries (I used Craisins)
  • 3 Tablespoons Orange Juice
  • 3/4 Cup Sugar
  • 2 Teaspoons Baking Powder
  • 2 Eggs
  • 1/4 Cup Grated Orange Zest
  • 2 1/2 Cup AP Flour
  • 1/4 Teaspoon Salt
  • 1 Cup White Chocolate Chips

Instructions

  1. Preheat oven to 350*
  2. Place dried cranberries in a bowl and add boiling water. Let sit for five minutes. Drain well and set aside.
  3. In a mixer with a paddle attachment, combine butter and sugar and orange zest and mix until light and fluffy.
  4. Add eggs, one at a time and incorporate.
  5. Add Orange Juice, Baking Powder and Salt.
  6. Add flour until mixed.
  7. Turn out dough onto a lightly floured surface and shape into two 4″ x 8″ rectangles with softly rounded edges.
  8. Place on parchment lined or silicone mat lined cookie sheet.
  9. Bake for 25 minutes or until lightly golden brown.
  10. Allow to cool for ten minutes.
  11. Slice baked logs into one inch slices, on the diagonal, if you desire.
  12. Return cookies to the cookie sheet sliced side up and continue to bake for an additional 25 minutes.
  13. Allow cookies to cool.
  14. Microwave white chocolate chips in a microwave safe bowl, checking frequently to not scorch the white chocolate.
  15. Dip each biscotti into the white chocolate (or drizzle on top) and allow to cool.

Did you make this recipe?

Share a photo and tag us — we can't wait to see what you've made!

Posted in: Cookies, Recipes Tagged: Biscotti, Cookies, Cranberry, Cranberry Orange Biscotti, Orange, Zest

Rosemary Parmesan Skillet Bread

March 26, 2018 by chrissy@mythankfultable.com

Rosemary Parmesan Skillet Bread

When my son was almost a year old, I remember reaching into the pockets of my big bathrobe and discovering about twenty cheerios and a binkie (pacifier). I stood still and thought to myself, “Well, I guess I am officially a mom.”

To me, the day I baked bread and it not only smelled like heaven but looked and tasted divine, I decided I was a baker.

I make mistakes when I bake. Sometimes I pour in butterscotch chips instead of peanut butter chips and make a happy little accidents. Sometimes I go off recipe and double the zest or the extract and blaze my own trail. But bread? the beauty of bread is that it starts as a promise and grows. There is (a little) room for imperfection.

I think bread is like faith. You have to wait and see. You feed it, you give it a warm place to grow, and you shape it.

Rosemary Parmesan Skillet Bread

You place it in the fire and you wait for it to become something real.

This bread, like all good things, takes time. However, it is pretty simple as far as labor goes. Mix the ingredients, cover and place somewhere warm, shape, and bake. It bakes in a cast iron skillet in the oven , which is such a great idea.

Filled with rosemary, brushed with olive oil and topped with more rosemary and parmesan cheese, This gorgeous crusty loaf of bread has a beautiful crumb and the flavor of rosemary just carries through the whole loaf.

Now,

Rosemary Parmesan Skillet Bread

I do grow my own rosemary. I have two small plants that every year I marvel that they return. They technically shouldn’t because of my zone, but maybe where they are located in my yard just has magic, because last year I harvested some. Another neat fact is that I don’t use a lot of rosemary in my cooking, so, two little plants make more than enough for this bread and more.

My children do not like things in their bread. No to chunks or seeds or spices. No to raisins. No to herbs. But this bread is too good for me not to make because the kids I brought into this world can’t appreciate it.

Make this with French Onion Soup and use the bread instead of croutons. Make this when it snows and the warm Rosemary and Parmesan will make shoveling and snow removal worth it. It can be paired with salad, tomato soup, beef stew, made into grilled cheese sandwiches, oh, the list goes on.

Rosemary Parmesan Skillet Bread


What I love about homemade bread is the fact that you know exactly what goes into it. Flour. Yeast. Salt. Water. Sugar to feed the yeast if you are like me and want to make sure it blooms. Time. Love. Pretty simple stuff.

I use a basic AP Flour but have since purchased Artisanal Flour (More expensive and fancier bag) and have noticed little difference. You can play with heartier flours, but it will impact the density and consistency of the bread.

Rosemary Parmesan Skillet BreadI can not express how proud you will be when you take this out of the oven. Like those cheerios, it will rename you as a baker, for sure.

I hope you enjoy this recipe, and as always, thank you for coming to the table!

ChrissyRosemary Parmesan Skillet Bread

Click below for a printable recipe!

Print

Rosemary Parmesan Skilled Bread

Print Recipe

Original recipe from www.handletheheat.com with a few modifications by yours truly. So delicious, the combination of rosemary and parmesan make this the perfect accompaniment to soup or salad, or stand alone with or without butter!

  • Author: chrissy@mythankfultable.com

Ingredients

Scale
  • 2 Cups of Lukewarm Water
  • One Packet of Instant Yeast (2 1/4 Teaspoons)
  • 4 1/2 Cup Bread Flour
  • 3 Tablespoons dried Rosemary (I did not chop this- I crumbled it in my hand to both make the dried rosemary into smaller pieces and release natural oils.
  • 1 1/2 Teaspoon Salt
  • 3 Tablespoons Olive Oil
  • 1/3 Cup Freshly grated Parmesan Cheese

Instructions

  1. Place yeast and warm water in a large mixing bowl.
  2. Combine flour slowly, stirring with a wooden spoon or plastic spatula.
  3. Incorporate rosemary, salt, and mix until combined.
  4. Cover bread dough with a clean, warm, damp towel and leave in a warm spot to double in size. (I left mine over night, but it was ready for the next step in an hour or so).
  5. Place two tablespoons of olive oil in the cast iron skillet, making sure to oil the surfaces where the bread dough will touch.
  6. With floured hands, remove dough from the bowl, shape into a ball, and place in the oiled skillet.
  7. Preheat oven to 400*
  8. Allow bread dough to rise a second time in the skillet, approximately 30 minutes.
  9. Right before placing dough in the oven, pour remaining olive oil on the dough and brush to cover the top surface.
  10. Make a slash on the top of the bread in an X shape with a sharp knife.
  11. Sprinkle additional rosemary on top of the bread.
  12. Bake in a 400* for 25 minutes.
  13. Pull Bread out of the oven, sprinkle liberally with the Parmesan cheese, and return to the oven.
  14. Bake for an additional 20-25 minutes, when golden brown.

Did you make this recipe?

Share a photo and tag us — we can't wait to see what you've made!


Posted in: bread, Recipes Tagged: Bread, Parmesan, Rosemary, Skillet Bread, Yeast Dough

Chicken and Dumplings

March 21, 2018 by chrissy@mythankfultable.com
Chicken and Dumplings

Chicken and Dumplings

Wait, what? Another round of snow? My calendar says it is officially Spring. Oh well, welcome to life in New England. Better make some comfort food for supper!

Chicken and Dumplings is one of those dishes that screams out “Comfort Food!” It is a combination of chunks of chicken and sautéed vegetables served in a broth that has been slightly thickened by square pillows of dough.

The dumplings in and of themselves are a wonder. Quickly mixed and rolled out, the dough is cut into squares and actually cooks in the broth. This creates two things: The broth is thickened and the dumplings take on the broth flavor as they cook.

Chicken and Dumplings

Chicken and Dumplings

Now, if you do not like doughy things (and are we friends if you don’t?), this may not be the recipe for you. Dumplings are soft thicker noodles. They are tender and have an entirely different texture which contradicts the protein of the chicken and the tooth of the mostly cooked carrots.

Now the chicken. I use tenderloin or tenders, because it is easier. I left mine whole. You can chunk yours up if you want. I wanted easy. Leaving them as is, was easy. That is why you give your eaters forks and knives. They can cut up their own chicken. (I crack myself up).

While this type of meal may not be a regular on our rotation, I think because it isn’t, my family enjoyed it immensely. It is definitely a comfort food for cold winter nights. It is even better the next day, as the dumplings continue to soak up the broth and get bigger and more tender.

Chicken and Dumplings
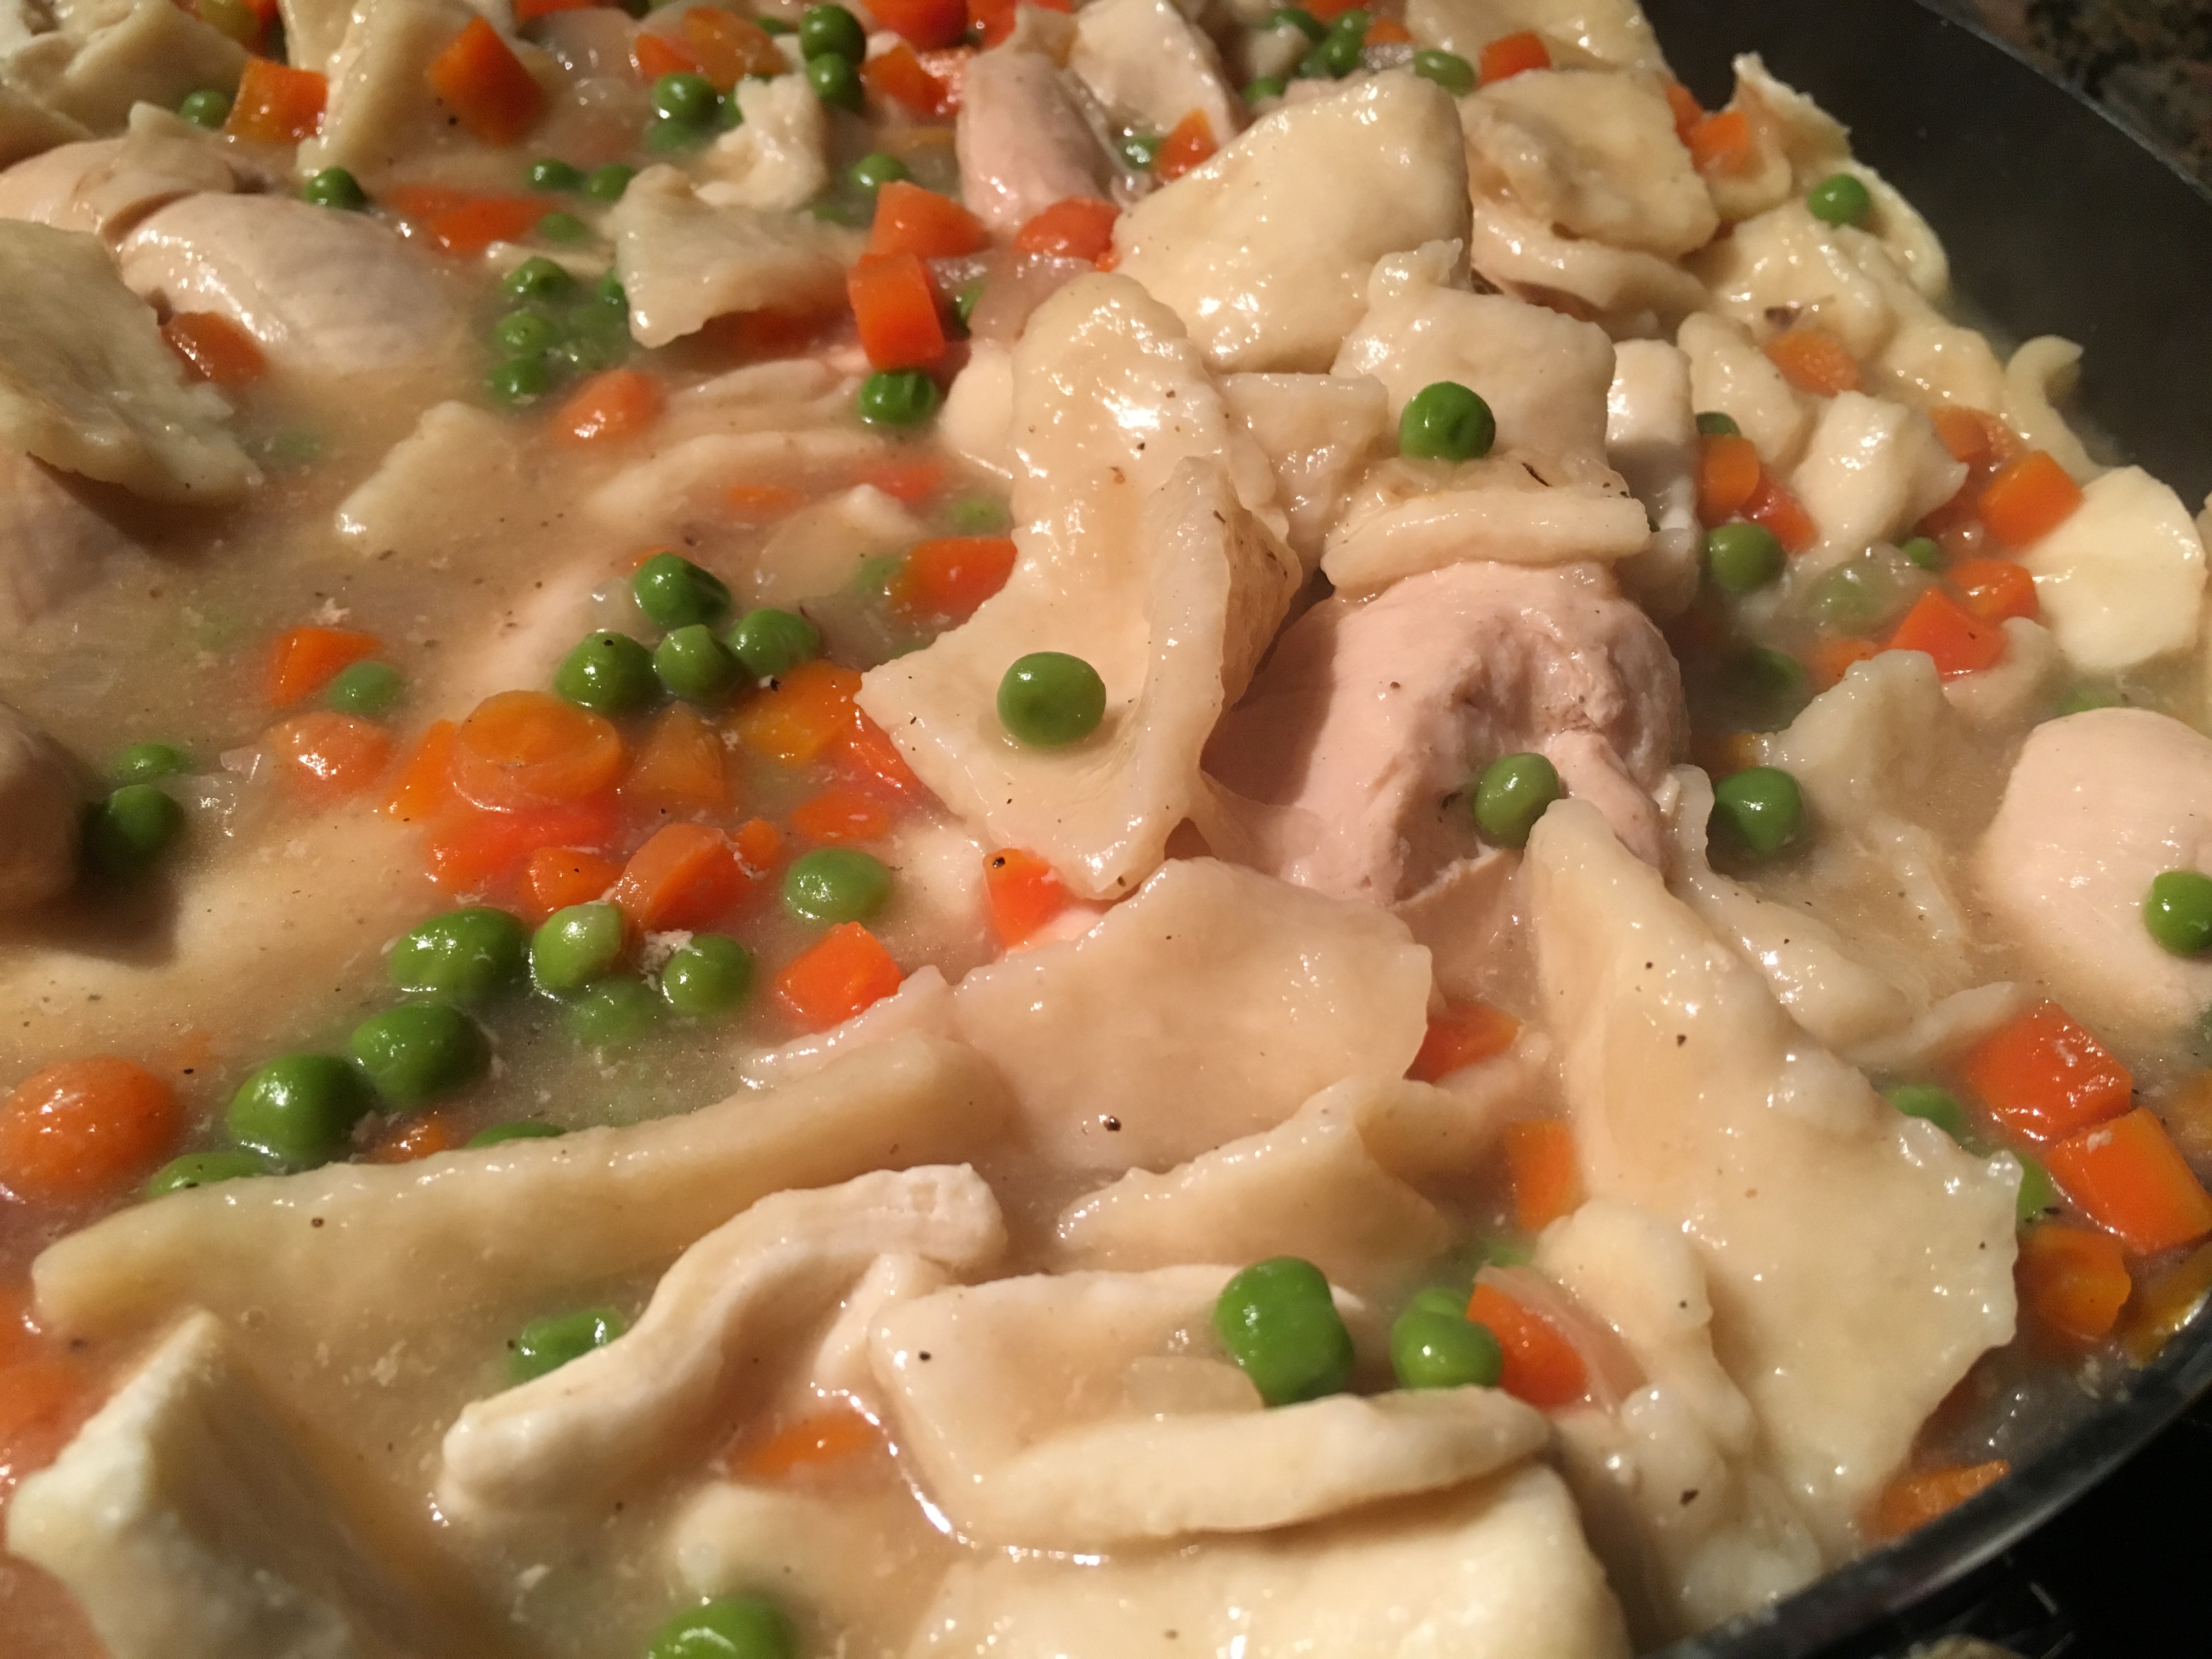
The dumplings are the hardest part in that you have to mix and roll out the dough. Technically this can be accomplished in the time you would order, drive through, pay, and pick up your fast food. I’m not joking. Mix, roll, cut.

So, it isn’t like you are giving up a night for this meal. It actually comes together much faster than you would imagine, and you can pat yourself on the back and give yourself a hug for doing something so cool as making your own dumplings. You go thankful table maker, you.

In a world where a little bit of comfort served in a bowl is a small but big gift, I am thankful I could share this recipe with you.

I hope you enjoy this recipe, and as always, thank you for coming to the table.


Print

Chicken and Dumplings

Chicken and Dumplings
Print Recipe
  • Author: chrissy@mythankfultable.com

Ingredients

Scale
  • 2 Pounds Chicken Tenders
  • 1 Cup Chopped Carrots
  • 1/2 Cup Chopped Onions
  • 24 Ounces of Chicken Broth
  • 1 Package frozen Peas

Dumplings:

  • 2 Cups AP Flour
  • 3/4 Teaspoon Baking Powder
  • 3 Tablespoons Butter
  • 1/2 Teaspoon Salt
  • 1 Cup Milk

Instructions

  1. In a large pan, saute onions and carrots in a little bit of oil. Sauce until soft.
  2. Remove vegetables and add chicken tenders, cooking until golden brown.
  3. Add carrots, onions, and peas to the pan, add chicken broth and simmer.
  4. In a bowl, combine ingredients for dumplings until combined.
  5. Turn out dumpling dough onto a floured surface and roll until 1/4″ thickness.
  6. Slice dough into 2X2″ squares or larger/smaller if desired.
  7. When broth is simmering, slowly add dumplings to the pan, turning to make sure cooked.
  8. Allow dumplings to cook for approx. ten minutes, serve.

Did you make this recipe?

Share a photo and tag us — we can't wait to see what you've made!

Posted in: My Story, One Pan, Recipes Tagged: Broth, Chicken, Chicken and Dumplings, Chicken Tenderloins, Dough, Dumplings, One Pan

Chocolate Dipped Peanut Butter Biscotti and Happy Little Accidents

March 20, 2018 by chrissy@mythankfultable.com
Chocolate Dipped Peanut Butter Biscotti

Chocolate Dipped Peanut Butter Biscotti

My precious. Peanut Butter Biscotti dipped in melty semi-sweet morsels. You had me at hello. I don’t even love peanut butter and chocolate the way some people do, but this cookie holds a sweet spot (pun intended) in my heart.

This dough is a peanut butter based, and actually doesn’t even have regular butter in the dough. It uses and mix dark brown sugar and white sugar instead of all white, and calls for an extra egg than my regular batter calls for.

Chocolate Dipped Peanut Butter Biscotti

I have a small kitchen, but a very organized pantry. Baking ingredients live on two shelves, and my various pans and baking implements live together happily so this baker knows what she does and doesn’t have. So…when I added the chips to the mixer (which were supposed to be peanut butter chips) and realized as they were being incorporated that lo and behold they were butterscotch chips…well it was a happy little accident. The peanut butter chips live right next to the butterscotch chips. I grabbed the wrong bag. Chocolate Dipped Peanut Butter Biscotti

I am sure had the chips been the peanut butter and not butterscotch the peanut flavor would be boosted above and beyond. It was not intentional, but the change of plan made for an amazing cookie. The peanut taste is there and the chocolate as well and the scotchy seemed to make the peanut butter almost taste peanut buttery-er. However, if you make these, you do you. Use the peanut butter chips.

Chocolate Dipped Peanut Butter Biscotti
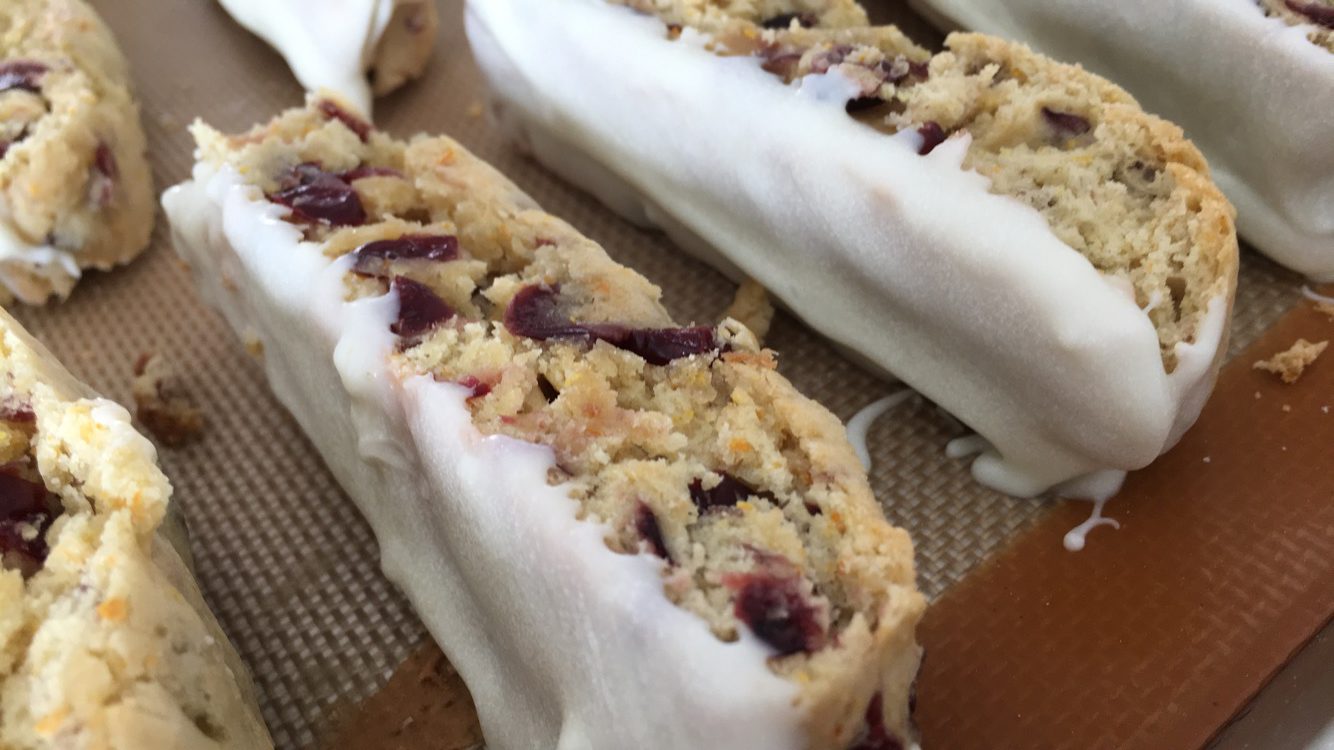
If I baked these cookies a little longer after being sliced, they would crisp up nicely, but I chose to leave them slightly softer and chewier, a decision I do not regret. While there is a place in the world for the crisper crunchier biscotti, these cookies called for a bit of chew. Call me sentimental, but I like my peanut butter cookies chewier.

Whether you embrace my happy accident or go full on Peanut Butter, the way this biscotti dough cooks up, you will be so happy. The outside forms a perfect shell, with a hint of a crackle when you slice into it. Then, the inner portion of the cookie stays tender and soft (which does firm up with the second bake). I could have left them as they were without doing the second bake- but then it would not have been biscotti.

I love the way people light up when they realize I have made something peanut butter based. It really does have a following. This cookie will not disappoint. Even with the butterscotch chips- it is pretty darn near the perfect cookie. If I do say so myself.

I hope you enjoy this recipe, and as always, thank you for coming to the table!

Chrissy

Click below for a printable recipe.

Print

Chocolate Dipped Peanut Butter Biscotti and Happy Little Accidents

Chocolate Dipped Peanut Butter Biscotti
Print Recipe

This delicious peanut butter based biscotti incorporates the sweet mellow flavor of butterscotch chips and wrap up in a chocolate dip. The perfect accompaniment to tea or coffee.

  • Author: chrissy@mythankfultable.com

Ingredients

Scale
  • 1 Cup Creamy Peanut Butter
  • 1/2 Cup Dark Brown Sugar
  • 1/2 Cup Sugar
  • 3 Eggs
  • 1/4 Cup Milk
  • 1 Tablespoon Baking Powder
  • 1 Tablespoon Vanilla Extract
  • 3 Cups AP Flour
  • 2 Cups Butterscotch Chips

Instructions

  1. Preheat oven to 350*
  2. In a mixer with a paddle attachment, combine peanut butter and sugars. Combine until light and fluffy.
  3. Add eggs, one at a time, and incorporate.
  4. Pour in milk, extract, and mix until combined.
  5. Add dry ingredients, slowly, until all incorporated. Stop to scrape the sides of the bowl as you go.
  6. Add chips into the mixture.
  7. Separate the dough into three sections and form each into a softly rounded rectangle/log.
  8. Place on a silicone or parchment lined cookie sheet and bake for 15-20 minutes or until firm and lightly golden.
  9. Allow to cool for ten minutes.
  10. Slice logs into one inch slices, and return to the baking sheet cut side up.
  11. Return to oven and bake for an addition 10 minutes or until dry (I keep mine chewier).
  12. Remove biscotti and allow to cool completely.
  13. In a microwave safe bowl, melt semi sweet or dark chocolate chips (approx 1 -2 Cups)
  14. Dip cookies into melted chocolate or drizzle on top of cookies.

Did you make this recipe?

Share a photo and tag us — we can't wait to see what you've made!


Posted in: Cookies, Recipes Tagged: Biscotti, Butterscotch chips, chocolate dipped, Cookies, Peanut Butter, Peanut Butter Biscotti, semi sweet chocolate

Carrot Cake Blondies and the Easy Way Out

March 19, 2018 by chrissy@mythankfultable.com
Carrot Cake Blondies

Carrot Cake Blondies

I am ever surrounded by strong, determined, multi-tasking women. We work at home, we work at our jobs, we work at the gym, we work at our families, and finally, at the end of the day, we work to make ourselves finally relax and unwind. Yes, for some of us, down time is actually hard.

I have a friend in Pennsylvania who’s younger brother has this amazing ability to nap. Anywhere, anytime. My son can sleep in for hours beyond my internal alarm clock. I vaguely remember my mom waking me up with the vacuum cleaner at some point in my high school years, because even though it was summer and I didn’t have to work, no one should be in bed after 9 am.Carrot Cake Blondies

I am envious of those people. The sleepers. The ones who can sit on a couch with the intention of resting. In a weird creepy but un-creepy way, I want to snuggle next to them and learn their magic. The magic of the sleep. There is nothing like a warm sunbeam and soft breathing and rest. It is truly one of my ultimate goals.

That being said, with all of the working and the being strong and the multi-tasking, sometimes we need to just take the easy way out. For example. We reheat the leftovers or eat cereal for supper. We sweep but don’t wash the floor. We pull the sheets up but don’t necessarily smooth everything out underneath when we make the bed. We buy the pre-shredded carrots or potatoes for recipes. And it is all OK.

Carrot Cake Blondies
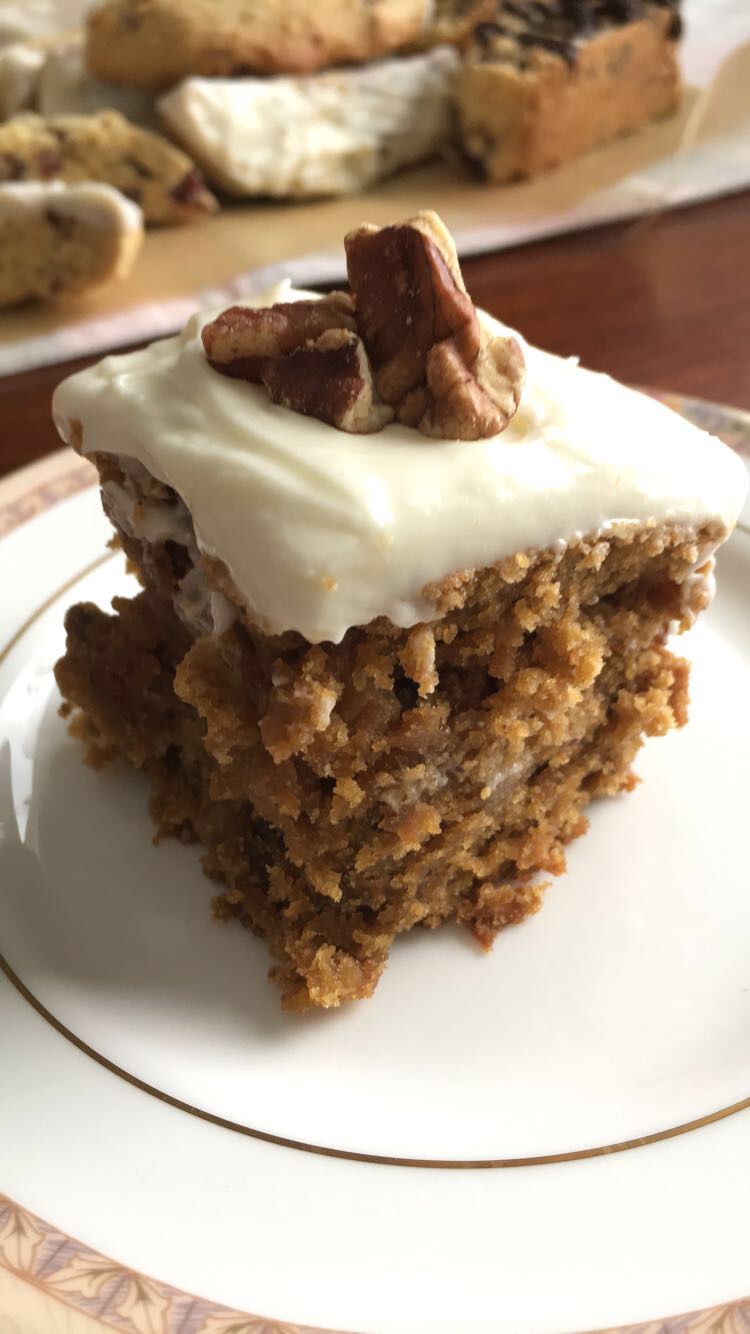
While this recipe isn’t necessarily easy (as in box mix easy) it is easy when compared to making a carrot cake. So I say yay. And no one will find it lacking, I promise. I PROMISE.

Now the world is divided into Carrot Cake lovers and haters. You choose your side. While I don’t want it more than say my banana cake, I do love a slice of carrot cake every now and then. As spring promises to be around the corner (sort of…who are we kidding there is still snow on the ground) Carrot Cake seems like the perfect Easter-y brunch-y dessert.

And then, this baby is covered in a thick, cream cheese frosting, so you can’t say no.  Cream cheese frosting is like the mortar that holds all of life together. You can literally spread it on a piece of raw celery and you will be happy.  Cream cheese frosting is the pinnacle of all desserts. OK, I’m over reacting a bit. No, I am not.

This is a one bowl mix it all in, bake in under an hour dessert.

I did grate the carrots myself, because I like a fine grate and the pre-shredded carrots are too big for me. But that is me. I packed the cup measurement, because carrots mean moisture and that is never a bad thing in a blondie.

The recipe calls for chopped pecans, and all of the spices you expect in carrot cake. It delivers. Oh so moist. Oh so flavorful. Oh so almost healthy if you forget the sugar, butter, and cream cheese frosting. Make it anyway.

Carrot Cake BlondiesI will say the original recipe (bakerbynature.com) which is from an amazing website I love called for a 9X9″ pan. My pan was smaller 8X8, and my dessert ended up being higher in the pan and therefore I sliced them smaller. I will be questing for a larger pan so I can make these again.

After the dessert cools, you slather up that frosting and go to town. I topped my squares with a half pecan for the pretty factor, but it doesn’t need to be pretty, it is delicious. I will always choose delicious over pretty, and this blog is about shortcuts, so save the decorations for when you have more time.

I may never be a great napper, I will always be a multi-tasker, but I will also choose the easy way out on occasion. I am only one woman after all. We deserve the good desserts too, even if they don’t have layers and piped baby carrots out of fondant on it.

I hope you enjoy this recipe, and as always, thank you for coming to the table!

Chrissy

Click below for a printable recipe.

Print

Carrot Cake Blondies and the Easy Way Out

Carrot Cake Blondies
Print Recipe

Adapted original recipe from www.bakerbynature.com These rich, decadent carrot cake blondies have all of the magic of carrot cake without all of the hard work. Rich, cream cheese frosting tops the magic and makes this one amazing dessert.

  • Author: chrissy@mythankfultable.com

Ingredients

Scale
  •  1 Cup Melted Butter (8 ounces)
  • 1 1/2 Cup Dark Brown Sugar
  • 2 Teaspoons Vanilla Extract
  • 1 Large Egg and 1 Large Egg Yolk
  • 1 Packed Cup of finely grated carrot
  • 1 1/2 Cups of Flour plus 2 Tablespoons
  • 1 Teaspoon Ground Ginger
  • 1 Teaspoon Ground Cinnamon
  • 1/2 Teaspoon Salt
  • 3/4 Cup Chopped Pecans

Cream Cheese Frosting:

  • 8 Ounces (One block) of Cream Cheese, softened
  • 2 Teaspoons Vanilla Extract
  • 2 Cups Confectioner’s Sugar


Instructions

  1. Preheat oven to 350*
  2. Line a 9×9″ baking pan with parchment paper (my pan was 8×8″).
  3. In a mixer with a paddle attachment, combine melted butter, brown sugar, and vanilla until combined and smooth.
  4. Add in eggs and grated carrot. Combine.
  5. Add spices and dry ingredients.
  6. Fold in chopped pecans.
  7. Pour batter into parchment lined pan, and smooth.
  8. Bake for 32-35 minutes, or until the center is set (and tester comes out clean).
  9. Cool completely in pan before removing in frosting.
  10. To make frosting, combine cream cheese, vanilla, and powdered sugar until combined.
  11. Cut into squares and serve.

Did you make this recipe?

Share a photo and tag us — we can't wait to see what you've made!

Posted in: Dessert, My Story, Recipes Tagged: Blondies, Carrot, carrot cake, Carrot Cake Blondies, cream cheese, cream cheese frosting, dessert

Sea Salt Peanut Butter Dark Chocolate Chunk Cookies

March 17, 2018 by chrissy@mythankfultable.com
Sea Salt Peanut Butter Dark Chocolate Chunk Cookies

Sea Salt Peanut Butter Dark Chocolate Chunk Cookies

Oh this life. It can hand you some things. Good, bad, hard, easy, thankful, grumpy…we ride the roller coaster and take each day as it comes.

And when you stumble upon a recipe titled “Jumbo Peanut Butter Chocolate Chip Cookies,” (www.oliveandartisan.com) and further realize the recipe calls for flaked sea salt to be sprinkle on top…you say, “Thanks, life, for letting me find this.”

We had another snow day, and therefore, I baked. I baked and then shared because I am trying to become a smaller version of myself (bigger on the inside but maybe smaller on the scale side). Which is never a bad thing, sharing cookies such as these.

Sea Salt Peanut Butter Dark Chocolate Chunk Cookies

These cookies are soft and pillowy, with huge dark chocolate chips (why are the dark chocolate chips bigger in the Nestle bag? Not sure but I am all for it.), and then topped with sea salt. Just enough to make the dark chocolate resonate and the peanut butter stand out. It’s a pretty brilliant cookie.

I made my dough the night before and refrigerated it so my cookies are a little puffier than I anticipated. They also are baked at a lower temperature so they stay oh so soft and chewy.

Sea Salt Peanut Butter Dark Chocolate Chunk Cookies
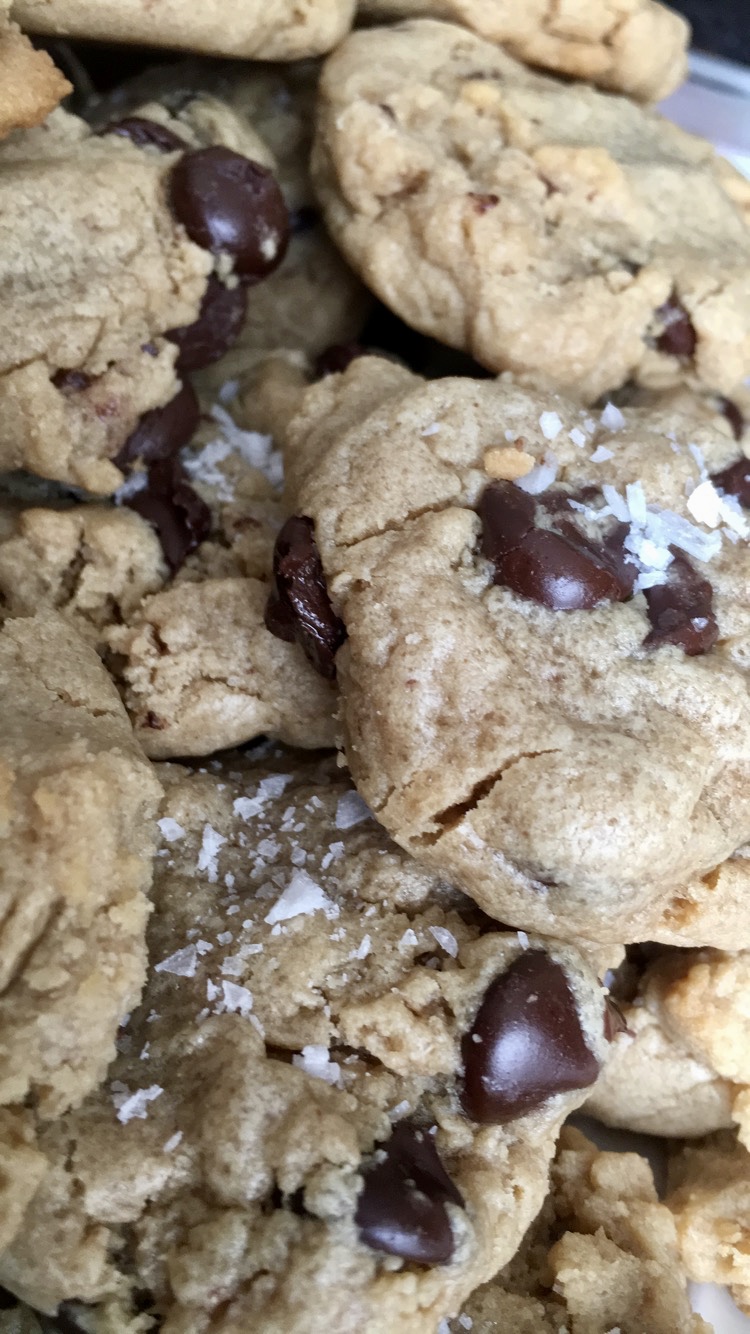
They have a similarity to the stand by Peanut Blossom Cookie without being as heavy or as dense. They have all of the flavor and then some. I actually like the idea of smaller chocolate pieces as opposed to the big Hershey kiss of the Peanut Blossom.

I usually can pass by a peanut butter cookie (I know, I’m weird). Not these. These are actually a cookie dough I would eat raw (I try not to- old mom infused habits of old). It is that good.Sea Salt Peanut Butter Dark Chocolate Chunk Cookies

I actually doubled the recipe as well because I had every intention of sharing. After all, when your children beg you to stop making biscotti and make a soft cookie for once, you plan that they will eat the soft cookies. Add a snow day and being inside and well, there aren’t many left over. Which is always a good thing.

I hope you enjoy this recipe, and as always, thank you for coming to the table!

Chrissy

Click below for a printable recipe!

Print

Sea Salt Peanut Butter Dark Chocolate Chunk Cookies

Print Recipe

This delicious peanut butter dark chocolate chip cookie with sea salt sprinkled on top takes peanut butter love to the next level. Recipe adapted from www.oliveandartisan.com This recipe makes approx. 48 regular-sized cookies.

  • Author: chrissy@mythankfultable.com

Ingredients

Scale
  • 1 Cup Butter
  • 1 Cup Creamy Peanut Butter
  • 2 Teaspoons Vanilla Extract
  • 1 Cup Sugar
  • 1 Cup Brown Sugar
  • 2 Large Eggs
  • 3 Cups AP Flour
  • 1 Teaspoon Baking Soda
  • 1 Teaspoon Baking Powder
  • 1 Teaspoon Salt
  • 1 Bag Dark Chocolate Chips/Chunks (You can ALWAYS ADD MORE!)
  • Flaked Sea Salt for topping


Instructions

  1. In a mixer with a paddle attachment, cream together butter and peanut butter.
  2. Add Sugars and mix until light and fluffy.
  3. Add Vanilla Extract, and Eggs and mix until combined.
  4. Add in dry ingredients and mix until combined thoroughly.
  5. Pour in Dark Chocolate Chips/Chunks.
  6. Refrigerate dough for a few hours or over night (If you do not refrigerate you will have less puffy cookies-your choice).
  7. Preheat oven to 325*.
  8. Scoop with a small ice cream scoop or spoon and place on cookie sheet lined with either a silicone baking liner or parchment paper. I made generous sized scoops and placed them approximately 15 per baking sheet.
  9. Bake for 12-14 minutes or until just set.
  10. Sprinkle with sea salt (I pressed my cookies down just a bit before sprinkling).
  11. Leave on cookie sheet for 1-2 additional minutes.
  12. Cool completely on a wire rack or parchment paper lined surface.

Did you make this recipe?

Share a photo and tag us — we can't wait to see what you've made!

Posted in: Cookies, Recipes Tagged: chocolate chunk, Chocolate Chunk Cookies, Peanut Butter, Sea Salt

Lemon Lemon Biscotti

March 16, 2018 by chrissy@mythankfultable.com
Lemon Lemon Biscotti

Lemons and Lemon Rind

My recipe file is like my Apple iTunes playlist. A mix of classic rock and the new stuff, the stuff you wouldn’t play in front of your kids, the stuff my parents listened to when I was little, and all of the other genres I have collected along the way. I have said it before, “I am not defined by my playlist.” My recipes reflect that as well.

What can I say about lemon except, “I love you?” I love everything lemon from lemon in my water to lemon curd. Every juice I have cold pressed contains at least one lemon. My favorite pie growing up was lemon merengue. I have a taste sensor where I don’t want my lemon to be sweet, (that means no lemon filled donuts or Danish…) so a lemon cookie isn’t something I endeavor to make often, but here it is…a lemon biscotti that makes me literally swoon.Lemon Lemon Biscotti

I know, the biscotti love. I just can’t help myself. I will keep at this biscotti game until I have exhausted it. My kids are over it already, my colleagues at work are not. So I will continue this journey.

Now the beauty of this cookie is that it combines lemon zest, lemon extract, lemon juice, lemon glaze, it delivers the lemon burst you are looking for when eating a lemon cookie. I can not express the disappointment I feel when I expect something to be lemon-y and it isn’t. It’s yellow, it has the lemon scent, but then you bite into it and, meh. Am I alone in this? I hope not.

Lemon Lemon Biscotti
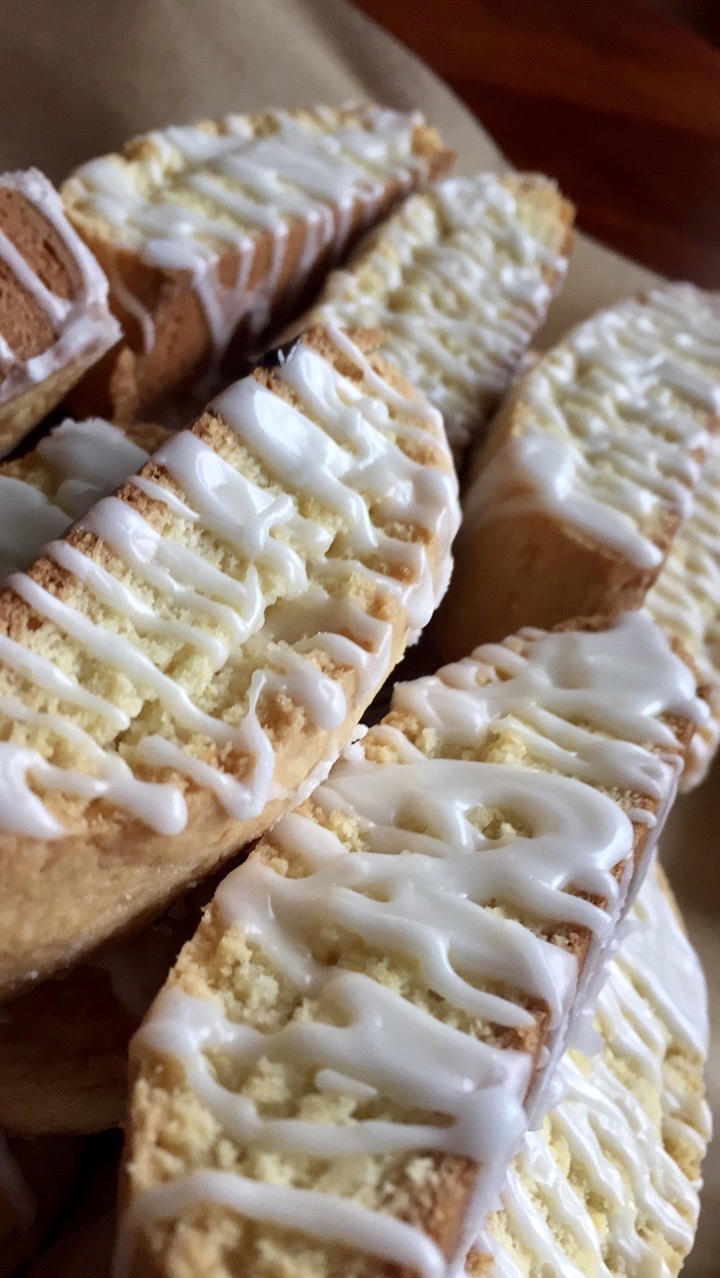
Back to the biscotti. Yes, it is pale and golden but it combines the zest and juice with the buttery base and it is beautiful. I made a basic glaze with lemon and powdered sugar and life is good.

These biscotti will last in an air tight container for two weeks. I kid you not. They won’t be around that long, but they will last.

Lemon Lemon Biscotti

If I could put sunshine into a cookie this would be that cookie. Sweet and Tart, a combination of chew and crunch, and oh so lovely. This cookie deserves a spot in your spring baking list for sure.

I hope you enjoy this recipe, and as always, thank you for coming to the table!

Chrissy

Click below for a printable recipe.


Print

Lemon Lemon Biscotti

Lemon Lemon Biscotti
Print Recipe

Delicious lemon biscotti with a lemon glaze.

  • Author: chrissy@mythankfultable.com

Ingredients

Scale
  • 1/2 Cup Butter
  • 1 Cup White Granulated Sugar
  • 2 Large Eggs
  • 1 Teaspoon Baking Powder
  • 2 Teaspoons Lemon Extract
  • 1/4 Teaspoon Salt
  • 2 Lemons, zested and juiced
  • 2 Cups All Purpose Flour

Glaze:

  • 1 Cup Powdered Sugar
  • 2–3 Teaspoons Lemon Juice

Instructions

  1. Preheat oven to 350*
  2. Line a cookie sheet with parchment paper or silpat.
  3. In a mixer with a paddle attachment, combine butter and sugar until light and fluffy.
  4. Add eggs to mixture until incorporated.
  5. Add Lemon extract and zest.
  6. Add flour to mixture until a sticky dough comes together.
  7. Transfer dough to cookie sheet, forming two logs.
  8. Bake for 35 minutes at 350* until lightly golden.
  9. Allow to cool for 5-10 minutes.
  10. Slice on an angle into one inch slices.
  11. Place sliced cookies slice side up on cookie sheet.
  12. Reduce oven temperature to 300*
  13. Bake for an additional 15-25 minutes or until cookies are firm to the touch.

Did you make this recipe?

Share a photo and tag us — we can't wait to see what you've made!

Posted in: Cookies, Dessert, My Story, Recipes Tagged: Biscotti, Cookies, lemon, Lemon Biscotti, Lemon Drizzle

Guinness Dark Chocolate Chunk Cookies

March 15, 2018 by chrissy@mythankfultable.com

Guinness Dark Chocolate Chip CookiesI know, Saint Patrick’s Day is coming and where the everyday cook makes corned beef and cabbage (no thank you), I make Guinness Dark Chocolate Chunk Cookies. Hey, it’s a solid nod to the holiday and it will not in any way disappoint.

While my dad was faithful to make corned beef and cabbage every year, I can’t say it is because I miss my dad that I don’t make it. It’s just not my thing. I will eat it if someone serves it to me, but otherwise, hard pass. I know. I’m sorry.

These cookies incorporate dark chocolate cocoa powder, dark chocolate chunks, and of course, 1/2 Cup of Guinness Beer. While the finished product doesn’t have, to my palette anyway, a sensory overload of this strong beer, you can definitely smell it in the dough before you bake it.

I typically make Guinness Slow Cooker Beef a few times a winter, and so there is that one extra can in the pantry, making this the perfect recipe.Guinness Dark Chocolate Chip Cookies

This cookie is soft and moist and so dark chocolatey. It is perfect in its chocolatey goodness. It makes me jig around my kitchen. Ok, I dance in my kitchen whether there are these cookies or not, but seriously. Make these cookies.

I originally found this recipe in 2013 on http://heathercristo.com and have adapted the recipe slightly, I bake at a lower temperature and use dark chocolate chunks in the dough instead of semi sweet.

These cookies have a fudge-y tendency when cooked at the lower temperature, so I did tend to leave them on the baking sheet after removing them from the oven for a few minutes to cool before transferring them to a cooling surface. I would rather a chewy over crispy cookie anyway, so if you are more towards the latter, turn the heat up to 350* instead.

All cookie crispy chewy aside, I saw a really great quote from Saint Patrick on my Instagram feed this week, I thought I would include it with this post:

“May the strength of God pilot us,

May the wisdom of God instruct us,

May the hand of God protect us,

May the word of God direct us.”

I hope for you strength, wisdom, protection, and direction today. And, as always, a thankful heart. Thank you for coming to the table!

Chrissy

Click below for a printable recipe.

Print

Guinness Dark Chocolate Chunk Cookies

Guinness Dark Chocolate Chip Cookies
Print Recipe

This dark decadent cookie combines the flavor of Guinness beer with dark chocolate and Dark Chocolate Chunks! Recipe adapted from heathercristo.com

  • Author: chrissy@mythankfultable.com

Ingredients

Scale
  • 1 Cup Butter
  • 1 1/2 Cups White Sugar
  • 2 Large Eggs
  • 1/2 Cup Guinness Beer
  • 1 Cup Dark Cocoa
  • 2 Cups Flour
  • 1 Teaspoon Kosher Salt
  • 1 Teaspoon Baking Powder
  • 1 Bag of Dark Chocolate Chunks

Instructions

  1. Preheat oven to 325*
  2. In a mixer with a paddle attachment, cream together butter and sugar until light and fluffy.
  3. Add the dark cocoa powder and combine.
  4. Add eggs and mix thoroughly.
  5. Add the Guinness beer and combine.
  6. Add the dry ingredients to the batter.
  7. Slowly incorporate chocolate chunks into the dough.
  8. Scoop the batter onto a silicone or parchment lined cookie sheet.
  9. Bake for 10 minutes. Allow cookies to cool on the baking sheet for an additional two minutes.
  10. Transfer to wire rack or parchment paper to cool.

Did you make this recipe?

Share a photo and tag us — we can't wait to see what you've made!

Posted in: Cookies, Recipes Tagged: Cookies, Dark Chocolate, Dark Chocolate Chunk, Guinness, Guinness Dark Chocolate Chunk Cookies

Buttermilk Banana Orange Muffins with Orange Glaze

March 14, 2018 by chrissy@mythankfultable.com
Buttermilk Banana Orange Muffins with Orange Glaze

Buttermilk Banana Orange Muffins with Orange Glaze

I have a serious citrus love. From my essential oils in my diffuser or the perfume that I wear, satsuma, sweet orange, lemon, lime, you name it. I am a fan. So, when I spotted a recipe that would incorporate orange and bananas to make a muffin with a sweet orange glaze, I was sold.

All winter long I have purchased bananas for the family, for post work out snacks, to freeze, for smoothies, and to take along in lunch boxes. However, no matter how frequently we eat them, there are always one or two that are too ripe to be anything other than frozen and or made into banana bread/muffins.

I always quest for a muffin that is worth the caloric value. And truthfully, a citrus-y recipe will call out to me. If it incorporates my soon to be expired bananas, I am all in!

This recipe calls for orange zest in both the muffin as well as the glaze. Another very cool thing, if you don’t have buttermilk on hand (I never do) you can make your own with regular milk and vinegar. I know. Cooking and science is amazing. This muffin recipe also calls for both oil and melted butter, which, initially had me wondering if it would be heavy and oily. They are anything but.

Orange Citrus Banana Muffins
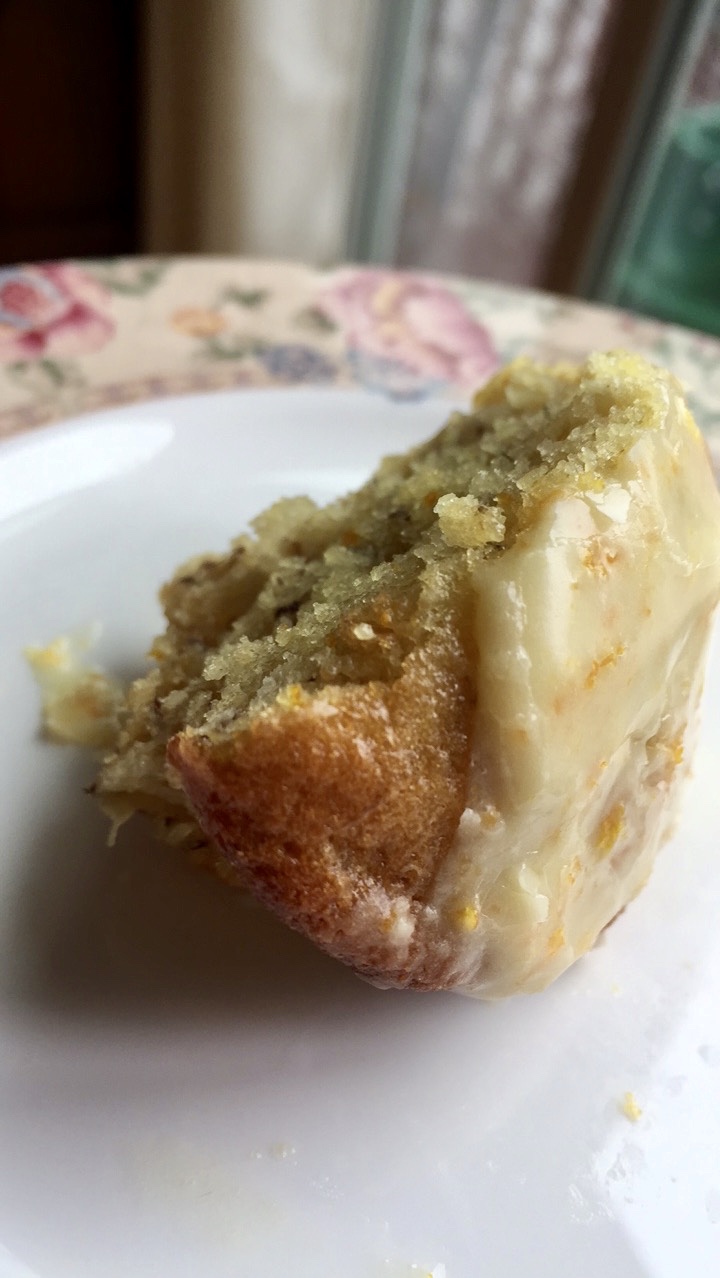
These muffins are light and springy, they pop with orange flavor and the glaze…oh, the glaze…I will make this the next time I make cinnamon rolls and take them to the next level.

In this unending winter, a little spot of sunshine and citrus in your morning is absolutely called for. These muffins would be perfect for an Easter Brunch or just for a regular morning treat.Orange Citrus Banana Muffins

I hope you enjoy this recipe, and as always, thank you for coming to the table!

Chrissy

Click below for a printable recipe!

Orange Citrus Banana Muffins

Print

Buttermilk Banana Orange Muffins with Orange Glaze

Print Recipe

Delicious Orange Banana Muffins with an Orange Sour Cream Glaze that is out of this world. Original Recipe posted at www.creationsbykara.com


  • Author: chrissy@mythankfultable.com

Ingredients

Scale
  • 1/4 Cup Melted Butter
  • 1/2 Cup Vegetable Oil
  • 1 1/2 Cup Buttermilk
  • 3 Eggs
  • 1 1/2 Cups Granulated Sugar
  • 1 1/2 Teaspoon Baking Soda
  • 1 1/2 Teaspoon Baking Powder
  • 1/2 Teaspoon Salt
  • 4 Overripe Bananas, mashed
  • 3 Cups AP Flour
  • 2 –3 Tablespoons Orange Rind, Zested

Glaze:

  • 1 1/2 Cups Powdered Confectioner’s Sugar
  • 1/4 Cup Sour Cream
  • 2 Teaspoons Orange Zest

Instructions

  1. Preheat oven to 350*
  2. In a mixer with a paddle attachment, combine eggs, melted butter, oil, buttermilk, mashed bananas, and orange zest.
  3. Add sugar and combine.
  4. Combine Flour, baking soda, baking powder, and salt.
  5. Slowly incorporate dry ingredients to the mixture.
  6. Fill muffin liners 3/4 full.
  7. Bake for 15 minutes
  8. Combine glaze ingredients.
  9. While muffins are still warm, top with glaze.

Notes

This recipe has more orange zest than the original simply because I can’t get enough! If it is too much, scale back to suit taste.

Did you make this recipe?

Share a photo and tag us — we can't wait to see what you've made!

Posted in: breakfast, Recipes Tagged: banana, Banana Muffin, Buttermilk, Orange
« Previous 1 2 3 4 5 6 7 8 9 10 11 12 Next »

Recipe Search

Recent Posts

  • Fluffernutter Cookies…You Heard Me April 12, 2024
  • On Nests July 30, 2023
  • Lemon Rosemary Shortbread Cookies April 24, 2022
  • Praline Sweet Potato Pie March 22, 2022
  • Italian Ricotta Cake March 13, 2022

Recent Comments

  • Cathy Carroll on To My Daughter On Her 18th Birthday
  • Maureen / Mimi on To My Daughter On Her 18th Birthday
  • Kathy G on To My Daughter On Her 18th Birthday
  • chrissy@mythankfultable.com on Cherry Crescent Moon Cookies and Finding the Joy
  • chrissy@mythankfultable.com on Cherry Crescent Moon Cookies and Finding the Joy

Archives

Categories

  • appetizer
  • bread
  • breakfast
  • Cookies
  • crockpot
  • crockpot
  • Dessert
  • Fruit
  • My Story
  • One Pan
  • Recipes
  • side dish
  • Side Dishes
  • soup
  • Vegan

Copyright © 2025 mythankfultable.com.

Lifestyle WordPress Theme by themehit.com