mythankfultable.com

Feeding the Heart, Body, and Family

  • My Pics
  • My Story
  • The Puppies
  • Contact Us
Feeding the Heart, Body, and Family

Recipes

Here is the recipe!

Cream Cheese Frosted Carrot Cake Cookies

September 22, 2017 by chrissy@mythankfultable.com

Cream Cheese Frosted Carrot Cake Cookies

Oh my. This has been a week…(read: THIS HAS BEEN A WEEK!!!) and this blog is better than therapy. Sometimes, it’s just better to stand in my kitchen and watch the cream cheese frosting form as soft clouds of confectioner’s sugar and vanilla come together to make the perfect topping for the perfect cookie.

Actually, these cookies are not like a cookie at all. If I could compare them to a muffin top (the good kind) or a mini cake, it would be more accurate. Soft, cakey, and packed with spice and carrot  without the density of a carrot cake.

Whipped Cream Cheese Frosting

Oh, and did I mention the frosting?

For all things vegetable, I am a huge fan of the fine grater. Little shreds of orange goodness start off this batter. I used two different types of flour, and I think that contributes to the lightness of the cookie. I also watched them carefully as they baked, and baked them in a 325* oven, to get that cooked but not browned on the bottom look. It’s my cookie snobbery rearing it’s ugly but delicious head again.

I refrigerated the dough, and scooped the chilled dough with my baby ice cream scooper for size consistency. Let the cookies cool completely before frosting. I found with this recipe there was extra frosting left over, which I will find use for, for sure. (No, eating spoonfuls of cream cheese frosting while standing in front of the fridge is not a good use).

Carrot Cake Cookies

Now in my world, I have a mom who, while she likes a little frosting, is not a big frosting eater. Win for me. She scoops hers off…and hey, it has to go somewhere. Note to self: sit next to momma at birthday parties.

Carrot Cake Cookie

While I am holding off on apple and pumpkin recipes for just a little bit longer, it is the first day of Autumn, officially. Even though I found my first fallen leaf yesterday in my yard, I feel like pumpkin reigns supreme until the end of November.

That’s a lot of pumpkin.

I love pumpkin, don’t get me wrong, and you will see a lot of it here on the blog soon. True confession? I still haven’t put my summer clothes away yet, so pumpkin has to wait. At least until this weekend.

Carrot Cake Cookies

Carrot cake, on the other hand, has one foot in each season. It bridges the gap. And then, it fills in the gap with cream cheese frosting.

These cookies are small but indulgent, rich but not sickly sweet. I sold them at the bake sale four to a plate, and it was the perfect snack while watching Field Hockey players play in the rain. It also went really nicely with a cup of coffee.

I am currently in a relationship with my calorie counter app, so if I am going to put a cookie in my body, it needs to be worth it. These are.

I also heard as a small child carrots are good for your eyes…so it’s a win?

Anything wearing a cream cheese layer makes the week, even a week like this, better.

Cream Cheese Frosted Carrot Cake Cookie

I hope you enjoy this recipe, and as always, thank you for coming to the table!

Chrissy

Click below for printable recipe

Print

Cream Cheese Frosted Carrot Cake Cookies

Print Recipe

Little pillows of carrot cake covered in cream cheese frosting. Oh yes, you will want more than one!

  • Author: chrissy@mythankfultable.com

Ingredients

Scale

Cream Cheese Frosting

  • One package of cream cheese (usually 8 ounces)
  • 1/2 Cup Butter
  • 3 1/2–4 Cups of Confectioner’s Sugar (Add more for thickness)
  • 1 Tablespoon Vanilla (If you can find the clear vanilla-it won’t tint your frosting…but the real vanilla has a bean in it and it will be worth the trade off color vs. flavor)

Carrot Cake Cookies

  • 1 Cup (2 Sticks) Butter
  • 3/4 C White Granulated Sugar
  • 3/4 C Light Brown Sugar
  • 2 Eggs
  • 1 1/2 Teaspoon Vanilla
  • 1 1/2 C AP Flour
  • 1 1/2 Cake Flour
  • 4 Teaspoons Cinnamon
  • 1 Teaspoon Baking Soda
  • 1 Teaspoon Baking Powder
  • 1/2 Teaspoon Salt
  • 2 Cups Finely Grated Raw Carrots

Instructions

For Frosting:

  1. In mixer, combine cream cheese and butter until smooth, combined, and fluffy
  2. Add confectioner’s sugar.
  3. drizzle vanilla in.
  4. If necessary, add more confectioner’s sugar for thickness until desired consistency.

For Cookies:

  1. Grate Carrots and set aside.
  2. In mixer, cream together the butter with the two sugars until light in texture.
  3. Add eggs and vanilla
  4. Combine dry ingredients (flours, cinnamon, baking soda, baking powder, salt).
  5. Add dry mixture into wet ingredients slowly.
  6. Add finely grated carrots. Mix batter thoroughly.
  7. Refrigerate dough for a few hours or overnight.
  8. Scoop dough with small ice cream scoop or teaspoon and place on parchment lined baking sheets.
  9. Bake at 325* for 12-14 minutes.
  10. Allow cookies to cool completely.
  11. Frost with Cream Cheese Frosting.

Did you make this recipe?

Share a photo and tag us — we can't wait to see what you've made!


Posted in: Cookies, Recipes Tagged: carrot cake, carrot cake cookies, cream cheese, cream cheese frosted carrot cake cookies, cream cheese frosting, frosted cookies

Browned Butter Sea Salt Caramel Chocolate Chip Cookies

September 19, 2017 by chrissy@mythankfultable.com
Brown Butter Sea Salt Caramel Chocolate Cookies
Browned Butter Sea Salt Caramel Chocolate Chip Cookies

Browned Butter Sea Salt Caramel Chocolate Chip Cookies

You ever make a recipe that has a title so long, it better be good? Seriously, this recipe has a looooong name. However, in order to understand the layers of flavor, it doesn’t leave anything to the imagination.

This week is all about the Bake Sale, and these cookies will be on the table. While there is a combination of salty and sweet, chewy and gooey, the cookie itself is substantial, and holds up to the caramel center. It may not be cookie nirvana…but it is close.

Brown Butter Sea Salt Caramel Chocolate Chip Cookie Dough

Brown Butter Sea Salt Caramel Chocolate Chip Cookie Dough

Now, this cookie has sea salt in the cookie dough as well as a sprinkling on top. I know my last post also had the elements of salty and sweet, but hey, sea salt is very cool right now, and well, browned butter has me at hello, so game on. I might also add these are all getting out of my house ASAP, so I can wield my spatula like James Fraser in Outlander, which, I am binge watching as I bake, by the way. If you have a person in your life like I do who is allergic to sea salt, you can trade it out for kosher salt  and it will have a similar result.

I used the original recipe from the www.whatmollymade.com website. I followed the recipe almost to the letter, except, I chilled the dough over night, and I did not stack two scoops with the Carmel in between the layers. I cut caramels in half, and left them open to be exposed in the oven.

Unbaked Brown Butter Sea Salt Caramel Chocolate Cookies

Unbaked Brown Butter Sea Salt Caramel Chocolate Cookies

I also sprinkled sea salt over the top of the cookies while they were hot out of the oven, and found the little crystals to not only have eye appeal but that little extra kick over into salty sweet bliss.

In the realm of cookie difficulty, the batter itself is easy once the browned butter is made, and really, that’s letting the butter melt and brown slowly on the stovetop…you’ve got this.

I scooped the batter with my ice cream scoop used for cookie dough purposes, popped in the fridge overnight.

The batter needed to warm up a bit before the caramel could be successfully mushed into the center of the dough, and then cooked in the oven for 12-14 minutes at 325. All of my cookies are baked at this temperature. It’s a cookie bottom thing. I don’t want a cookie with an overcooked bottom. I know, it’s an elitist thing to say, but I am a cookie snob. (You should see the list of rules for our holiday cookie swap at school…it isn’t for the faint of heart).

Brown Butter Sea Salt Caramel Chocolate Cookies

Brown Butter Sea Salt Caramel Chocolate Cookies

After baking, sprinkle with another layer of salt, and let cool. The caramel stays soft and the cookie is just a little crisp. I’m thinking that’s the browned butter element. Curse my lazy heart for not pursuing science instead of history in college. It helps with my love of Outlander, but not in my cookie science.

Good thing my tastebuds don’t care. I’m hoping these go at the Bake Sale, even though the forecast calls for rain! I bagged them up three to a package, so there should be enough salty and sweet to carry the dedicated fans in the stand for two games!

I hope you enjoy this recipe, and as always, thank you for coming to the table!

Chrissy

Click below for a printable recipe

Print

Browned Butter Sea Salt Caramel Chocolate Chip Cookies

Brown Butter Sea Salt Caramel Chocolate Cookies
Print Recipe

Delicious bite-fuls of salty and sweet, chewy and gooey! Original recipe from the www.whatmollymade.com website Brown Butter Salted Caramel Chocolate Chip Cookies

  • Author: chrissy@mythankfultable.com

Ingredients

Scale
  • 2 Sticks/1 Cup Butter
  • 1 1/4 Cup Brown Sugar
  • 1/2 Cup White Sugar
  • 3 Teaspoons Vanilla Extract
  • 1 Egg + 1 Egg Yolk
  • 2 1/2 Cups AP Flour
  • 1 tsp Baking Soda
  • 1 tsp Baking Powder
  • 1 Tsp Sea Salt (I used Himalayan Pink Sea Salt)
  • 1 –2 Cups Chocolate Chips (Semi-Sweet or Dark)
  • 1 Bag of Pre-wrapped Caramels, cut in half

Instructions

  1. Make Browned Butter by melting 2 sticks of butter in a pan over low heat, melting, and continuing to cook until the butter turns a light brown color. I stir or swirl the butter throughout the process to make sure it doesn’t scorch. The difference between browned butter and burned butter is not pleasant.
  2. Let browned butter cool.
  3. With a stand up or hand mixer, mix cooled browned butter and sugars together thoroughly.
  4. Add egg, egg yolk, and vanilla to the mix and combine.
  5. Add dry ingredients and continue to mix until combined.
  6. Add chocolate chips by hand with rubber spatula.
  7. Scoop rounded mounds of dough into container and refrigerate for a minimum of two hours- overnight.
  8. Take dough out of the refrigerator and set out for at least fifteen minutes.
  9. Place 1/2 of each caramel into each rounded mound of dough.
  10. Bake in a 325* oven for 12-14 minutes, until cooked but not overcooked.
  11. Sprinkle baked cookies with additional sea salt and let cool.

Did you make this recipe?

Share a photo and tag us — we can't wait to see what you've made!


Posted in: Cookies, Recipes Tagged: Browned Butter Chocolate Chip Cookies, Chocolate Chip Cookies, Cookies, Sea Salt Caramel

Salty Chocolate Chip Bars

September 18, 2017 by chrissy@mythankfultable.com

One of the best parts of having athletes for children, especially when you didn’t grow up an athlete, is the whole “team” concept. I am the mother of a Field Hockey  player and a Wrestler. They both do winter sports as well, but overall, those are the dominating sports in our home. Fortunately one ends, I have a few weeks, and the next begins. We are busy, we are on the move, but life is a gift.

Salty Chocolate Chip Bars

I love every minute. From early drop offs to all day sitting on a bench, I am thankful. Thankful for my children, thankful for their teams, thankful for the families we get to know and grow with as our kids train and play. We holler their names out when they succeed, and cheer them on when they need to hear “Good hustle!” or “Great endurance!” We do our parent thing.


Another wonderful part of being on a team is working together, providing snacks, helping out in the concession stand, ribbons for the team, supporting the fundraisers. Tomorrow, the team is helping out a family in need.

Salty Chocolate Chip Bars

Tomorrow the Field Hockey Team is having a fundraiser for a fellow student who was diagnosed with cancer. In addition to charging admission and opening up the concession stand, there will be a Bake Sale. So this week, all of the posts will be about baked goods for a cause. Today, we have Salty Chocolate Chip Bars.


If you ever thought about a big soft cookie with the shape of a brownie, chewy and buttery, with big chunks of chocolate, this is your dessert.

It is a one bowl, one pan mix with the addition of, you guessed it, salty on top.

This recipe can be made with Sea Salt Flakes, or freshly ground sea salt, but we have a sea salt allergy in my building, so when I make these for work, I use regular Kosher Salt. The combination of salt on top with the sweet of the cookie makes this the quintessential snack. In fact, it will be the snack I pack for the team when it is my game to host. They slice up nicely and the chunks of chocolate stay gooey. Who can say no?!

On our first day of Staff Professional Development, a pan of these made their way into the training, still warm from the oven. I took home an empty pan. That, to me, says it all.

Salty Chocolate Chip Bars

When a day spent in my kitchen brings smiles to people’s faces, my heart is happy. When I can add a fundraiser for a great cause to the mix, my heart is filled and overflowing. I’m hoping tomorrow there are no left overs, and a family in need is blessed.

I hope you enjoy this recipe, and as always, thank you for coming to the table!

Chrissy

(click below for printable recipe)


Print

Salty Chocolate Chunk Bars

Print Recipe

Delicious combination of sweet and salty.

  • Author: chrissy@mythankfultable.com

Ingredients

Scale
  • 3/4 C Softened Butter
  • 1/4 C Cream Cheese
  • 1 1/2 Packed Brown Sugar
  • 1/2 Tsp Kosher Salt
  • 1/2 Tsp Baking Soda
  • 1 1/2 Cup Cake Flour
  • 1 1/4 Cup AP Flour
  • 2 Large Eggs
  • 3 Tablespoons Vanilla Extract
  • 1 Package (approx. 2 Cups) Chocolate Chunks
  • Additional Kosher Salt for sprinkling

Instructions

  1. Line and prepare a 9 X 13″ cake pan with foil or parchment.
  2. Preheat oven to 350*
  3. Use either a hand held mixer or a stand mixer with paddle attachment.
  4. Cream together Butter and Cream Cheese, add Brown Sugar.
  5. Add Salt, Baking Soda, and Beat until combined.
  6. Add Eggs and Vanilla.
  7. Add Flour(s) until combined.
  8. Fold in Chocolate Chunks.
  9. Turn mixture out into prepared pan and smooth until flattened and even.
  10. Bake 20 minutes, until tester in center comes out clean.
  11. Sprinkle Kosher salt as soon as bars come out of oven.
  12. Cut into bars. (Wait for a few minutes before you devour them)!

Notes

You can use Sea Salt Flakes in this recipe, but for school we do Sea Salt Free (That’s what you do when your friend is allergic)!

Did you make this recipe?

Share a photo and tag us — we can't wait to see what you've made!

Posted in: Dessert, Recipes Tagged: Chocolate Chip, Cookie Bars, dessert, Salty, Salty Chocolate Chip Bars, Sweet

White Chicken Chili

September 16, 2017 by chrissy@mythankfultable.com

Autumn is around the corner and it’s time to break out the soup and chili recipes!

Poached Chicken Breasts

I tend to put chili in the recipe rotation once every three or four weeks, and serve it with a nice green salad and some fresh cornbread or soft rolls. White Chicken Chili is simple and quick, and hearty as well. You can up the ante and add shredded cheddar or more spices, but this basic recipe is easy to do, especially when the weather turns colder and a bowl of comfort is welcome at the table.

For this recipe, I poached thinly sliced chicken breasts in chicken broth. Poaching sounds like a next level cooking term, but essentially, its simmering the meat in broth at a low temperature until it’s cooked through. The end result is a tender, moist chicken that is easy to shred. I think, in a pinch, you could use rotisserie chicken, but it is actually easier to poach and throw the breasts into a Kitchen Aid mixer to shred than it would be to stand there and take the chicken off the bone, and less greasy as well. However, some people love the use of extra Rotisserie chicken, and if it is on sale and you don’t mind the extra step, go for it!

Shredded Chicken Breasts

I poached the chicken, put it in the Kitchen Aid with the paddle attachment, and mixed it on low until the chicken had a fine shred. Again this is to your taste, so if you prefer bigger chunks, or larger shreds of chicken, go in that direction. I also saved the poaching liquid, and used that in the chili itself, as it is essentially broth that cooked the chicken, it is filled with flavor.

I have recently learned that my son doesn’t like the chunks of chili, be it tomatoes or onions, so this recipe is thick and hearty without seeing big chunks of anything. Now myself, I am a chunky person (I laugh to myself here. So much for self esteem). In more ways than one. Soup, cookies, muffins, chunks are good. So, this chili needed to deliver big flavor without big chunks.

in a stockpot, saute finely diced onion (you can add celery and carrot, I didn’t) until tender. Add the poaching liquid, three cans of drained, rinsed white beans, the chicken, and your spices.

Now for me, chili needs heat. I kept this mild and added hot sauce procured from my local farmers market that is a combination of smoked apple and heat. I did put in a dash of hot sauce into the chili to give it the extra pizazz. You can add green chili peppers that are canned, fresh jalapeño or ghost peppers if you like it hot.

Oh I almost forgot…what makes this chili creamy and delicious? A block of cream cheese! Cubed and stirred into the mix while it is on the stove, after heating thoroughly, the cream cheese dissolves and adds not only to the texture, but also to the flavor.

Let the chili cook on the stove until ingredients are combined, and serve. I love to add cheddar cheese, sour cream and hot sauce to mine. I would add cheddar cheese to the whole batch, actually.  Boom and Wow.

Serve with your favorite cornbread http://mythankfultab

White Chicken Chili

le.com/2017/09/14/cheesy-skillet-cornbread/

and enjoy!

I hope you enjoy this recipe, and as always, thank you for coming to the table!

Chrissy

Click below for a printable recipe!

Print

White Chicken Chili

Print Recipe
  1. 2 Pounds thinly sliced Chicken Breast
  2. 64 oz Chicken Stock
  3. 1 Tbsp Olive oil
  4. 1 Onion, finely diced
  5. 1 block of Cream Cheese, cubed
  6. 1-2 Cups Shredded Cheddar Cheese (If you wish/optional)
  7. 3 Cans White Cannelini Beans, drained and rinsed
  8. hot sauce, spices, canned green chilies, salt, pepper, to taste


  • Author: chrissy@mythankfultable.com

Ingredients

Scale
  1. Gently poach chicken breasts in 1/2 of stock. (I usually use two containers of chicken stock, one to poach and one to add to chili later on). Poach until chicken is tender and cooked through. Drain and reserve poaching liquid.
  2. Shred chicken either in mixer or by hand until chunks and shreds are as desired. Set aside.
  3. Finely dice onion (you can also add carrots and celery but for this recipe I did not).
  4. Saute onion in olive oil in stockpot until translucent.
  5. Add three cans of drained white beans, chicken, poaching liquid, and additional stock.
  6. Add one package of cream cheese, cubed to chili and stir until mixed in.
  7. Add spices, chile peppers, hot sauce, and heat through.
  8. If desired, add cheddar cheese and continue to heat until melted.
  9. Serve with sour cream, additional cheddar shredded, and hot sauce.

Did you make this recipe?

Share a photo and tag us — we can't wait to see what you've made!

Posted in: Recipes, soup Tagged: chicken chili, chili, comfort food, cream cheese, one pot, soup, white beans, white chicken chili

Cheesy Skillet Cornbread

September 14, 2017 by chrissy@mythankfultable.com

Whisking Egg Whites

There is something about the fall season, and the need to pull out the crock pot and make a big bowl of soup or chili, hearty and rich, with a ton of flavor. It just seems like the right thing to prepare when you are getting ready for work in the morning and hear the Canadian Geese flying overhead, or catch a glimpse of color in the trees as you head home. It’s coming, and soon.

Autumn in New England is one of the greatest gifts on this earth. Everywhere you look the world is awash in color. My world smells different in fall. Crunchy leaves, apple crisp, bonfires, and pumpkin spice everything, from coffee to room deodorizer.

In our house, if you make chili, you serve it with sour cream, shredded cheese, hot sauce, and these cute little cornbreads that I buy from the grocery store.

Wait, WHAT? I BUY my cornbread? Well, yes, usually I do. Because it’s scary to make and its so easy to buy. I buy the good ones, you know, that the grocery store bakery people make…it’s not the same, right? No?

Cornbread Mixture

OK, I was blog-shamed into making my own cornbread.

And I learned, guess what? It wasn’t that hard after all. Now, it wasn’t buy-the-box-mix-add-eggs easy, but it wasn’t give-birth- without-an-epidural hard either. It was actually no where near as hard as the things an average person would have to deal with, and hey, if you are doing this on the weekend, in fall, it just seems right. Then you too can boast you made your own cornbread to the “ooohs” and “aaahs” of the crowd.

The hardest part of this recipe was whipping the egg whites, which, yes, I did by hand. (More blog shame) I will, moving forward, pop the whisk attachment into the Kitchen Aid and let that beast make the peaks out of those whites.

Skillet Cornbread

After combining the ingredients, whip the whites, gently fold, and pour into a prepared Cast Iron Skillet.

Oh yes, I did use a cast iron skillet. I told you, I was in for a penny in for a pound for this recipe.

Once upon a time this skillet went camping, now it lives on my baking shelves.

For such a time as this.

If you don’t own cast iron, a brownie or cake pan will work equally as well. You can also bake it in a deep dish pie plate and make glorious wedges of cornbread…and who doesn’t like fancy once in a while?

I liked the way the cast iron made a crunchier crust on the bottom of the bread, and gave it that little extra rustic feel. This was served with white chicken chili (recipe coming soon), and it just looked snazzy on the table.

As for the flavor, this recipe calls for buttermilk, and cheddar cheese, so you know there was

Cheesy Skillet Cornbread

potential for success. The separating of the eggs and the lightness of the whites, it was this light, sweet, cheesy concoction of goodness. The flip side is, cornbread has a certain hearty expectation, served with a denser soup like chili, it needs to be dense but not brownie like in consistency, and this delivered.

It was delicious with supper, and it was delicious for breakfast the next day. I served it warm with fresh butter and even my preserves got a spot at the table.

Sweet enough but not too sweet, this bread really met right in the middle in the realm of texture, density, sweetness, and flavor. It was a win.

I guess I won’t be buying the cornbread at the bakery counter at my grocery store anymore!

Cheesy Skillet Cornbread Square

I hope you enjoy this recipe, and as always, thank you for coming to the table!

Chrissy

(click below for printable recipe)

Print

Cheesy Skillet Cornbread

Print Recipe

Delicious cheese cornbread baked in a cast iron skillet for a golden brown crust. Perfect on its own or with a bowl of chili!

  • Author: chrissy@mythankfultable.com

Ingredients

Scale
  • 4 Eggs, yolks and whites separated
  • 1 Cup Buttermilk
  • 1 tsp Almond or Vanilla Extract
  • 1 1/2 Cup Cornmeal
  • 1 1/2 Cup Flour
  • 3/4 Cup Melted Butter
  • 3/4 Cup Granulated Sugar
  • 1 TBSP Baking Powder
  • 1 tsp Salt
  • 1 Cup Shredded Cheddar Cheese

Instructions

  1. Preheat oven to 350* and spray a Cast Iron Skillet with cooking spray.
  2. In one bowl, combine Melted Butter, Egg Yolks, Milk, and Extract of choice. Stir until combined
  3. Add Flour, Cornmeal, Sugar, Baking Powder, and Salt and mix.
  4. In a separate bowl, whip Egg Whites until stiff peaks form.
  5. Fold Egg Whites into Cornmeal mixture.
  6. Pour mixture into prepared Cast Iron Skillet.
  7. Bake at 350* for 25-30 minutes.

Did you make this recipe?

Share a photo and tag us — we can't wait to see what you've made!

Posted in: bread, One Pan, Recipes Tagged: cheesy, cheesy skillet cornbread, cornbread, skillet, skillet cornbread

Elvis Overnight Oats

September 13, 2017 by chrissy@mythankfultable.com
Elvis Overnight Oats

I know. I know. Some things go from being good to over the top, and they need a name worthy of their awesomeness. May I introduce my latest breakfast creation, The Elvis Overnight Oats.

Elvis Overnight Oats

Elvis Overnight Oats

It started out as an endeavor to create a high-protein, healthy, filling, nutritious breakfast. Which it is, don’t get me wrong. Starting out with steel-cut oats, right before the liquid is absorbed, I added peanut butter powder. Step one of yum. Then, taking plain Greek yogurt, I added Quest Banana Protein Powder, which is one of my favorites.  So you have the peanut butter and banana part.

My official peanut-butter-taste-tester-man commented it needed more peanut butter, so we added a tablespoon of chunky style peanut butter on top.

I felt it needed more banana, so in went the fresh banana.

It was perfect.

Or so I thought.

As an aside, I was lucky enough to host the JV Field Hockey team for breakfast on Sunday, and was impressed not only that this team of girls were kind, and polite, and gracious athletes…but that they put away almost as much food as the wrestling team can (after a match, before they don’t like to eat much). Go girls! Did I mention they ate almost six pounds of bacon? I know, impressive.

Peanut Butter and Banana Overnight Oats

Peanut Butter and Banana Overnight Oats

So, my perfect breakfast was put just over the top with the leftover bacon from the breakfast (I was able to salvage a few strips). This serving literally has half a strip, so in the big scheme of things it didn’t create caloric devastation, but it did tip the scales in the realm of breakfast flavor.

When I visit my brother in West Des Moines, a mandatory stop is Zombie Burger, for an Undead Elvis (check it out, it is amazing). If you are a carnivore, and believe in the burger to end all burgers, the apocalyptic (pun intended) experience is worth the flight. So, that said, a breakfast that includes, peanut butter, banana, and (sigh) bacon, deserves the king of names.

Elvis Overnight Oats

Elvis Overnight Oats

Elvis was before my time, but his voice graces my play list, and his favorite blend of banana, peanut butter and bacon is in my opinion, brilliant.

You can disagree. If you must know, this morning I had the peanut butter and banana oats as I originally intended, without the bacon. It was equally delicious. Sometimes, over the top is best saved for special occasions. That, and the JV team ate the rest of the bacon.

They have won their first two games, so who’s to complain?

I hope your breakfasts love you tender, and as always, thank you for coming to the table!

Chrissy

click below for printable recipe

Print

Elvis Overnight Oats

Elvis Overnight Oats
Print Recipe

This recipe makes four servings of “King” worthy breakfast!

  • Author: chrissy@mythankfultable.com

Ingredients

Scale
  • 1 Cup Steel Cut Oats
  • 4 Cups Boiling Water
  • 2 Tablespoons Peanut Butter Powder
  • 1 Cup Plain Greek Style Yogurt
  • 1 Scoop/packet Banana Quest Protein Powder
  • 2 Bananas
  • 4 Tablespoons Chunky (or Plain) Peanut Butter
  • 2 Strips of Crispy Bacon

Instructions

  1. Cook Oats according to directions, boiling water, adding the oats and stirring until liquid is absorbed.
  2. At the end of cooking time, stir in Peanut Butter Powder (this is found in peanut butter aisle at grocery store, and typically contains less fat and calories)
  3. Divide into four serving bowls
  4. In a separate bowl, mix plain Greek yogurt with Banana Protein Powder
  5. Scoop four separate portions of Banana powder onto oats
  6. 1/2 Banana into each serving portion
  7. Scoop 1 TBSP Peanut Butter into each portion
  8. Crumble 1/2 strip of bacon into each portion.
  9. Put on some classic Elvis and enjoy.

Did you make this recipe?

Share a photo and tag us — we can't wait to see what you've made!

Posted in: breakfast, Recipes Tagged: banana, breakfast, Greek yogurt, overnight oats, Peanut Butter, Protein Powder, steel cut oats

Chicken Tenderloins with Wilted Cherry Tomatoes and Baby Spinach

September 11, 2017 by chrissy@mythankfultable.com
Chicken Tenderloins with Cherry Tomatoes and Wilted Baby Spinach

Chicken Tenderloins with Cherry Tomatoes and Wilted Baby Spinach

The school year is back into full swing, sports schedules are busy, this blog post was supposed to be finished this morning, and oh wait, I still need to feed my family. While I typically prep meals for the week on Sunday, I plan ahead through Wednesday and plan on the remainder of the week being leftovers, or quick meals such as this one.

One pan, small ingredient list, simple on its own or over pasta or with a side of rice. That’s the type of supper that works in our house.

Now, this can be jazzed up with small pieces of fresh mozzarella, or with a cream sauce, additional vegetables, or even finely minced garlic. However, this meal is, as I said, simple. There is a beauty to such a meal on a Monday night, say after a long day of work after an already busy weekend, and a first field hockey game of the season.  Not drive through easy, but way more healthy and absolutely more delicious. Also, the leftovers can be tossed into a salad for lunch tomorrow.

For this recipe, I had 1-2 pounds of chicken tenderloins, rinsed and patted dry. Salt and pepper chick while pan is heating over medium heat. In a large frypan (mine is actually wok shaped with a flat bottom…one of the best pans I own) a little olive oil – and saute the tenderloins until browned. When done, toss in a handful of cherry tomatoes (as much or as little as you want) and let cook for a few minutes until wilted. Throw in two cups of baby spinach and toss until wilted.

At this point, you can add baby fresh mozzarella, basil, Alfredo sauce, whatever you choose to spice things up. My family prefers this as is, with angel hair pasta on the side. A salad, and you are good to go. If you are adding in the extra carbs, a soft loaf of crusty Italian bread would be magical.

chicken tenderloin with cherry tomatoes

chicken tenderloin with cherry tomatoes

Not every recipe needs to be complicated in order to be delicious. Like in life, sometimes less is more. Be it items on the to do list, loads of laundry to complete, personalities of the people around you, or supper ingredients. You get the picture.

I hope you enjoy this recipe, and as always, thank you for coming to the table!

Chrissy

click below for printable recipe

Print

Chicken Tenderloins with Wilted Cherry Tomatoes and Baby Spinach

Chicken Tenderloins with Cherry Tomatoes and Wilted Baby Spinach
Print Recipe

Simple chicken tenderloins sauted with cherry tomatoes and wilted baby spinach! Delicious and easy.

  • Author: chrissy@mythankfultable.com

Ingredients

Scale
  • 1–2 pounds chicken tenderloins, washed and patted dry
  • salt (to taste)
  • pepper (to taste)
  • 1–2 Cups of Cherry Tomatoes
  • 2 Cups Baby Spinach

Instructions

  1. In a good sized fry pan, saute chicken tenderloins in olive oil, season with salt and pepper to taste (at this point you could add any seasoning you would like)
  2. Saute until golden brown.
  3. Add cherry tomatoes and cook for a few minutes until they start to wilt.
  4. Add baby spinach, and toss with chicken to wilt.
  5. Serve

Did you make this recipe?

Share a photo and tag us — we can't wait to see what you've made!

Posted in: One Pan, Recipes Tagged: Baby Spinach, Cherry Tomatoes, Chicken, Chicken Dinner, Chicken Tenderloin, One Pan Meal, Wilted

Sweet Dark Cherry Overnight Oats

September 9, 2017 by chrissy@mythankfultable.com

Sweet Dark Cherry Overnight Oats

Sweet Dark Cherry Oats sound more like dessert than breakfast, but the intention was breakfast indeed!

True confession: I’m not an athlete. In my heart I would love to be a runner, but I am more of a brisk walker. I like the gym. Ok, I like it once I get there. Oh alright, I have been known to text my man phrases like, “I hate this.” or “I would rather go without sugar than be here.” once I get there.

But I go…because I need to go. How I am raising two athletes has not escaped my notice. I still wonder how that happened.

Back to Overnight Oats.

So, this luxurious breakfast is a combination of Steel Cut Oats, High Protein Cherry Yogurt, and Frozen Sweet Dark Cherries. You could throw some chocolate chunks in there, but then, that may defeat the purpose of this healthy snack.

Maybe dark chocolate? Like 90% oooh. I missed the boat on that one.

The point of my gym shame confession is this: This snack also makes a great pre work out food. The combination of good carbs, protein, and fiber make this a good go -to  pre or post gym treat. Sweet Dark Cherries can be purchased in the frozen food aisle, and they are beautiful, pitted, easy. While I love fresh cherries, there is no question the ease of making this recipe with the frozen variety makes sense.

Sweet Dark Cherry Overnight Oats

Following the recipe for steel cut oats, bring four cups of water to a boil, stir in one cup of oats, and continue to cook until the liquid is absorbed. These are made by layering the cooked oats, cherry high protein yogurt (I used Oikos Triple Zero), and cherries. Then place in the refrigerator overnight. Simple! It is delicious. You will not regret it. It may even motivate you to exercise…or at least be a reward for going!

As always, thank you for coming to the table,

Chrissy

Print

Sweet Dark Cherry Overnight Oats

Sweet Dark Cherry Overnight Oats
Print Recipe
  • 1 Cup Steel Cut Oats
  • 4 Cups Water
  • 1 Container Frozen Cherries – diced
  • 2 Containers Cherry Yogurt
  • Author: chrissy@mythankfultable.com

Ingredients

Scale
  • Following instructions on the Steel Cut Oats container – Cook 1 cup Oats (My recipe called for boiling in 4 Cups Water) until water is absorbed.
  • Cool Oats for a while.
  • Using 3–4 containers, layer oats, yogurt, cherries. Repeat.
  • Cover and chill in the refrigerator overnight.

Did you make this recipe?

Share a photo and tag us — we can't wait to see what you've made!

Posted in: breakfast, Recipes Tagged: breakfast, cherry, frozen cherries, overnight oats, steel cut oats, sweet dark cherries

Springform Pan Blueberry Crumb Coffee Cake

September 7, 2017 by chrissy@mythankfultable.com

Once upon a time, I went to bed with a cookbook and a stack of post its. OK, it wasn’t that long ago…no worries, I have fully accepted and embraced my nerd status. I’m ok with it.

Actually, I tend to purchase cookbooks and read them like novels. There is something about a back story to a recipe or the person creating it. Enter websites and food blogs, and I am one happy reader. Listen, some people binge watch reality tv, recipes are my thing…it’s all good.

As a teacher note- if you or your loved one doesn’t consider yourself, “a reader,” but you find yourself drawn to reading online articles, sports magazines, book about bugs, how-to books, or say, cookbooks…guess what? You are a reader. You just prefer non-fiction. I am a balanced reader, in that I read whatever, but for some people (and students in particular young students who don’t love reading) non-fiction is my in. I am teaching about bugs, and trucks, and tigers, oh my. If they are interested in what they are reading, leave it alone and let them read. 

We also have this staff breakfast on Fridays at my work where we take turns supplying the eats. It’s a collaborative friendly celebration of survival and academic excellence. So my inner breakfast bossy-pants wants to bring my best to the table, I want my staff to know I love them enough to make the good stuff.

Practice makes perfect. So, I tried out another recipe.

This recipe started out with one from the justapinch food blog. The original recipe can be found here: https://www.justapinch.com/recipes/dessert/cake/blueberry-crumb-coffee-cake.html I did make some changes because I don’t want to just use another person’s recipe, and I am also always struggling with the density of coffee cakes and muffins, and am on a cake flour bender.

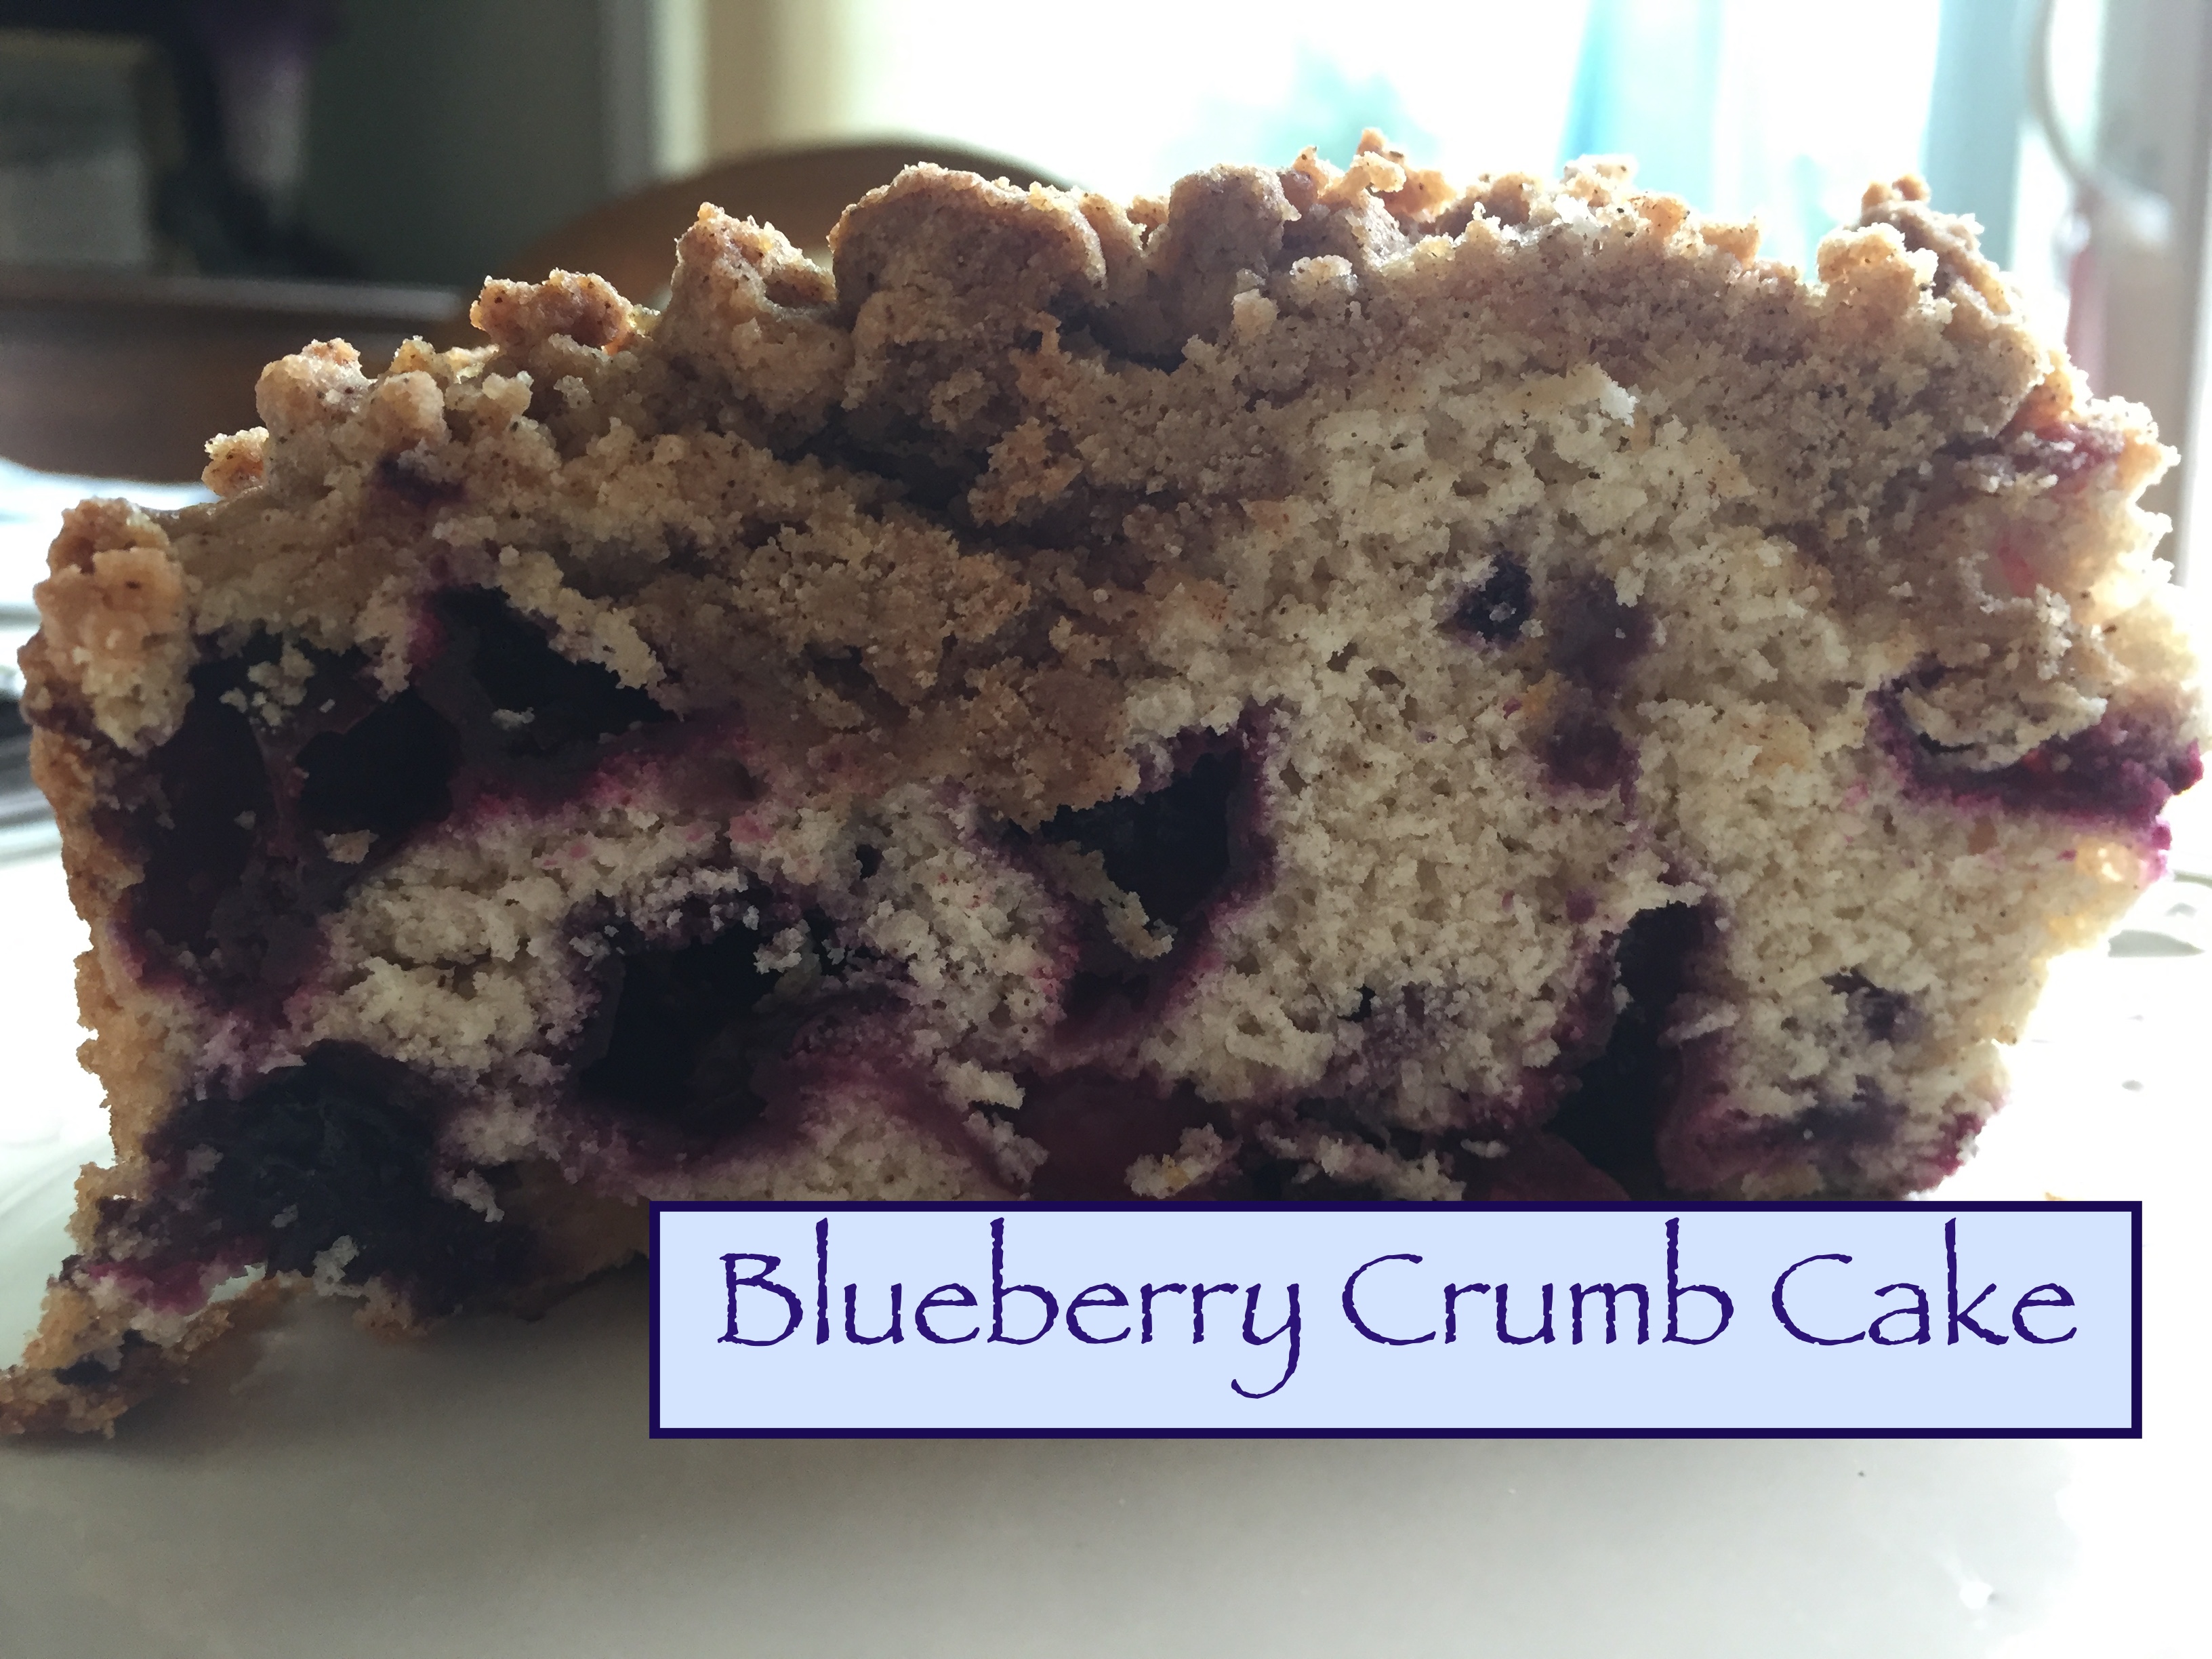
I made this recipe using a springform pan, which is another new thing for me, but I think the effect of the finished cake was beautiful, and enabled me to slice it into perfect wedges for sharing.

The crumb topping for this cake is beautiful. I added more spices than the original and in truth, felt it needed more. I asked my tasters (fresh out of the gym, yes I am the bad friend who hands baked goods over after people work out) and the response was, “What? It doesn’t need anything.” Granted, it could be the boot camp talking. They work hard in those classes. Anything may have tasted good at the moment.

I once read about how one of the makers of Ben and Jerry’s Ice Cream had a condition which made him not be able to taste efficiently, which is why the flavors in that ice cream are so intense. I wonder sometimes if I suffer from the same thing? The need for more cinnamon is a thing, right? Right?

So, in addition to messing with the flour, I also added a little more sugar, more blueberries, and like aforementioned, more spice.

This deliciousness will be coming to Friday breakfast for sure, and even though it is close to perfection, I can be absolutely sure it won’t be my last recipe when it comes to blueberries, crumb topping, and the oven. Like my nerd awareness, I am ok with it. I really am.

I hope you like this recipe, and as always, thank you for coming to the table!

Chrissy

Print

Springform Pan Blueberry Crumb Coffee Cake

Print Recipe


This blueberry perfection is based on the original Recipe Blueberry Crumb Coffee Cake by Lori Newton of www.justapinch.com My alterations to the recipe include combination of flours, and minor regarding amounts of spice, sugar, and berries. Her recipe is perfection!


  • Author: chrissy@mythankfultable.com
  • Category: Breakfast
  • Method: Baking
  • Cuisine: Coffee Cake

Ingredients

Scale


Blueberry Cake:

  • 1 C AP Flour
  • 1 C Cake Flour
  • 2 tsp Baking Powder
  • ½ tsp salt
  • 1 tsp cinnamon
  • 1 ¼ C granulated sugar
  • ¼ C softened butter
  • 1 egg
  • 1 tsp vanilla extract
  • ½ C buttermilk
  • 4–5 C blueberries

Perfection Crumb Topping:

  • ½ C light brown sugar
  • ¼ C AP Flour
  • ¼ C Cake Flour
  • ½ C Butter
  • 1 ½ tsp cinnamon
  • 1 tsp freshly ground nutmeg (I used a nutmeg and a microplane)


Instructions


Prepare a springform pan, buttering and flouring, then set aside. Preheat oven to 350*

Combine ingredients for crumb topping, mixing flours, cinnamon, nutmeg, brown sugar until combined. Grate butter or cut into small cubes and cut into dry mixture until form a crumble texture.

For Cake:

Cream together butter, sugar, until light yellow, add in egg, vanilla, and small amount of buttermilk. Combine dry ingredients, then add to mixture slowly, alternating with remainder of buttermilk. Gently fold in blueberries.

Put batter into prepared springform pan, and top with crumble topping.

Depending on your oven, bake anywhere between 45-60 minutes, testing the center until the tester comes out clean with just a little crumb.

Cool and slice in to wedges.

Did you make this recipe?

Share a photo and tag us — we can't wait to see what you've made!

Posted in: breakfast, Recipes Tagged: blueberry, Blueberry Cake, Blueberry Crumb, breakfast, coffee cake

Dad’s Macaroons

September 5, 2017 by chrissy@mythankfultable.com

Coconut Macaroons

So this weekend I became the official owner of my Father’s vehicle. Which, if you know me is bittersweet. Awesome because I was gifted a vehicle.

Not awesome because it belonged to my Dad.

Who should be driving it himself.

Preferably to go play golf.

If you knew Cliff, he was the perfect mix of grumpy and kind. Mostly grumpy, but the kind part outshined enough to make you say, “Yeah, that’s Cliff.” He was a nursing administrator at a hospital, lead by example, didn’t say more than what needed to be said, listened, problem solved, worked hard, played hard. Loved. Quietly.

When I needed to move home, my parents rearranged their life, let us take over their house, and start over. It enabled me to go back to school for my Masters, and again for my Sixth Level. When I was accepted into the program for my MFA in Writing, I asked my Dad, “Do you really want to sign on for two more years with us?” He did his Dad grin and said, “Get it done.”

Momma’s Goodness

I always call my Dad my anchor and my Mom my nest.  Where Mom wants to know how she can help, and jumps in, makes it safe and supportive (more on Norma in another post) Cliff would say, “You need to do this.” Then he would anticipate you to do the right thing. Now.

Coconut Macaroon Batter

I’d be writing papers at two am after I fell asleep putting the kids to bed, and he’d peek my doorway to see if I was ok. He’d nod his head, then leave. That was my Dad.

When my Dad was diagnosed with cancer, We put on our brave faces, asked, “What can we do to help?” and did what we needed to do. We did this for less than a year.

He never complained. Not. Once.

He passed the first week in November. His Christmas cards were already addressed.

The following part is hard to say, but as his daughter, I am so thankful he went as he did.

With dignity and the best quality of life his diagnosis could have offered.

But, as his daughter, I still wake up, almost three years later, and wish I had him for one more day.

Coconut Macaroon Cookies

The best grieving advice I ever got was from my oldest friend, who said, “You expect Christmas to be hard. You don’t anticipate Tuesday to be hard.” I guess that’s just grief. Like an ocean tide, coming in and going out.

When he bough the car, he told my mom, “Give it to Chrissy, then she will be set for awhile.” The paperwork was lined up, all set to go. That’s the kind of Dad I had.

It took me three years to make it mine.

And it has heated seats. My old Honda doesn’t have heated anything!

Sometimes when I cook, or bake, it isn’t because I even want to eat it. (It’s TRUE). Sometimes it serves a higher purpose.

Where some people dread the task of food prep, there is a simple, therapeutic, peaceful beauty to time in my kitchen. I welcome it. It’s my Sunday post church, church, if you know what I mean. Some Sundays, it is my church.

Coconut Macaroon Cookies

The very last recipe my Dad shared with me was for his all time favorite cookie, the Coconut Macaroon.

Baked Coconut Macaroon Cookies

Due to his type of cancer, at one point eating became really difficult. So, when he was able to have a macaroon for the first time again, it was a good sign. Temporary, but I am so thankful for those cookies and what they meant for my father.

SO this rainy morning, even though I am sad, I am thankful. Thankful for the Dad I had as long as I did. Thankful he loved to cook and shared that with me. Thankful for the anchor I was blessed enough to know.

It seems fitting I bake his favorite cookies, doesn’t it?

These are a simple, non piped, chewy, basic macaroon. Mix in one bowl, chill if you like but don’t need to, drop on parchment, and bake cookie. It’s a sweeter cookie, so one is enough. Ok, eat the second one too.

A cookie recipe of few words. Unlike this post. So much like my Dad.

If you aren’t a fan of coconut. I know you are out there. It’s ok. You don’t have to like it or make them. But, I wish for you love and anchors and nests in your life. If you didn’t have one, that you’ll become one, and that our hearts are thankful. Every day a gift.

I hope you enjoy this recipe, and as always, thank you for coming to the table.

Chrissy

Click for Printable Recipe

Print

Dad’s Macaroons

Print Recipe

A simple mix and drop cookie that would make my Dad’s heart happy.

  • Author: chrissy@mythankfultable.com

Ingredients

Scale
  • 14 oz Sweetened Condensed Milk
  • 1 Egg White
  • 2 Tsp Vanilla Extract
  • 1– 14 Oz Package Flaked Coconut (Sweetened)

Instructions

  1. Preheat oven to 325*
  2. Line baking sheet with parchment paper.
  3. Mix ingredients in order.
  4. Chill in the refrigerator for 30-60 minutes.
  5. Drop by rounded tsp. (or use a small ice cream scoop). If you don’t want little mounds, flatten slightly.
  6. Bake 15-17 minutes until golden brown.
  7. Cool Cookies on wire rack.

Did you make this recipe?

Share a photo and tag us — we can't wait to see what you've made!

Posted in: Cookies, My Story, Recipes Tagged: coconut, Coconut Macaroon, Cookies, Family, Fourless, Macaroon, One Bowl
« Previous 1 2 3 4 5 6 7 8 9 10 11 12 Next »

Recipe Search

Recent Posts

  • Fluffernutter Cookies…You Heard Me April 12, 2024
  • On Nests July 30, 2023
  • Lemon Rosemary Shortbread Cookies April 24, 2022
  • Praline Sweet Potato Pie March 22, 2022
  • Italian Ricotta Cake March 13, 2022

Recent Comments

  • Cathy Carroll on To My Daughter On Her 18th Birthday
  • Maureen / Mimi on To My Daughter On Her 18th Birthday
  • Kathy G on To My Daughter On Her 18th Birthday
  • chrissy@mythankfultable.com on Cherry Crescent Moon Cookies and Finding the Joy
  • chrissy@mythankfultable.com on Cherry Crescent Moon Cookies and Finding the Joy

Archives

Categories

  • appetizer
  • bread
  • breakfast
  • Cookies
  • crockpot
  • crockpot
  • Dessert
  • Fruit
  • My Story
  • One Pan
  • Recipes
  • side dish
  • Side Dishes
  • soup
  • Vegan

Copyright © 2025 mythankfultable.com.

Lifestyle WordPress Theme by themehit.com