mythankfultable.com

Feeding the Heart, Body, and Family

  • My Pics
  • My Story
  • The Puppies
  • Contact Us
Feeding the Heart, Body, and Family

Recipes

Here is the recipe!

Grown Up Rice Krispy Treats
February 21, 2019 by chrissy@mythankfultable.com
Grown Up Rice Krispy Treat

Rice Krispy Treats with Browned Butter, Dark Chocolate, and Sea Salt

Grown Up Rice Krispy Treat

I’ve been on a rice Krispy treat bender.

Ok, that may be an over exaggeration. Maybe. I may have bought the gigantic box at the store on Sunday (you know, the one that can feed the five thousand…) as a healthier option for breakfast foods.

But that would be a lie. I bought them for the delicious squares of chewy stickiness they would provide.

Last year it was biscotti in this kitchen. This year…Rice Krispy Treats. I promise you, I only allow myself to eat one or two and the rest are either divided up and given away or eaten by visitors to the house. So in a way, it’s good will. My comfort of cooking brings joy to others so it can’t be wrong. Tell me making the treats isn’t wrong…

At a recent time and place when I was required to sit for many hours (It may have been PD for the second day) I was sitting there, taking notes like a boss, being all professional when suddenly…I got to thinking about my next Rice Krispy treat endeavor. (don’t judge, there are worse topics on which to let your mind wander off) and I got to thinking…”what if I used browned butter first…and added chocolate and sea salt at the end?” So yes, in my notes that thought is written, circled, and I got right back to paying attention.

Hey I am a multi-tasker.

First of all, the miracle of browned butter…the nutty aroma in my kitchen is enough to draw attention. This recipe calls for three tablespoons total. That is not a lot of butter for a whole pan of desserts. It also browns up swiftly and leaves tiny bits of browned goodness.

I used mini marshmallows because I like the control factor and they melt quickly and evenly. I used a whole 10 ounce bag. At some point I will make these with homemade marshmallows but this was not that day. Truth be told, today I went grocery shopping and didn’t even cook supper. My daughter and her friend wanted pizza and I said, as all truly good mother of the years do, “Of course!” I also served it on paper plates. I have no shame.

Now the part I hate about making rice Krispy treats is the whole “It is starting to cool and I am covered in sticky and the marshmallows aren’t coating everything and there are threads everywhere of stickiness it is on me get it in the pan quick” moment. Or is that just me? I don’t like the stress of the crunchy and the not covered and the time factor.

But…

If I kept the warm mixture in the pan and slowly add the cereal in cupfuls, and mix them, then add more…the whole mess is contained in the pan and evenly coated. I know. Insert my genius crown here.

I use a big pan. It’s old and non stick but holds all six cups of the cereal mixture. In the pan (on the lowest heat setting) the whole mixture stays warm and soft and pliable. Then the whole mix gets dumped into the waiting vessel and then all you have to do is pat-pat-pat the mixture down. I am sure I didn’t invent this and I know I didn’t read this somewhere so I am going to think I am smart until proven otherwise.

I use a parchment lined 9X11 pan that I sprayed with cooking spray just because…sticky.

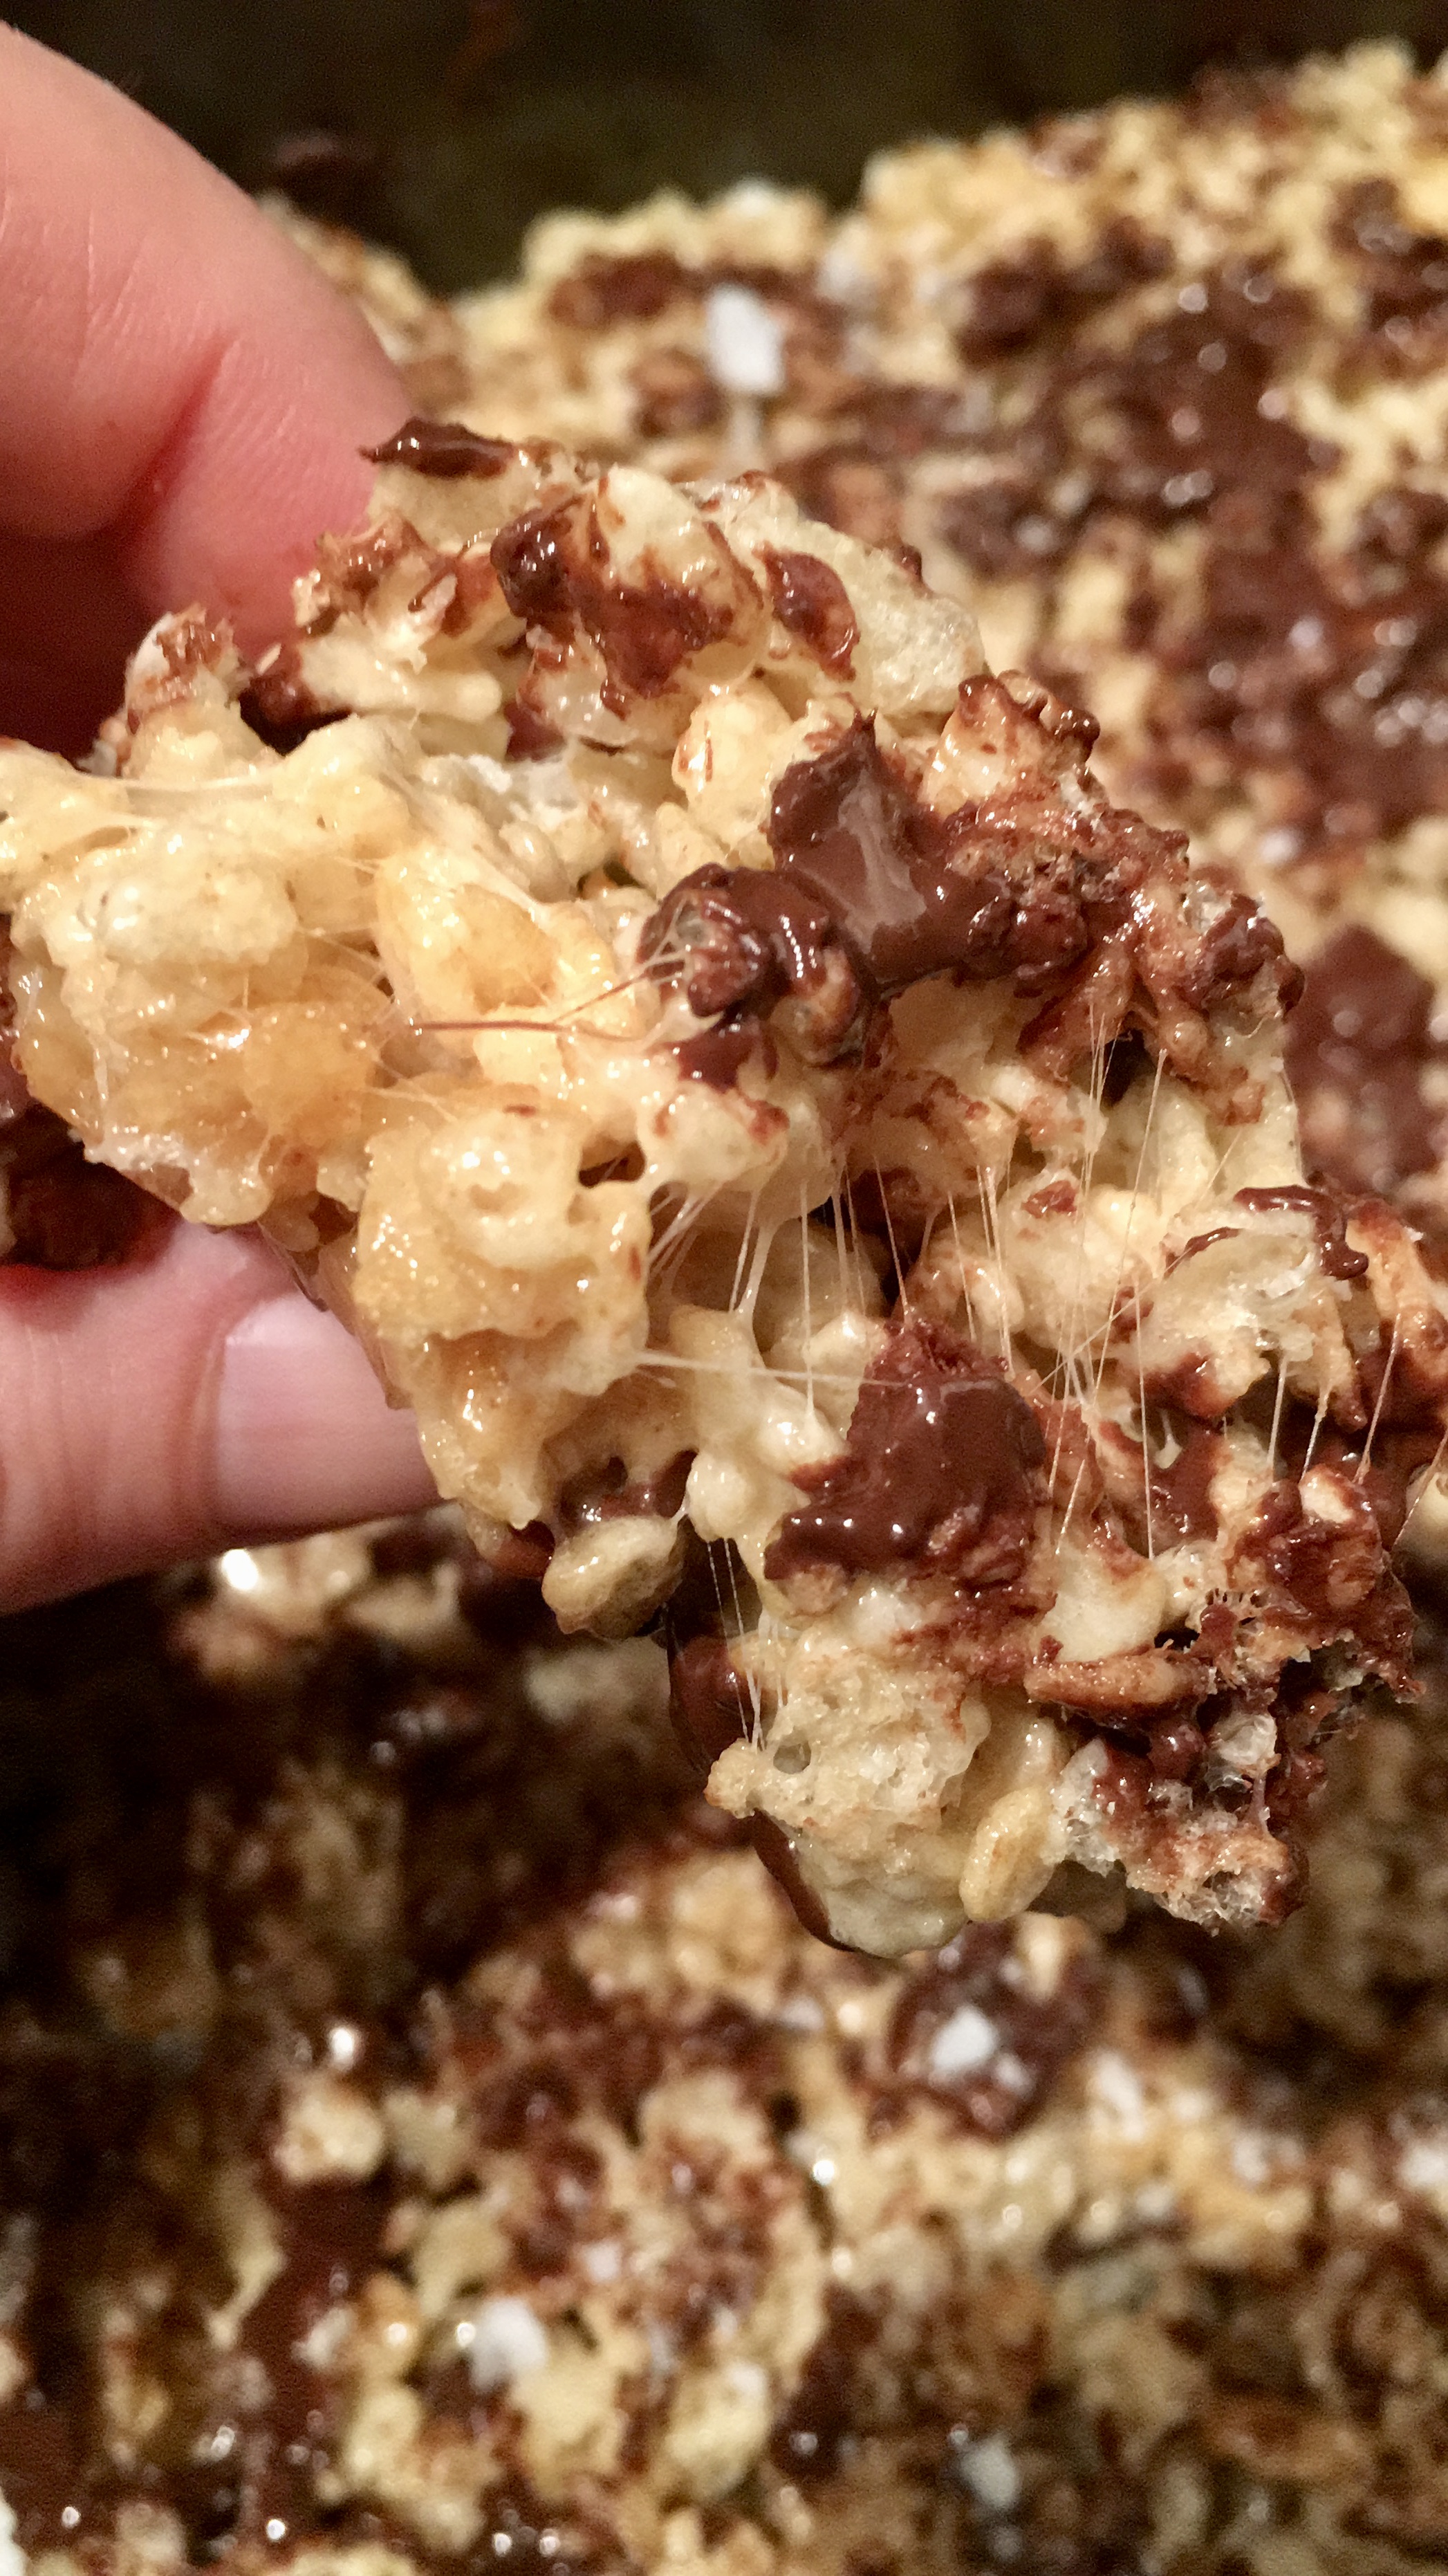
At the last second I dumped approximately 1 1/2 cups of dark chocolate morsels into the mix and folded my heart out. Some stayed solid, some stayed slightly melty, and some melted more than I cared for. It doesn’t matter. Say it with me -Melty Dark Chockey. There need be no apology.

Then, for a final attempt at glory, I sprinkled sea salt flakes on top of just 1/2 half of the pan…in case it was going too far.

It wasn’t. I need to mention here my daughter always says, “Mom, don’t go overboard with the salt.” So- you add as much as you feel is necessary.

Now, baker’s notes: upon cooling, these bars have a slightly crispy over chewy texture. I am not sure if this is due to the browned butter or the chocolate, but I am planning to remedy the next batch with a little more marshmallow to compensate.

Disclaimer: This entire pan will be eaten. I have staff who will find a wrapped treat today. They will not think, “Hmmm….wow these are more crispy! I don’t like them, thanks anyway.” They won’t. Because Rice Krispy Treats with Dark Chocolate and Sea Salt are swoon worthy. Even if they are slightly less chewy than the regular kind. Don’t get me wrong, they are still chewy, just the crisp is pronounced a little too.

Grown Up Rice Krispy Treat

Now my brain is kind of going down a Krispy Treat road. What if we incorporated butterscotch chips? Peanut Butter Chips? Peanut butter and chocolate chips? Potato Chips? Could we add nuts and fruit? Where does this road end? I don’t know people. I will let you know when I find out. I’m still making biscotti and that madness began a year ago.

I think, some days you may just be a regular Rice Krispy treat sort of person. Some days you jazz it up. But either way, the sweet things in life get celebrated. This gal leans toward bits of dark and salty in real life and in desserts for sure!

I hope you enjoy this recipe, and as always, thank you for coming to the table!

Chrissy

Click below for a printable recipe.

Print

Grown Up Rice Krispy Treats

Grown Up Rice Krispy Treat
Print Recipe

This original Rice Krispy Treat recipe is kicked up with the addition of browned butter, dark chocolate, and sea salt. 

  • Author: chrissy@mythankfultable.com

Ingredients

Scale
  • 3 Tablespoons Butter
  • 10 Ounces mini marshmallows (for chewier treats throw in an extra 1/2 cup)
  • 6 Cups Rice Krispy Cereal
  • 1 1/2 Cups Dark Chocolate Morsels
  • Sea Salt Flakes (to taste)

Instructions

  1. Bring butter to a soft melty browned state in a large pan. Once melted, swirl in the pan until it has a nutty aroma and is darkened in color.
  2. Add marshmallows and stir until melted and bubbly.
  3. With mixture in the pan, on the lowest heat setting, slowly add cereal in one cup measurements. Incorporate/coat cereal evenly before adding more until all six cups have been incorporated. 
  4. Turn off heat, and quickly fold in dark chocolate morsels. Some will melt, some will be soft, some will stay firm. Speed is your friend here!
  5. Press mixture into a prepared baking pan. (I used a regular cake pan with parchment and spray)
  6. When bars are still tacky, sprinkle with sea salt to taste.
  7. Allow to cool (I wasn’t able to, I ate mine warm) and cut and serve.

Did you make this recipe?

Share a photo and tag us — we can’t wait to see what you’ve made!

Posted in: Dessert, Recipes Tagged: bar, Dark Chocolate, dessert, rice krispies, rice Krispy bars, Sea Salt

Tomato Ricotta Tart in an Herbed Crust

September 4, 2018 by chrissy@mythankfultable.com
Tomato Ricotta Tart

“Mom, you haven’t blogged in a while…” the comment was innocent, but accurate.Ricotta Tart

I haven’t blogged in a while.

I took the summer to regroup. I would say summer is normally a time to get stuff done. In a way, and I did get stuff done. Just not the writing stuff.

Every now and then our lives get full. Ok, most of us have full lives…a lot of the time…most of the time…, OK all of the time. Go. Go. Go.

Many nights I sit and promptly fall asleep in the chair. I am super fun. My alarm goes off early and all of the stuff has to get done before work, then work stuff, then family stuff, then supper stuff, then more house stuff. You know the drill. I am not one to let things go undone. Things need to get done. It’s how I roll.

Except.

herbed crustExcept, by the end of the school year this time around, I was weary in my core. This year was tougher for some reason. Across the board. We weathered a few major storms at home. I got sick, like a lot. Our school year had a lot of transitions. I looked out at my gardens this late winter/early spring and thought, “I’m not doing it this summer.”

Now, if you follow my Instagram feed you know, I dig in the dirt and take pictures of my flowers. So, something was definitely wrong.

I wouldn’t call it depression. I would call it exhaustion?

Soul tired. Have you every been soul tired?

Yeah, its kind of ugly.

SO this summer, when the graduation party was over and friends  were hanging out in the dining room, and swimming, and having fun being kids and the world slowed down a bit, I chose to stop. I chose to embrace the break.whipped ricotta

I listened to books (I love audible and free audio library books/apps). I went to the gym, or walked outside as much as possible. I worked outside. I played the dumb game I am addicted to on my phone. I watched bad television. I cooked with no blogging agenda. I had meals with people I love from long ago, from work, from book club, from life.

I just stopped with the overwhelming get everything done immediately mindset. For a little bit.

I’m not going to lie. A lot of the checklist got done. I just did a gut check before I did it. And, it happened after I worked out. After I took care of myself. Guess what? it was all waiting for me.

I researched. I took out a million cookbooks. I listened to successful bloggers podcasts. I filled my soul.

Tomato Ricotta TartBecause even soul’s get hungry, and one year in, mine needed nutrition.

Now, we are back to school and life is the treadmill again but I am different.

I’m choosing joy and not the drama of the day-to-day. I’m working hard to love more. Including me. I’m exercising daily. I’m drinking Kale Smoothies. (Yeah, I know…). I am saying NO to stuff. No to the stuff that can wait. It’s all going to be ok.

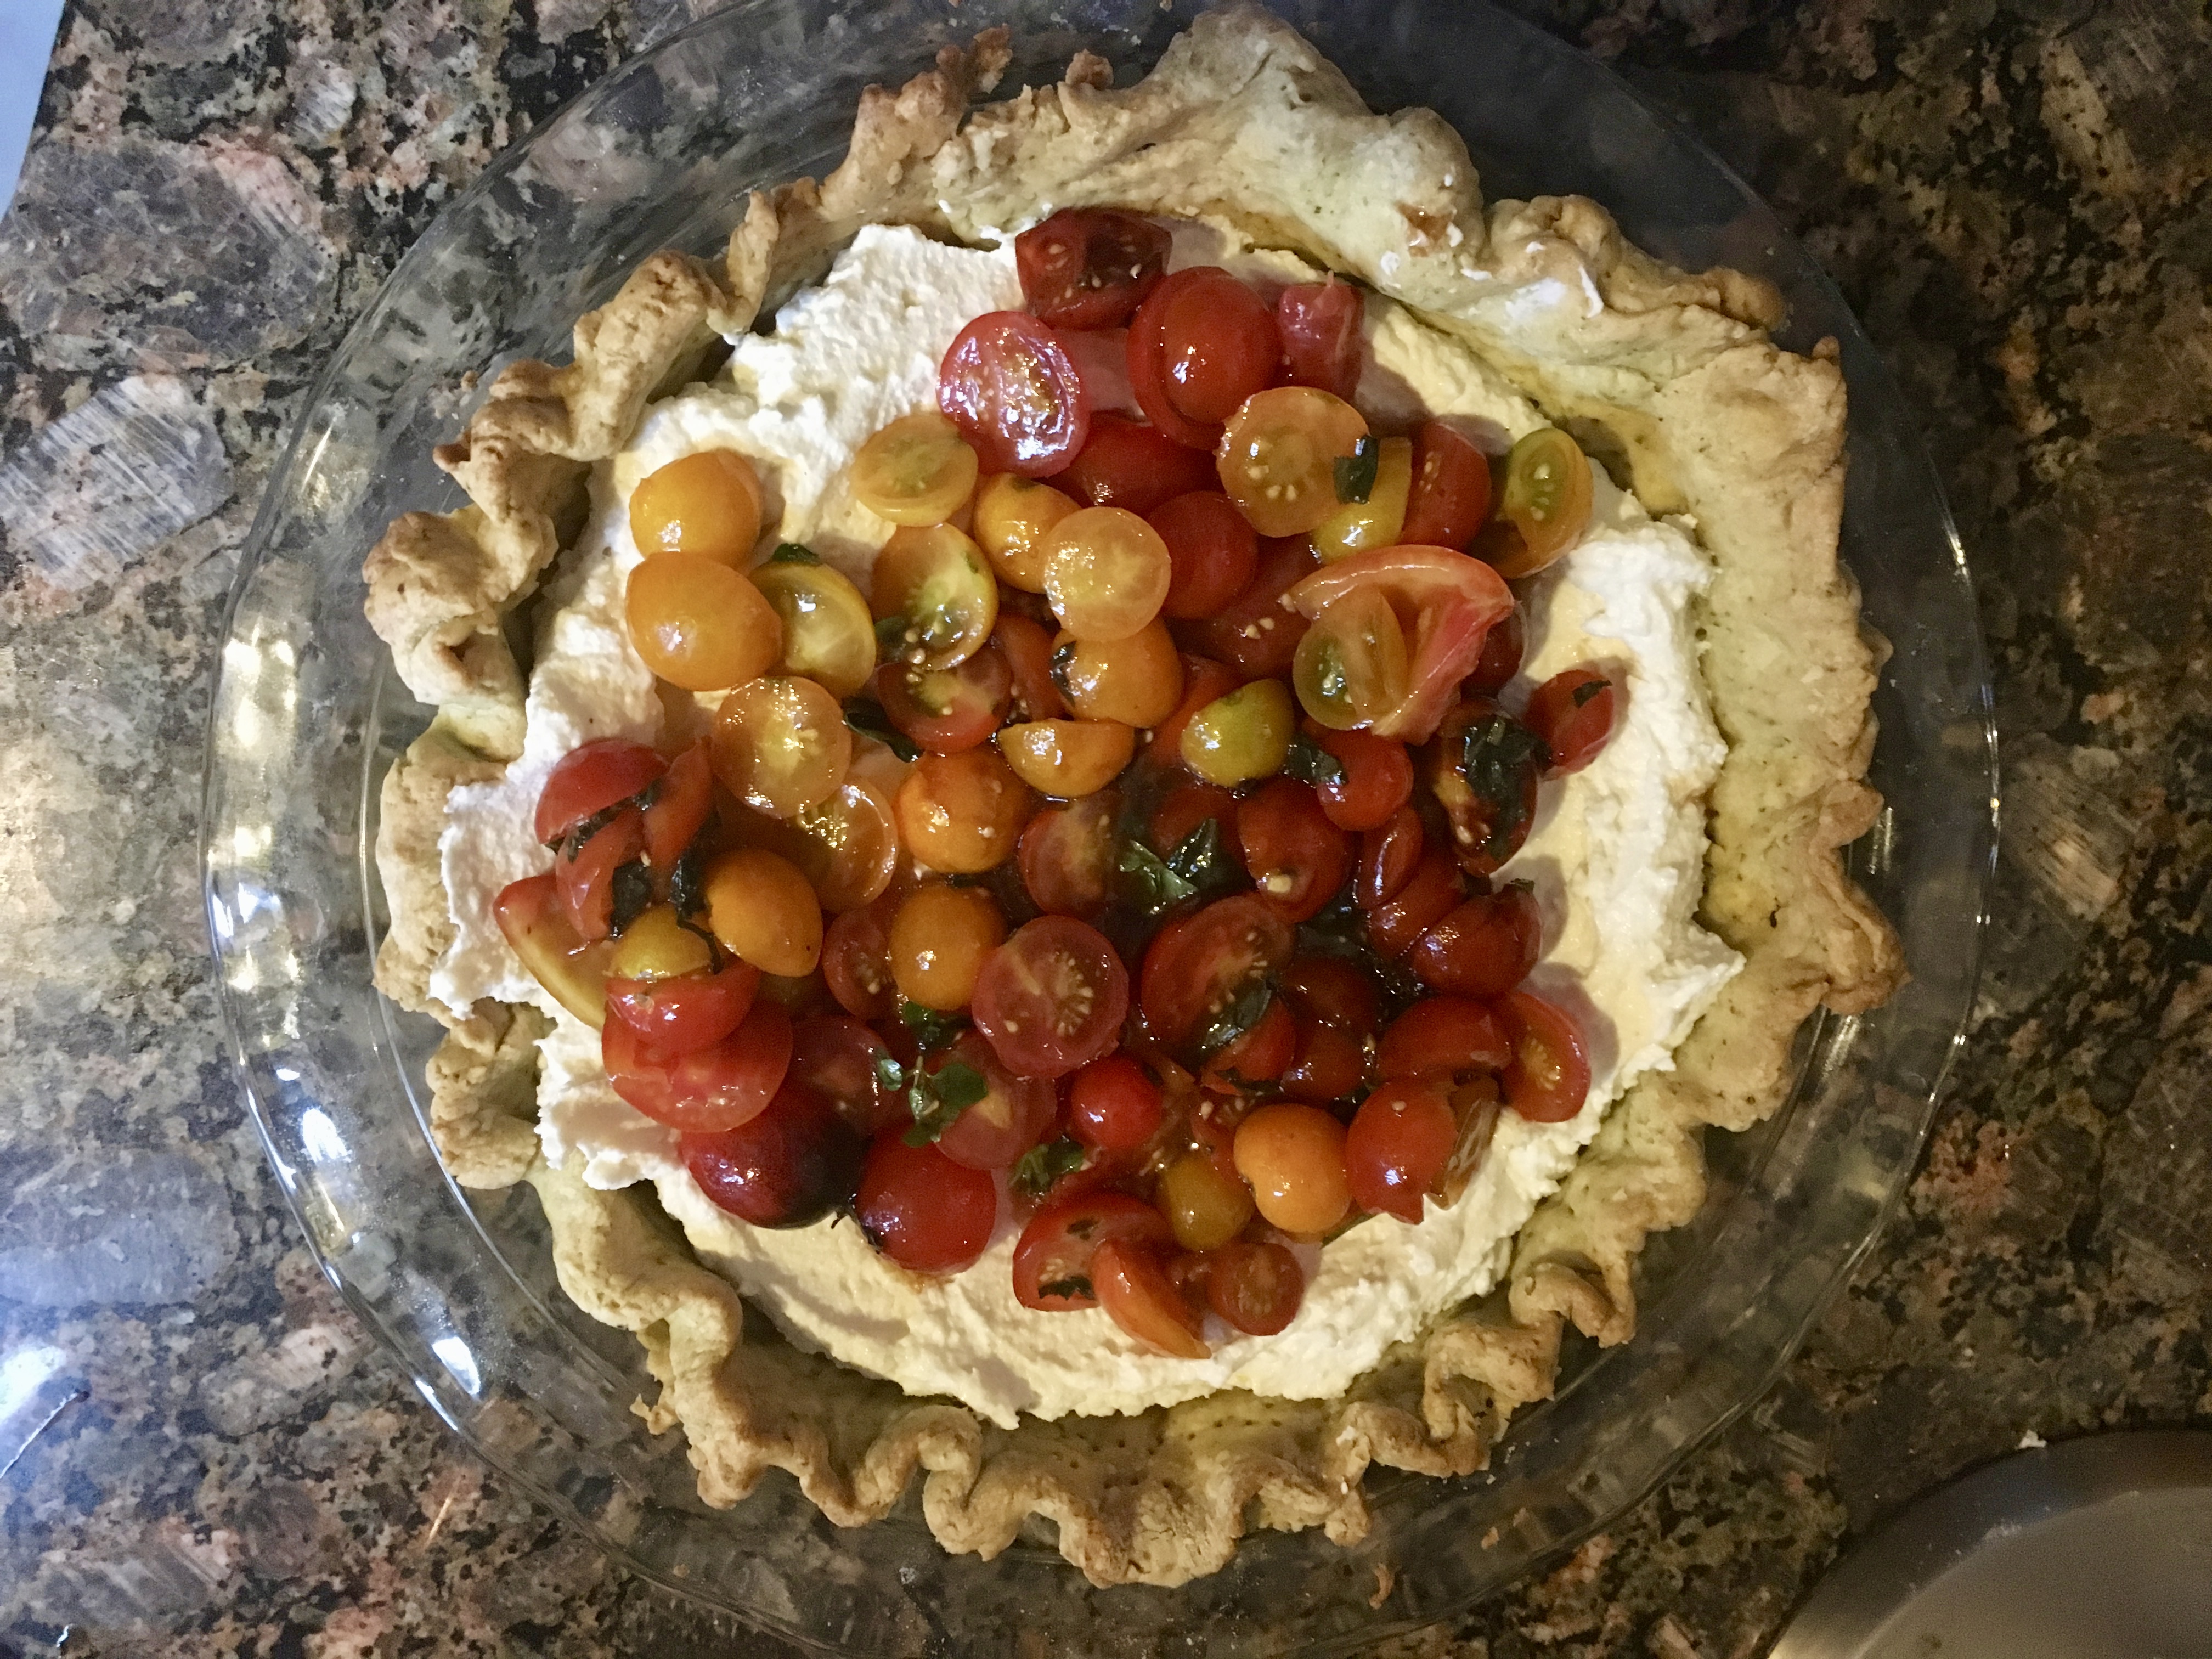
I did cook all summer. I didn’t bake as much (more on that later) but with the abundance of tomatoes I found this perfection of a recipe from www.foolproofliving.com. So beautiful. So the essence of all that summer savory tarts should be, and hello, ricotta.

I tweaked the recipe in that I added fresh basil and oregano the crust. (Summer research paying off). I used multi colored cherry tomatoes because I have them in every container I can put them in. (Hooray for small tomatoes that excel all summer long). I used high quality balsamic, because it’s an indulgence to buy pretty olive oils and balsamic vinegar on road trips instead of trinkets. Life is good.

The crust is easy to prepare in advance (even though it looks like a lot of steps it really isn’t) and is baked, and awaits the filling. The filling is quick to make. Assembling on site is a matter of spread filling, top with tomato topping, drizzle. If ever there was a recipe that looked hard but secretly isn’t…you have it here. Tomato Ricotta Tart

Now, if you don’t like ricotta or tomatoes…why are we friends? Seriously. Ricotta is so, so lovely. Tomatoes are mouthfuls of summer. (One of my children loathes tomatoes. The other despises ricotta. So I know the jury is out readers. But just not with this gal).

For my educator friends, my mommas of school aged children friends, and anyone else impacted by the academic calendar, the year is just beginning. We have full hearts and our hands our busy. Our students/children and staff/colleagues need us strong and calm. Souls filled. Imagination ready. Inspiration accessible. Make sure in the midst of the “stuff” you remember to take care of yourself and feed your souls and minds as well as your bodies. And make this tart. You won’t be sorry.

As always, I hope you love this recipe, and thank you for coming to the table!

Chrissy

Click below for a printable recipe.

Print

Tomato Ricotta Tart in an Herbed Crust

Ricotta Tart
Print Recipe

This gorgeous summery tart takes an herb infused crust, filled with lemony ricotta, and topped with tomatoes and balsamic vinegar.

  • Author: chrissy@mythankfultable.com from www.foolproofliving.com (minor changes in crust)

Ingredients

Scale

Herbed Dough:

  • 3 tablespoons almond flour/meal
  • 1 ¼ cups all-purpose flour, plus more for rolling
  • Pinch of salt
  • ½ cup unsalted butter, cold, cubed or grated
  • Handful of basil and oregano leaves, roughly chopped (will pulse with dough ingredients to become pulverized in food processor)
  • 2–4 tablespoons ice-cold water, depending on how much it takes to come together

For the Filling:

  • 1 generous Cup Fresh Ricotta, at room temperature
  • 4 ounces Cream Cheese, softened
  • ½ cup grated Romano or Parmesan Cheese
  • 1 teaspoon Lemon Zest (I used one lemon)
  • 1 teaspoon lemon juice

For the Tomato Topping:

  • 2 cups tomatoes, (I used a combination of multicolored cherry tomatoes, halved)
  • 1 tablespoon olive oil
  • ½ Teaspoon Kosher Salt
  • ½ Teaspoon freshly Ground Black Pepper
  • ¼ Cup leaves of fresh Basil, loosely packed
  • 2 tablespoons fresh Oregano leaves
  • 1 tablespoons Pine nuts (optional)

Instructions

To make the dough:

  1. Combine almond flour, all-purpose flour, and salt in a food processor.
  2. Add Fresh Herbs.
  3. Cube or Grate Butter and add to the food processor with flours, salt, and herbs.
  4. Pulse the cold butter into flour/herb mixture.
  5. Slowly drizzle the cold water into food processor while pulsing, gradually adding as much water as you need to make the dough come together.
  6. Turn dough out into a piece of plastic and shape it into 4-inch disk. Cover tightly and refrigerate for 30 minutes or until ready to use.
  7. When ready, remove chilled dough from the fridge. If it is too cold to roll out, let it sit on the counter for a few minutes. Uncover before rolling.
  8. Using a rolling pin, roll it into 11-inch circle on a well floured surface.
  9. Place the dough into 9-inch tart pan with a removable bottom (or a pie pan)making sure the dough is evenly distributed throughout the pan.
  10. Using your fingers be sure to push the dough in the corners of the pan.
  11. Prick the bottom of the tart all over with a fork.
  12. Place pie pan/tart pan with dough in the freezer for 15 minutes. (Don’t use glass or you will have to let it sit out before you place in hot oven).
  13. Preheat the oven to 400 F degrees.
  14. Remove the pie/tart pan from the freezer.
  15. Place a sheet of parchment paper on top and fill it with dried beans (or pie weights).
  16. Place in the oven for 15 minutes, then remove the beans and parchment paper and bake for another 20-25 minutes, until lightly golden brown.
  17. Let it cool on a cooling rack for at least 15 minutes before filling.

Ricotta Filling:

  1. Using a mixer with the silicone/rubber spatula attachment, combine Ricotta, Cream Cheese, and Pecorino Romano in a bowl.
  2. Fold in the lemon zest and juice.
  3. Season it with ½ teaspoon kosher salt and ¼ teaspoon freshly cracked black pepper.
  4. Refrigerate until assembling tart.
  5. Half or quarter the tomatoes and place it in a bowl. Stir in the olive oil, salt and pepper.

When ready to serve:

  1. Remove the tart from the pan (unless it is in a pie plate) and place it onto a large dish.
  2. Spread the ricotta filling evenly over the top smoothing the top with a spatula.
  3. Top it with tomato filling, garnish with basil, oregano, and pine nuts (if preferred).
  4. Drizzle balsamic vinegar, garnish with pine nuts if you desire.

Did you make this recipe?

Share a photo and tag us — we can't wait to see what you've made!

Posted in: My Story, Recipes Tagged: Cherry Tomato, Herbed Crust, pies. balsamic, Ricotta, romano, savory tarts, Side Dishes, Tart, tomato

Lemon Blueberry Zucchini Bread

July 21, 2018 by chrissy@mythankfultable.com
Lemon Blueberry Zucchini Bread

Lemon Blueberry Zucchini BreadI’m just going to put it out there, the word “moist” does not have a big following. But in a bread, loaded with freshly picked (I picked mine but hey picking a carton out at the grocery store counts too) blueberries, the zing of lemon, and a superhero ingredient of zucchini, this bread is so good, sweet and tart and yes, moist.

When you add zucchini to anything, even if you squeeze the liquid out before hand, it still adds to the texture of a bread. I shred mine on a box grater (actually it is a six-sided grater – so a hexagon grater) on the fine shred side. You can do this and pop it in the freezer or the refrigerator before hand. I give the shredded zucchini a squeeze to remove extra liquid but don’t make a big deal out of it. (There is no wringing it out in a towel  or setting out overnight). Because I use a finer shred, not only is it barely detectable, the bread maintains the integrity of being lemony and blueberry without looking or tasting like a zucchini bread.Lemon Blueberry Zucchini Bread

This recipe calls for two key ingredients that you can find in abundance right now where I live. The first round of berries (bigger and sweeter) are ready, and everybody who has a garden with squash has one or two or ten extra to give away. So bake it up into a bread and put some glaze on it.

The bread uses lemon extract as well as the punch of zest. I go overboard on the blueberries because that’s how I roll, but you can certainly reduce the berries, use vanilla extract, and switch up the oil as well. I used a mixture of vegetable oil and greek style yogurt (I like what it adds to the texture of the bread). I used Siggis Vanilla yogurt, but if I had Lemon flavored yogurt on hand I would have used that, or plain-no flavor yogurt.

If I am going to cave for a sweet at my local coffee shop, it will be for the glazed lemon loaf. It better taste like lemon. Not yellow bread. So, I will be heavy-handed in the zest. You will find it in the bread as well as the glaze.

The glaze…oh you sweet lemony goodness. Glaze is temperamental in the fact that you don’t want a mouthful of sugar. You want balance of sweet and tart. You want it to not be sticky and gross all over your bread. It’s not frosting. So, you play with it. If it needs more lemon juice or heavy cream, add it. Ideally, you want it loose enough to spoon into a plastic baggie, snip the end off, and drizzle. It will firm up after a bit and maintain it’s pretty design on the top of your bread.

Fresh picked blueberriesIn a world where I can not only be productive and useful, utilizing berries I picked and fresh zucchini from the farm stand, I want a little sweet. A bread with the tart of lemon, the jewel-like blueberries, which visually and taste wise are remarkable, and the ninja like skills of hidden zucchini will get my vote every time.
I hope you enjoy this recipe, and as always, thank you for coming to the table!

Chrissy

Click below for a printable recipe!

Print

Lemon Blueberry Zucchini Bread

Lemon Blueberry Zucchini Bread
Print Recipe

This deliciously moist bread combines the flavors of lemon, blueberry, with finely shredded zucchini to combine the flavors of the season. Recipe yields two loaves, or one large loaf and three smaller loaves of bread.

  • Author: chrissy@mythankfultable.com

Ingredients

Scale
  • 2/3 Cup Vegetable Oil
  • 1 container (5.3 ounce) Greek Style Yogurt
  • 3 Eggs
  • 3 Cups AP Flour
  • 2 1/4 Cup White Sugar
  • 2 Cups Finely Grated Zucchini
  • 2 Teaspoons Lemon Extract
  • 1 Teaspoon Vanilla Extract
  • Zest of one Lemon (OK- I use three lemons but it is because that is my thing)
  • 1 Teaspoon Salt
  • 1/2 Teaspoon Baking Soda
  • 1 Teaspoon Baking Powder
  • 4 Cups Blueberries

Lemon Glaze:

  • 1 Cup Powdered Sugar
  • Zest of 1/2 Lemon
  • 1 Tablespoon Lemon Juice
  • 1 Tablespoon Whipping Cream

Instructions

  1. Preheat oven to 350*
  2. Prepare either 2 loaf pans or four small loaf pans with cooking spray or oil.
  3. In a mixer with a paddle attachment, combine oil, yogurt, and sugar.
  4. Add eggs and combine.
  5. Add zuchinni, extracts, zest, flour, salt, baking powder, and baking soda until combined.
  6. Fold in blueberries.
  7. Pour batter into prepared pans.
  8. Bake for 50 Minutes.

Did you make this recipe?

Share a photo and tag us — we can't wait to see what you've made!

Posted in: bread, breakfast, Recipes Tagged: blueberry, Bread, breakfast, lemon, Lemon Blueberry Zucchini Bread, Zucchini

Chewy Oatmeal Cookies with Golden Raisins, Dried Cranberries, Chocolate Chunks, and Walnuts

July 17, 2018 by chrissy@mythankfultable.com

It begins with the table. Whether it is the family you are born into, or the family you make on your own, I am convinced the table is where a family evolves.

For some of us, the joy is in prepping and serving. For others, there is no joy in the cooking, but the gift resides sitting next to people you love and talking about whatever topic arises.

For me, the best times around a table are potluck. Where everyone brings something. We share. It isn’t as stressful or scary or overwhelming, and it somehow all comes together

Potluck suppers have been my last week. We spent a whole week in the glorious Outer Banks: four families, varying supper plans. Only for me, the one with no grill or stove, I was the one who made due. I was welcomed at the table regardless.

(I brought the cookies).

This week held meals around pop up tables, picnic tables, poolside tables, bay side beach chair on your lap tables, and at each, we were family. Some topics dinner appropriate. Some topics…not. But, we laughed, and shared, and sat in silence. It was perfect.

All week-long I thought, “it all starts at the table.” We teach our children, we feed our elderly, we welcome the hurting. We provide, and we ever so humbly receive. We learn to sit. To listen. To share. We learn to respect and to be kind. We learn to laugh at ourselves. We all clean up together, and there is joy in that as well.

If you are lucky, the table is sacred. You take the time to stop the world, put down your electronics, and not just look at but see the people around you. And your heart becomes even more thankful.

For every time I complained about my father’s staunch five o’ clock supper time, I would give anything to sit at his table. When we eat as a family, it is almost always a joint decision as to where. Inside? Outside? But mostly…together.

For every crumpled napkin, shared plate, “try this,” forkful or sip of a drink, every “would you please pass…” or “Anybody want anything else before we clean up?” Our lives are connected. We are family…and it happens at the table.

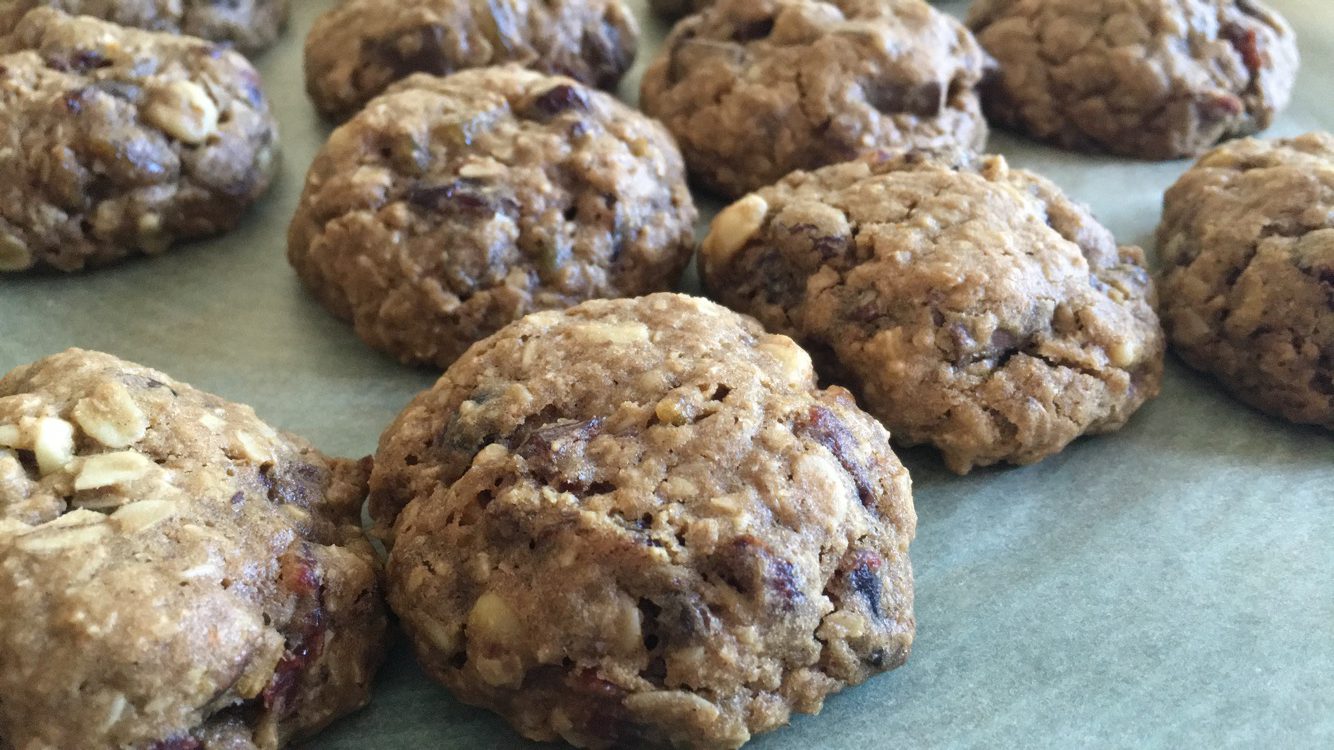
For this cookie you can think it’s healthy and it is… but it really isn’t. Oatmeal, dried cranberries, dark chocolate chunks, orange zest, walnuts, and golden raisins all dance around with brown sugar and molasses. Chewy, filled with jam like dried fruit, and that little kick of orange balances it all out.

Yes, these went to the table. To the beach, to the bay, to the pool. Because life is just sweeter on vacation with dessert. Cookies need no plate. These were the healthiest of the cookies I brought, and they got eaten just like the others…and I am thankful. Ever so thankful, for the family I got to share for the week.

I hope you enjoy this recipe, and as always, thank you for coming to the table!

Chrissy

For a printable recipe, click below!

Print

Chewy Oatmeal Cookies with Golden Raisins, Dried Cranberries, Chocolate Chunks, and Walnuts

Print Recipe
  • 1 Cup Butter
  • 1 Cup Brown Sugar (I like to use dark)
  • ½ Cup White Sugar
  • 2 Eggs
  • 2 Tablespoons (generous) Molasses
  • 3 Cups Rolled Oats (Can be Gluten Free)
  • 1 ½ Cup Flour
  • 2 Teaspoons Cinnamon
  • 1 Teaspoon Baking Soda
  • 1 Teaspoon Salt
  • 4 Teaspoons Corn Starch
  • 1 ½ Cups Dried Cherries
  • 1 ½ Cups Golden Raisins
  • 2 Tablespoons Orange Zest
  • 1 Cup Dark Chocolate Chunks/Chips
  • Author: chrissy@mythankfultable.com

Ingredients

  1. Dough can be made ahead of time and refrigerated for up to a few days but can be mixed and baked.
  2. Preheat oven to 325*
  3. Line cookie sheets with parchment paper or Silicone mats.
  4. In a mixer with a paddle attachment, combine butter and sugars until light and fluffy.
  5. Add in eggs and molasses and combine until smooth.
  6. In a separate bowl combine flour, oats, baking soda, salt, cornstarch, and cinnamon.
  7. Add dry ingredients to butter mixer until combined.
  8. Stir in dried cherries, zest, raisins, chocolate chunks.
  9. Scoop dough onto prepared cookie sheets.
  10. Bake for approx. 12 minutes. Allow to cool.

Did you make this recipe?

Share a photo and tag us — we can't wait to see what you've made!

Posted in: Cookies, My Story, Recipes Tagged: Cookie, Dark Chocolate Chunks, Dried Cranberries, Golden Raisins, Oatmeal, Oatmeal Cookie, Walnuts

Being the Beacon and Cherry Cheesecake Dip

June 30, 2018 by chrissy@mythankfultable.com
Cherry Cheesecake Dip

We’ve always had a sign.

Cherry Cheesecake Dip

Cherry Cheesecake Dip

When you are a mom with child(ren) at the beach, even with a group of friends, you are ever watching, monitoring, counting heads.

I have two children. One who loves the waves, the other who does not. Both adventurous. Both fun seeking, but one in the water and one in the sand. It is inevitable at some point you have to decide which one leaves your side to have their version of fun. Even though you have back up people to go with them, or stay with them…it is hard to let go.

When my son would boogie board or ride the waves, and we would watch as the tide would  pull him this way or that, we had a sign. I would raise my arm, he would see it, and he would raise his arm in the same fashion. Without words, this was the conversation:

“I’m here! You OK? Don’t let the tide drag you much farther!”

“I’m OK mom! I see you!”

And I would watch and do it all over again.

The older he got, the less frequently I would raise my arm, but the eyes are always watching. That’s what moms do.

This year I watched that boy walk across the stage and get his diploma, which is a pretty big deal. Not every kid loves school, just like not every kid likes to stay on the beach. Some kids take the honors courses and write the papers last-minute. Some kids plan out their papers for weeks in advance. As an educator, and a mom, I see all different kinds of learners. I have changed as a learner myself.

This year my son wrapped up High School and I could not be more proud. (and relieved…it wasn’t without several “Come to Jesus” meetings in the last decade).

If life has taught me anything, it is that, like the ocean, things are always changing. You can count on the tide, but the grains of sand it kicks up get shifted and move over and settle in new places. Constantly.

I have a pick-up-the-smoothest-stone-and-stick-it-in-your-pocket issue. As in, the stones that you can hold in your hand and are so soft they feel like velvet, come home with me. (Not all, just a couple). They remind me that life can smooth out any edges in time. They also remind me that no matter what you start out as…you end up differently if you choose to stay in the water and let the waves do their work.

My son has so many life stories to encounter, and so many plans to make and evolve. He already has transformed so much from that new baby who wouldn’t sleep. That sweet boy who loved to dig up worms, the teenager who liked video games as much as possible. Even with what he’s handled so far I know there is more to come. Things I can’t protect him from, prevent, or fix.

He’s a young man. Hopefully the momma wisdom I have tried to pour into his life has roots and will guide him along the way.

Graduation was a blur and filled with family and friends and life, loud and ready.

So imagine my pure bittersweet joy, when in a sea of people on the steps of the graduation ceremony, trying to let my boy know where we were waiting…I automatically raised my arm.

He saw me, smiled, and did the same.

Oh precious child of my heart. I am here. I am here.

We are imperfect and tired and sometimes lost in the sea of this life we call motherhood. Days where it is spot on and days when we wonder if we are enough.

If nothing else, I hope my children know beyond all things…that they are loved just as they are and I am the beacon to call them home. I will raise my arm, and they can find me from wherever they go.

Every. Day. A. Gift.

Now to the recipe: If you want an easy so yummy summer dessert, this is your recipe. It’s cheesecake like, no bake, covered in canned pie filling and served up with Nilla Wafers. The recipe I used is from www.cincyshopper.com

Blend together cream cheese, marshmallow creme (in New England it is FLUFF), Cool Whip, and spread in a pie plate. Top with cherry pie filling. Put back in the refrigerator until you need it. EASY? YES. DELICIOUS? YES. Can I hear summer potluck? YES.

Much love to you my readers. We are on the sand or in the waves of this life together.

I hope you enjoy this recipe, and as always, thank you for coming to the table!

Chrissy

Click below for a printable recipe!

Print

Being the Beacon and Cherry Cheesecake Dip

Cherry Cheesecake Dip
Print Recipe

Simple and delicious cherry cheesecake dip served with the cracker or cookie of your choosing! Original recipe from www.cincyshopper.com.

  • Author: chrissy@mythankfultable.com

Ingredients

Scale
  • 8 ounces (one package) cream cheese, softened
  • 8 ounces (1/2 Jar of Fluff-I used the big plastic 16 ounce container)
  • 8 ounces Cool Whip -thawed
  • One Can (2 Cup) Cherry Pie Filling
  • One Box Nilla Wafers or Chocolate Grahams or Cookie of Choice

Instructions

  1. Whip together softened cream cheese and Fluff until blended together and smooth.
  2. Incorporate thawed cool whip and combine with the mixer until light and fluffy.
  3. Spread mixture into a pie plate or glass dish of choice.
  4. Top with canned pie filling.

Did you make this recipe?

Share a photo and tag us — we can't wait to see what you've made!


Posted in: Dessert, My Story, Recipes Tagged: Cheesecake, cherry, Cherry Cheesecake Dip, dessert, Dip, Easy

Strawberry Rhubarb Muffins with Pecan Streusel

May 20, 2018 by chrissy@mythankfultable.com
Strawberry Rhubarb Muffins

Well, spring just arrived, sort of. Some days feel like summer, some days feel like I need to build an ark, and finally, finally, the world is blooming. Allergies are not happy, but my heart and my camera lens are. I think the habit I have made for myself of going outside and taking pictures of the flowers in my yard is just one step in making sure I appreciate the world around me. I am pretty faithful in trying to capture one beautiful thing a day. That feeds my soul.

One of my favorite things of the summer is the farmer’s markets. It seems to have rained every day ours is open but we are there anyway. Lately, the rhubarb is ready and even though my own strawberries aren’t ready for picking, there are strawberries available at the grocery store. Bring on the strawberry rhubarb everything.

I will be making strawberry rhubarb preserves soon, but for now, I am experimenting with crisps and these muffins. Using a combination of greek yogurt, sour cream, apple sauce, and a little bit of oil, the muffins are dense and moist and yet not heavy. Using brown sugar, they are not too sweet, but the sugar could actually be reduced if you choose.

This recipe yields 24 -30 generous muffins, but I also tried making mini muffins with my leftover batter and found they are actually even better. I like the idea of morsels of sweet and a little crunchy of the streusel topping. I even made some of these muffins without the streusel (for the non nut eaters in my life) and they were yummy too.Strawberry Rhubarb Muffins

This recipe is a combination of sweet, tangy, and the colors of the rhubarb and strawberry are the perfect combination for early summer. The little bit of orange zest brings out the flavor of the strawberry and the rhubarb. The streusel has a combination of melted margarine that is looser and it doesn’t need to have a lot per muffin to balance out the cinnamon crunch with the tender fruit-filled muffins.

The best part of watching winter disappear is… wait, my list is too long and I have no favorites when it comes to why I am glad to see winter go, except now I can dig in the dirt, photograph everything that blooms, and make recipes that embrace all of the fresh produce available through local farmers.

I hope you enjoy this recipe, and as always, thank you for coming to the table!

Chrissy

Click below for a printable recipe!

Print

Strawberry Rhubarb Muffins with Pecan Streusel

Strawberry Rhubarb Muffins
Print Recipe

This delicious muffin recipe combines the delightful early summer flavors of strawberry and rhubarb with just a hint of orange and the cinnamon streusel topping with a cinnamon crunch!

  • Author: chrissy@mythankfultable.com
  • Yield: 24 -30 1x

Ingredients

Scale
  • 3/4 Cup Greek Yogurt
  • 3/4 Cup Sour Cream
  • 1/2 Cup Applesauce
  • 3 Eggs
  • 1/4 Cup Vegetable Oil
  • 2 1/3 Cup Brown Sugar
  • 2 Tablespoons Orange Zest
  • 2 Teaspoons Baking Soda
  • 2 Cups Diced Rhubarb
  • 2 Cups Sliced Strawberries (I sliced and then halved the slices so they weren’t too big)

For Topping:

  • 1 Stick Margarine (melted)
  • 1/2 Cup Pecans
  • 1/2 Cup Walnuts
  • 1/2 Cup Old Fashioned Oats
  • 1 Tablespoon Cinnamon

Instructions

  1. Preheat oven to 350*
  2. Combine streusel ingredients and set aside.
  3. Line muffin tins with liners and set aside.
  4. Combine yogurt, sour cream, applesauce in a mixer with a paddle attachment.
  5. Add eggs and oil and combine.
  6. Add in dry ingredients and mix until incorporated.
  7. Add in strawberries and rhubarb until combined.
  8. Scoop muffin batter into prepared muffin tins until 3/4 full.
  9. Top muffin batter with streusel topping.
  10. Bake for 20-25 minutes.

Did you make this recipe?

Share a photo and tag us — we can't wait to see what you've made!

Posted in: bread, Recipes Tagged: breakfast, Muffins, Rhubarb, Strawberry, Streusel

Strawberry Rhubarb Crisp

May 1, 2018 by chrissy@mythankfultable.com
Strawberry Rhubarb Crisp

Strawberry Rhubarb Crisp

If ever there was a personal ad for food, it would read; “Fresh Rhubarb looking for a sweet time with a sexy strawberry. Warm crunchy topping essential, vanilla ice cream optional.”

Ok, I can’t honestly say I have ever read a personal ad, or written one for that matter, but what a match you have when you pair the tart of rhubarb with the sweet of strawberry. This recipe has a touch of cinnamon in the crunch topping, and orange juice and zest in the filling. It’s addictive. It’s the quintessential spring dessert, and the minute I spy rhubarb my wheels spin with dreams of crisps and pies and preserves. This crisp was the first. It won’t be the last.

Crisps are amazing because they bake up and reduce to a point where the juices thicken and bubble under a blanket of crunch and crumble that not only meets the texture but also the flavor of the dessert. It hits all of the senses, and it really does deliver. So many times I am able to talk myself out of a processed dessert because, it never really tastes the way you think it should. This is a dessert that appeals to the eye as well as the taste buds.

Strawberry Rhubarb Crisp

The funny thing is, as a kid I never understood the love for rhubarb. It has the look of red celery and it’s tart, tart, tart. I love citrus, but rhubarb has a level of tart all its own.

This dessert is based on Ina Garten’s recipe. I have a colossal baking dish especially for this type of recipe, so I changed the proportions, added cinnamon to the crisp, and a little more zest than the original…because I love orange zest. End of story.

Slice the strawberries, chop the rhubarb, and set aside. Mix your orange juice, sugar, and cornstarch and coat the berry mixture.

Strawberry Rhubarb Crisp

I use a box grater to grate my cold butter and find it cuts into the flour/oat/sugar mixture easily. Top your berries and bake. So simple, and absolutely delicious.

When it comes to baking, I am not a fan of runny pies or crisps. I love that the cornstarch thickens the filling. I also bake it until it bubbles and the smell of cinnamon and strawberry rhubarb is so overwhelming you have to take it out of the oven.

In this window of time where rhubarb and strawberry growing season is just emerging and overlapping, take advantage and bake something delicious!

I hope you enjoy this recipe, and as always, thank you for coming to the table!

Chrissy

Click below for a printable recipe.

Print

Strawberry Rhubarb Crisp

Strawberry Rhubarb Crisp
Print Recipe

Delicious strawberry rhubarb filling with a cinnamon crumble topping. Original recipe from Ina Garden.

  • Author: chrissy@mythankfultable.com

Ingredients

Scale
  • 6 Cups fresh rhubarb, cut into 1 inch dice
  • 6 Cups fresh strawberries, sliced
  • 1 3/4 Cups white granulated sugar
  • 1 1/2 Tablespoons grated orange zest
  • 2 Tablespoons cornstarch
  • 3/4–7/8 Cup orange juice
  • 1 3/4 Cup all purpose flour
  • 3/4 Cup light brown sugar, lightly packed
  • 1 Teaspoon Salt
  • 1 3/4 Cup quick-cooking (not instant) oats
  • 16 Tablespoons cold butter, grated
  • 2 Generous teaspoons of cinnamon

Instructions

  1. Preheat oven to 350*
  2. Slice strawberries and cut up rhubarb. Mix 1 Cup of white sugar and orange zest.
  3. In a measuring cup, dissolve cornstarch into orange juice, combine with sugar and zest.
  4. Pour mixture over berries and rhubarb and toss.
  5. Pour the mixture into the baking dish.
  6. Grate butter and set aside.
  7. Combine flour, remaining white sugar, brown sugar, salt, and oatmeal.
  8. Add grated butter and mix until the dry ingredients are crumbly and butter is evenly distributed.
  9. Sprinkle the topping over the fruit, covering it completely.
  10. Bake for 60-80 minutes, until the fruit is bubbling and the topping is golden brown.

Did you make this recipe?

Share a photo and tag us — we can't wait to see what you've made!


Posted in: Dessert, Recipes Tagged: Berry, Crisp, dessert, Rhubarb, Strawberry, Strawberry Rhubarb Crisp

Parmesan Zucchini Sticks

April 29, 2018 by chrissy@mythankfultable.com
Parmesan Zucchini Sticks

Some recipes are so easy they don’t need to be written up, but I love a new spin on any vegetable, and we have suddenly leapt from winter to summer it seems here in New England. While I will grill in the winter if the need for something grilled is strong, I typically save the grilling for this type of weather. Yay! Finally the days where we can think about eating outside have arrived…for the day anyway (who knows what the next day holds).Parmesan Zucchini Sticks

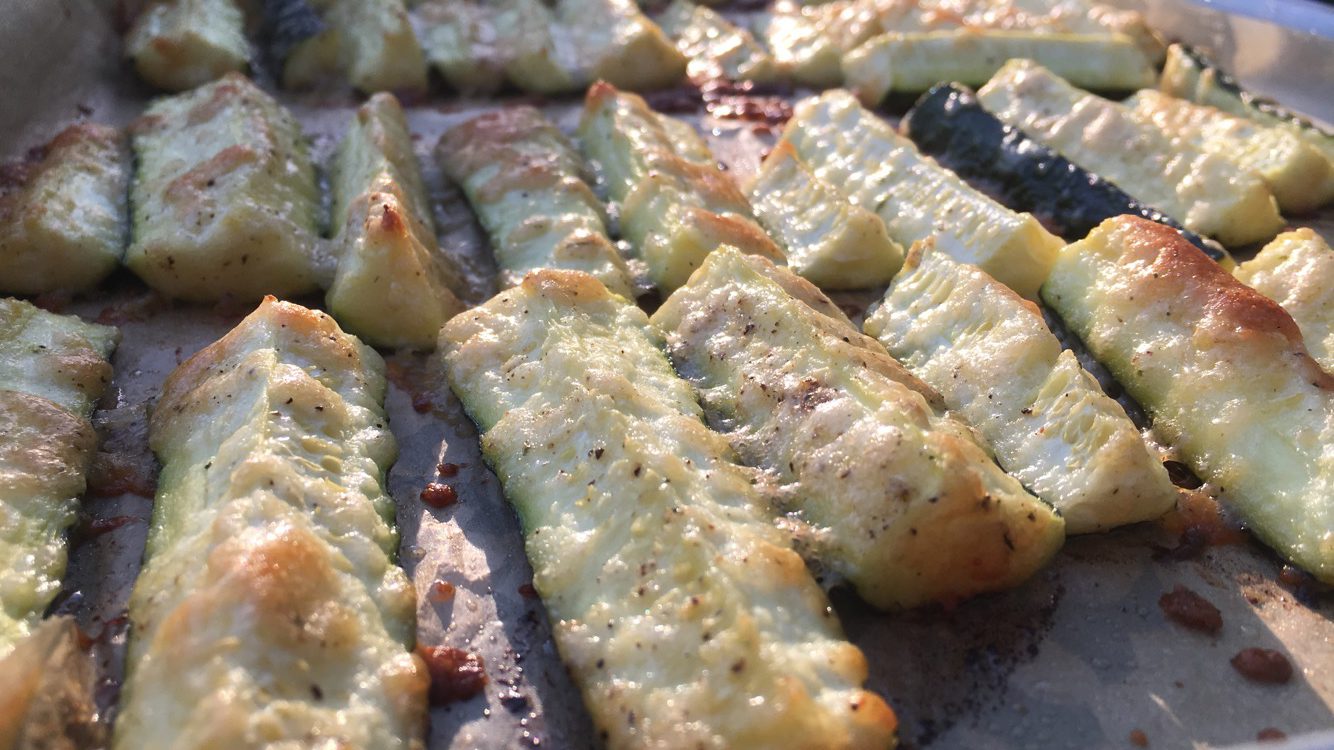
This recipe is adapted from Parmesan Potato Wedges all over the Pinterest. For zucchini, I selected slender, young looking zucchini, about a half-dollar size in circumference (1 1/2″-2″).

Slice into quarters, then into sticks about three inches long. Place zucchini in a plastic gallon sized bag or container and drizzle with oil. I used plain old vegetable oil, but you can use olive oil as well. Season with salt, pepper, garlic powder, and then toss. Once the zucchini is coated, add 1/2 -1 Cup of grated parmesan cheese (I actually used grated pecorino Romano cheese). Coat the zucchini with all of that cheesey goodness!Parmesan Zucchini Sticks

Preheat your oven to 400* and line a baking sheet with parchment paper.

Pop them in the oven. I set the timer for 15 minutes, but ended up cooking them longer, I wanted to see if I could get them to go from melty to golden. In total, the zucchini cooked for approx. 25 minutes but I would watch them. Nothing in this world smells like burned cheese, and that isn’t a good thing. I started the grill, started the zucchini, and magically everything was done at the same time.

This is a simple side dish, but they are tasty enough to be considered a main dish, especially if you are looking for a veggie that has a little extra.

Parmesan Zucchini SticksNow, the variables…you could mix up the cheese, add different spices (think smoked paprika, chili powder, dill, you see where I am going with this).
In a season where I am now working outside digging in the dirt and pulling up weeds and mowing lawns, I want simple. This delivers and your guests are never going to know (unless you tell them)!

As always, I hope you enjoy this recipe, and as always, thank you for coming to the table!

Chrissy

Click below for a printable recipe!

Print

Parmesan Zucchini Sticks

Parmesan Zucchini Sticks
Print Recipe

Simple, baked zucchini sticks with a melty, crunchy parmesan coating. This side dish is sure to please!

  • Author: chrissy@mythankfultable.com

Ingredients

Scale
  • 5 small zuchinni quartered and cut into approximately 3 inch lengths.
  • 2 Tablespoons of oil
  • 1 teaspoon sea salt
  • 1 teaspoon fresh cracked pepper
  • 1 teaspoon Garlic Powder
  • 1/2–1 Cup Grated Parmesan or Pecorino Romano Cheese (to taste)

Instructions

  1. Preheat oven to 400* and line a cookie sheet with parchment paper.
  2. Slice and cut zucchini.
  3. Place zucchini, oil, spices in ziplock bag or container and toss.
  4. Add grated cheese to bag and coat each piece of zucchini.
  5. Arrange zucchini on parchment lined paper and place in the oven.
  6. Bake initially for 15-20 minutes, additional time to make the cheese go from melty to golden.
  7. Serve!

Did you make this recipe?

Share a photo and tag us — we can't wait to see what you've made!

Posted in: Recipes Tagged: Parmesan, side dish, vegetable, Vegetarian, Zucchini

Double Chocolate Biscotti

April 20, 2018 by chrissy@mythankfultable.com

Chockey, Chockey, Chockey. I love you so.

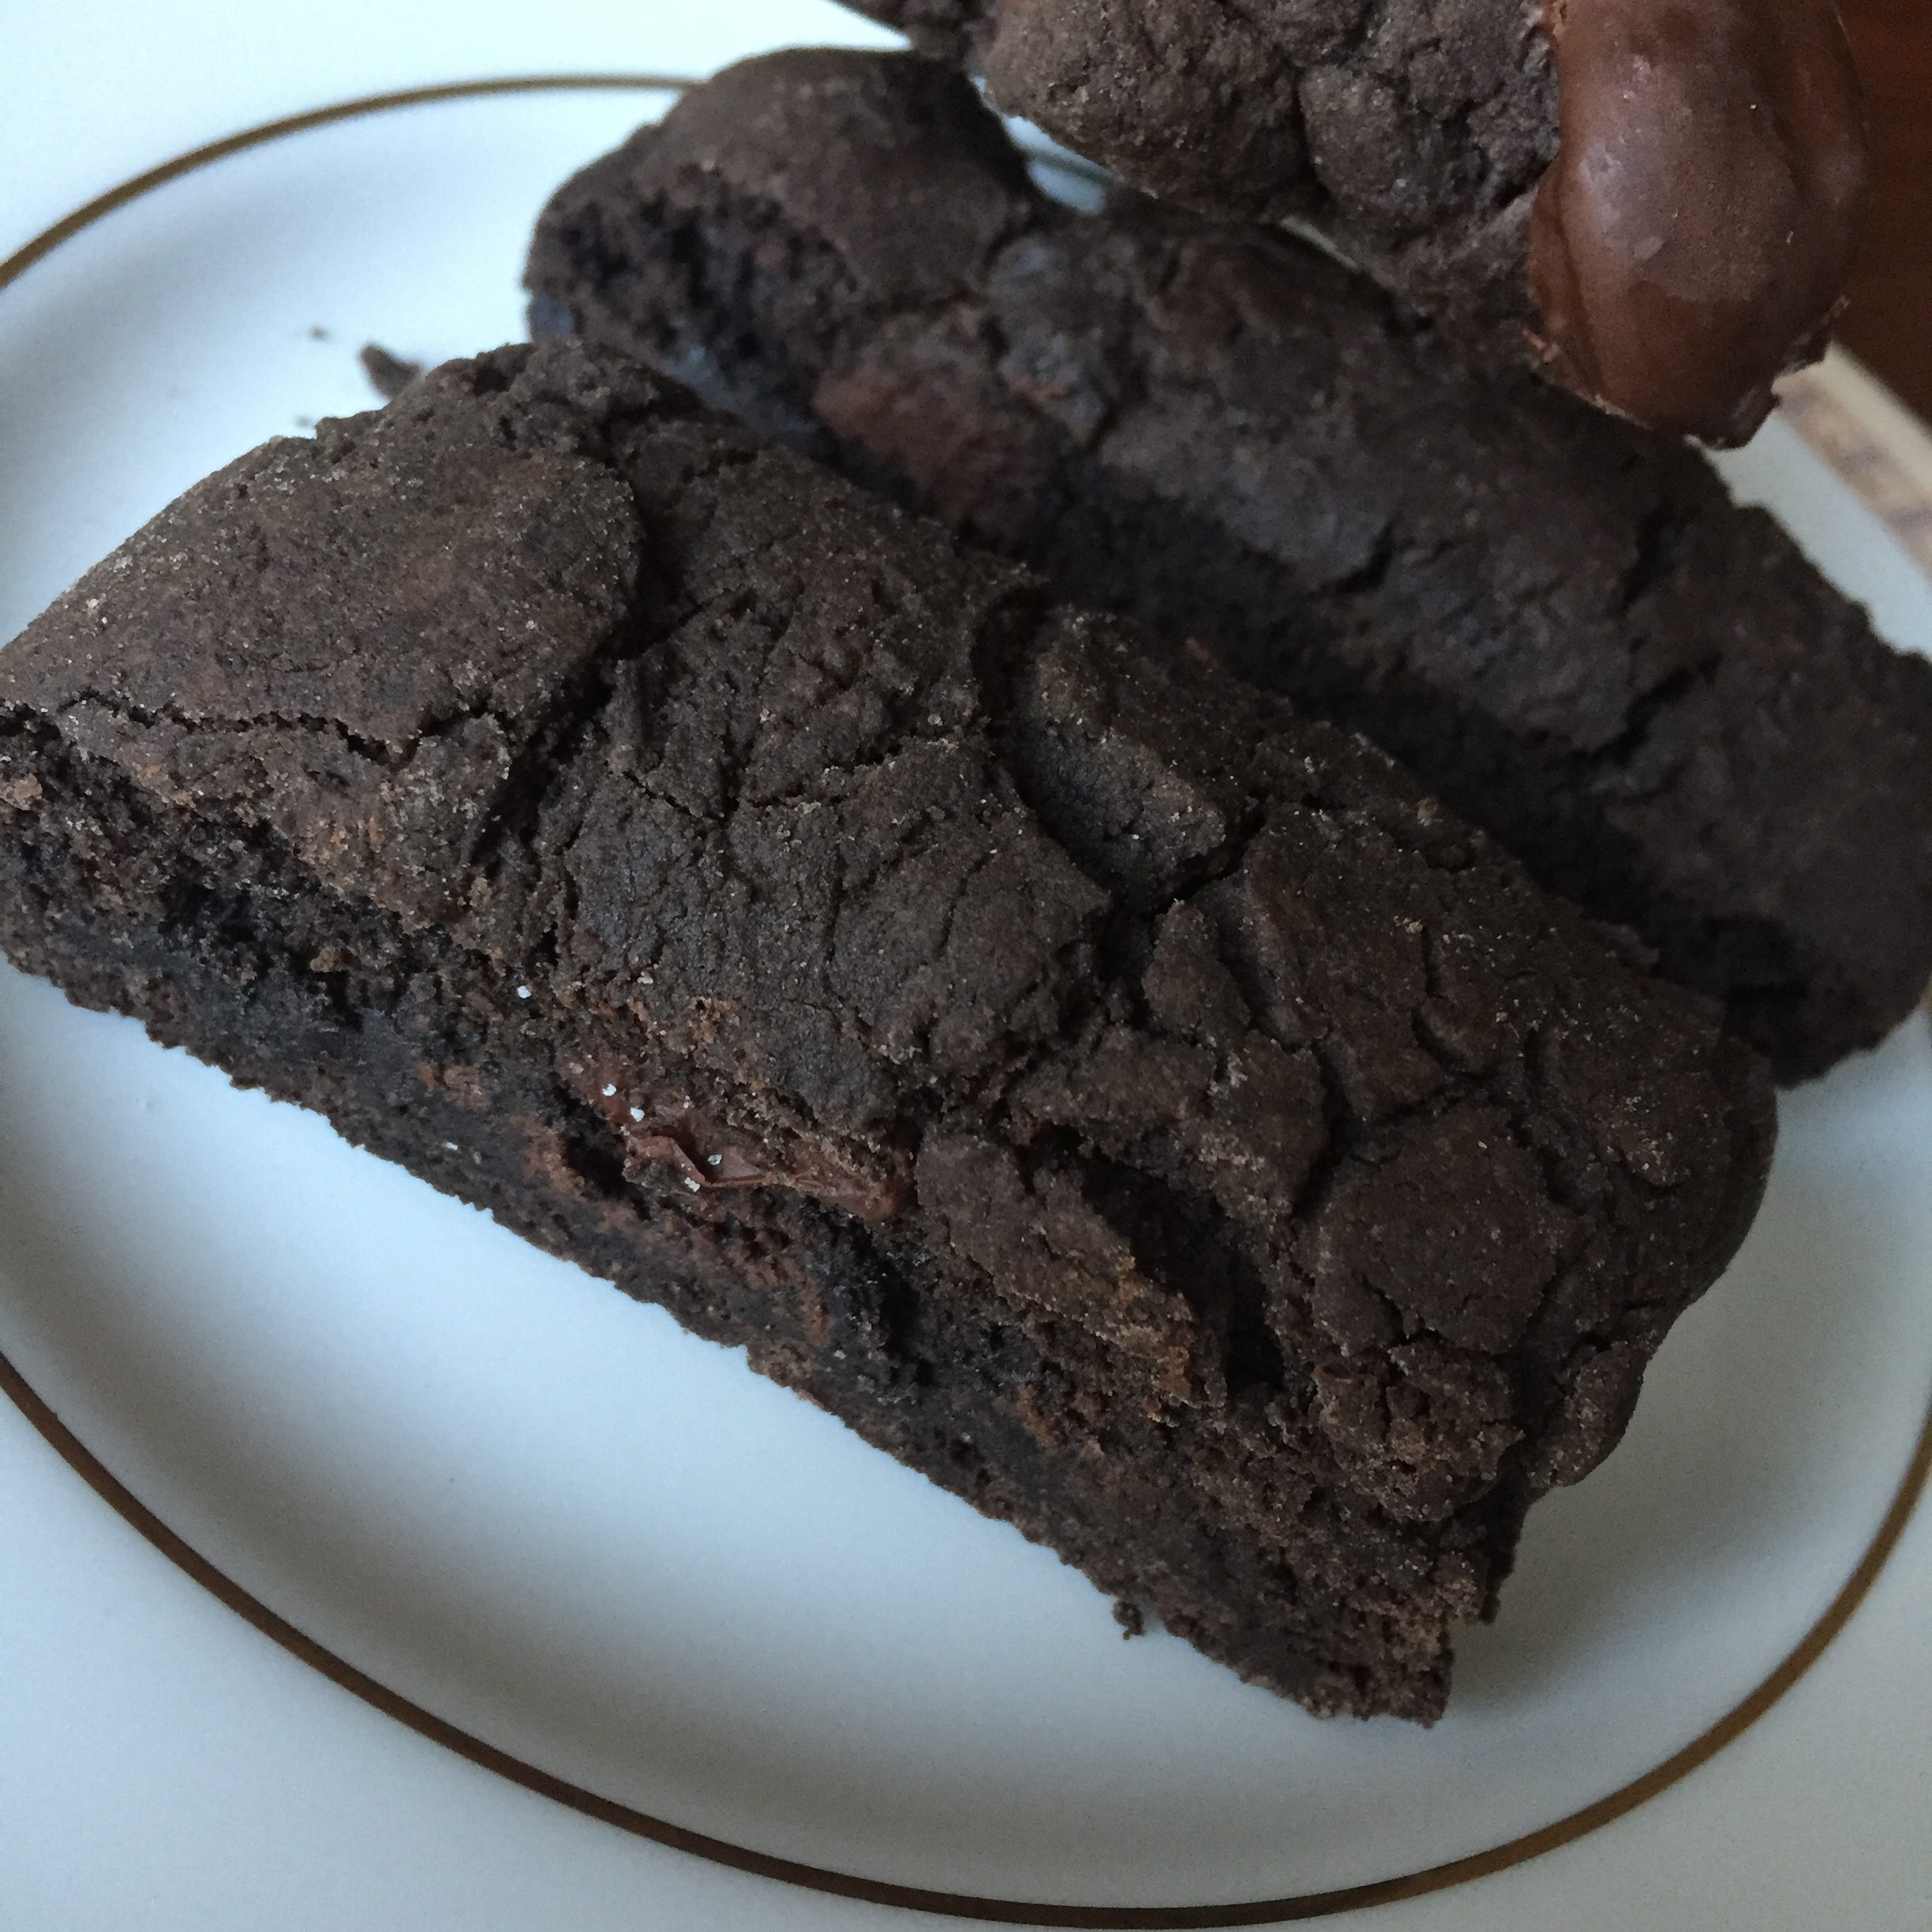
Dark chocolate biscotti with dark chocolate chips bring this sweet cookie to life that makes all things better.

I know, enough with the biscotti already. But seriously. It is a cookie this gal has some serious affection for. It has flavor and texture and shelf life. It can be dipped into a hot beverage and not fall apart like an Oreo (I hereby proclaim soggy Oreos to be exceptional at the right time and place).

This dough is, for all intents and purposes, a dream. It comes off the mixer in one lump, is divided, baked, sliced, and baked again. It needs no garnish but will take one with pride. It has dark chocolate chunks, but the potential for this dough…add in slivered almonds, dried cherries, cranberries, orange zest, pistachios…the ideas are endless.

For this cookie, I kept it simple. Dark chocolate cocoa powder, dark chocolate chunks, need I say more? I did indulge and dip half of the batter into melted chocolate because, yes please.

Today’s blog is short and sweet, pun intended. These cookies need no elaboration. If you don’t bake them as long the second round, they will have a soft crunch. Which, if you are going to have hard edges, you should have a soft center. In personality as well as a cookie, am I right?

I hope you enjoy this recipe, and as always, thank you for coming to the table!

Chrissy

Click below for a printable recipe!

Print

Double Chocolate Biscotti

Print Recipe

Delicious dark chocolate biscotti with dark chocolate chunks.

  • Author: chrissy@mythankfultable.com

Ingredients

Scale
  • 1/2 Cup Butter
  • 1 Cup Sugar
  • 2 Eggs
  • 1 Teaspoon Vanilla extract
  • 1/2 Cup Dark Cocoa Powder
  • 1 Teaspoon Salt
  • 1 Teaspoon Baking Powder
  • 2 Cups AP Flour
  • 1 Cup Dark Chocolate Chunks/Chips

Instructions

  1. Preheat oven to 350*
  2. In a mixer with a paddle, combine butter and sugar until light and fluffy.
  3. Add eggs and vanilla extract and combine.
  4. Add Dark Cocoa powder, baking powder, and salt.
  5. Add flour, and incorporate until it makes a dough an add dark chocolate chips.
  6. Form dough into two logs onto a Silpat or parchment lined cookie sheet.
  7. Bake for 30 minutes.
  8. Remove from oven and cool for ten minutes.
  9. Slice biscotti into one inch slices.
  10. Place slice side up onto cookie sheet and return to the oven for an additional 10-15 minutes.

Did you make this recipe?

Share a photo and tag us — we can't wait to see what you've made!

Posted in: Cookies, Dessert Tagged: Biscotti, Chocolate Chunks, Cookies, Dark Chocolate, Dark Chocolate Biscotti, Dark Cocoa

Welcome to the Circus and Dark Chocolate Chunk Greek Yogurt Banana Muffins

April 14, 2018 by chrissy@mythankfultable.com
Dark Chocolate Greek Yogurt Banana Muffins

Dark Chocolate Chunk Greek Yogurt Banana Muffins

My Spring Break is coming to a close, and while I did a ton of cleaning and purging and moving furniture around, etc… I am only now settling in to write. Why is it that the writing part is the hardest part?

Do you ever walk around composing in your brain? Letters you need to write or cards to send, emails to respond to, and for me, blog posts as well. It is what it is. If I am lucky, I get an opportunity to write it down. If I am not, I place a post it note somewhere and come back to it thinking, “huh?”

One of the best parts of my week off, besides the opportunity to stay at the Cape for a few days, (Thanks Aunty Cathy) was the chance to walk with friends. I mean early morning, after work, lunch break walks with people I don’t get to see in daily life. Walk, and listen, and share, and all while filling my lungs with fresh air and moving my body. To me, that is a gift. I did my first set of pull-ups this week as well (Thank you Erika) so hey, rock on. Forty-six, here I come.

We have been a predominantly vegetarian household for almost a month, and yet, I still have a list of recipes to share that are not necessarily super-healthy, but are in the works. The blog is about two weeks behind my real life. So when I post a batch of cookies, chances are they are long gone and the crumbs are already swept of the teacher’s lunch room table at school. It’s just reality.

We work. We have family. We have outside responsibilities. We feed and nurture and take care of our circle. So, the extra stuff waits for most of us. We don’t really get the chance to be selfish. It isn’t who we are.

I had the chance to grab coffee with a precious friend this week who shared some things, and she said, “Thanks for letting me look into your life.” My response was, “My life is a Sh8t Show!” and her response was, “But it makes me think I can do it too.”

To which I say, AMEN and YES. YES YOU CAN. Our lives are imperfect. We have kid issues and work issues. We have addictions and illnesses and death and loss. We have messy. We have step-over-this-part-of-my- life-and-no-one-needs-to-see-it stuff. We have the stuff we won’t put on Facebook.

You will never see me post my children’s report cards on social media. Not because they aren’t worthy. But because, it’s not my thing. You will see me post a picture of them laughing together, or playing their ukuleles together, because while I love that my children are smart, I love that my children have the capacity to be kind. Not to shame those who do. Like Amy Poehler says in her book, “Good for you, not for me.” I realize my parenting style is not the same. I am not raising free-range chickens or lab rats. I am not raising super heroes. I am raising children (technically young adults). I am sure they will need therapy for something. It won’t be because I didn’t try.

Yesterday I asked my son, “Do I stress too much and act really cranky when we travel?” He looked at me and said (carefully and only slightly sarcastically), “Ahhhh, yeah?” Point well taken. My response? “I’m really sorry. I’m working on it.” I’d rather they remember me identifying and apologizing and changing as a mom. At least they know I am trying and willing to work on stuff.

Truthfully, I suck at the circus. I can do this or that really well and the rest I am trying my best. Sometimes my best is not good enough for my standards. Sometimes my best still rocks but it isn’t enough. That’s where grace comes in.

No one has it all together. No one has a Facebook perfect life. We can’t compare or it will kill us slowly from the inside. Comparing is as bad as cancer in my book.

In the last year, I have slowly learned to unfold from years of this mindset of being the good parent, or the adult, or the martyr in some situations. I am not done. I am so not done. Every day I am trying to love this body and this soul inside my skin and forgive myself of all the shortcomings. This is hard. It is hard because I am great at finding the good outside of myself but not necessarily inside of myself.

What a slow process. I have said it before, I wish I wanted all the good for myself that my mom would want for me or I want for my kids. That I would breathe and say, “Chrissy, you’ve got this,” more. I am learning.

I am changing habits and while I think of cookies (recipe not posted yet) while I do pull ups for the first time, I am realizing that cookies are lovely and therapeutic to make, but not the only option.

Still, give me all the chocolate. (I am working on this too).

So. This recipe. It is a dark chocolate muffin and it uses banana, coconut oil, greek style yogurt, and it is still a muffin but it is a better choice muffin.Dark Chocolate Greek Yogurt Banana Muffins

For the banana haters of the world…yes, it still does have a slight banana smell but it is not a banana muffin, if you get me. It also has dark chocolate chunks and is delicious. It has sugar but not a ton. It is decadent enough to be a cupcake- but it is dense. So it really is a muffin. I chose dark chocolate cocoa powder because it is my personal preference, but regular cocoa powder will work too.

My only wish for these muffins is that they would last longer, you need to share them and eat them within a few days or they toughen up. So make these and bless those around you with a healthier version of a breakfast treat. You can pop them in the microwave or a few seconds to heat them up and they are even better.

As for a glimpse into my circus. It is what it is. Hopefully it makes you think you can tame the tigers, unload the clowns out of the small car, hang from the trapeze, eat the popcorn and ride the camel too. We do the best we can, and take it one day at a time. We need to look at ourselves with kindness. We need to fall in love with ourselves a little bit more every day. Because, we are worth it. I’ll say it to you now, and tuck it into your heart: You’ve got this.

I hope you enjoy this recipe, and as always, thank you for coming to the table!

Chrissy

Click below for a printable recipe.

Print

Dark Chocolate Chunk Greek Yogurt Banana Muffins

Dark Chocolate Greek Yogurt Banana Muffins
Print Recipe
  • Author: chrissy@mythankfultable.com

Ingredients

Scale
  • 1 Cup extremely ripe mashed bananas (2–4 depending on banana size)
  • 1/2 Cup Plain Greek Yogurt
  • 1 Large Egg
  • 2 Teaspoons Vanilla Extract
  • 1/4 Cup melted coconut oil, cooled
  • 1/2 Cup Dark Brown Sugar
  • 4 Heaping Tablespoons Dark Cocoa Powder
  • 1 Cup Dark Chocolate Chips
  • 1 Cup Flour
  • 1 Tablespoon Corn starch
  • 1/2 Teaspoon Baking Soda
  • 1/4 Teaspoon Salt

Instructions

  1. Preheat oven to 350*
  2. Line a muffin tin with paper liners. If you want the added protection from muffin sticking to liner, lightly spray muffin liners with baking spray. You can dust liners with additional cocoa powder.
  3. Mix dry ingredients and chocolate chips.
  4. Mash bananas and combine with yogurt and egg.
  5. Add melted and cooled coconut oil, brown sugar, and vanilla extract.
  6. Add in brown sugar.
  7. Combine wet ingredients and dry ingredients, mixing until just combined, not overworking the batter.
  8. Divide batter into muffin tins, this yielded 12 regular sized muffins.
  9. Bake for 18-20 minutes or until tester comes out clean.
  10. Allow to cool and store in an airtight container for up to 3 days.

Did you make this recipe?

Share a photo and tag us — we can't wait to see what you've made!

Posted in: breakfast, Recipes Tagged: banana, Banana muffins, Dark Chocolate Chunk, Greek yogurt, Muffins
« Previous 1 2 3 4 5 6 … 8 9 10 11 12 Next »

Recipe Search

Recent Posts

  • Fluffernutter Cookies…You Heard Me April 12, 2024
  • On Nests July 30, 2023
  • Lemon Rosemary Shortbread Cookies April 24, 2022
  • Praline Sweet Potato Pie March 22, 2022
  • Italian Ricotta Cake March 13, 2022

Recent Comments

  • Cathy Carroll on To My Daughter On Her 18th Birthday
  • Maureen / Mimi on To My Daughter On Her 18th Birthday
  • Kathy G on To My Daughter On Her 18th Birthday
  • chrissy@mythankfultable.com on Cherry Crescent Moon Cookies and Finding the Joy
  • chrissy@mythankfultable.com on Cherry Crescent Moon Cookies and Finding the Joy

Archives

Categories

  • appetizer
  • bread
  • breakfast
  • Cookies
  • crockpot
  • crockpot
  • Dessert
  • Fruit
  • My Story
  • One Pan
  • Recipes
  • side dish
  • Side Dishes
  • soup
  • Vegan

Copyright © 2025 mythankfultable.com.

Lifestyle WordPress Theme by themehit.com